Features and Usability
Once past getting the software setup for our printer and going through the extreme amount of options (I had to actually split it into a difference section because there were so many) we can finally get into some of the features of Simplify3D and see what set it apart from the previous software I was using. To do that I should first start off with a rundown of the overall layout when you open up the software. When you boot it up you will have an empty build plate over on the right that is shaped to match your printer. With some printers, it will even have a 3d rendering of the rest of the printer as well. On the right, you have a few controls to pick from. The first few move your view, move the print around on the printer, one will let you change the direction the print faces, and there is a scaling option. The click to scale option lets you drag the print bigger. When doing this there isn’t any information on how big you have made it but there is a place to do that and I will show it here in just a minute.
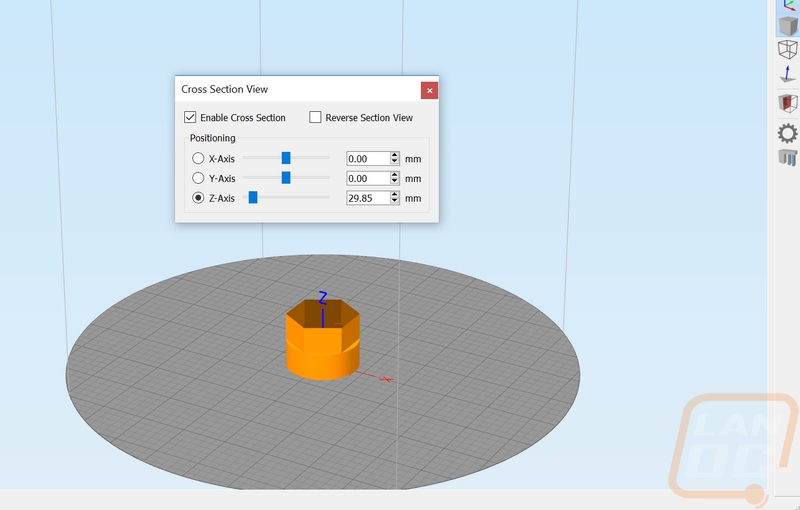
The rest of the options over on the right let you pick default viewing angles and turn on a wire framed view. There is also an option to click and cut into your print to see inside. This is perfect for checking out an internal view of a print for example.
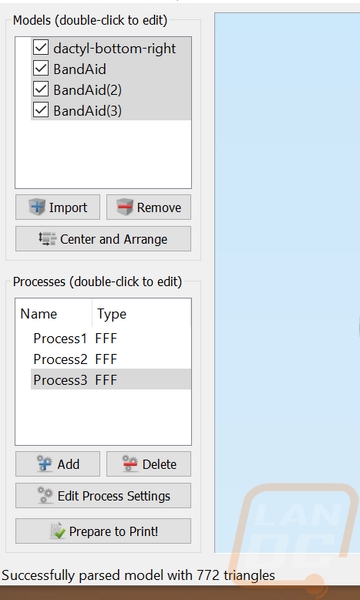
The left side of the screen has two main boxes with import and remove options on one and add and delete on the other. The top box will list all of the models on the print surface that you are working with. Down in the bottom box is the processes listing. The idea of a process was a little weird to me at first because MatterControl basically just has one and that’s it. But this is actually a powerful tool. Each process is where you configure print specific settings like infill, supports, layer heights, and everything else you see in the previous section. Most of the time you will only be working with the one process, but if you are printing multiple items, maybe you want to give one more infill or change the print speed for it. You can create additional processes and then tell the software what models to attach each process too. If that isn’t cool enough, you can also group the processes together after setting your different infill and make changes to the group that you want to apply to all of the processes.
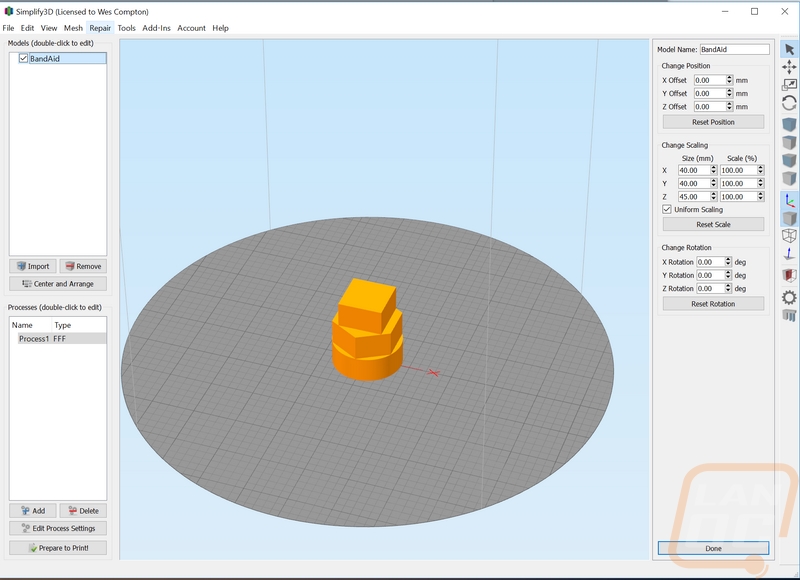
If you need to dive into specific details for one of your models you can double click it and open up everything over on the right. This is where you can rotate your print on the build plate by angles or change scaling by actual measurements or percentages. Basically the entire view and edit part of MatterControl is all here and it’s easier to work with (not to mention faster).
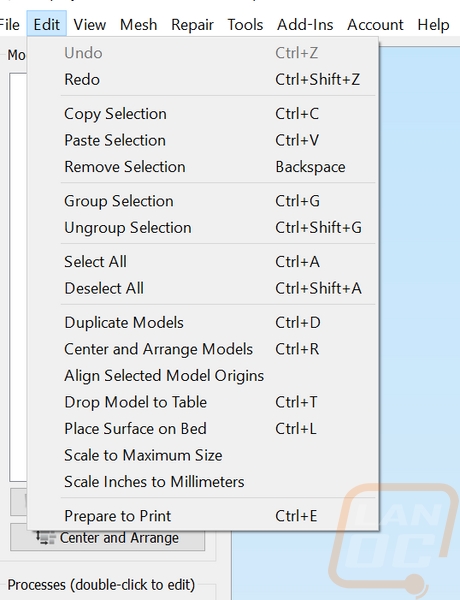
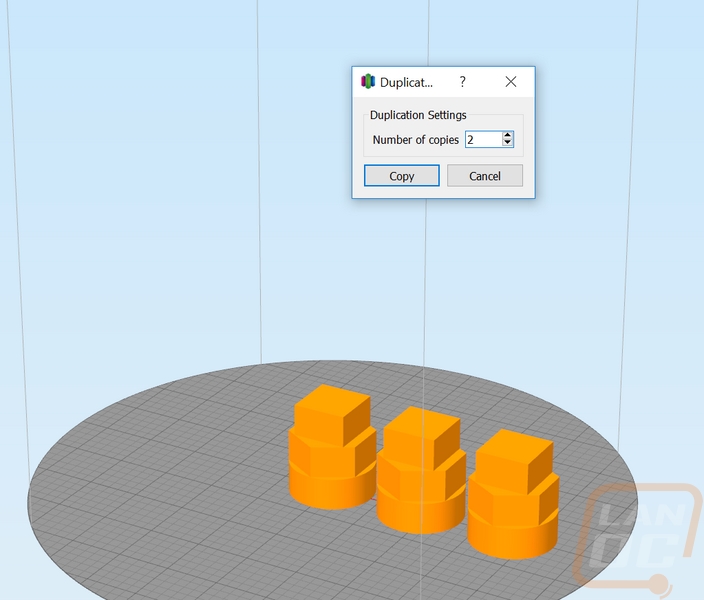
Flipping through the drop down menus I found that some of the options are already available in the buttons on the main screen like the center and arrange models option. But there were a few other things in the edit dropdown of interest. For starters, there is a scale inches to millimeters’ option that should really come in handy. If someone designs a model in inches and your printer is setup for mm when you open it up it won’t be the right size so a quick option to fix it without having to do the math is nice. The scale to maximum size is also a cool option to fill up your print space when you just want it to be as big as you can print. The duplicate model's option is nice, normally you have to copy and paste but this lets you put in a number and get multiple copies all at once.
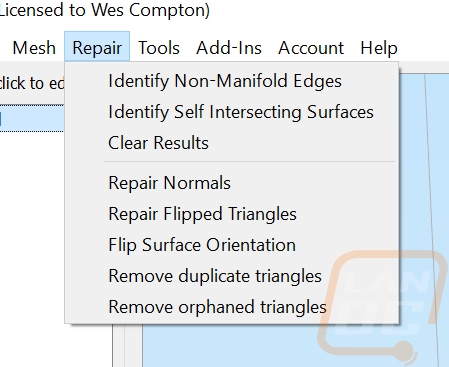
One thing I didn’t get to mess with much in my testing were the repair options. All of my designs worked fine, but it is really cool to have a list of one-click repair options to avoid having to open up Meshmixer or a similar program to repair the design. MatterControl had nothing like this.
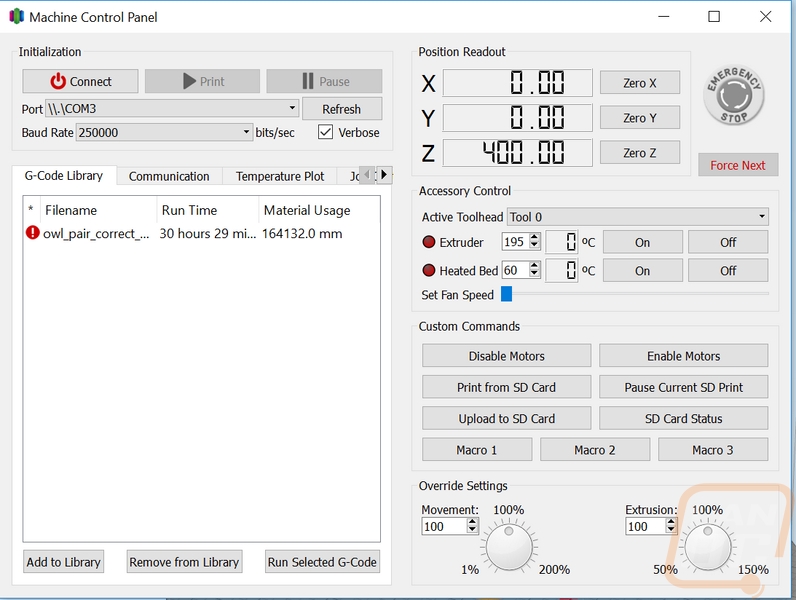
Okay, so when it comes to actually controlling your printer there aren’t any visible options right in the normal Simplify3D software. This is an area where MatterControl had better integration and you could at least see temperatures and stop and start from any page. With Simplify3D you have to open up the control panel and then from there you can get into things like turning the extruder or heatbed on or turning the steppers off to manually move something. It would be nice if you print from USB if this would automatically pop up or be better integrated into the software. That said everything you need is there as long as you know where to look to find the control panel itself.
I think the biggest thing that people point out with Simplify3D that is different than all of the other programs is their support generation tool. With MatterControl, for example, you just turn supports on in the settings then you have to generate or print the file to be able to see how the supports are going to look and even then you have to turn on 3d mode to get anything close to what Simplify3D. The software has the same auto support settings but when you turn the option on it shows you right in the preview window what the supports look like. Even cooler though, you can actually go through and remove supports if you think they aren’t needed by clicking on the remove support button and then clicking on each tower. The same goes for adding your own supports. As you can see in the photo below I manually added the supports on the right and the supports on the left were generated. You can also export and import support structures if you need to only sometimes use a layout on a specific file.

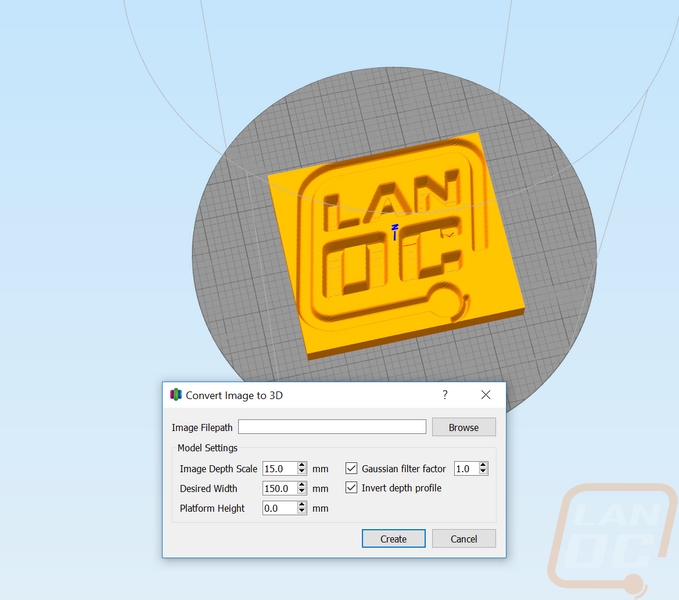
There is also a Convert Image to 3D option in the add-ins menu. I spent a little time messing with it and I will say it is most likely not what you are expecting. For example, I was hoping to be able to just import a LanOC logo and print it but even after going through the settings for a while I couldn’t get that. But what you do get is a simple option to be able to made custom 3d printed shades. You print these in a light color like white and then you can import a photo of someone and it will correctly add the photo so that when you put light behind the print you will see their picture. There are tools online to do this but this is a quicker way to do it.
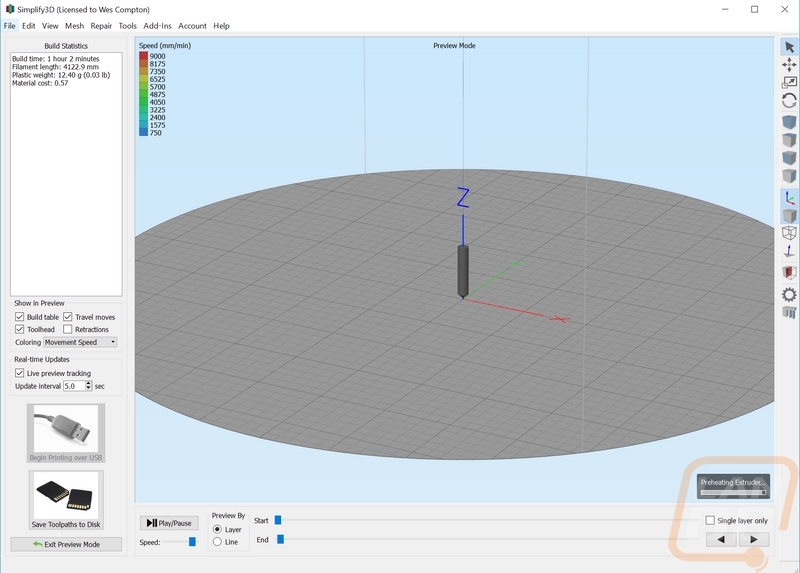
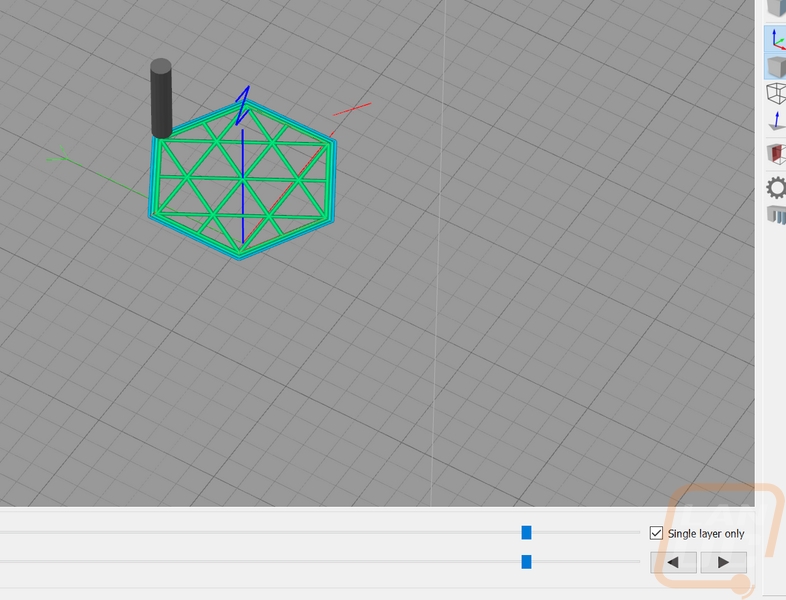
So once you know what you want to print you click the print preview mode and it opens up a page similar to before. Up in the top left corner it will let you know how long the print will take with your current settings, how much filament it will use, and if you input the correct filament costs it will even tell you exactly how much the print is costing you. The 3d preview image will show all of the movements the print needs and by default, they are color coded by speed. You can also switch to a mode that breaks down each component into what it is, so things like supports will be one color, infill another, etc. I like the movement speeds just to keep an eye out for any big slowdowns due to small areas. You can turn live preview on or off and change how often it updates. You can also play through the print at different speeds to show you how the print will go. There are also two bars down on the bottom, you can slide them to change the start and end points shown in the preview, so moving the end point will let you look to see what your infill looks like. If you prefer to look at individual layers you can do that as well with the option over on the right. Then once you are ready to go you can pick from printing over USB to the printer or save the g-code to an SD card to move to your printer. SD card is safer in case of windows updates on long prints but USB is quicker.