Installation and Performance
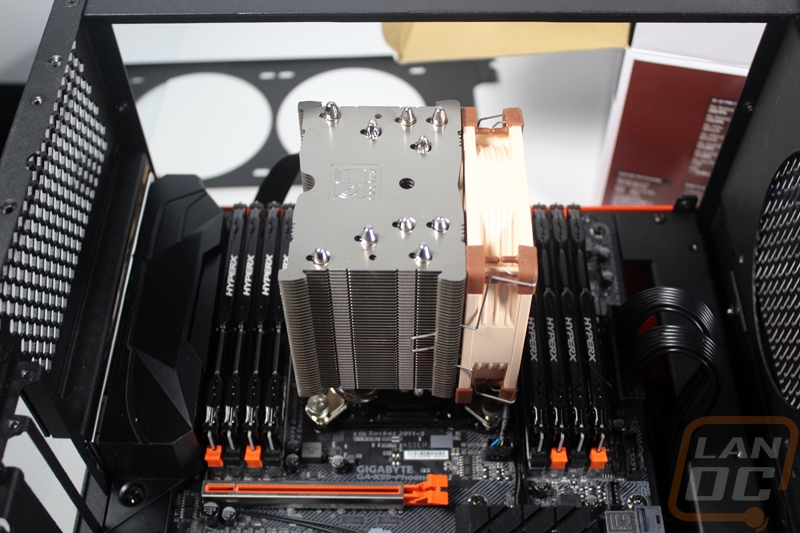
Before testing out the case I did have to get our build into it. Because the Bullet BH7 was going to be part of a project build, I didn’t go with our normal test components, so I had to get all of the new components in and that took a while. With everything ready, I pulled the top panel off and remember just how many screws hold it on. From there I pulled the motherboard tray and wire management plate out. I started by pre-installing our Gigabyte X99 Phoenix motherboard. To do that I did have to install the standoffs as not all of them came installed, but beyond that this was as simple as putting all of the screws in. I also installed our CPU into the board, the ram, and installed a heatsink.
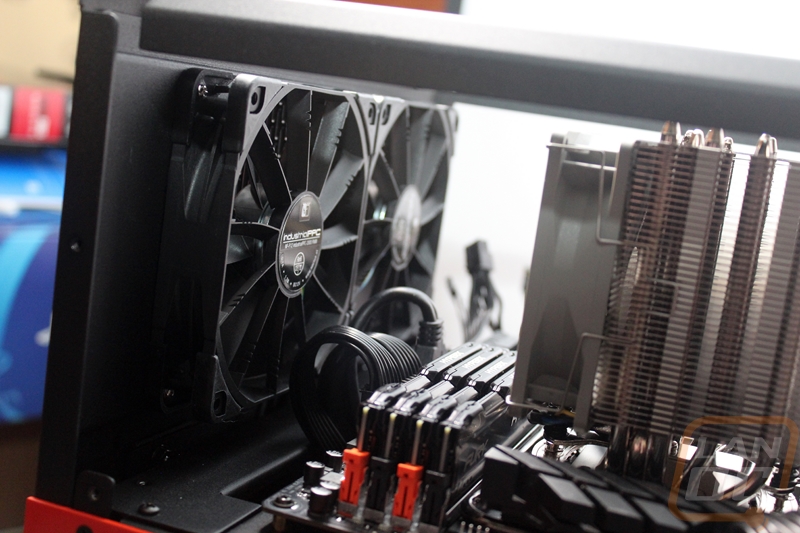
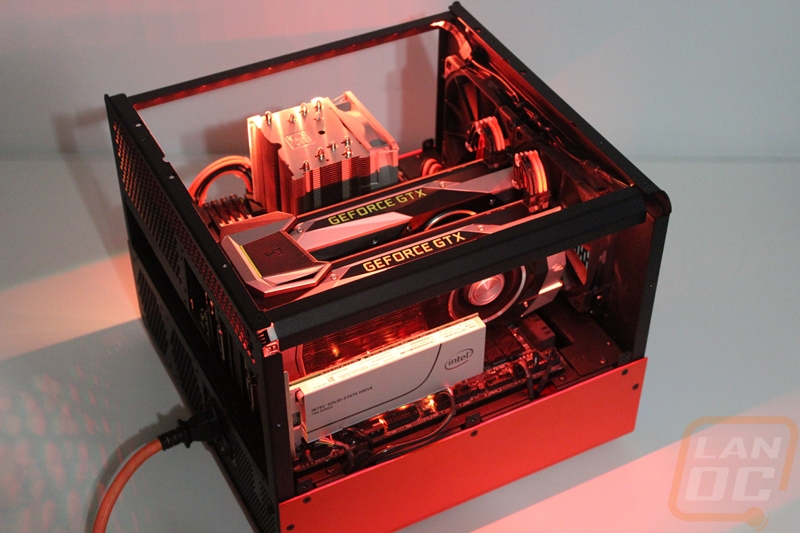
The heatsink became an issue when I reinstalled the motherboard tray to test fit everything. The Noctua NH-C14S cleared the limited height of the case, but when I installed a video card in the top slot it was jammed up against it. Because of this, I ended up switching to the Noctua NH-U9S for its smaller footprint and low height.
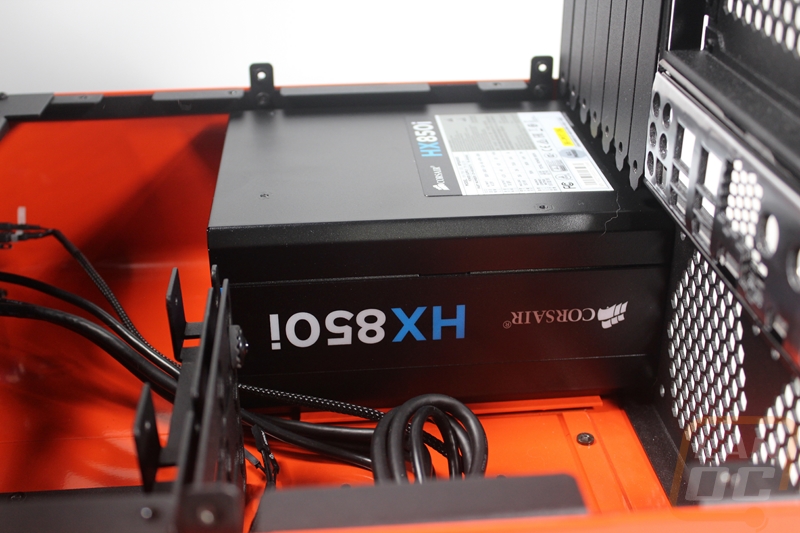
After that, I pulled the motherboard tray out and went around getting the bottom portion of our build all ready. Remember I did things a little out of order while waiting on parts. So here I installed the Corsair HX850i and it was as simple as sliding it in and installing the four mounting screws. There weren’t rubber pads for vibration, but this power supply doesn’t turn the fan on until it is needed so it shouldn’t be an issue.
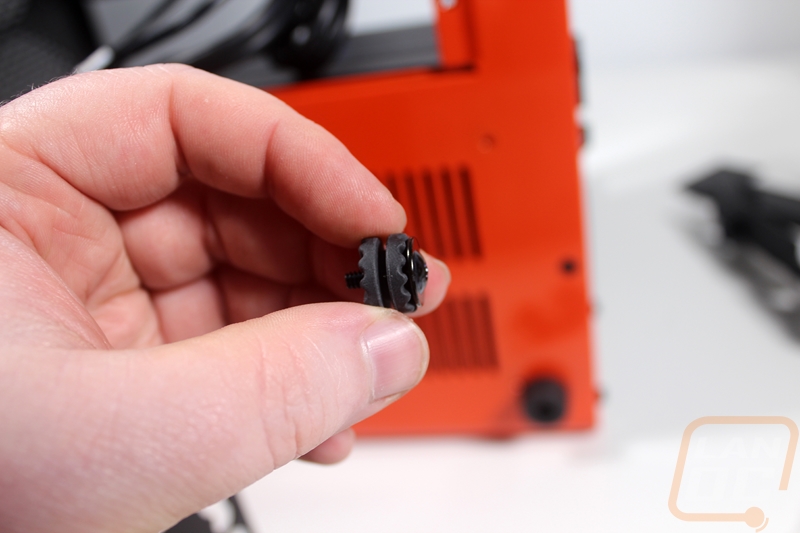
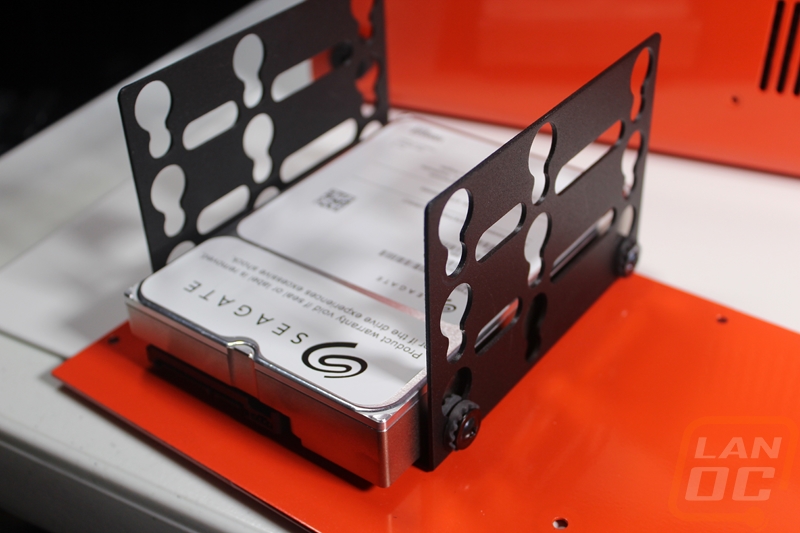
Next, I grabbed our hard drive to install it in the included drive cage. Because I was still considering water cooling options and I wanted as much room as possible for wiring I removed the hard drive cage and moved it to the optional right mounting location on the bottom plate. Then from there I slid the drive in place and screwed in the four mounting screws with the rubber dampeners installed. You can then slide the drive down to lock it in place. You can’t pre-install the mounting screws before putting the drive in the cage, so keep that in mind.
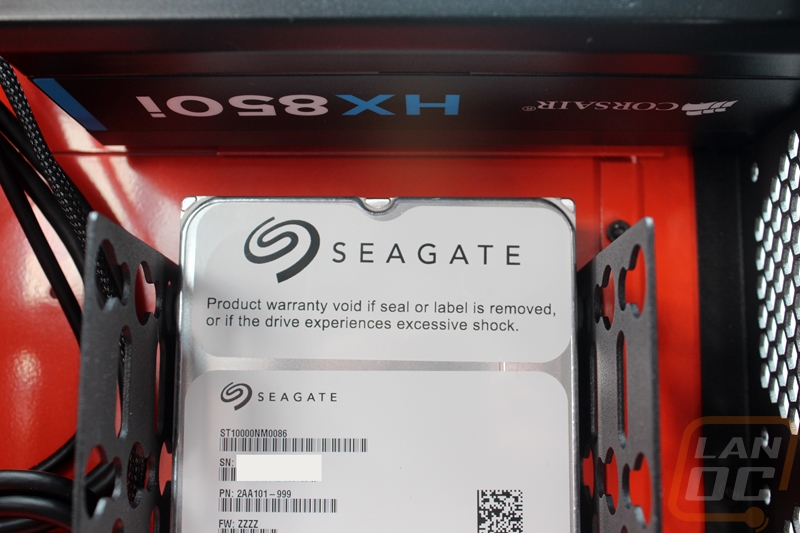
Now the right mounting holes for the hard drive cage ended up being less than ideal as you can see in the photo below. With the drive installed it pushed the connection side of the drive up against the power supply. I did get this to work though by removing the plate, installing the plugs then carefully reinstalling the plate. It was tight, but did fit. I would, however, recommend not moving the cage unless you need to do it or if you are using SSDs.
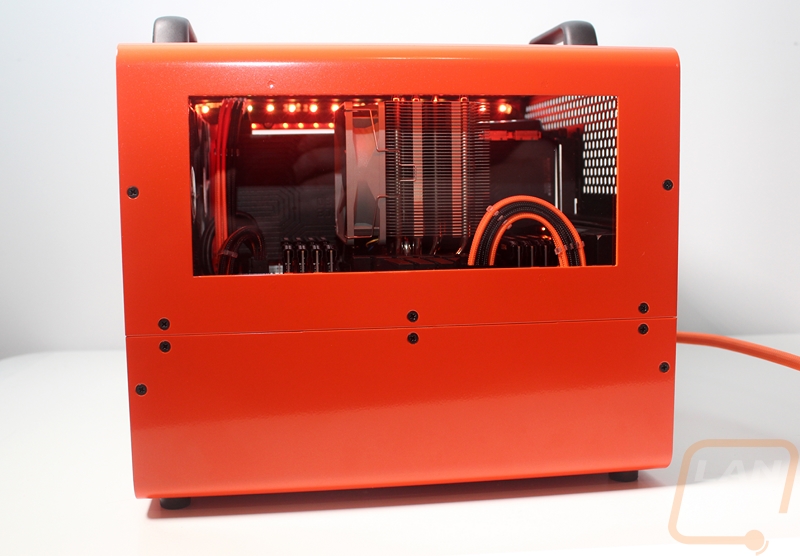
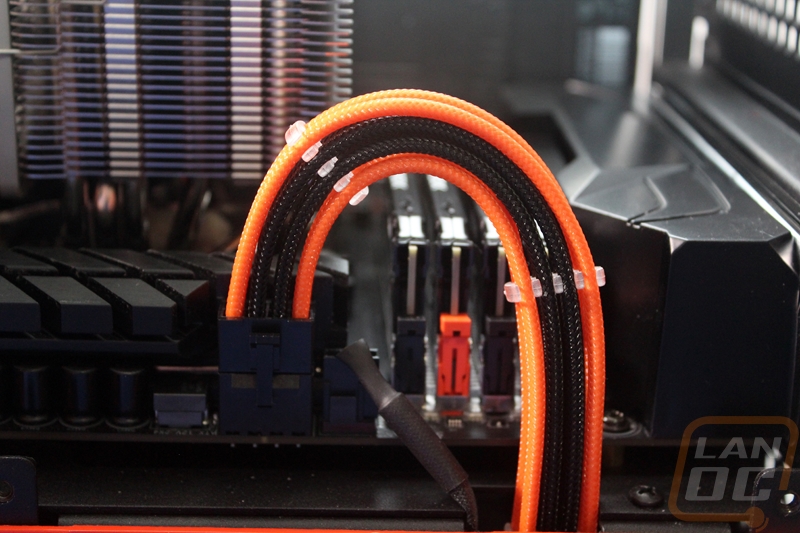
I hooked up all of the cables needed to our power supply then reinstalled the motherboard try, leaving the wiring plate off until I had each wire up to the top and hooked up. Caselabs gave the whole length of the wiring plate for wires to come up for things like SATA cables, video card power, and your 24 pin power. But for the 8 pin CPU power there is a smaller hole up at the top of the motherboard that allowed me to run our custom cables right up and over into the plug. The bottom connections were similar for things like the USB, HD Audio, and front panel I/O with two small holes down along that edge as well. All in all the Bullet BH7 was surprisingly good for clean wiring for a case that doesn't even have any grommeted holes. The split case design though hides everything up under the motherboard with more than enough room for everything.
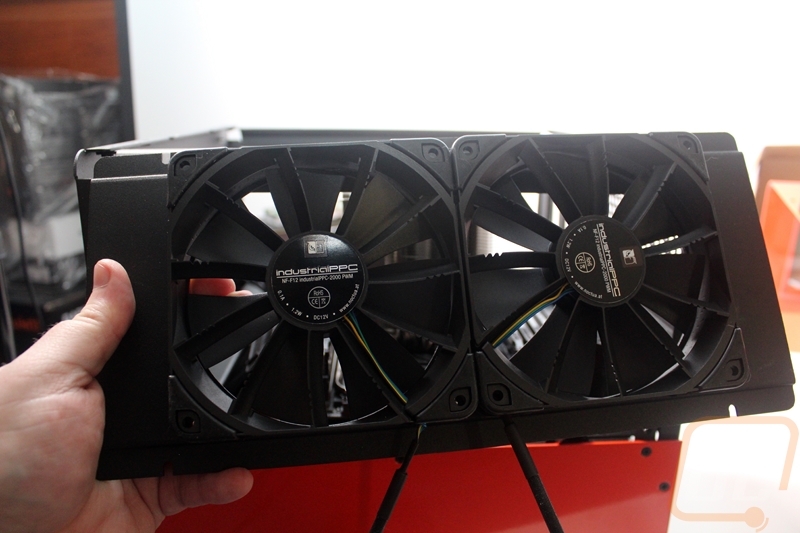
Next, I had to get fans installed into the front of the case for airflow to keep the dual GPU setup cool and to bring in fresh air for the air cooler. I went with two Noctua NF-F12 iPPC-2000 PWM fans with black corner pads. I removed the fan mount plate by pulling the top two nuts off and went about mounting the two fans before dropping the mount back in. They fit well and because they were right above the wire management plate, the two fan cables could drop down into the bottom of the case and run under the motherboard tray to their plugs for a cleaner look.
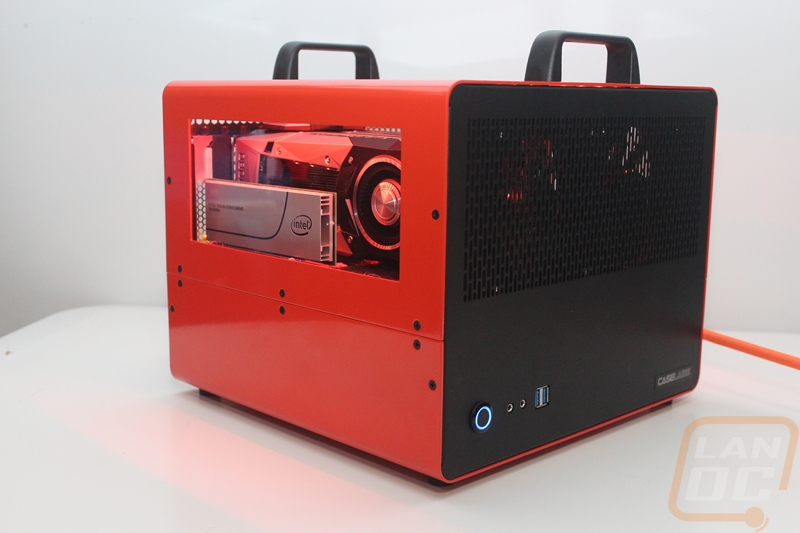
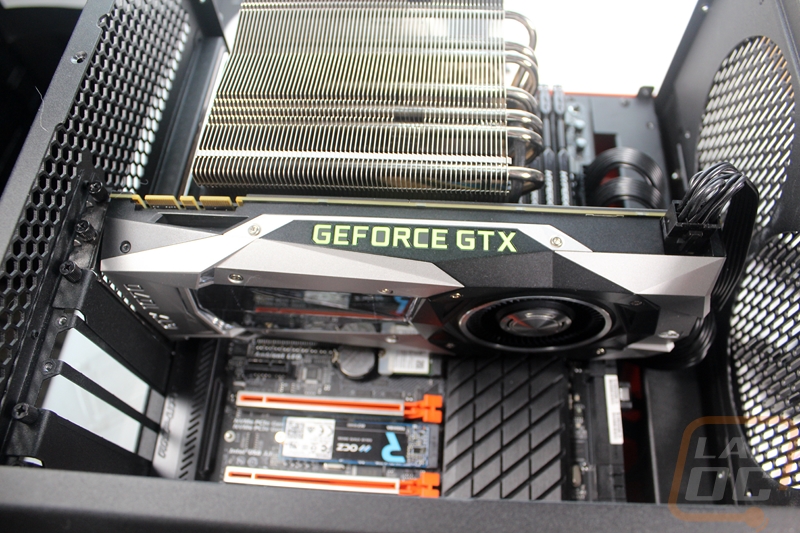
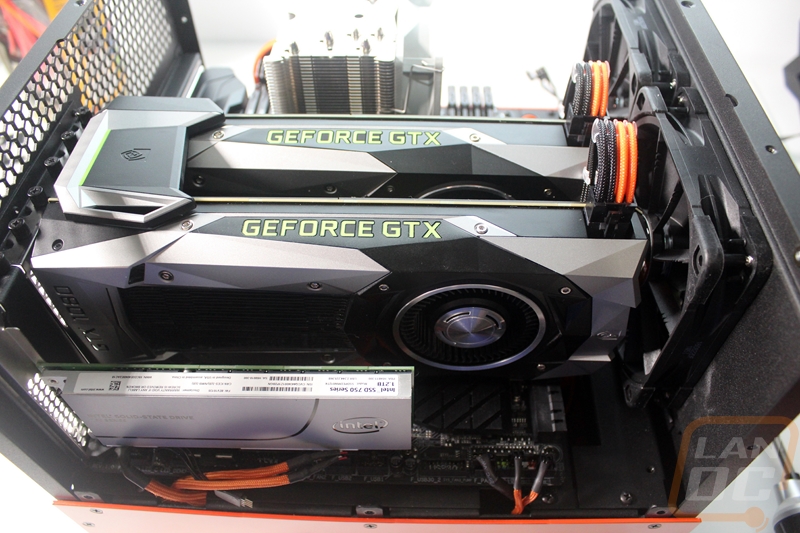
From there I had to get our GTX 1080’s in and make sure they would still fit with the newly installed fans. There ended up being a little room, but I wouldn’t go with anything longer than a Founders Edition or reference cooler. As for the height, there is a little more room for taller video cards but the power plugs will be tight against the top as you get into the taller cards. For these two cards though the custom Cablemod cables had room to run directly up and loop into their plugs.
Lastly, I had to get the lighting installed. You could go with any single color setup but for this build, I went with an RGB strip from Cablemod and wired them up to the RGB header on the Gigabyte board to integrate them with the on-board lighting. The optional LED mounts were awesome and I wish I had them in every case of mine. You can mount them facing in, facing down, or at an angle. I went with the angled mount to give good coverage in the entire case.
So, of course, building your PC into the case is a good portion of the performance testing, but I have spent a lot of time gaming on the build and have a little experience using the case for a LAN rig as well. What I found was that even with our high-end dual GPU PC in the BH7, it only took the two fans to keep everything running cool. I was a little concerned that the hard drive would get warm with no fans down in the bottom for overall airflow, just the PSUs fan that is independent. It ended up running cool, but if I had two fans stacked down there I would be looking to add one or two 80mm fans down in the bottom section to help keep things cool. The idea when adding the two handles to this build was to be able to move it around the office, not to take it to LANs, but the first action it saw was at a small LAN. The two handles made it much easier to carry around, but the larger footprint of the BH7 doesn’t really make it an ideal LAN case. Now the ITX and mATX Bullet cases, on the other hand, are looking to be great LAN options. They have the same features as the BH7 but are even more portable.