Inside
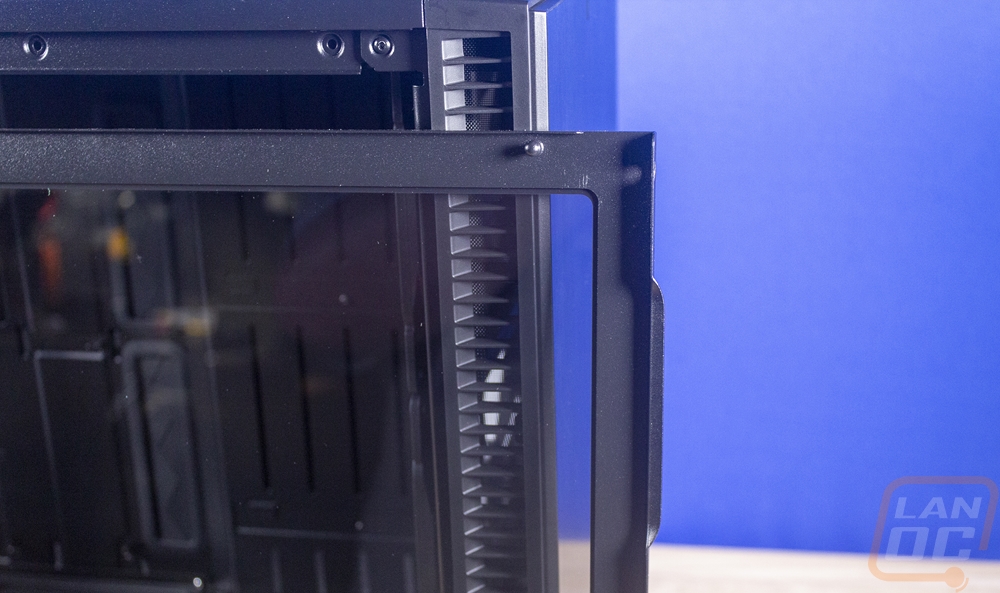
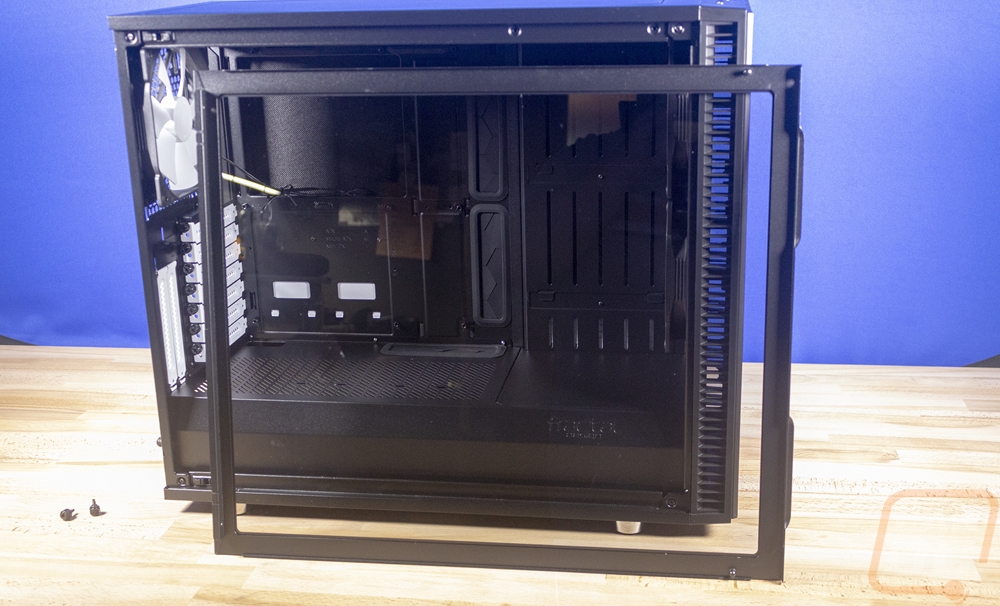
So to get inside of the case I had to pull the side panels off. Before diving in I did want to better show the tempered glasses mounting setup. You can see in the pictures below the steel frame that goes around it and the ball mount at the one end at the top and bottom to hold the side panel in place when removing and installing the thumbscrews.
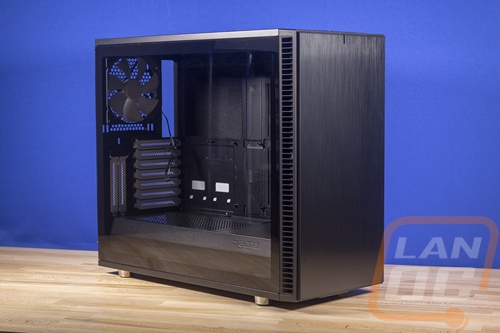
So with everything opened up we can get a much better look at the layout of the Define S2 and like I said earlier this is where the R6 and the S2 are much different. You see, the Define R6 is an amazing case but the interior is more closed off. A lot like when you are looking at houses and one is an older traditional layout with lots of walls and rooms and another is an open layout. The S2 is your modern open layout in a case form. Fractal went this way with the original S so it's not a big surprise. The idea is to allow you to do whatever you want, especially with custom water cooling. The big open area on the right is packed with hard drive trays in the R6 but here you have room for thick radiators in the front with a big pump res or even dual loops with more than one pump.
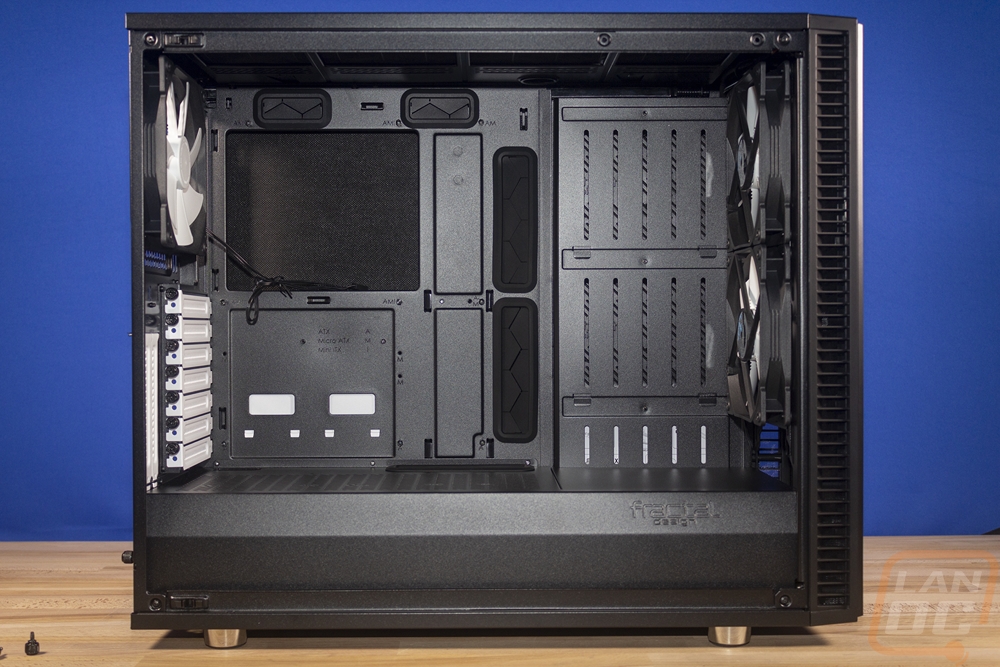
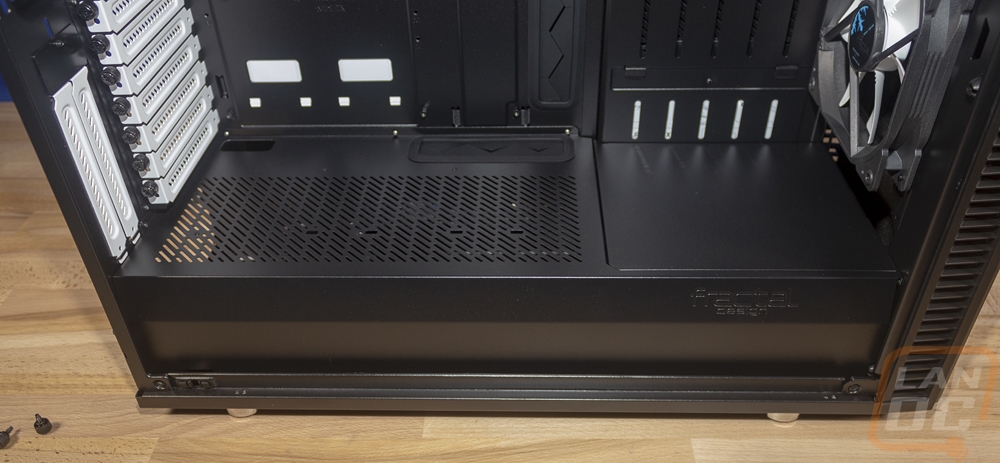
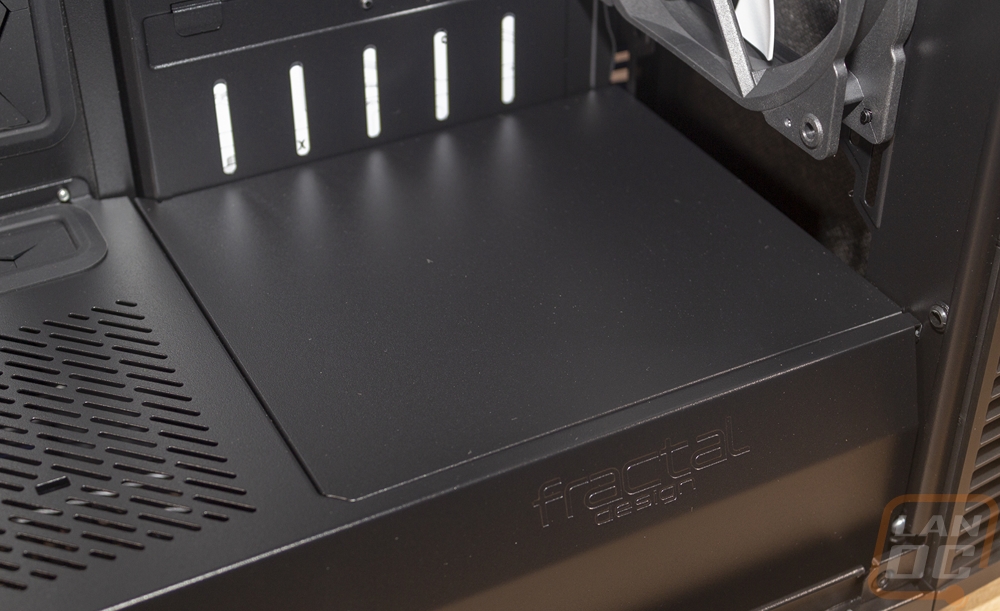
One of the big changes for the S2 is the addition of the power supply cover at the bottom. This is part of cleaning up wiring and hiding your cables. Fractal did this on their other cases as well. It does cut into the overall case space but they have put it to good use. First and most obvious it hides the power supply and gives you room to hide all of your wiring. It also has ventilation on top so the bottom section can get air if needed. In that same area, there are two SSD mounting holes that can use the 2.5-inch drive mounts from the rear of the case if you want to show off your drives. Then on the front, that panel can be removed if you want to install taller radiators and fans. Fractal Design also slipped in the only visible branding by embossing their log on to the cover as well. I like that better than a logo on the front.
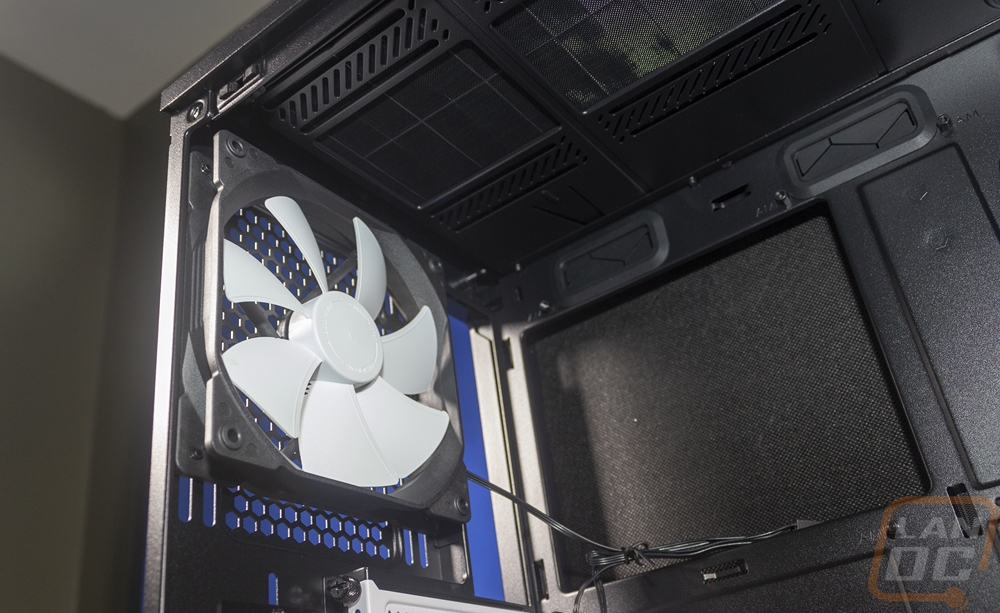
At the back, here is the interior view of the 7 normal PCI brackets and the two vertical brackets that you can use for a GPU with an optional riser. Then above that is the rear mounted exhaust fan. The S2 ships with a 140mm fan and this black and white model has the standard fans with a black casing and white fan blades to match the rest of the case. In this picture you can also see just how large the CPU backpanel access is, it is larger than an ITX motherboard so it should handle anything.
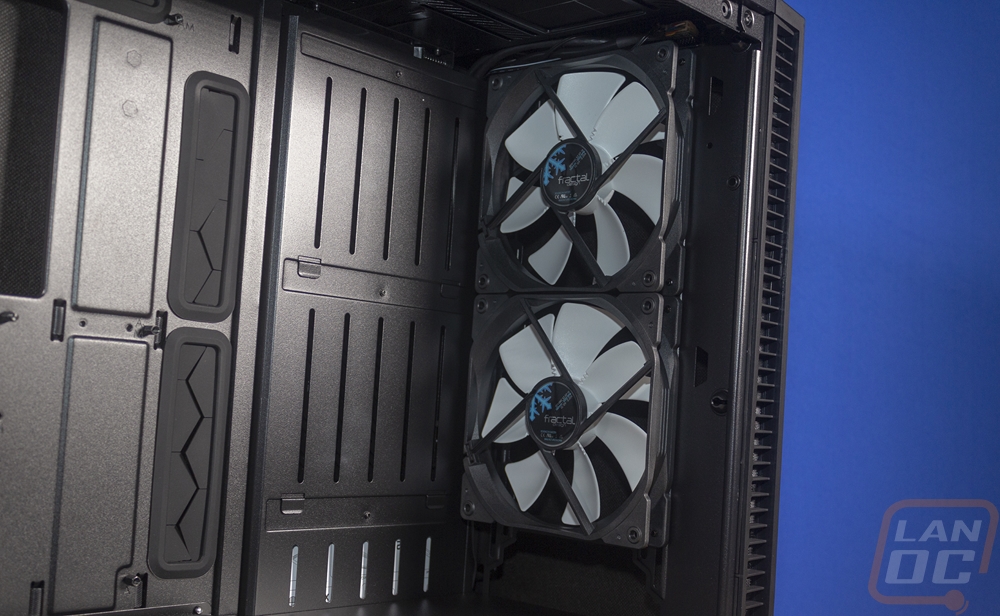
At the front of the case it comes with two more 140mm fans, these also have some flexibility with the mounting where you can slide them down, just like the back. This should help with long and thick radiator fan combos up top. The front of the S2 supports up to three fans in 140mm or 120mm configuration. You can run a three 120mm fan confirmation with a radiator or two fans with a 140mm radiator. The opening in the PSU cover limits the width of this to only 120mm radiators, there is a 147mm width max.
Speaking of radiators, the top of the case can do up to 360 or 420mm radiators with however thick you would like of a radiator and dual or single fan configuration just as long as your motherboard isn’t taller than 35mm. You can do all of that and still also have that top fill port behind the radiator.

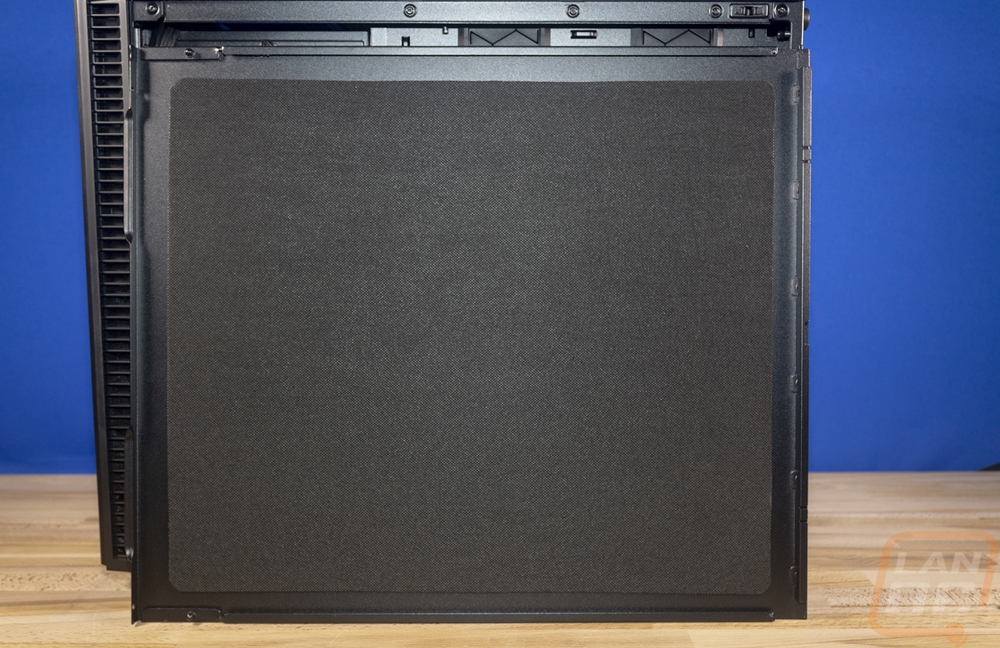
To get into the back of the Define S2 you have to remove the back panel. As heavy as the glass front panel is, the rear isn’t really any better. It is thick steel and then it has sound dampening material over the entire inside. Fractal made their name with this same material because most companies don’t bother to worry about sound at all so while heavy it is a welcomed addition.
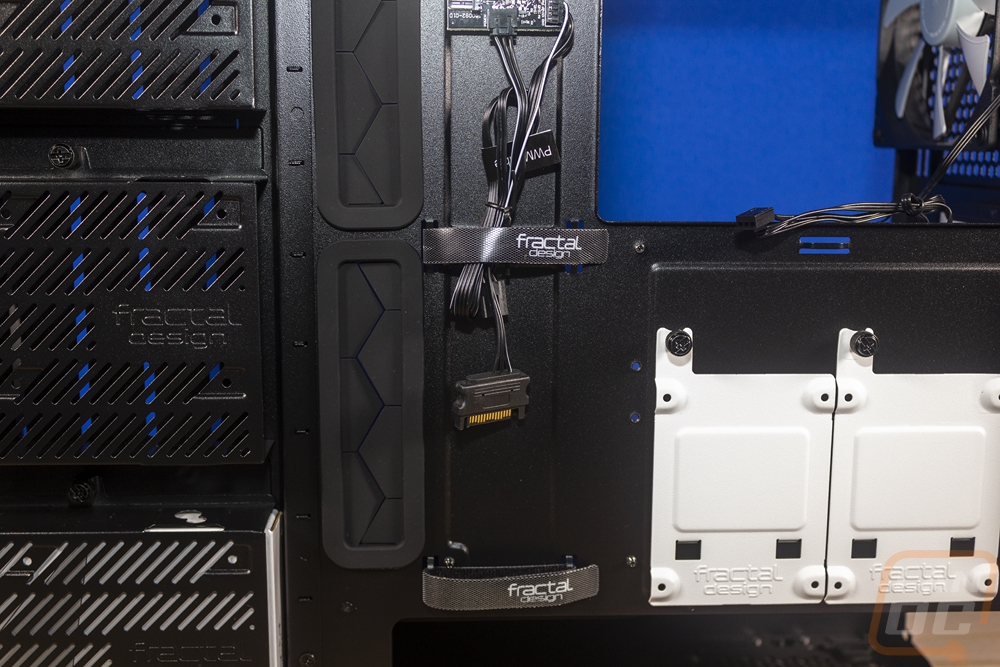
The overall layout of the back half of the Define S2 is actually close to the original but as you compare them you will see a lot of noticeable differences. The full shot shows a lot of cable management holes and tie does for zip or Velcro ties. There are a total of 14 tie down locations with a few used for the included Velcro straps. The back has 23mm of cable space between the side panel and the motherboard tray.
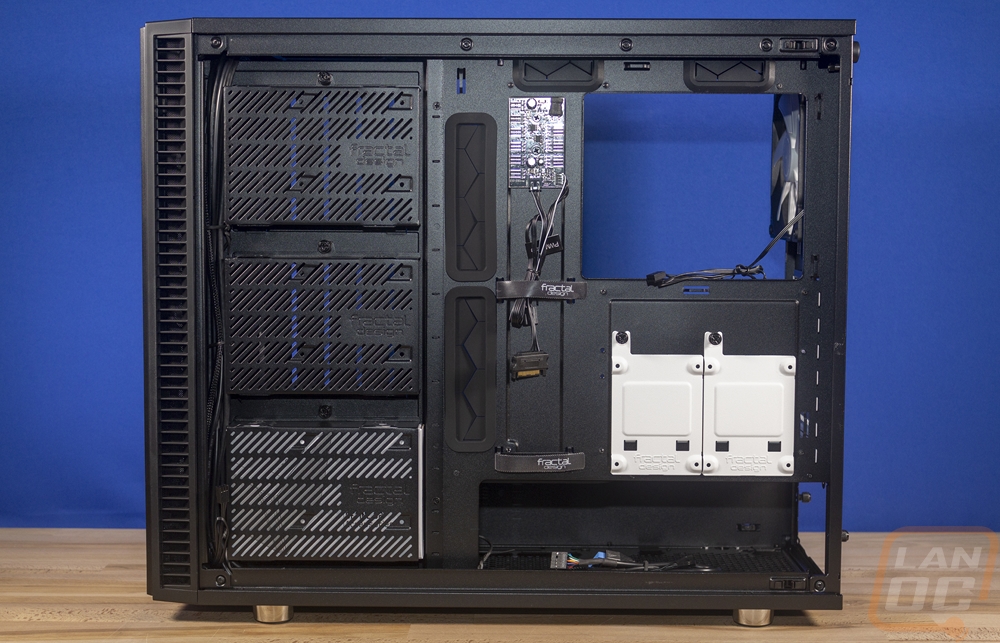
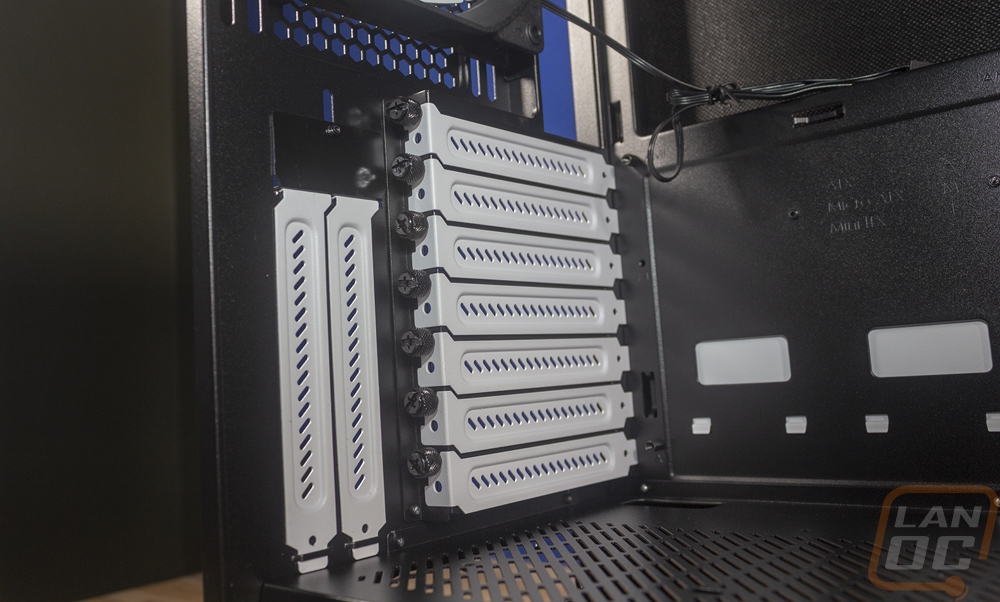
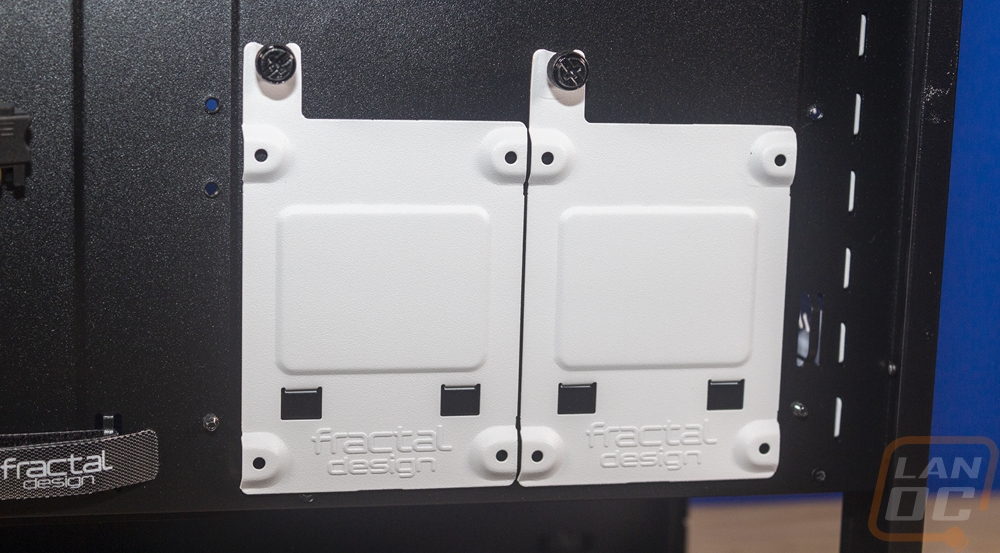
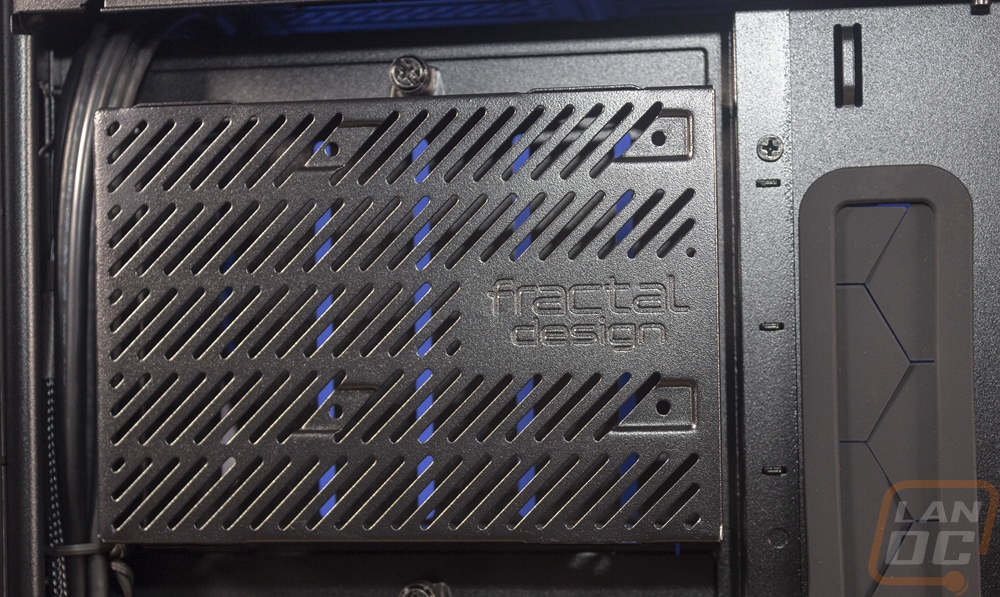
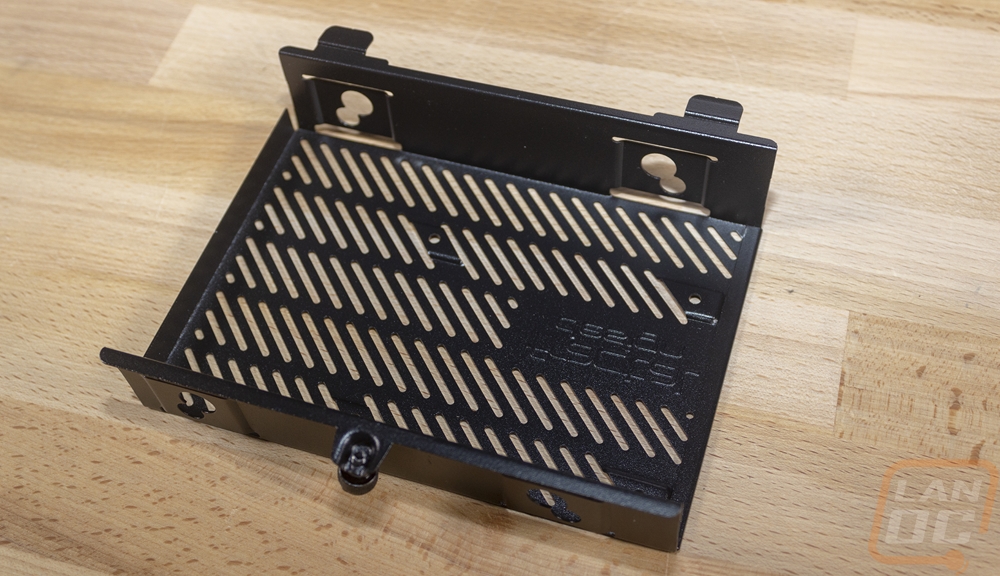
For 3.5 and 2.5 mounting, there are five locations. There are two 2.5 inch drive mounts that attach to the back of the motherboard tray. These can be moved to the front, or if you buy two more mounts you can double up on that storage. They are bright white on this model and they are held in place with a single thumbscrew. Then over on the left side of the back, there are three larger 3.5-inch bays. These used to be flat trays as well, but the new design are these cages that completely cover the drive. They have 2.5-inch mounting options as well should you need that giving the S2 a total of 3 3.5 inch drive locations with 2 2.5 inch mounts or 5 2.5 inch mounts.
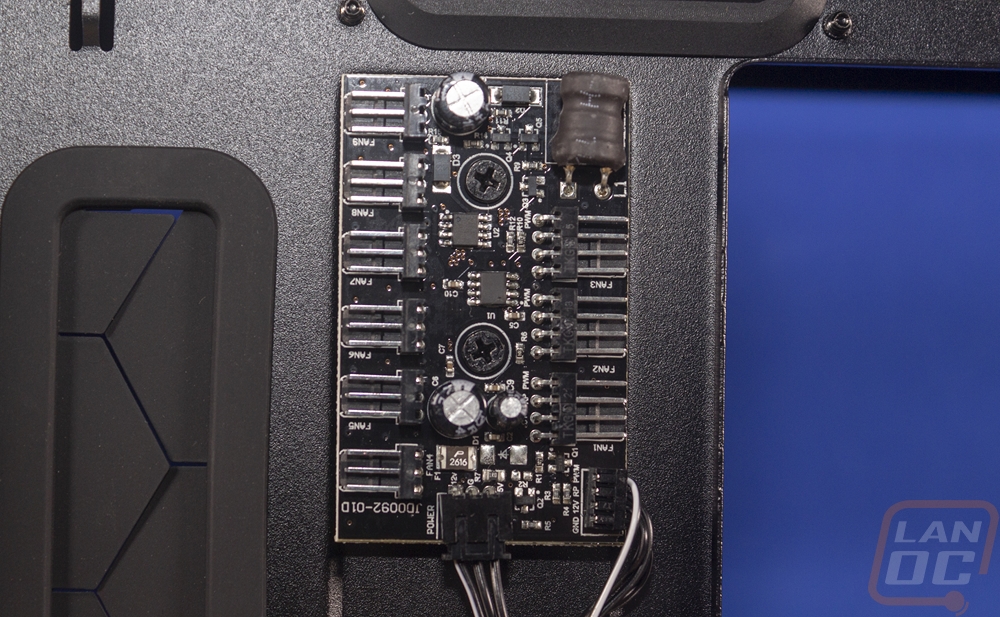
The other big inclusion is the Nexus+ PWM fan hub. A lot of cases are adding in fan controllers and the Define S2 is no different. This PCB gives you six traditional 3 pin fan headers on the left then three PWM fan headers on the right. The bottom right PWM header is for a pump or your CPU fan. Then the cable just below that hooks up to your motherboards CPU fan header to communicate to this controller. It is all powered by one SATA plug and tucked away here on the back. This helps cut down on the number of fans that need to be plugged into your motherboard, keeping your wiring clean.
Then for cable management, you have a big open area into the PSU area that leads up to the two reinstalled Velcro straps. Unlike some of the other case designs, Fractal didn’t need a channel for wiring, the back has enough room without that. This area does run up along the grommets for you to run your 24 pin and other cables out to the motherboard.