At this point, nearly everyone has their own RGB fans on the market but really only a few companies have been innovating at all. Corsair has been at the forefront of that so much so that Corsair and RGB lighting has become a meme sometimes on Reddit. Its okay Corsair, this is a safe space, we can talk about your love for RGB. Specifically, I want to talk a little about their new QL series of RGB fans that is launching today. I’ve had them around the office for a few weeks and I’ve had time to play around with them a little. Corsairs' big change with QL fans is that they have “spectacular lighting from any angle”. With lighting similar to their Light Loop fans, only this time around they doubled up and have lighting on the back as well and the edges have the lighting visible as well.
Product Name: Corsair QL120 RGB Fans
Review Sample Provided by: Corsair
Written by: Wes Compton
Amazon Affiliate Link: HERE
Packaging
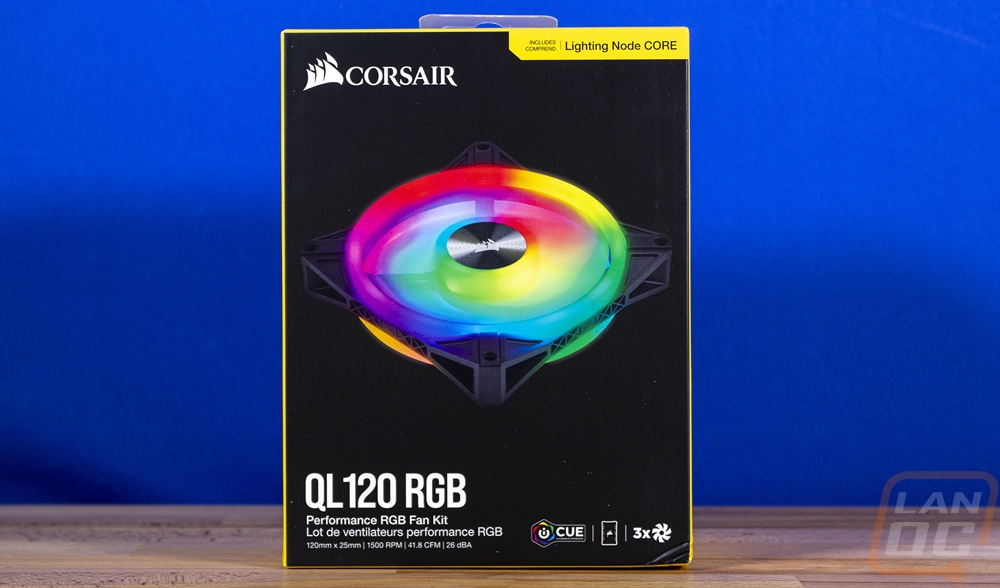
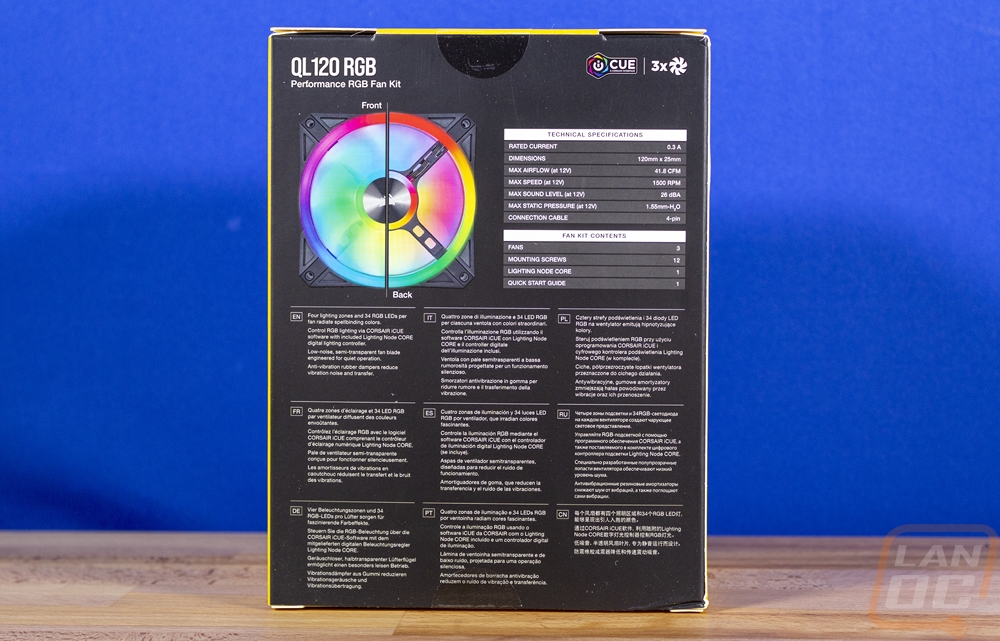
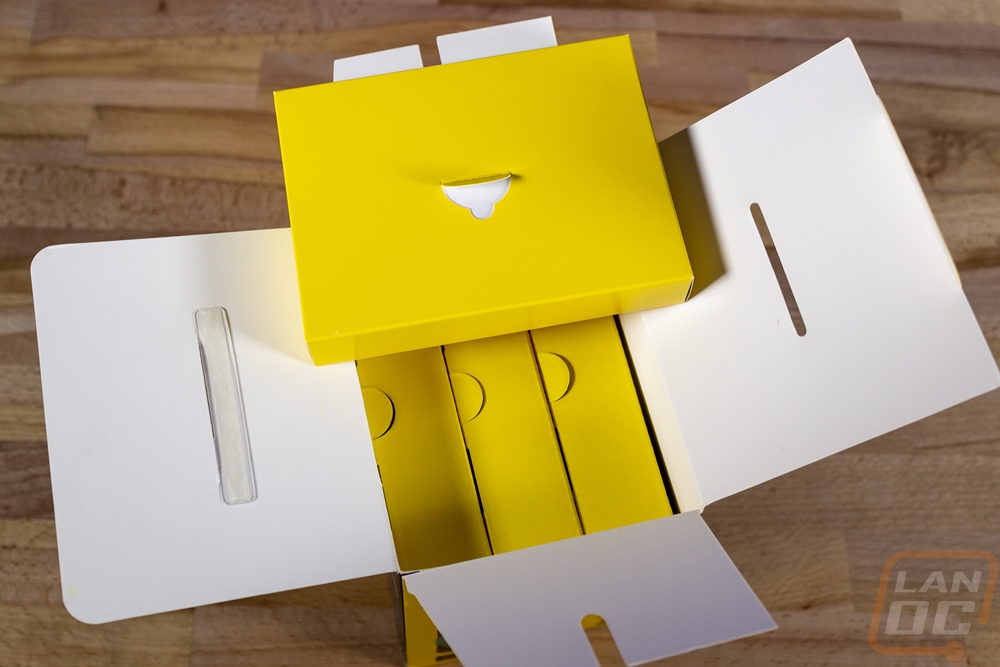
I went in expecting an all yellow box like most Corsair products but the QL120 RGB 3 fan kit did cut back on the yellow slightly. The sides of the box were yellow and there was a yellow trim but both the front and back are black so you can see the RGB better. The front has a picture of the fan from an angle that shows the lighting on the front and back along with the exposed sides which gets most of what Corsair wants to show all together in one photo. Beyond that, there isn’t too much going on with the front. The Corsair branding is up top and the model name is down at the bottom in the biggest font and they also show that you get a controller and three fans down at the bottom. I like that on the back Corsair actually has a specification listing and this time the photo is split between a front and a back picture. Beyond that they touch on the features in a shortlist that gets repeated across a total of 9 languages.
When you open up the box you see a lot more of that yellow. There is a small box up on top with the controller and all of the accessories and then below that are three trays for the fans. Each has a small pull tab to help you get them out of the box.
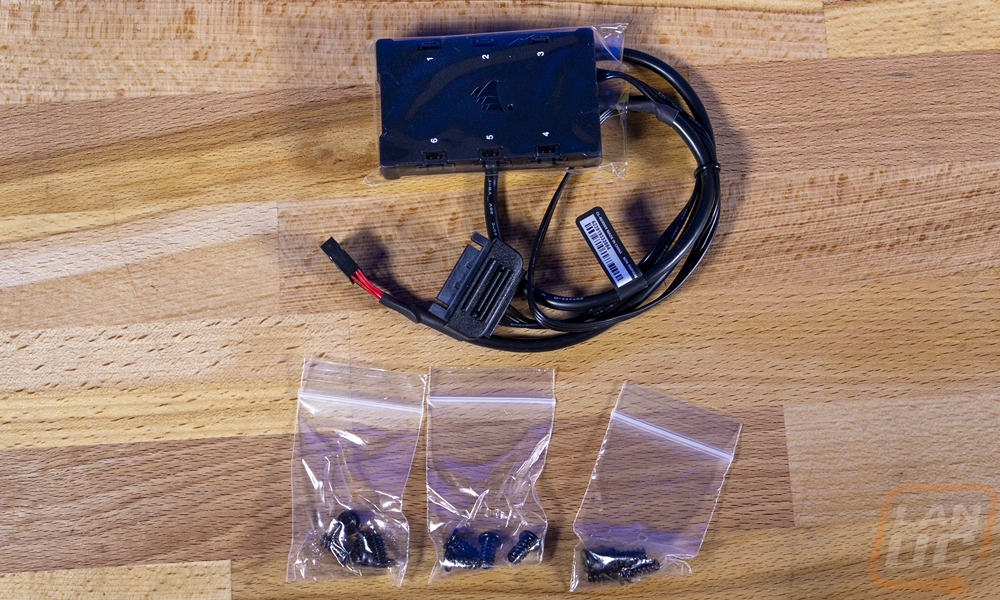
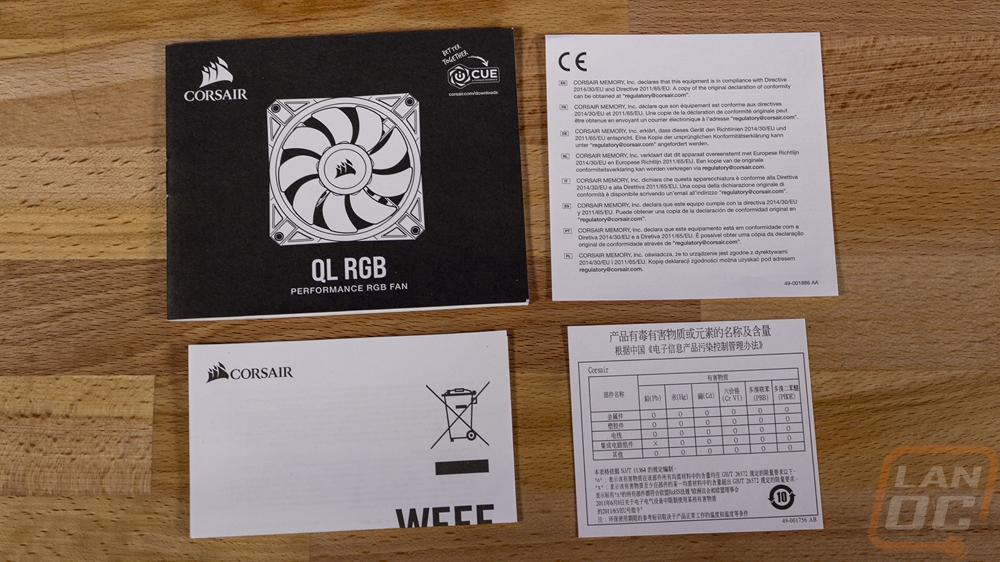
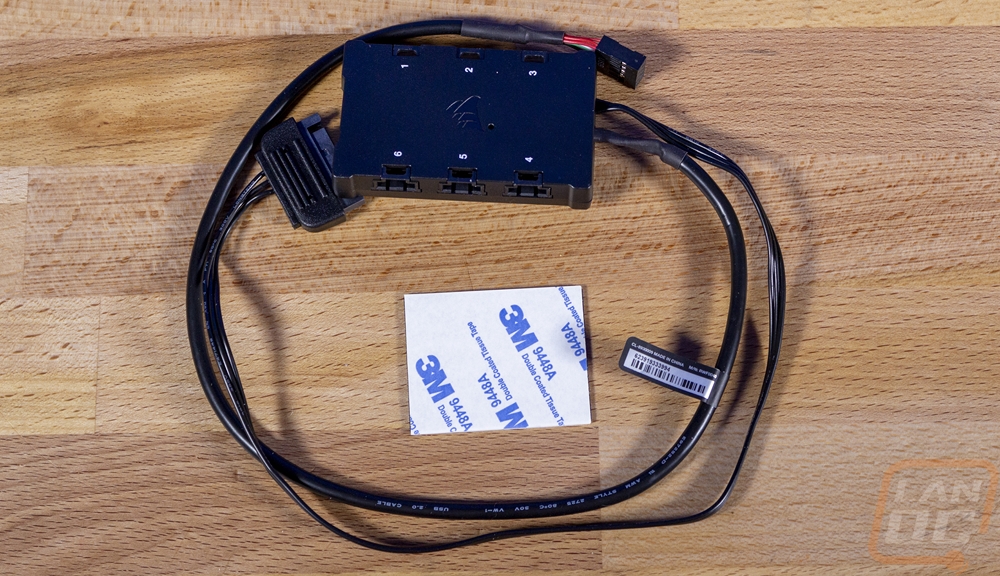
For documentation Corsair included a full manual which is really the only important documentation. There is then information on recycling and two pages that seem to be added later with certification information. From there for accessories you have the controller which they call the Lighting Node Core, it comes with a plastic bag over it. Then you have three sets of black fan screws, one for each fan. Inside of the Lighting Node Core bag there is also a large double-sided sticky tap pad for installing it.
Photos and Features
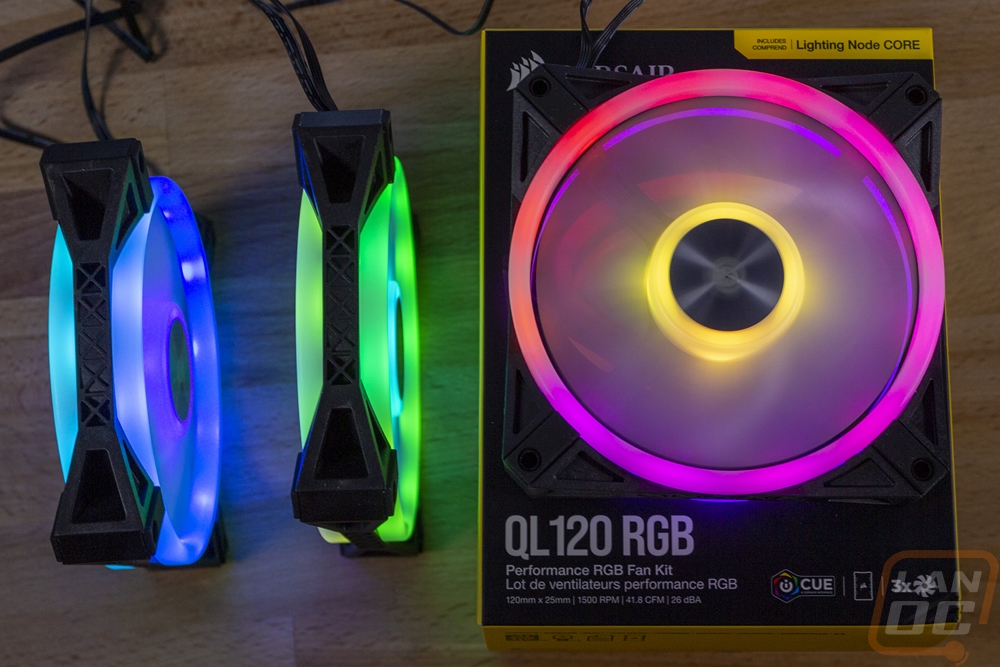
Just to break things down, the QL series has a few different options available. You have the QL120 and QL140 fans which are both available individually. The QL120 that I have here is the 120mm option as the name would imply and the QL140 is the 140mm fan. Both come in a kit form as well. The Ql120 kit is a triple fan kit that also includes the Lighting Node Core. The QL140 Kit comes with the Lighting Node Core as well but just two of the 140mm QL140 fans. You can also get the Light Node Core on its own as well. Today I’m looking at the QL120 RGB Kit, but almost all of the information still applies to the single fans and the QL140, only with the individual fans you will need a way to control them which includes the Lighting Node Core, the Lighting Node Pro, and the Commander Pro. The Core comes with a few of the Corsair cases as well and I believe if you already have one of their RGB water cooling kits the QL fans should work as well, though that would need to be confirmed because of the higher LED count on these fans.
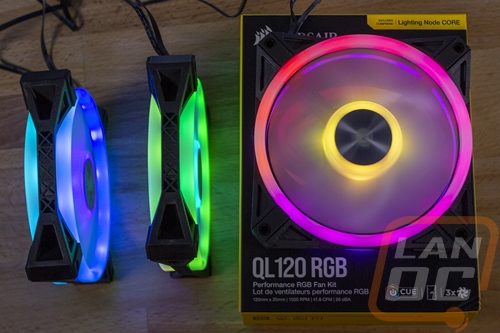
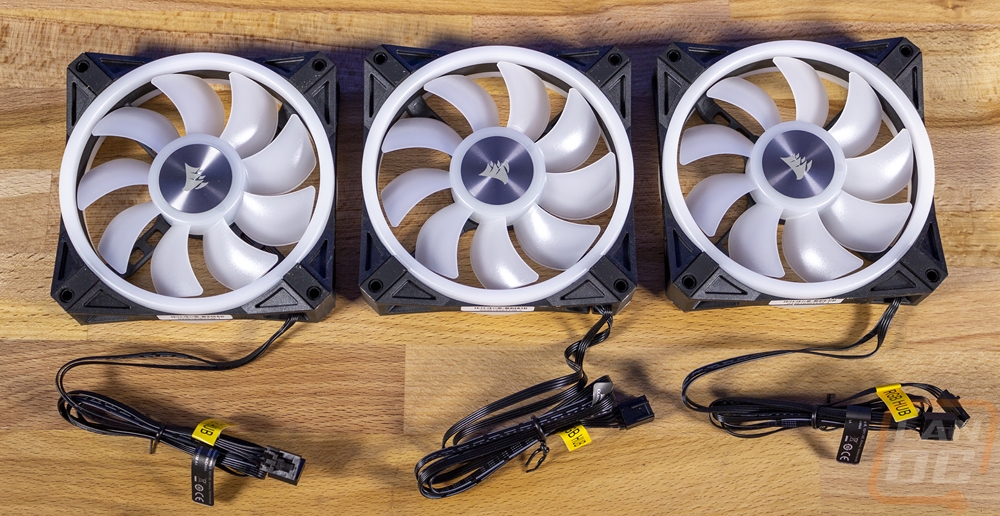
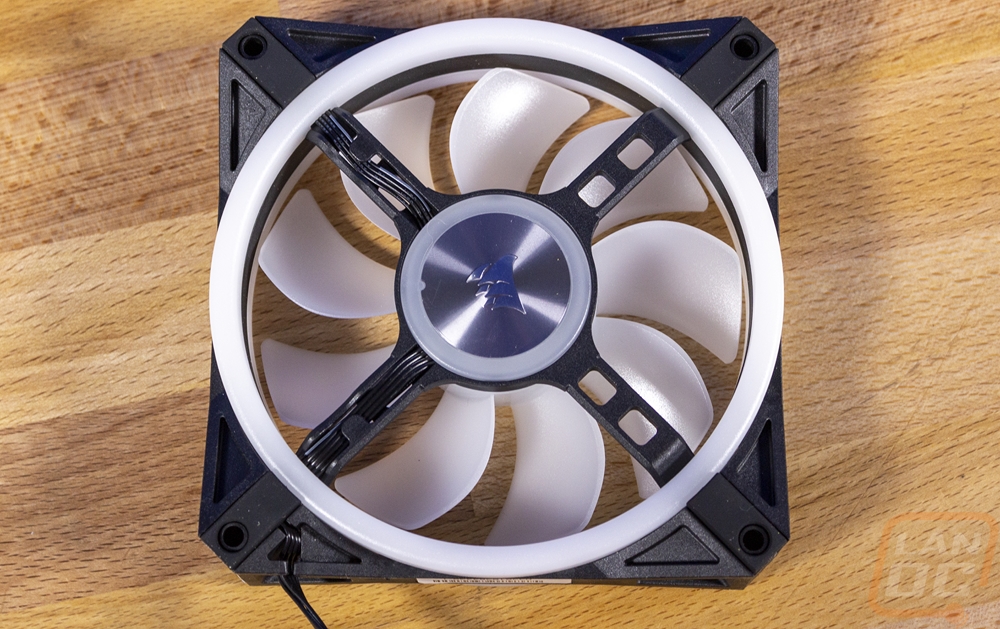
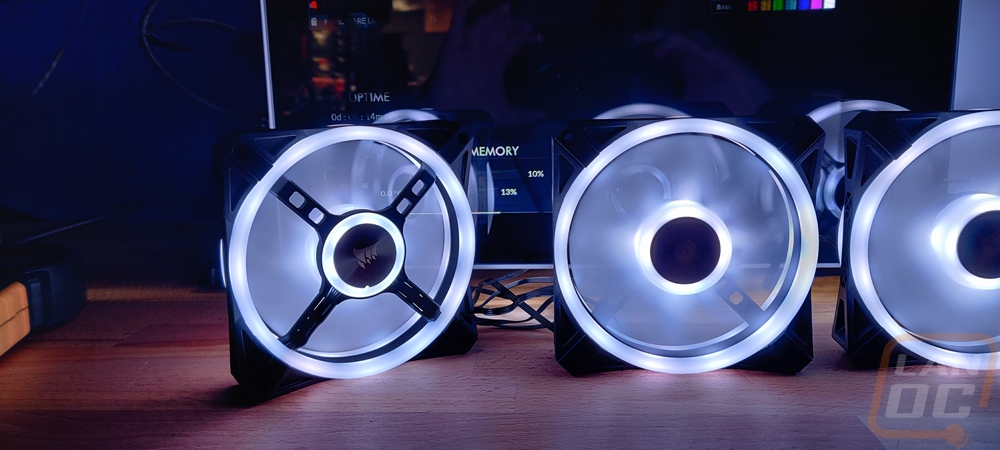
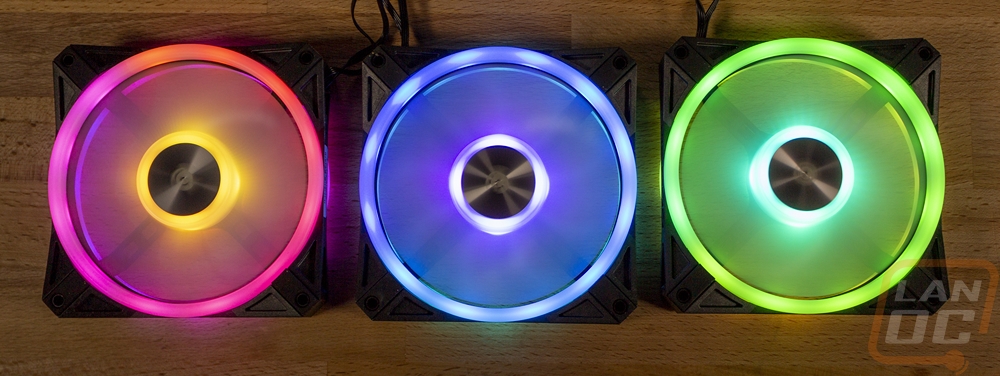
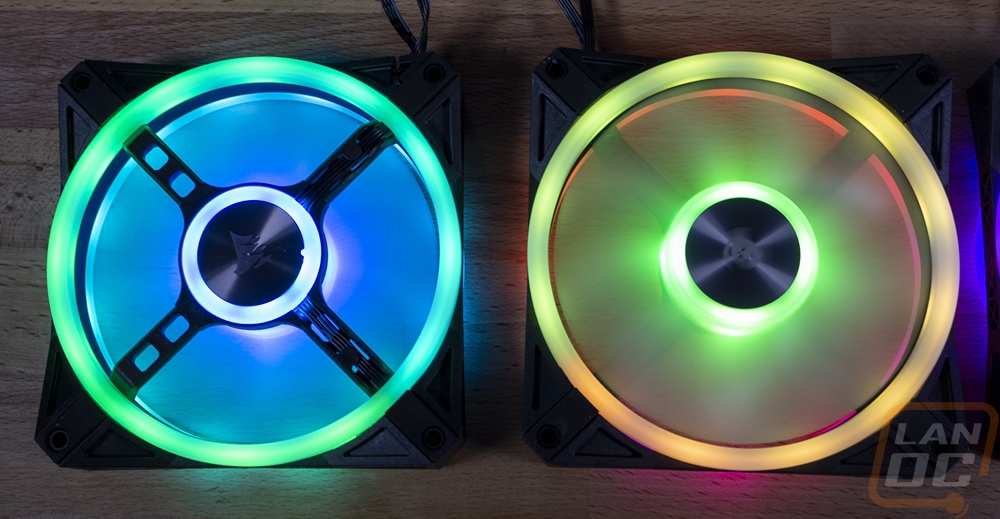
So here they are, three QL120’s and like I mentioned earlier honestly at first glance you might just think these are their LL series aka the Light Loop fans because of the ring that runs around the fan. I will have to get in a little closer to show the differences, but I did want to point out that with the three fans pictures below you are getting 102 addressable LEDs across 12 different loops with these fans. The LL Series have 16 LEDs per fan, so less than half of the total addressable LEDs of the QL fans.
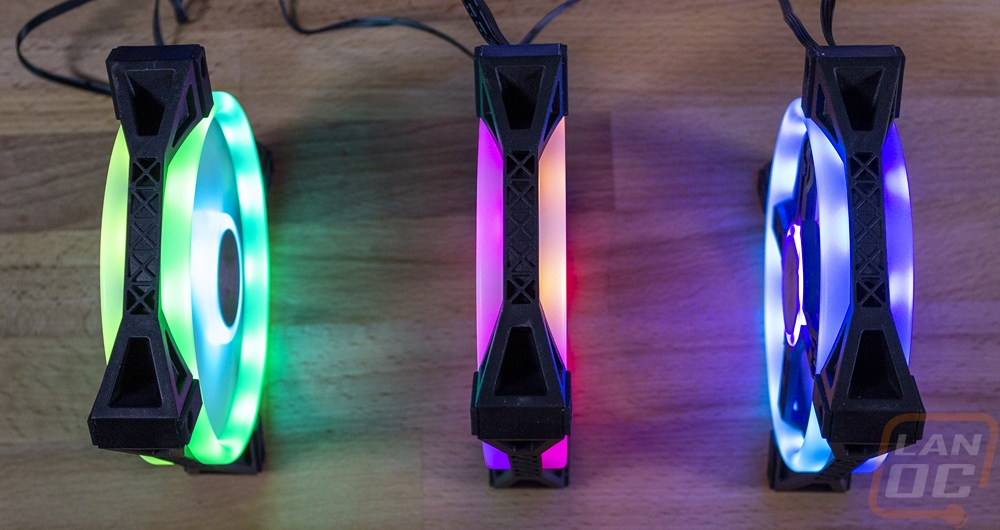
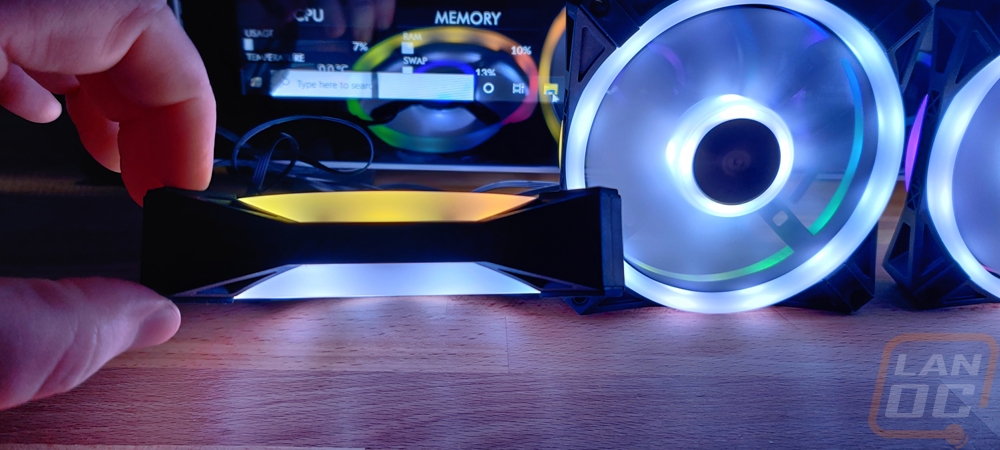
I’m actually going to start with the side profile view of the QL120 to show what is different in the fan housing. The LL120 has a traditional Corsair fan housing which is thick all the way around and with that the light loop isn’t visible from the side. For the QL series corsair thinned out black housing except on the ends where it attaches so you can now see the lighting from the side point of view. You can see both the top and bottom translucent rings.
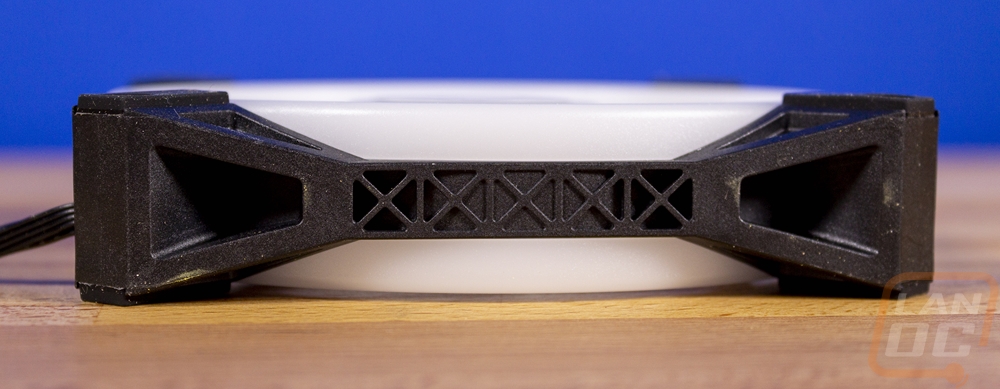
So from the top, you can see that the light ring goes out basically to the edge because of the new design. The corners where the fan mount still has thick vibration pads however. Also if you haven’t seen some of Corsairs' recent RGB fans you will notice that the fan blade is also that same translucent white, that is because the center housing has its own LEDs as well that face out into the fan. So you end up with 12 addressable LEDs around the outer ring and there are four inside the front. Also new here is the center with the Corsair logo has a machined aluminum look.

Now the back of the fan is where the big change has happened. With the LL series, the lighting was all on the front. Here the QL120’s have a second light loop on the back. The center still has to be supported so there is an X shaped bracket holding the fan motor but then there you will find another silver machined center and a second ring around that. The back of the QL120’s actually has more lights than the front with 12 on the outside again but 6 in the center, all individually addressable.
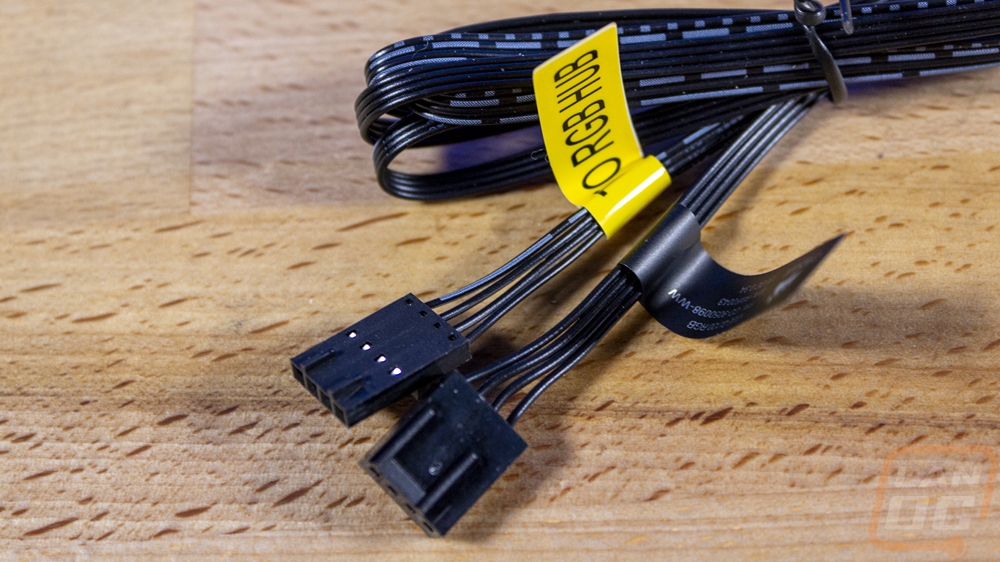
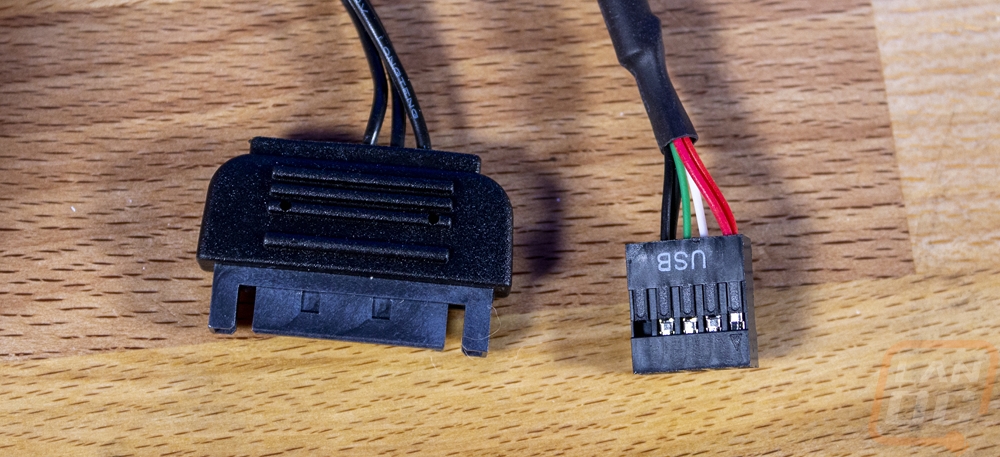
For connections, like previous Corsair RGB fans, the QL120’s do have two cables. Both are black and have a flat and flexible design. One is a traditional PWM fan plug to spin the fan and the other is a four-pin plug for the lighting. That one has a yellow tag to make sure you don’t get it mixed up. Both cables are 60cm long in total or just under 2 feet if you prefer that.
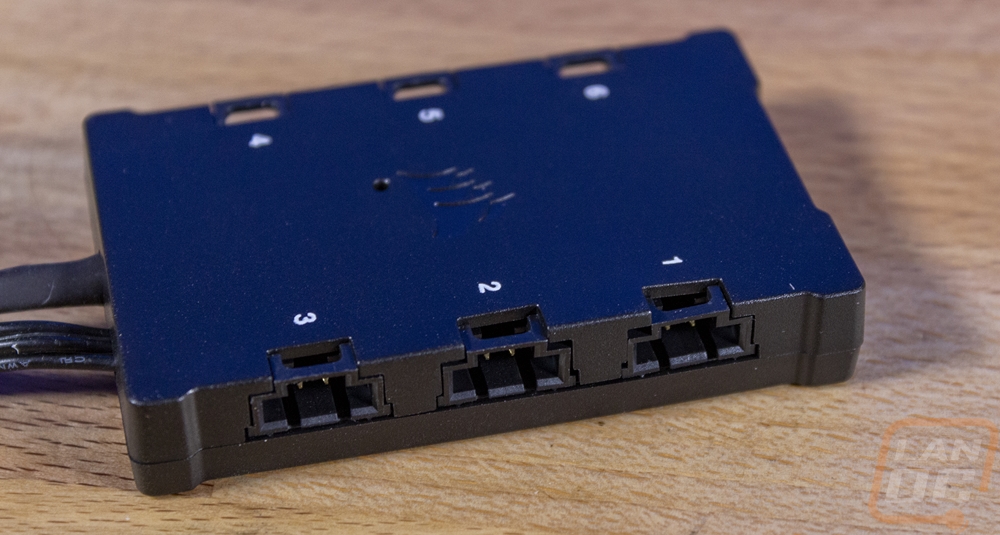
In order to control the three QL120’s included, the kit also includes the Lighting Node Core which is one of three controller options that Corsair has. Because the QL120’s have 34 addressable LEDs over the 16 of the LL series you do have to keep that in mind if you are using some of the other controllers like the Commander pro which can run up to 12 or 6 on the Lighting Node Pro when they are paired with the RGB fan hub. The Lighting Node Core has 6 total connections so you can add three more QL series fans and then it hooks up to your PC with a USB 2.0 connection and one SATA power plug.
Performance
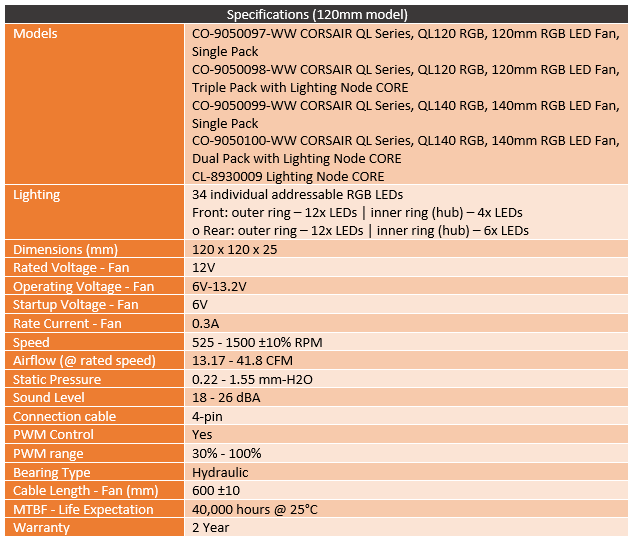
Now for performance testing, I mostly focused on the lighting as that is the key feature of the QL120’s. I did spend a little time toying with the overall performance as well. They are rated at 41.8 CFM when running at 1500 RPM. They are rated at 1.55 mm-H2O for static pressure which is enough for all but the thickest radiators. For noise, they are listed to be 18 - 26 dBA. I did test 100% fan speed noise levels and with our meter and with a much higher ambient noise level (32db) the QL120 peaked at 43.7db which is a little louder than what Noctua fans in our office test at, but still not that loud. I will say that getting all three fans hooked up ends up being a big wiring mess. Each fan has two cables, one for the lighting and another that goes to your motherboard for the PWM fan connection. Combine that with the Lighting Node Core having a USB 2.0 and SATA connection is a lot of cables. Part of me would prefer if the fans had just one that went back to the Node and handled both fan control and lighting. It would also make handling high numbers of fans a lot easier and tie in fan speed control into iCue.
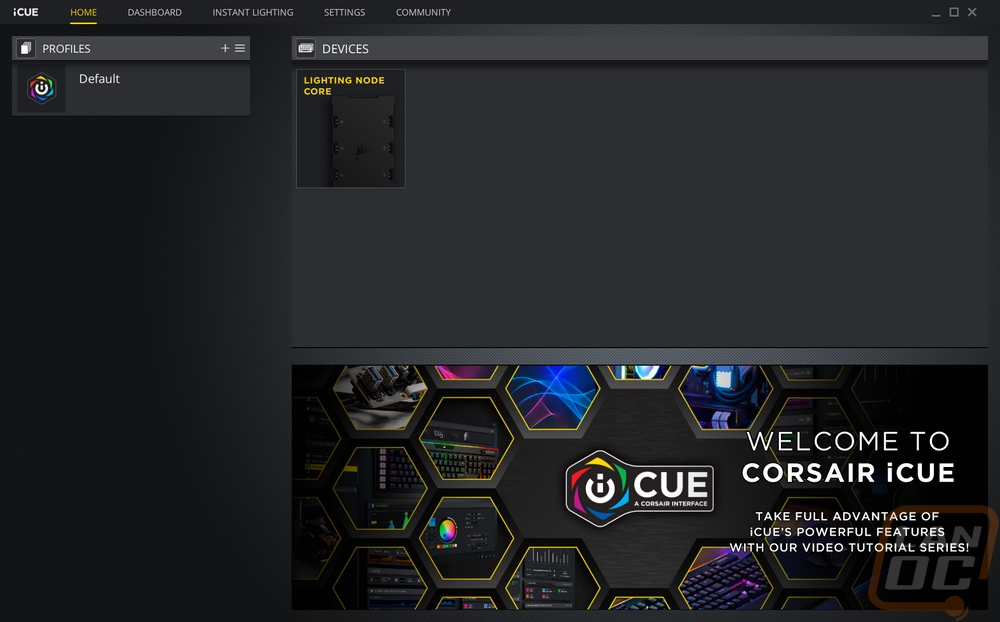
Speaking of iCue, the QL120’s do tie into Corsairs software. This is how you control all of the lighting of course. So before showing off the lighting I did want to show how it is all controlled in iCue with a look at the software. When you first get into the software you land on the devices page which depending on what all Corsair products you have hooked up will list multiple devices. In this case it just lists the Lighting Node Core, not the QL120 fans as the Node is what controls them. The lighting setup tab under the Lighting Node Core is just where you tell it what fan series you are running and how many you have hooked up. Not getting this right can mess up how the lighting works, it needs to know how many addressable LEDs to control per fan. You will also need the latest iCue version to use the new phones.
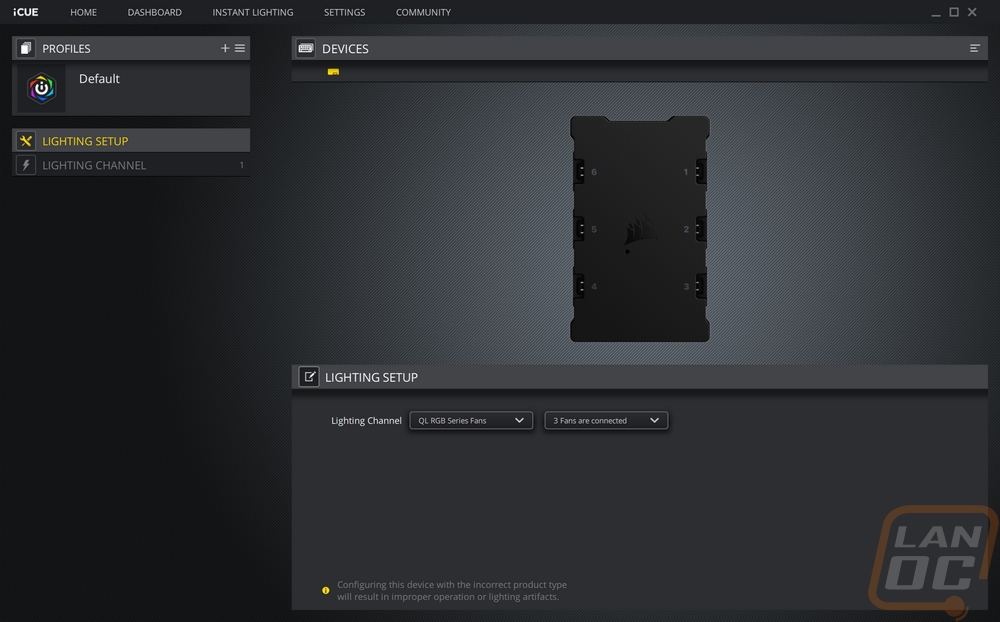
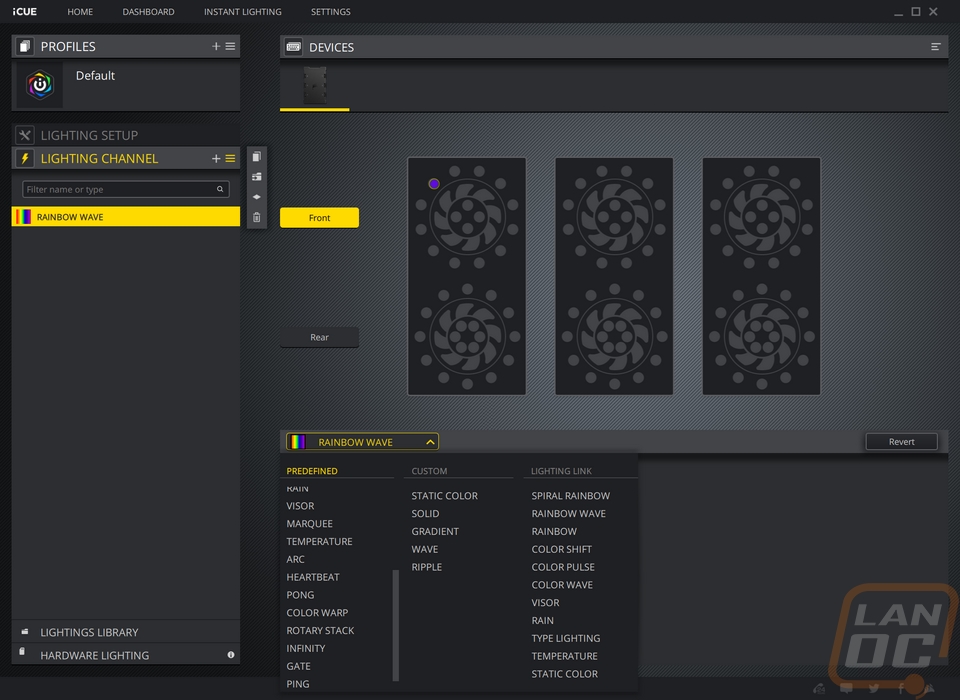
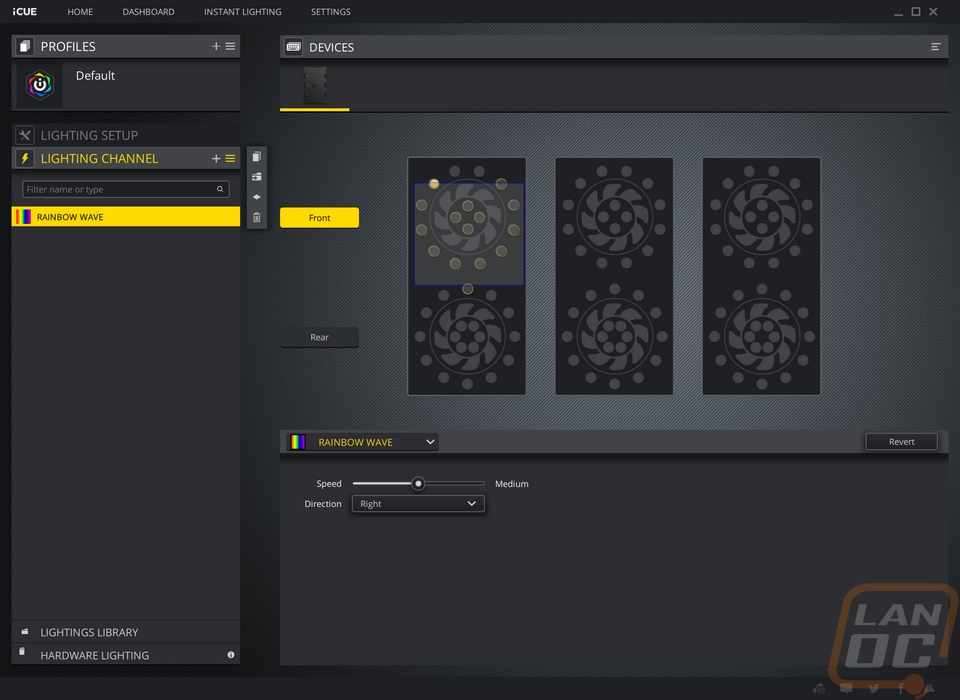
Once you have the QL120’s setup which for this kit is the three fans you can go down into the “lighting channel” tab on the left. From there under that you can add lighting layers. Each layer lets you select all or each individual LED on all three fans and then from there you can arrange the layers on what should be on top. So, for example, you could set a basic effect like the rainbow wave as a base and then program every other light to be white and all of the lights you didn’t program will still run the rainbow effect. Each effect you select has its own options like speed, direction, and some let you pick the colors it will use.
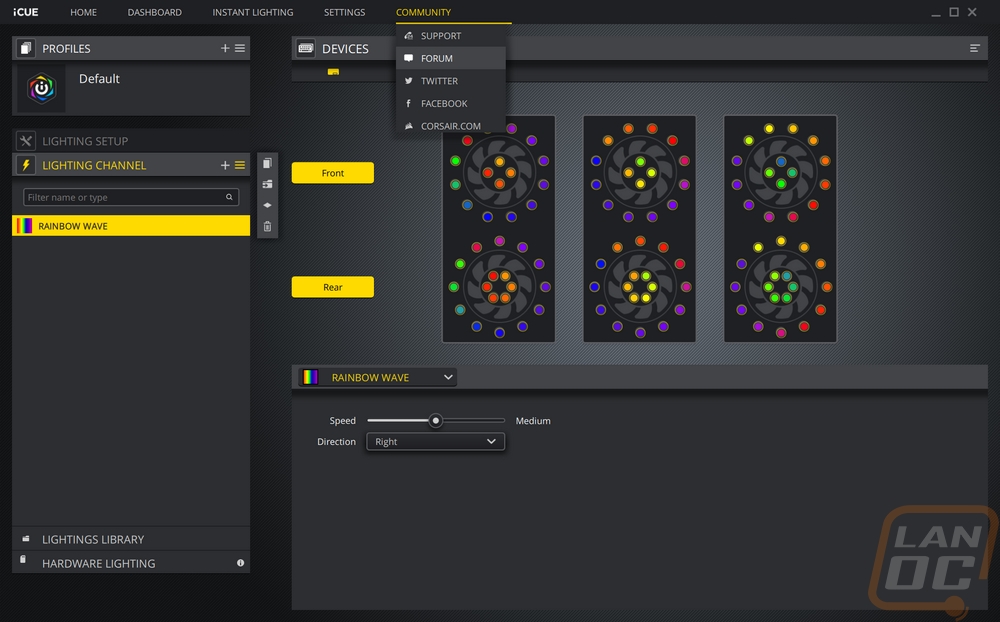
Along with being able to program each individual LED, there is a BIG list of effects as you can see in the two pictures below.
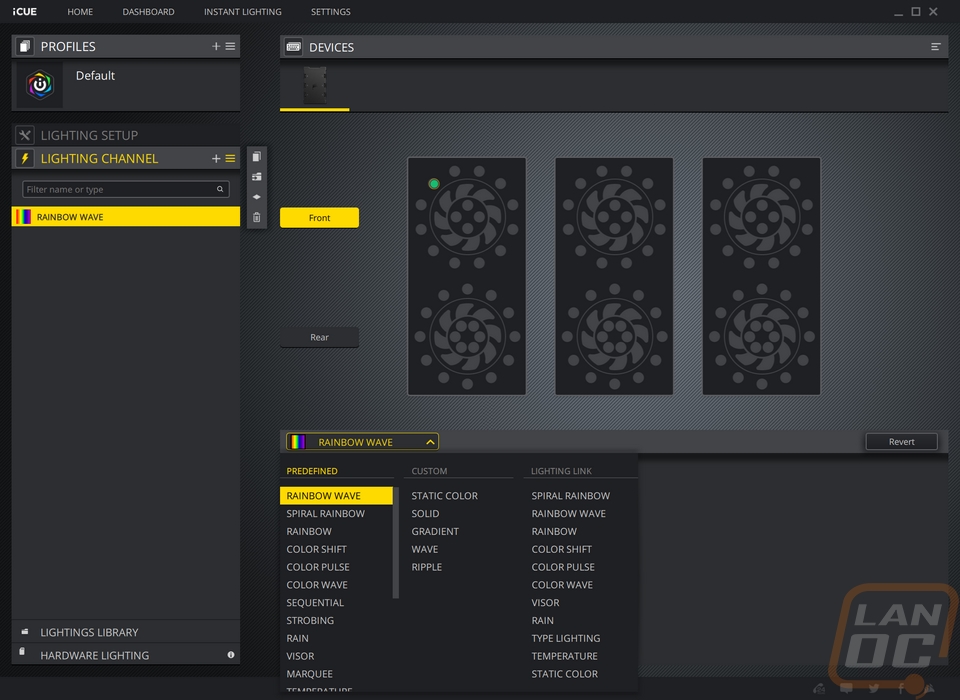
My only complaint with how all of the lighting is controlled is how they executed the drag function. It works and it works how I would want it too, but only if you click on the dark colored box around the fan. I wish it gave more room to click, doing it next to the outmost LED dots is especially tight.
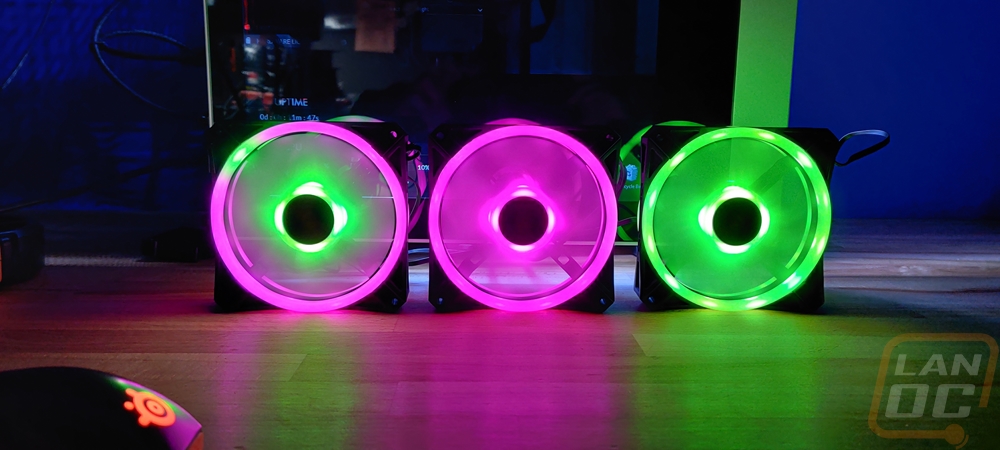
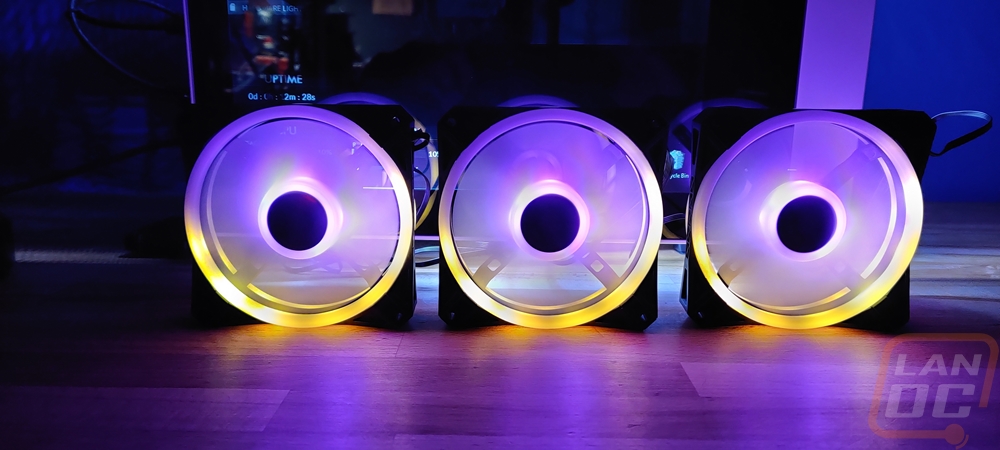
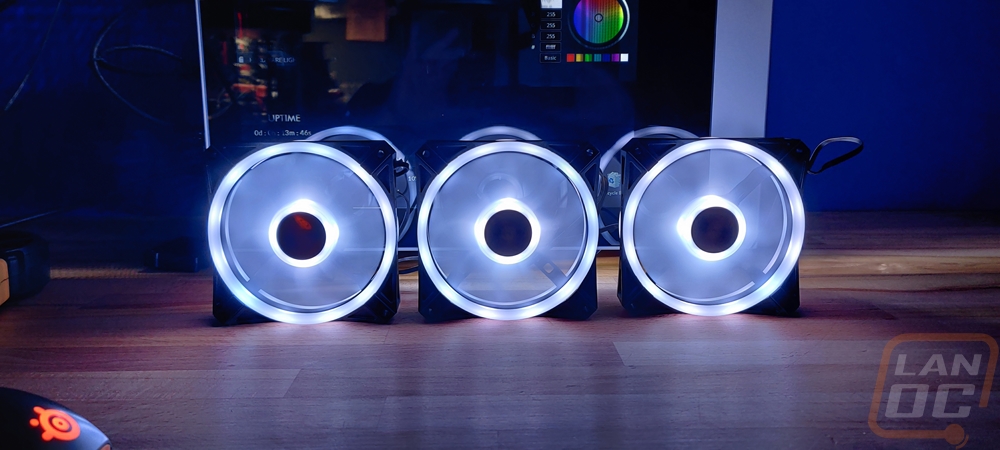
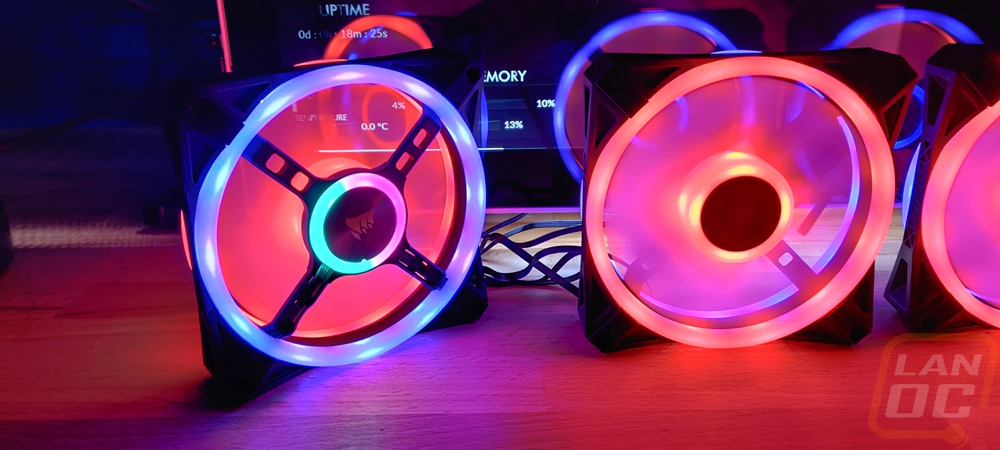
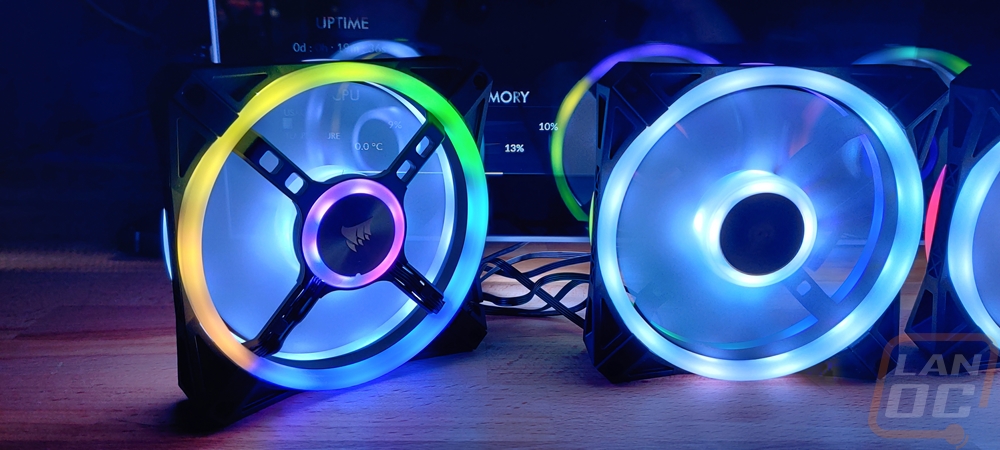
With the software out of the way, all I really want to do is show you what the QL series fans actually look like when lit up! That is what makes them special right? Well if you haven’t seen a Corsair Light Loop fan before you will really like the look. Having the LEDs around the outside and the ring inside combines for a really cool lighting effect, especially when you start mixing colors or different effects between them. Both the inside and outside ring lights fade into the fan blades to a point so it mixes in the middle of the fan blade. Below are a few of the different effects in action.
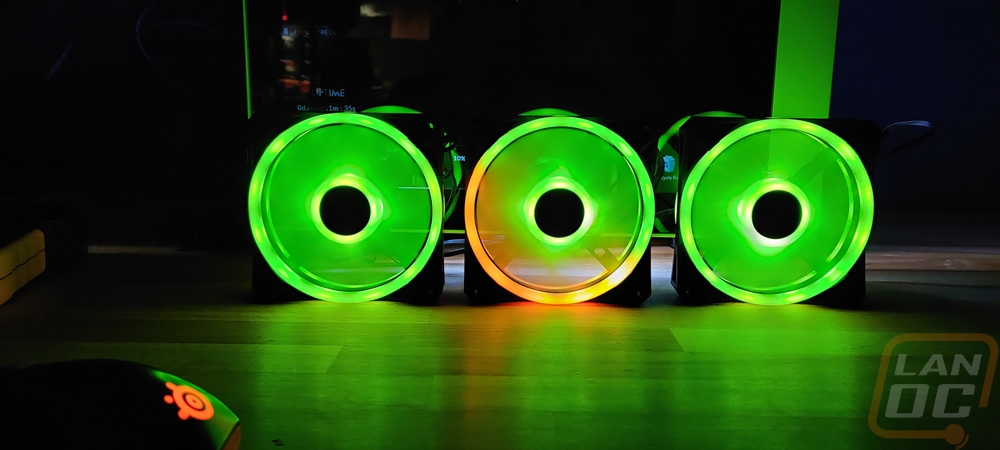
When first testing the QL120’s I had them hooked up to our Snowblind build which has Corsair memory, fans, and a watercooler all controlled by iCue and they run white lighting so the QL120’s defaulted to white at first. I have to admit, even without wRGB LEDs, the white comes out looking good and having LEDs on both sides of the fans did a good job of lighting up in front of and behind the fans.
So one of the other big features is the thinner outside housing that allows both the front and back rings to be visible from the side. Now a lot of cases are designed to try to hide the fans somewhat so the sides aren’t visible through the window, but when you are using them with a radiator or in some situations that side visibility can really come in handy. It lights up surprisingly well and I found using two different outer ring colors really set the look off, especially the orange and white in the picture below!
With 34 total addressable LEDs, the fans really pop with the standard full rainbow settings as well.

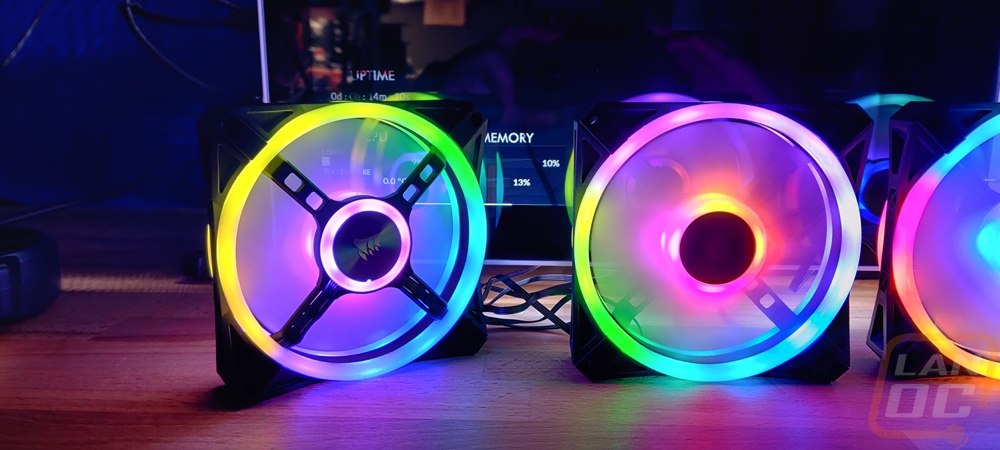
Playing with mixing colors with different colors on the inner ring and outer ring was cool as well, but you have an additional layer of that with the front and backlighting. Even if you don’t have both sides visible you can use the inside lighting to light up the radiator fins in a contrasting color (if you are using the Corsair White AIO) or to just mix effects like below.
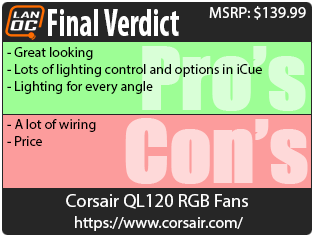
Overall and Final Verdict
Now let's be honest, with fans there is only so much testing that you can do. But I was surprised at how much time I ended up spending playing around with the lighting for Corsair’s new QL series fans. They took the lighting effects that their last set of fans, the LL series or the Light Loop fans had and doubled up with over twice as many addressable LEDs. This time putting the same light loop on the back of the fan. Having LEDs inside of the fan center and on the outside makes for interesting effects, then you double it and you can do some weird stuff. You can even have a different theme inside of your case as you have facing out when you have fans visible through a mesh or front glass. Corsair also designed the new fans to allow both the front and backlighting to be visible from the side allowing a cool look for every angle, assuming RGB lighting is your thing but I assume it is if you are checking these out.
The fans had solid performance, running quiet, though not as quiet as fans like Noctuas, and with the static pressure to handle most radiators. Especially the thinner radiators you find with All in One kits. My only complaint was with the wiring. Two wires per fan and then USB and power connections for the Lighting Node Core that is included in the kit can make for a wiring mess. I would love to see Corsair go with a simpler one wire setup that combined fan controls or maybe a daisy chain option either of which could cut down on the mess.
Beyond that my only other complaint was with the pricing because at $139.99 for the 3 fan kit you are spending more than a lot of people may spend individually on a case, AIO water cooler, or even some components like a motherboard or CPU depending on the build budget. These are without a doubt a premium option and just to add styling if RGB is your thing but the price for single fans at $45.99 for a QL120 and a QL140 at $49.99 make even the most premium fans look cheap. Of course, you might be able to find fans with lighting on both sides, but not with 36 addressable LEDs and with the control that Corsair is offering so the QL series fans are unique. But you do pay a big premium for that. Would I spend that? On a crazy high-end build, sure. But I would make sure I could use the lighting on both sides, if not the LL Series fans can save you a little and still get you a similar look.

Live Pricing: HERE


