Photos and Features
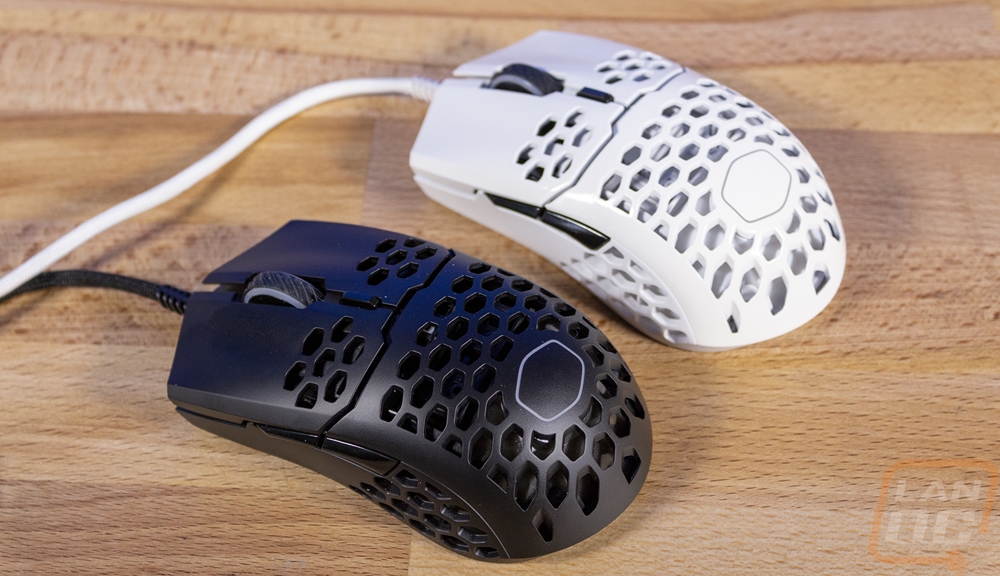
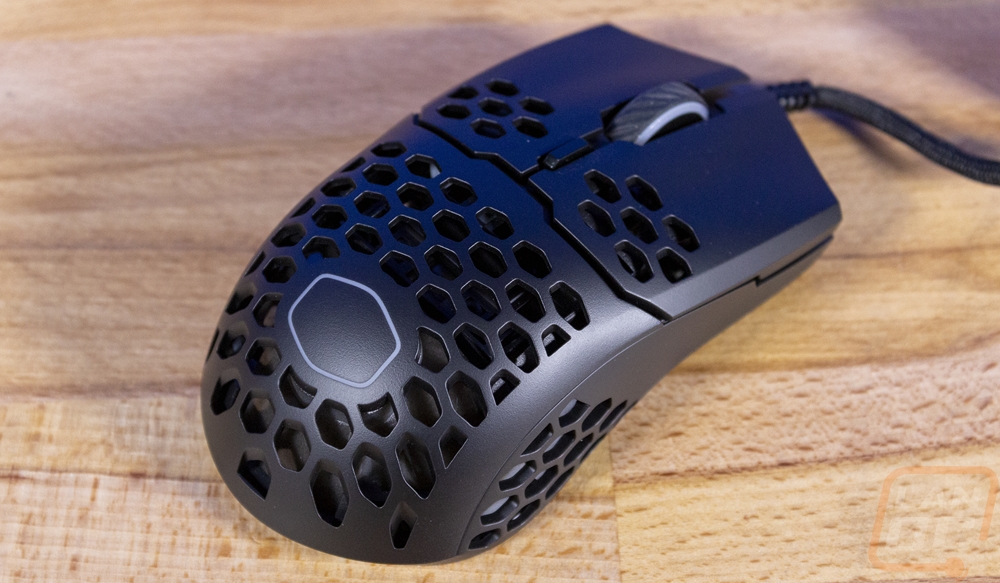
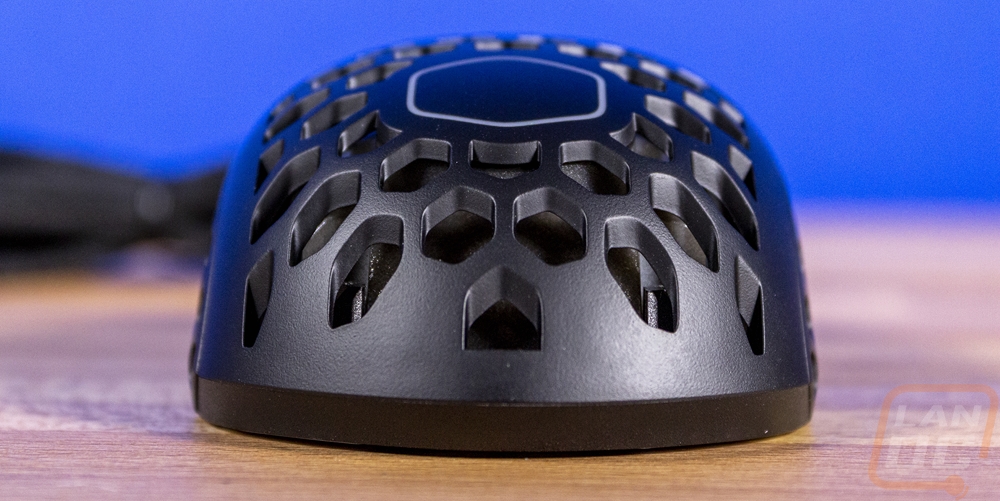
Well if you saw my original review of the Cooler Master MM710 then a lot of the MM711 won’t be much of a surprise. The MM711 is based on the MM710 with only a few small changes. Both mice have this swiss cheese looking design that might look completely insane to some people but has been a trend in some of the enthusiast-focused mice. The point is to create lightweight mice that you hardly feel when you are using it and the MM710 comes in at 60 grams, 7 grams more than the MM710. The mouse shape is ambidextrous and it comes in at 116.5 mm long, 62.4 mm wide, and 38.3 mm tall. The big change is with the Cooler Master logo shape at the back of the mouse, you can see the white outline as some translucent has been added for the addition of RGB lighting where the MM710 didn’t have lighting.
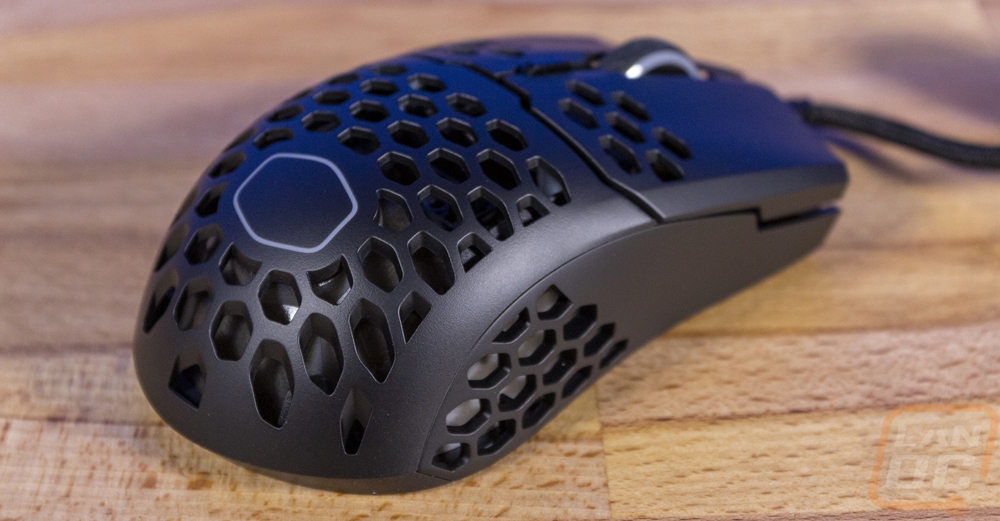
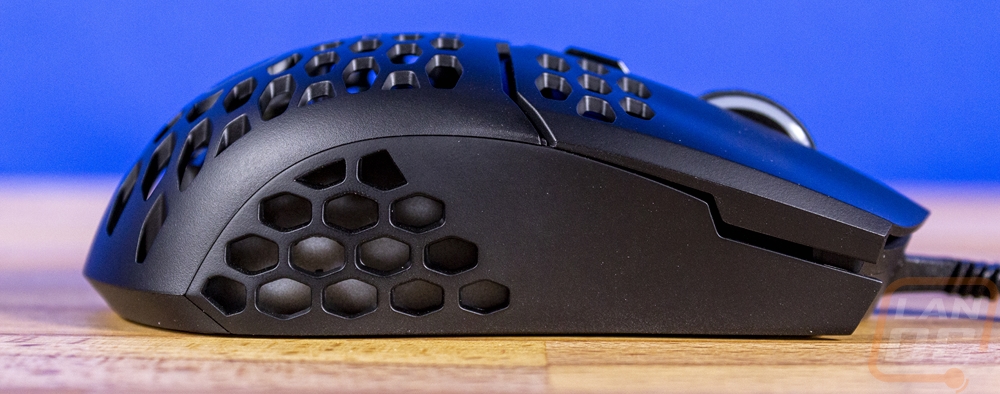
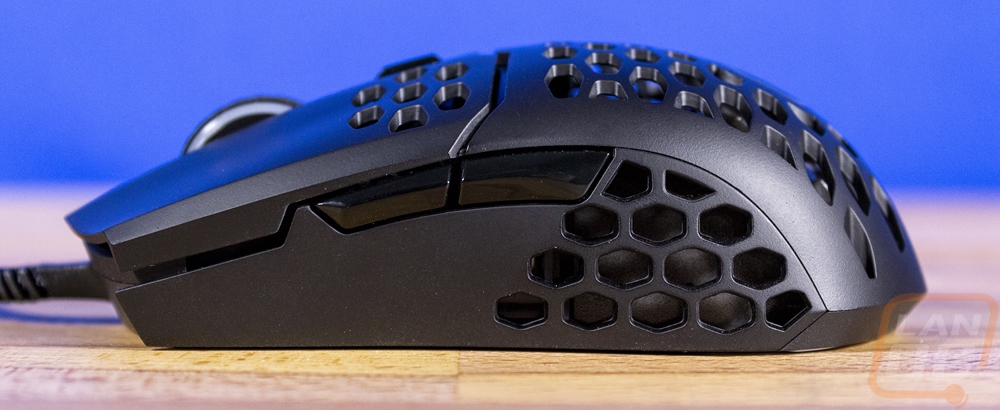
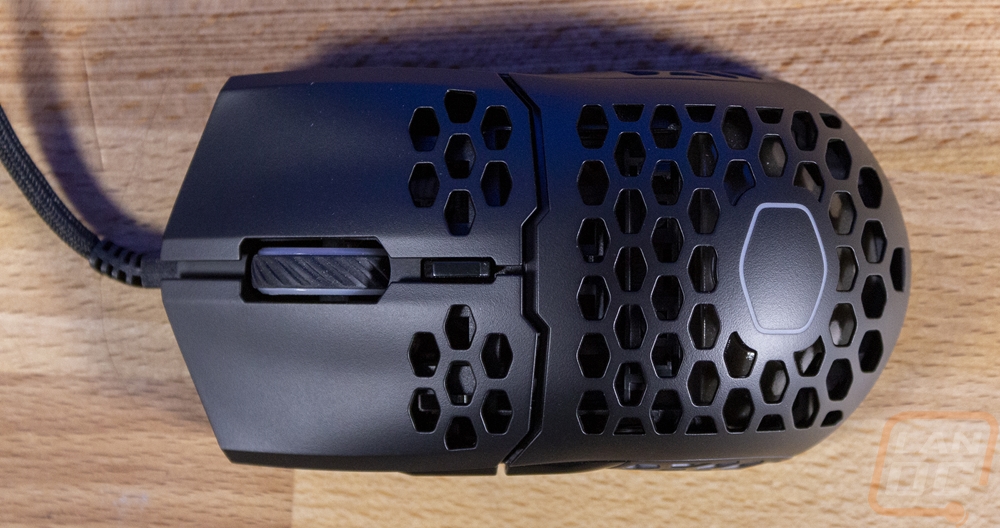
The side profile pictures of the MM711 do show that there are those Cooler Master logo shaped holes on both sides at the back where your fingers won’t touch. What is interesting though is with this being an ambidextrous mouse the side buttons are still only on the left side for right-handed use. This keeps weight down but means that lefties get the shape they need but won’t have easy button access.
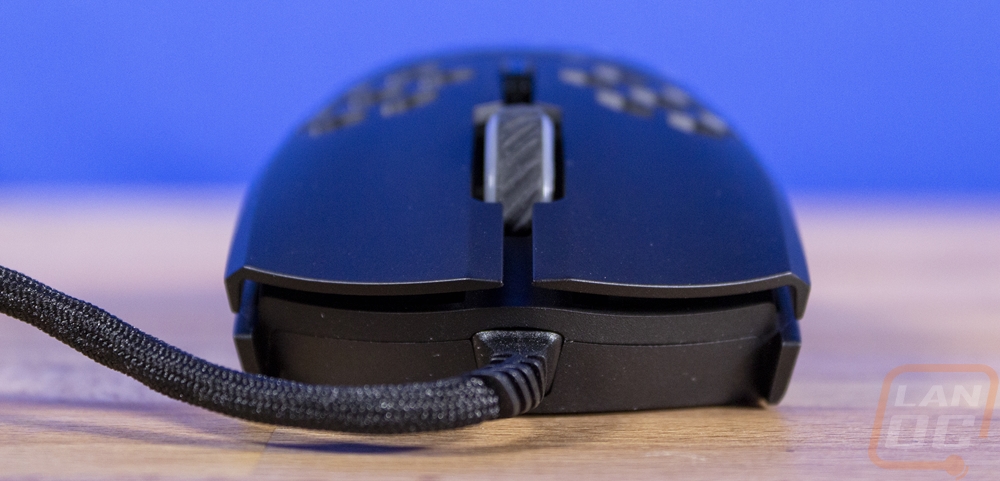
The front and back view helps show that ambidextrous shape as both views show that there isn’t a lean. Both sides have the exact same shape. The back view also shows just how big the holes in the housing are and how thick the top plastic is as well.
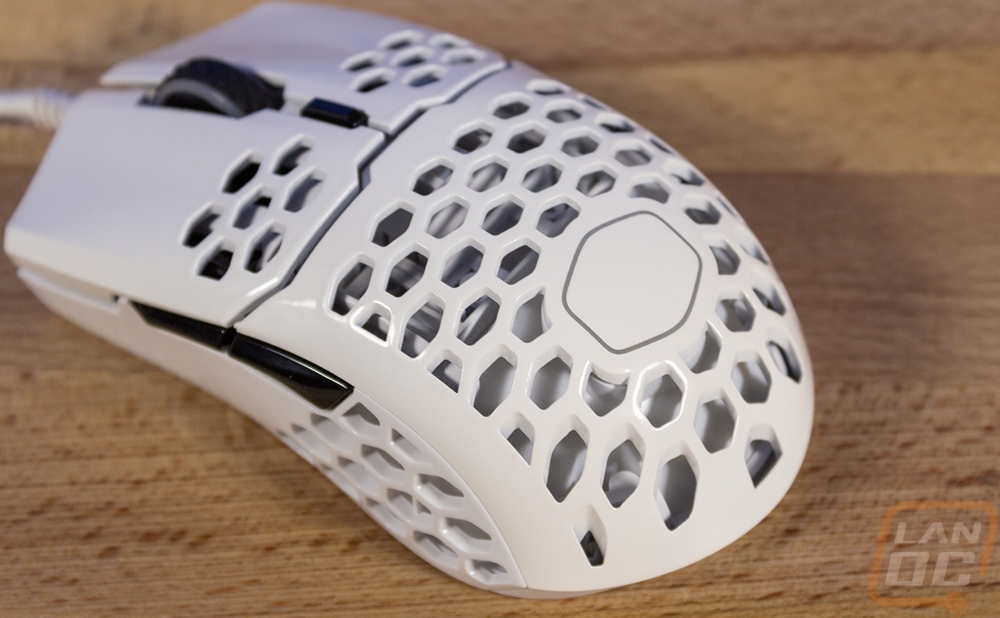
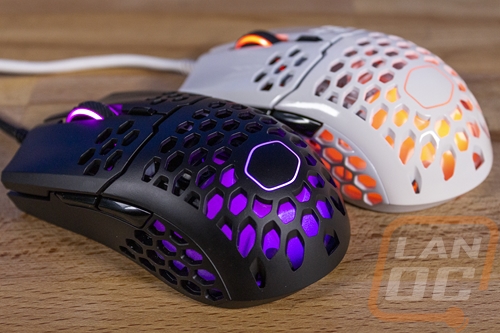
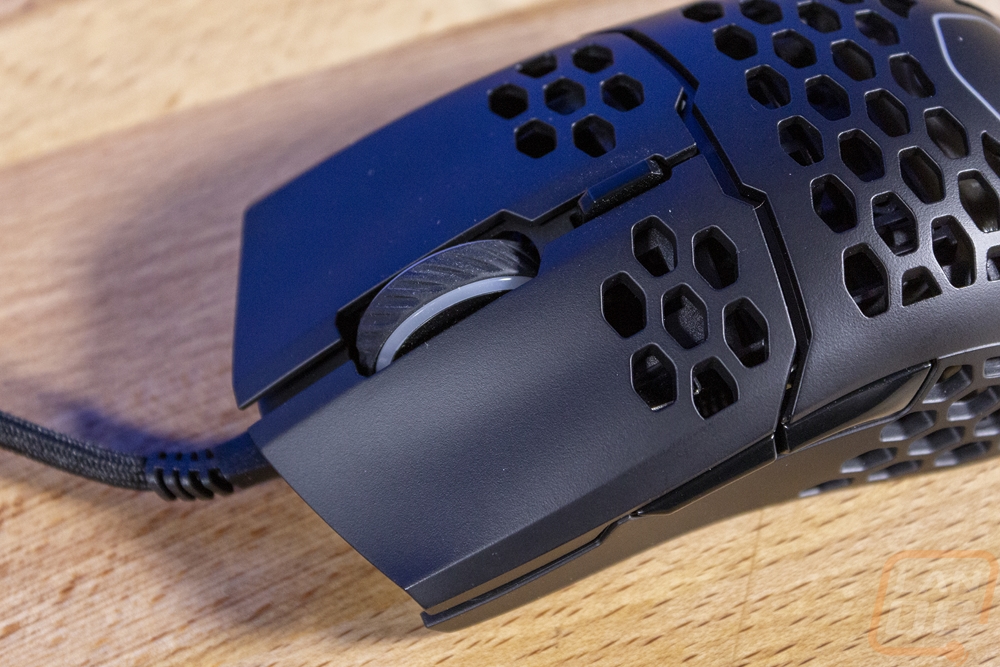
The top-down view gives a better look at those Cooler master logo shaped holes. It also shows the big gap around both of the front triggers and lets us see the small DPI/profile button behind the scroll wheel. The MM711 has Omron 20 million click switches for both of its triggers which has to be my favorite mouse switch right now. The 50 million click Omron switches have given me reliability issues so the 20 million model has been more reliable and has that firm and loud click that I love with Omron switches. The scroll wheel has the same switch as well and the scroll wheel has an angled rubber grip. Like with the other lighting, Cooler Master did add RGB on the wheel as well with translucent trips on each side. The wheel doesn’t have side to side clicks, though pushing it to the right will still trigger the down press due to the design of the mechanism. As for the triggers, this is one of the only areas that doesn’t have the honeycomb design, making sure your grip is on to solid plastic.
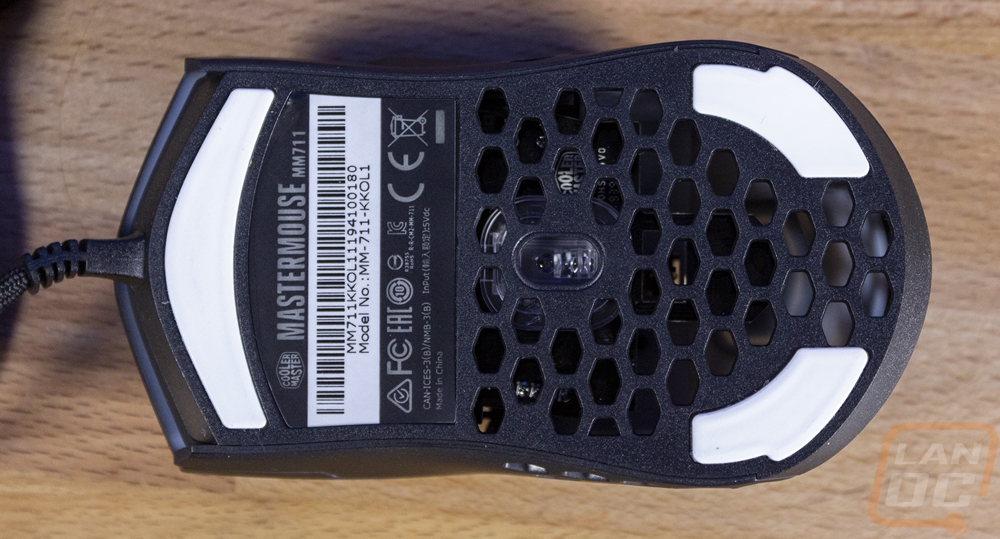
The bottom of the MM711 is packed with holes as well with them running all around the sensor in the middle. The entire bottom is the same as the MM710 but they both share a lot with the MasterMouse S as well. The bottom, of course, does have the normal sticker with all of the information on it. That includes required certification and disposal logos, the model name is there as well as the serial number and a bar code for it as well. For the sensor the MM711 sticks with the same PixArt PMW 3389 that the MM710 has which is based on the 3360. The 3389 also has great tracking speed at 400ips. The other big feature on the bottom are the PTFE feet. PTFE gliders is something that a lot of enthusiasts upgrade their mice with later, Cooler Master skipped the upgrades and offers them right out of the box along with an extra set which comes in the box as well. Both of our MM711’s didn’t come with the protective plastic on the feet and I assume that Cooler Master may have pre-tested our samples because the MM710 did come with the coating. Just know if you buy one of the mice that you need to remove the plastic on the gliders to get the full experience of the PTFE.
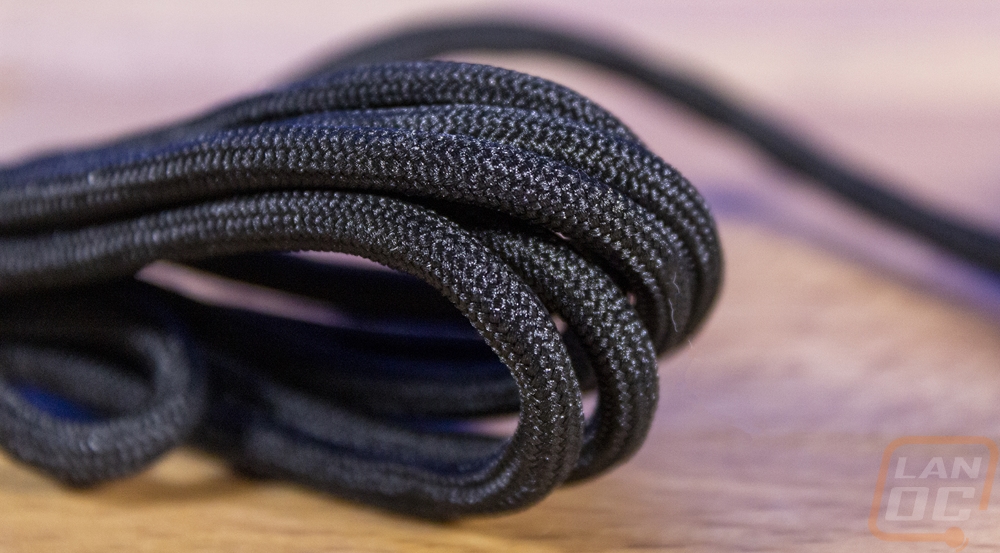
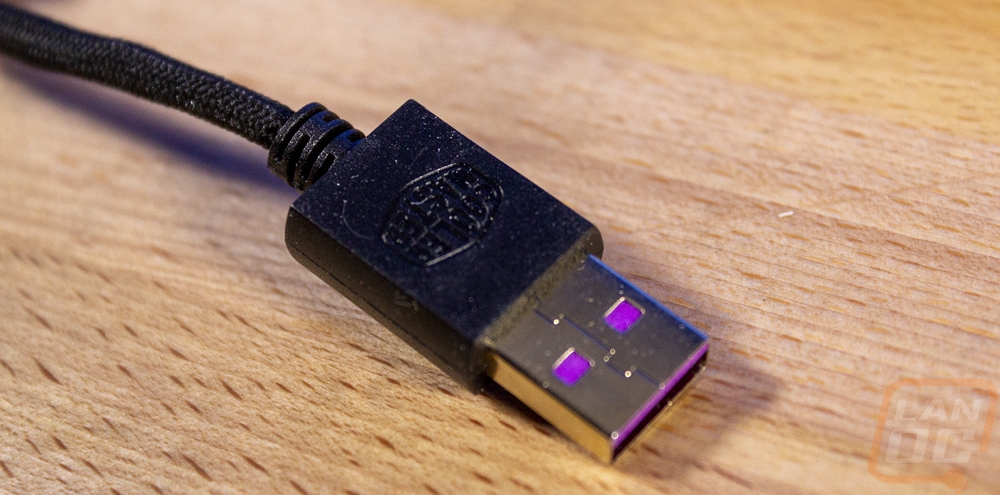
I think my favorite part about the MM710 was the “Ultraweave” cord and nothing was changed with that. Rather than the stiff sleeving that a lot of mice get, the MM711’s cord is an extremely soft paracord that is very flexible. It feels a little loose on the cord inside but the overall goal is that extreme flexibility. The idea is that if something on your cord catches on your desk that moving the mouse around won’t give that feedback of it being stuck on the other end. You can test this out on your own mouse by holding the cord 6-10 inches from the mouse and feel how it might keep you from moving the mouse freely. This is why I normally use a wireless mouse but Cooler Masters implementation is great here. The cord is long, flexible, soft, and at the end, you have the Cooler Master logo as well as the purple on the inside to let you know exactly which plug is your mouse.
With the MM710 they launched the mouse with two colors and two finishes and the MM711 is no different. Sadly on the MM710 I only had the chance to check out the flat black model, even with having three of the same model to use in the office and in both my wife and I’s LAN bags they were all the same finish. But for the MM711 launch, they did send over a white model, the glossy white. This allows us to check out the mouse in both colors and to see how the flat and glossy finishes are different. Both look great but I personally think the white looks best but the flat finish is the best feeling in hand. Glossy is easier to clean, but it feels greasy or oily quicker as well. What did surprise me though was that the white model got as much attention to detail as it did. White with the standard black cord is what I expected, but as you can see below the full sleeving is bright white as is the plug and even the ferrite near the end has a white casing as well!