Board Layout and Photos
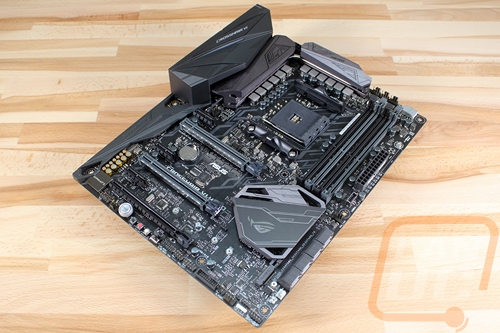
The Crosshair VI Hero is where we finally see a lot of the angular styling and features of the last few generations of Asus Intel boards finally reach an AMD chipset. The board itself really doesn’t look much different than a Z170 or Z270 board or even some of the later X99’s, but you have to remember that with AM3+ Asus is still literally selling the older anodized blue themed boards. They look good, but they haven’t had that look with the rest of their boards in 5 years, all the way back to Z77. They did have the 970 Pro Gaming/Aura, but beyond that, it’s a sea of blue or ROG boards. So the color neutral black PCB with dark and darker gray for the I/O cover, heatsinks, and ram is really nice to see.
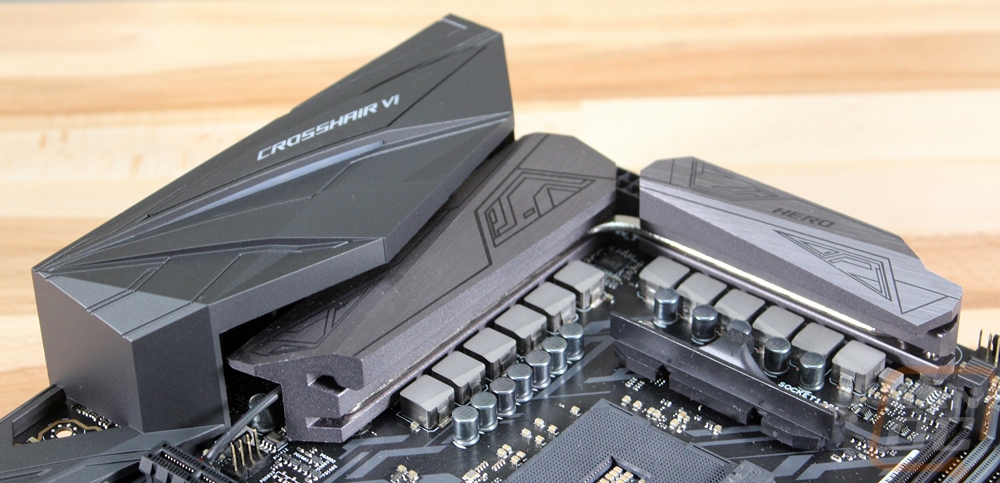
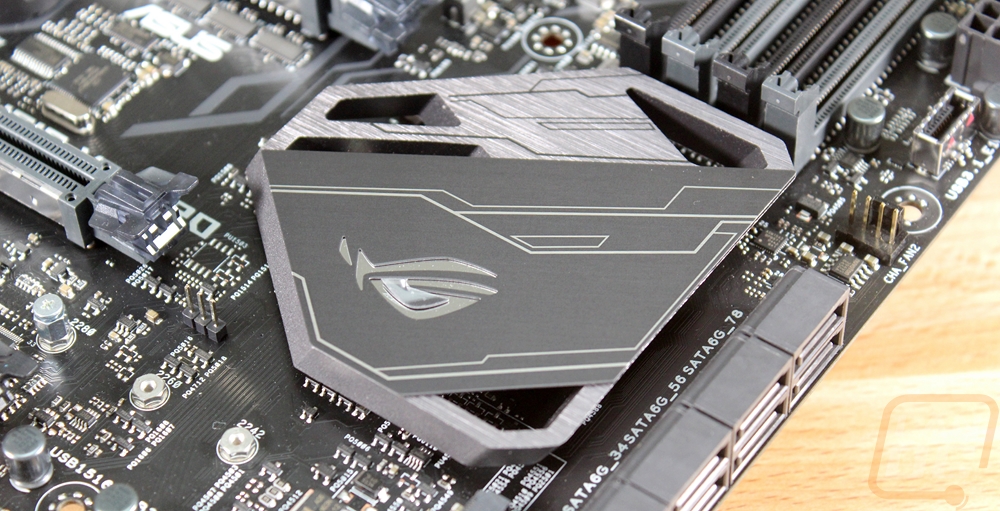
For cooling the Crosshair has three heatsinks. There is a thin mostly decorative heatsink to the right of the PCI slots for the chipset. I say it is mostly decorative because there aren’t really any attempts to add surface area or anything, not that it is really needed. It mostly floats and is backlit with RGB lighting that glows around the heatsink and through the ROG logo on the top. There are then two main heatsinks to the left and above the CPU. They are both in the lighter of the two dark grays with angular drawings un top including the Hero branding. There is also a heatpipe between the two to help spread the heat around. They both pull the heat away from the boards VRM phases. You can also see how the rear I/O cover also integrates with the left heatsink in the photo below.
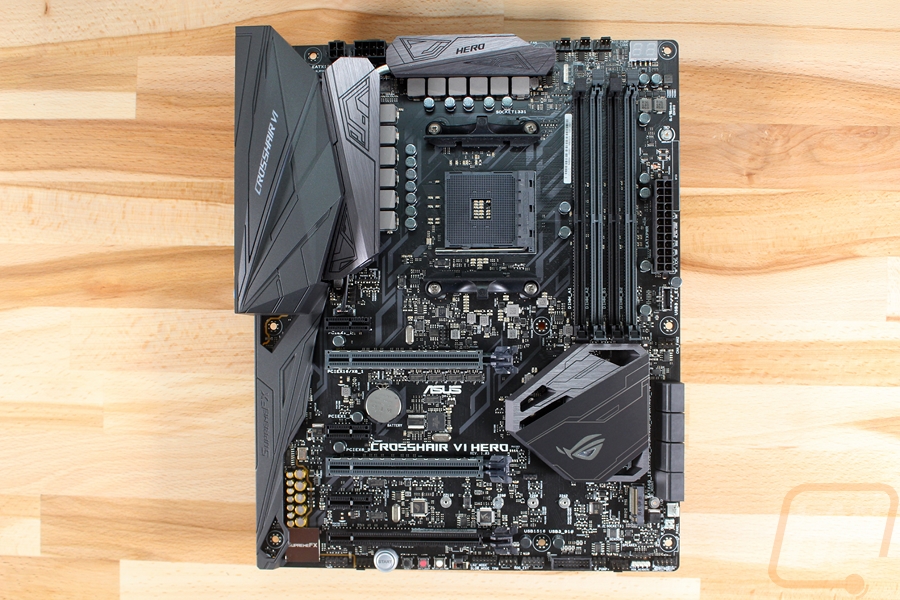
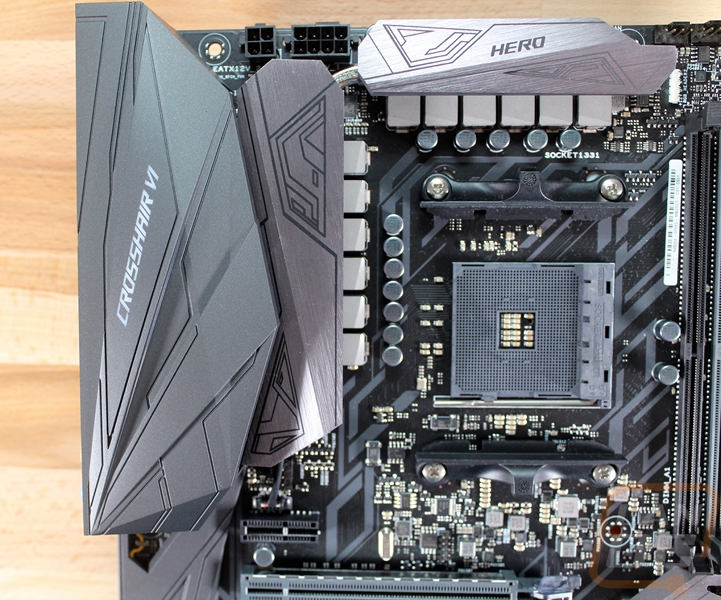
The top left portion of the board is mostly dominated by the two heatsinks and the large plastic cover over the rear I/O panel. Asus did slip the CPU power connections up in the top left, though. They have a standard 8-pin along with a 4-pin for additional power. We also have the CPU socket itself taking up a lot of space in this area. The new AM4 socket is similar to the AM3 in that it has an open area in the middle that could be used later with an AM4+ configuration to add more pins. The pins are also a little closer together, but the socket itself looks about the same as it always has. AMD still uses the clip design, but the new AM4 socket does have a new hole layout. Asus, however, did something unique and designed the board with both the old and new holes. They have done this in the last when sockets first changed as well. It basically means if you upgrade you don’t have to find an AM4 bracket for your cooler, not that most companies aren’t giving them away.
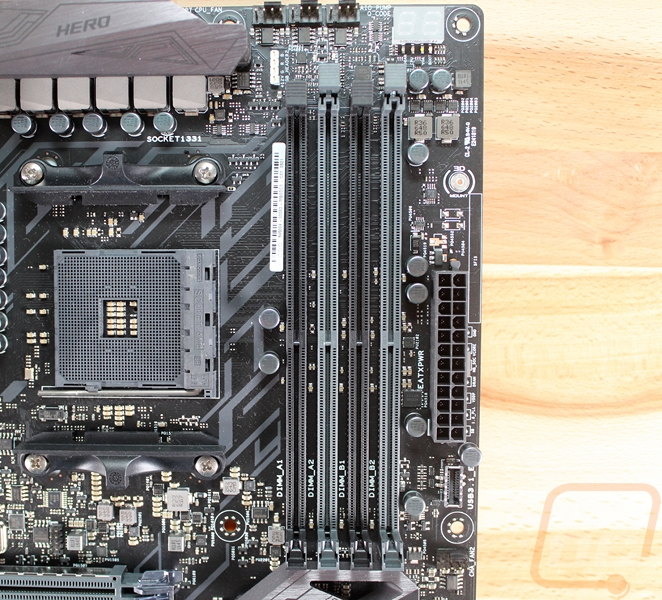
In the top right, we start to have more going on. There are the four DDR4 DIMMs to start. Above them are three fan headers that are all tied to the CPU socket so you can control your fans and a PWM pump altogether. There is also a tiny white 4 pin connection under them for Aura RGB lighting in the top portion of your case. In the top right corner is the LED status readout and down farther is the 24 pin motherboard power. Asus has a few 3D mounting locations including one above the 24 pin, you can 3D print designs that they have made or your own designs for covers to change the look of your board. Down below the 24-pin the board also has a new style USB 3.1 header and another 4-pin PWM fan header. The new USB 3.1 headers are great to see because those are going to be the future of front panel connections. They are faster and take up less space, not to mention they should be easier to keep plugged in.
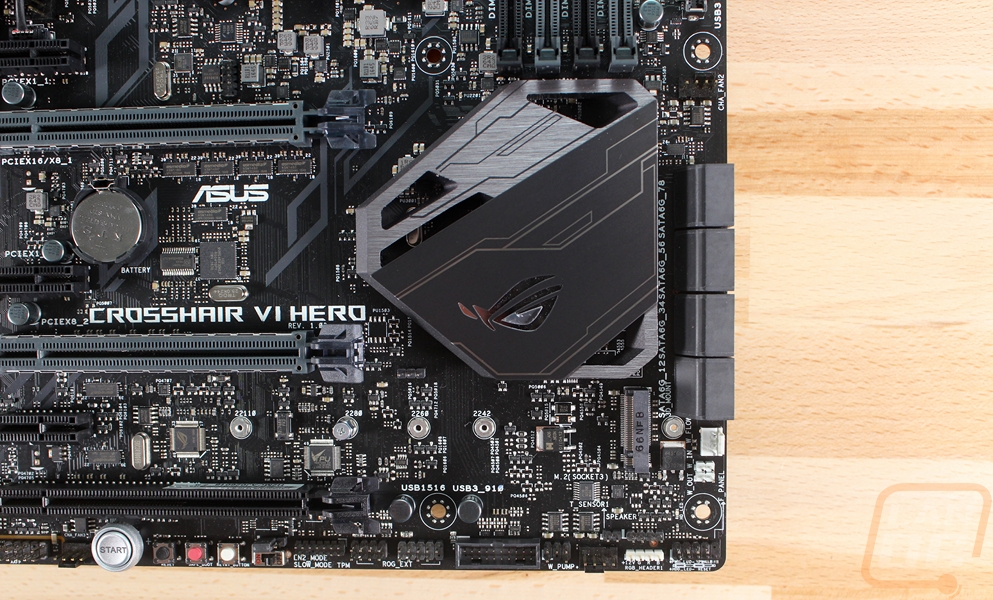
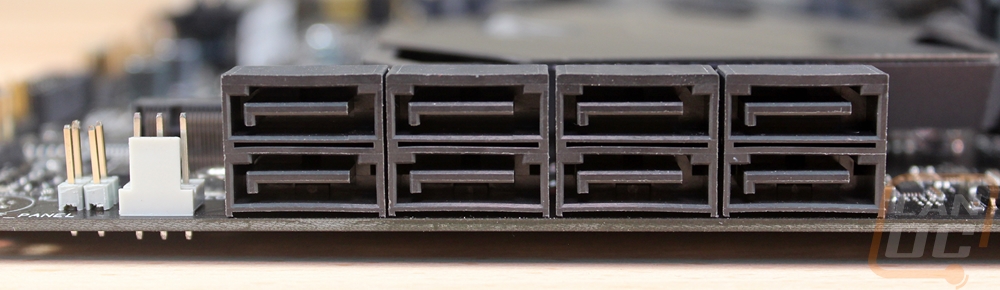
Moving down to the bottom right portion of the Crosshair VI Hero we have 8 right-angled SATA connections. Up under the chipset heatsink is a full-length M.2 socket with PCI x4 or SATA compatibility. Just under the SATA ports is an interesting out and in flow connection where you can hook up a flow meter to your water cooling and feed the information right into the motherboard so Asus’s software can keep track of it as well. Along the bottom edge, there is a second white RGB header. In the corner are the front panel connections. There is another PWM fan header and one USB 3.0 header before getting to the ROG Extension header for overclockers who use the ROG OC Panel.
Moving across the bottom edge over on to the left. There is another 4-pin PWN header next to the large backlit power button. There are also smaller buttons for reset, Safe Boot, and a retry button. Safe boot is for overclocking when you have trouble you can boot to a safe non-overclocked setting with this button. The retry button is something I wouldn’t mind having in real life, but in this case, it is also an overclocking button to force a hard reboot. Next to the TPM header, they also slipped an LN2 Mode switch aka a slow mode switch to help boot at a lower clock speed to avoid cold bugs when overclocking with LN2. There is a front panel audio connection and if you look closely you can see that this and the full audio card is all on its own PCB with a backlit gap between them. For the onboard audio, Asus went with the SupremeFX S1220 CODEC, Nichicon caps, and a Sabre Hi-Fi ES9023P for a DAC.
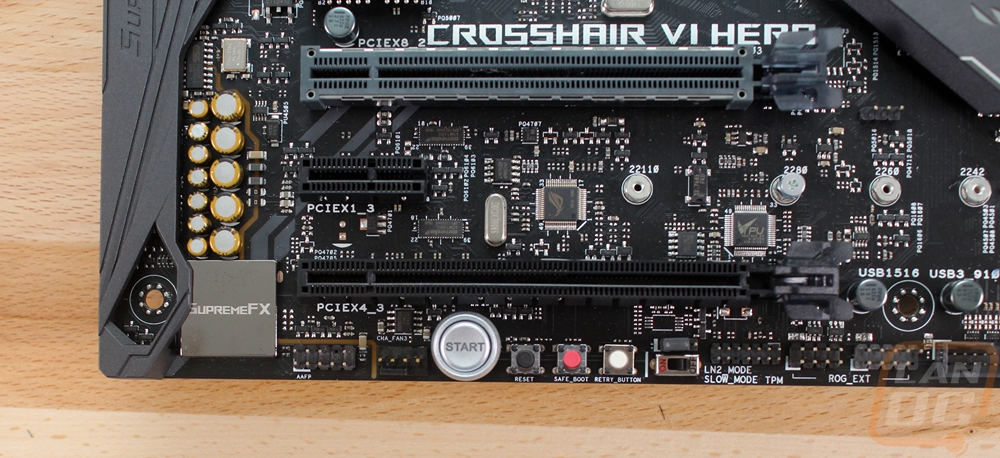
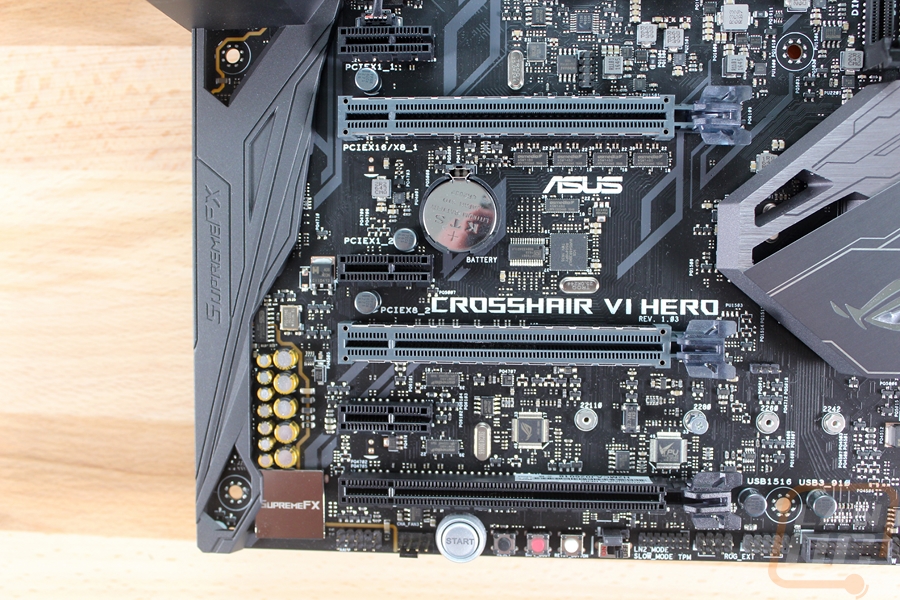
For PCI connections the Crosshair VI Hero has three X16 length slots and three x1 slots. Interestingly though all three of the x1 slots have an open design on the right. I haven’t seen this before but from what I understand the open design allows longer PCI x4 and maybe x16 devices to be plugged in and just run at x1 speeds. This is more appropriate for the original idea behind the x1/x4/x16 design where the slots would be flexible. The three x16 slots break down with the top two gray slots being PCIe 3.0 and being able to share x16 so if you run one card in the top slot you get x16 and if you run two cards with the built-in Crossfire and SLI support they both run at x8. The bottom slot and the x1 slots are all PCIe 2.0 and the bottom sx16 length slot only runs at x4.
The back view of the board gives us a better look at the all black PCB. The included CPU backplate is actually an AM3 by default for better cooler compatibility. The back view also gives us a better view of the phases where there are 6 and 6 for a total of 12.

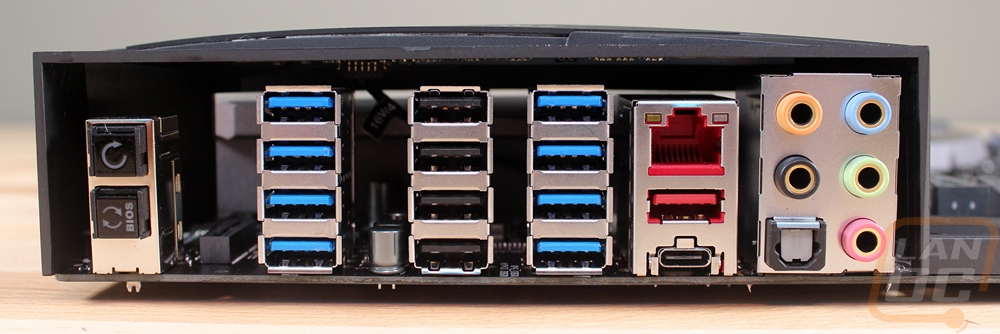
I think the rear I/O of the Crosshair VI Hero ended up being the best part of the board for me. Over on the right, you have the standard 5+optical audio connections but Asus did use gold plating inside of each plug for the best connection. Over on the far left is a Clear CMOS button and a BIOS flashback button. Surprisingly there isn’t Wi-Fi on the board, but there is a spot for it with an M.2 E-Key connection to add one to the rear I/O later next to the two buttons. Then They went with the Intel I211-AT for the Ethernet connection and they included Asus’s Anti-surge LanGuard to protect the connection from a power surge through the network. It’s the USB connections on this board that really set it apart, though. The red port below the NIC is a 10 Gb/s USB 3.1 Type A and the smaller connection below it is a new Type-C USB 3.1 as well. There are then an impressive 8 USB 3.0 and 4 USB 2.0 headers. All of the 3.0 and 2.0 ports run on the X370 chipset and the two 3.1 ports run on an ASMedia controller. I haven’t seen this many USB connections on a board in years and I can’t be happier about it.