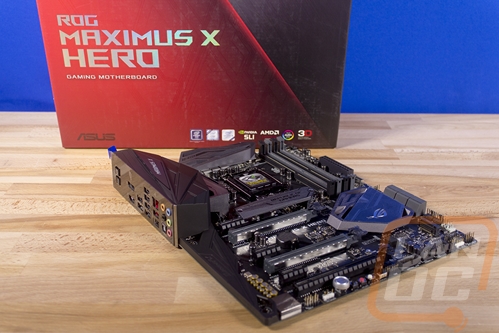
Well with the Z370 launch I did get a few boards in to check out (and I have a few more still in the works), but none of them were nicer boards that would really allow me to play around with overclocking on the platform. So when I found out we had an Intel i7-8086K coming in I reached out to Asus about a board and they sent over their ROG Maximus X Hero. Like most Z370 boards, the Maximus X Hero does share a lot of features with the Z270 variant, in this case, the Maximus IX Hero. Well, today I’m going to check out the board and see what it has to offer and see if this is the board you want to get if you are planning a higher end Z370 build right now.
Product Name: Asus ROG Maximus X Hero
Review Sample Provided by: Asus
Written by: Wes Compton
Pictures by: Wes Compton
Amazon Affiliate Link: HERE

Packaging and Accessories
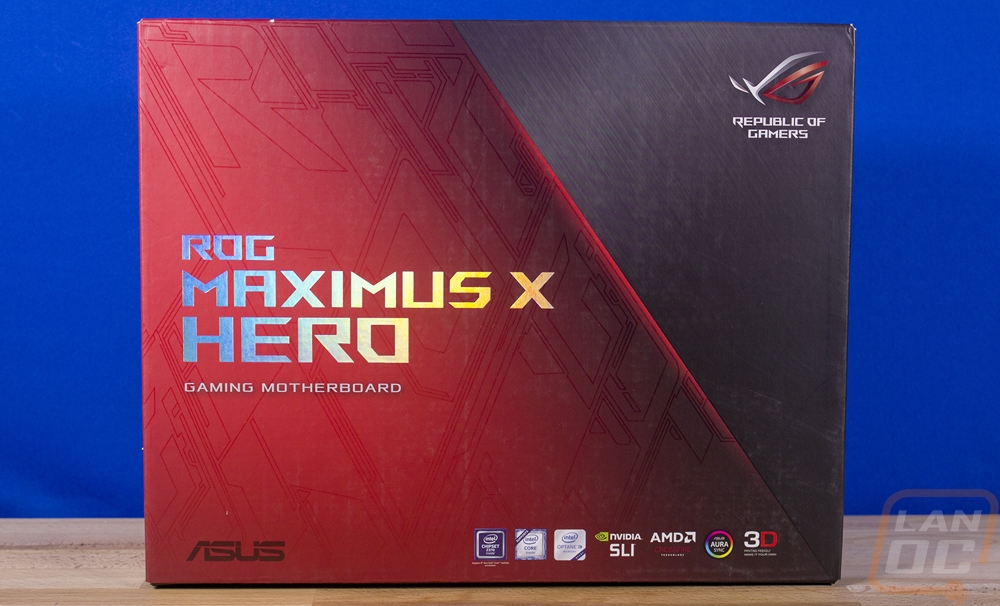
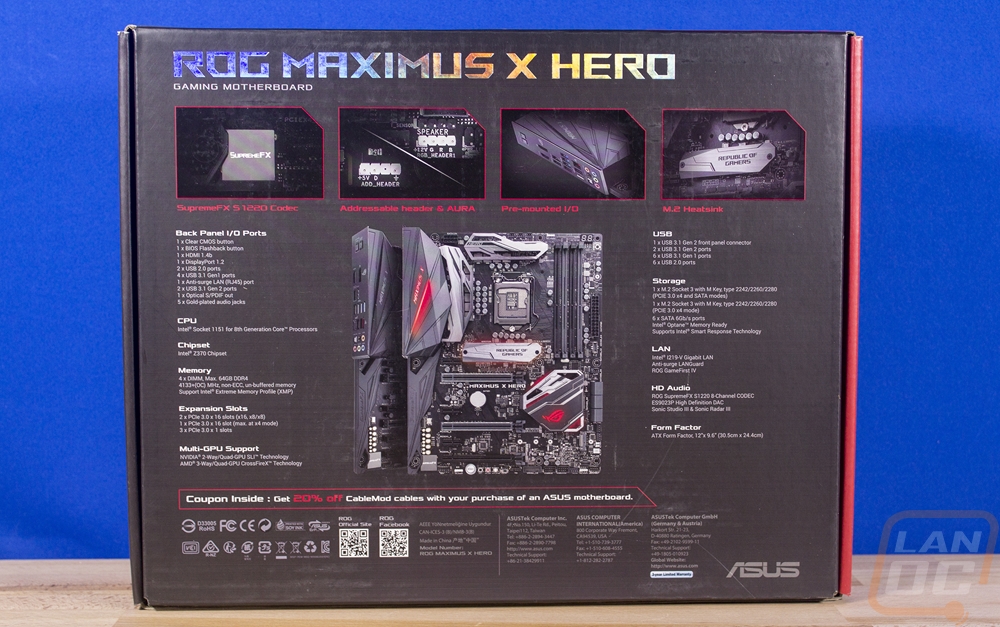
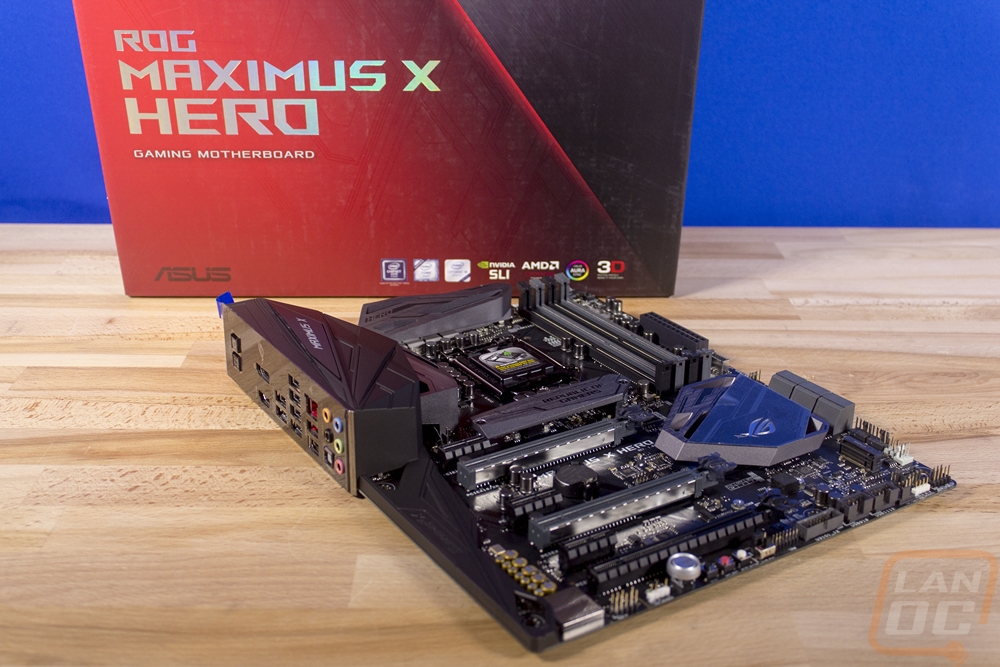
So the Maximus X Hero is a pure ROG board, not a ROG offshoot Strix board and you can see that right away when you check out the packaging. It has the ROG red covering most of it with a little grey up in the top right corner. The front of the box is mostly dominated with the product name and then with the ROG logo up in the corner and Asus logo in the bottom left corner. But they did slip in a line of badges for things like the required Intel badges, Nvidia SLI, AMD Crossfire, and their Aura lighting. Around on the back, the box has a lot more going on. We finally get a picture of the board in the middle, actually, it is two so they can angle the board enough to also include the rear I/O. Around it is a specification listing and then up top are pictures of four key features. I don’t like buying something without knowing what I’m buying so the pictures and information are awesome for picking this board up in a retail store.
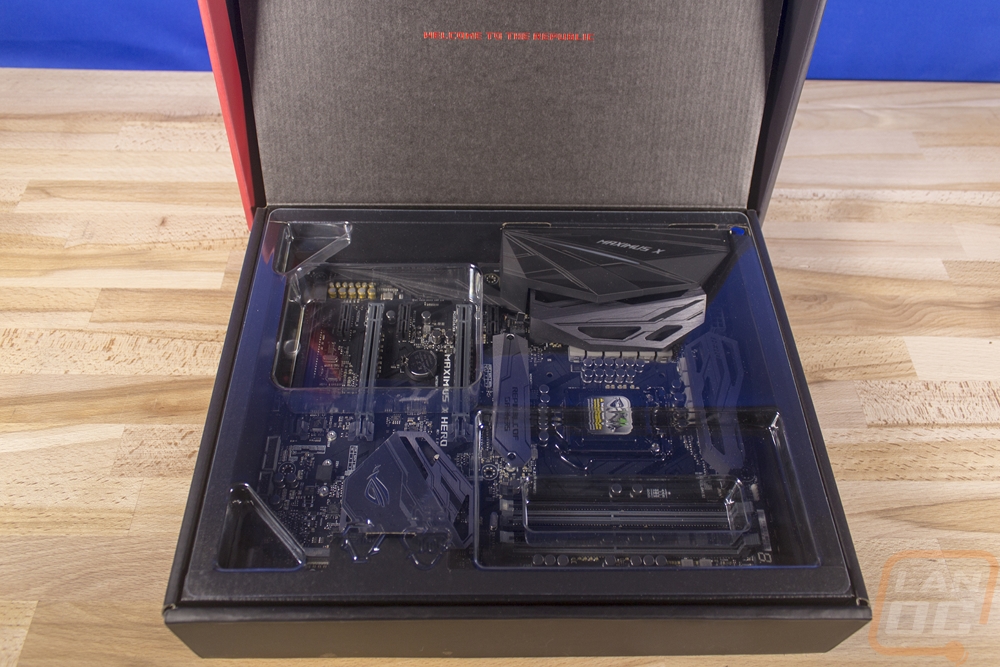
When you open the box up there is a weird fold-out panel in the top that welcomes you to the republic. Then you will see the motherboard sitting in its own cardboard tray with a plastic cover over top of it that is shaped to keep it from moving around. All of the accessories and documentation is hidden up under that cardboard tray.
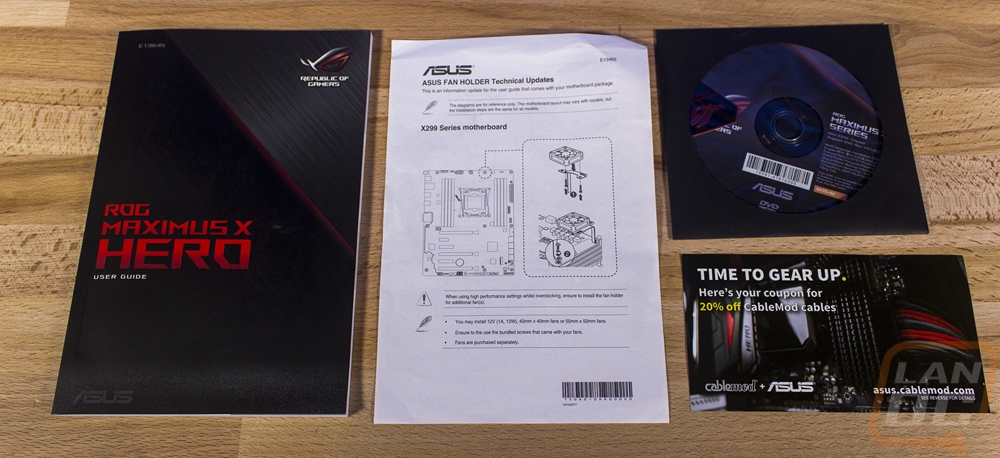
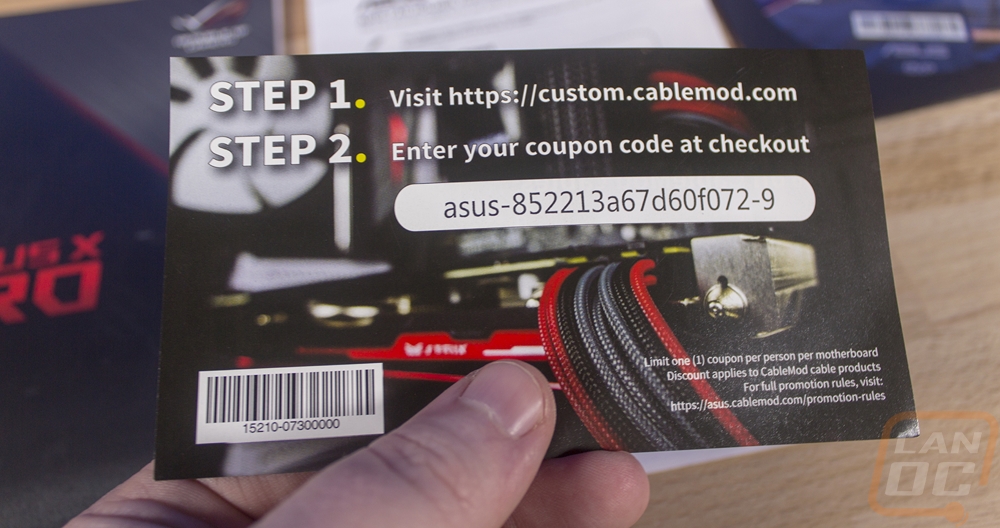
So along with the board itself, this being a premium board you do get a few things with it for documentation and accessories. For starters, you get a full user guide and they also include an update paper on the fan holder. Along with it, you will get a software and driver disc with a nice ROG case badge tucked inside as well. Then they give you a 20% off cablemod coupon, because I don’t need it I have included the code below. Go pick up some lighting or custom cables for a little less.
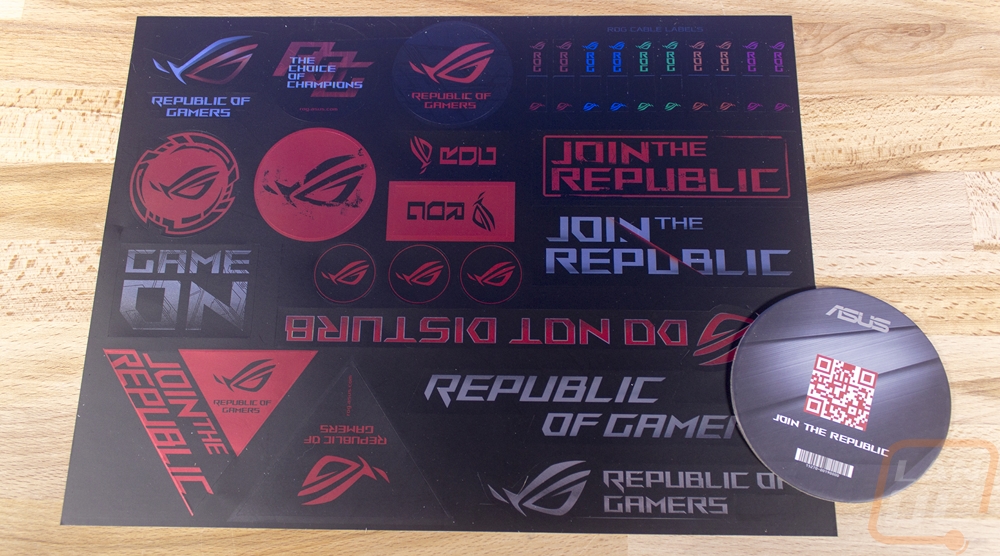
You also get a large sticker sheet with a metallic-like finish to them. Some of them are what you might stick on your door or laptop, then they also have a few SATA cable labels as well. There is also an Asus ROG cardboard coaster included along with them.
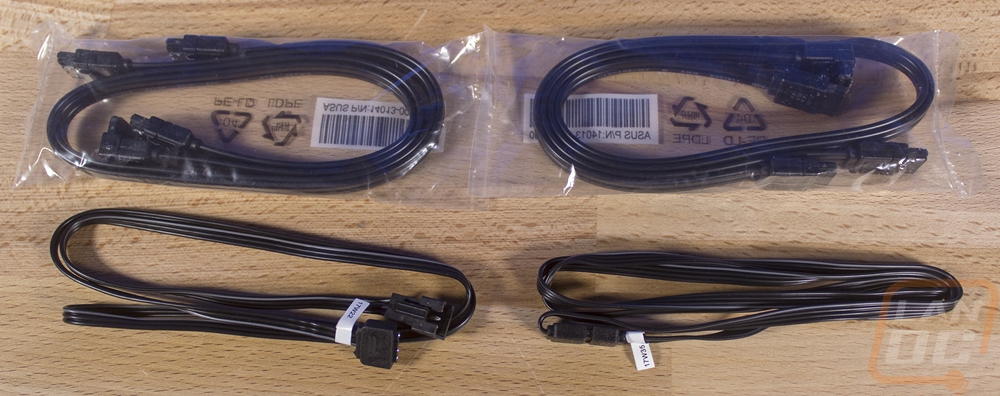
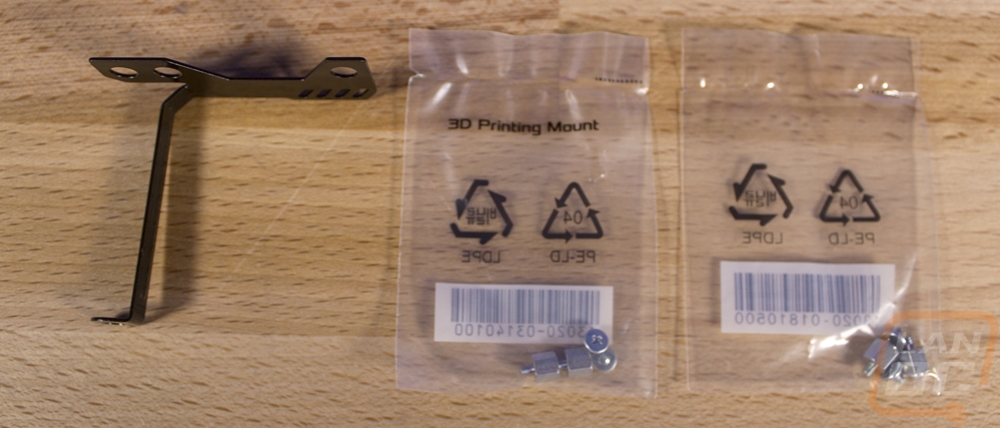
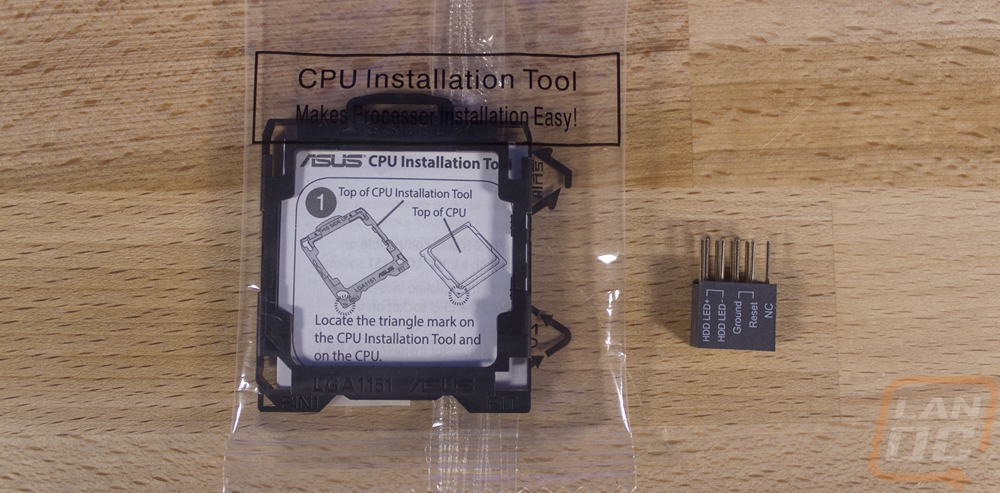
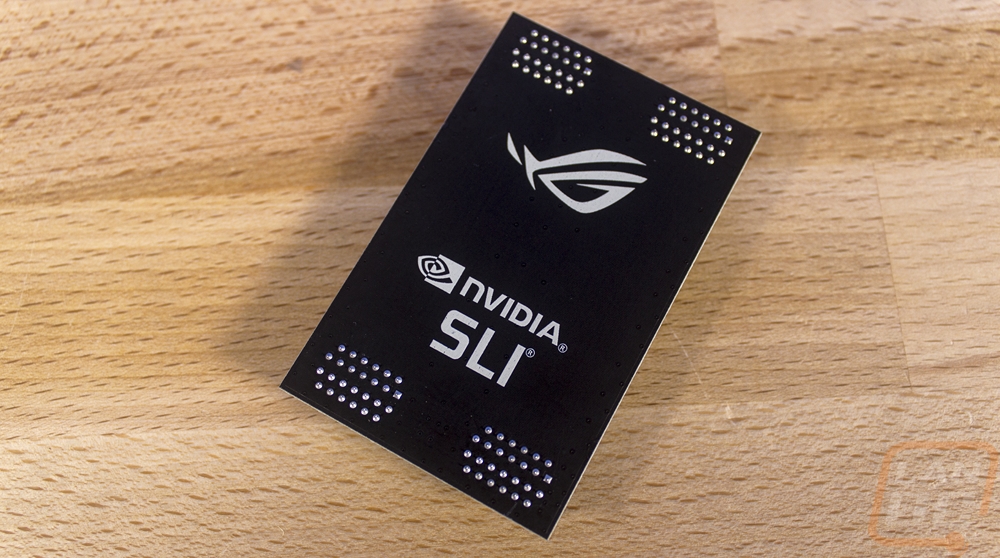
For accessories, you get two bags of SATA cables with two cables in each. Then there are two different RGB lighting cables. One is an extension cable for traditional 4 pin RGB lights and the other is a cable to hook up individually addressable RGB lighting. You get a small fan bracket and some mounting screws for M.2 drives as well as for 3D printed designs that Asus has on their website that you can print and put on your board. You get a solid PCB SLI bridge that is dark black with the ROG logo on it then there are two installation helpers. One is a CPU installer tool and the other is an adapter to let you plug all of the front panel cables in out of the case and then plug them into your board.
Board Layout and Pictures
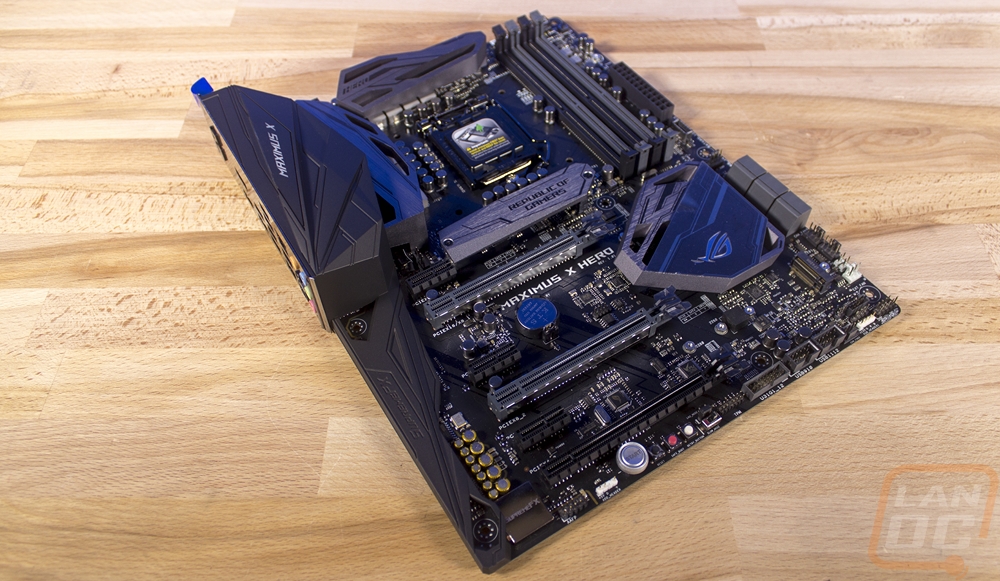
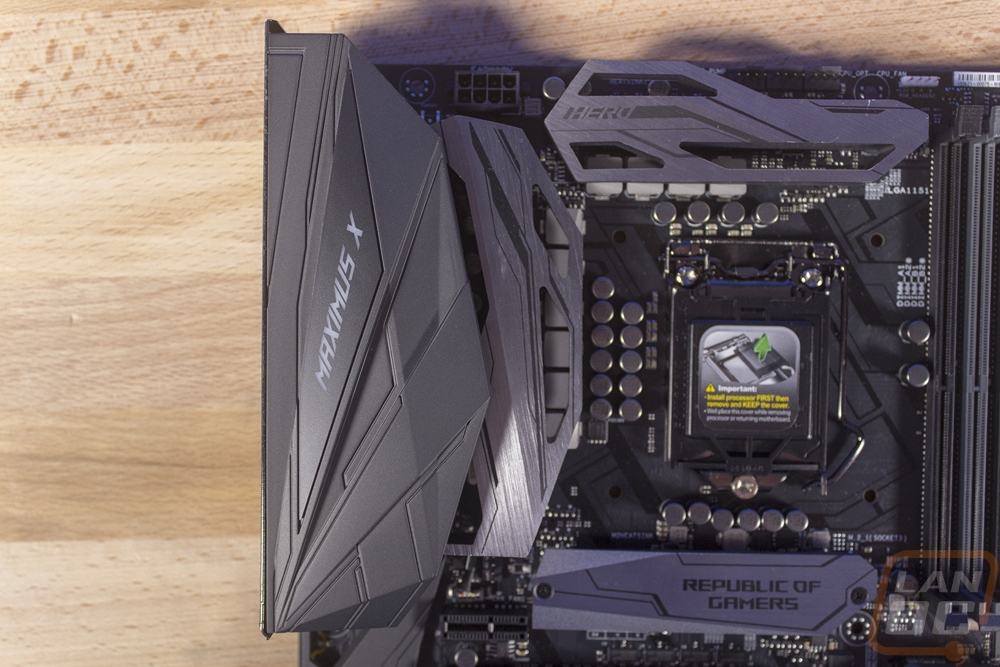
So the Z370 Maximus X Hero looks a lot like the Z270 Hero board, but that isn’t a big shocker, none of the boards between Z270 and Z370 have been huge changes. The most obvious change is the new heatsink covering the top M.2 slot. Overall though this is a great looking board with a flat black PCB, the black and gray plastic used on the memory and PCIe slots as well as the power and SATA ports. That black and gray also matches all of the cooling that is mostly CNCed aluminum and the black rear I/O shield that runs the full length of the board on the left. Speaking of the full length, this is a full ATX board that comes in at 12-inch x 9.6 inches.
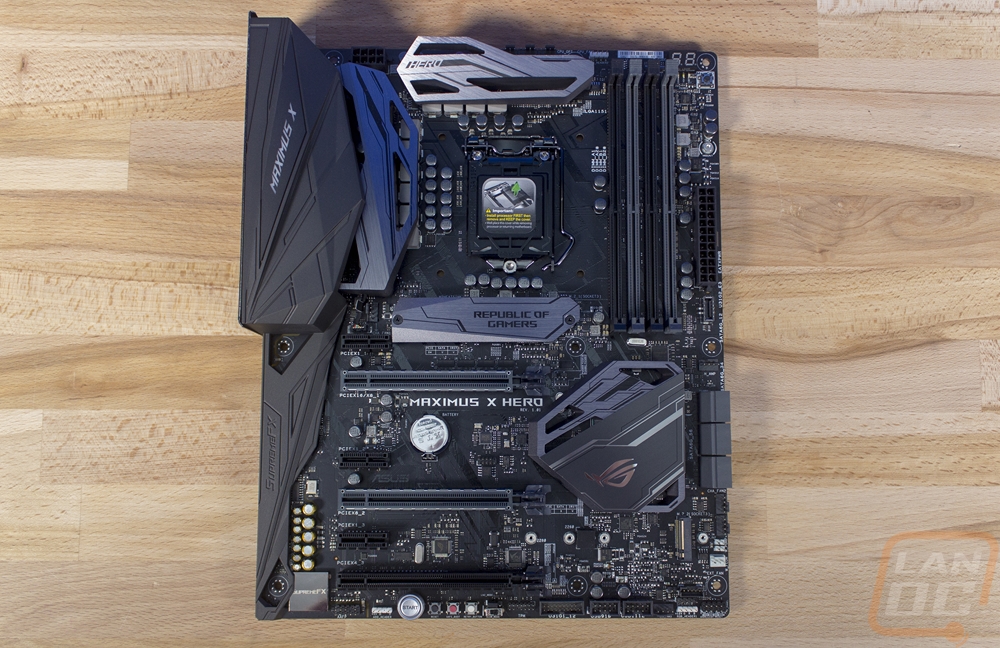
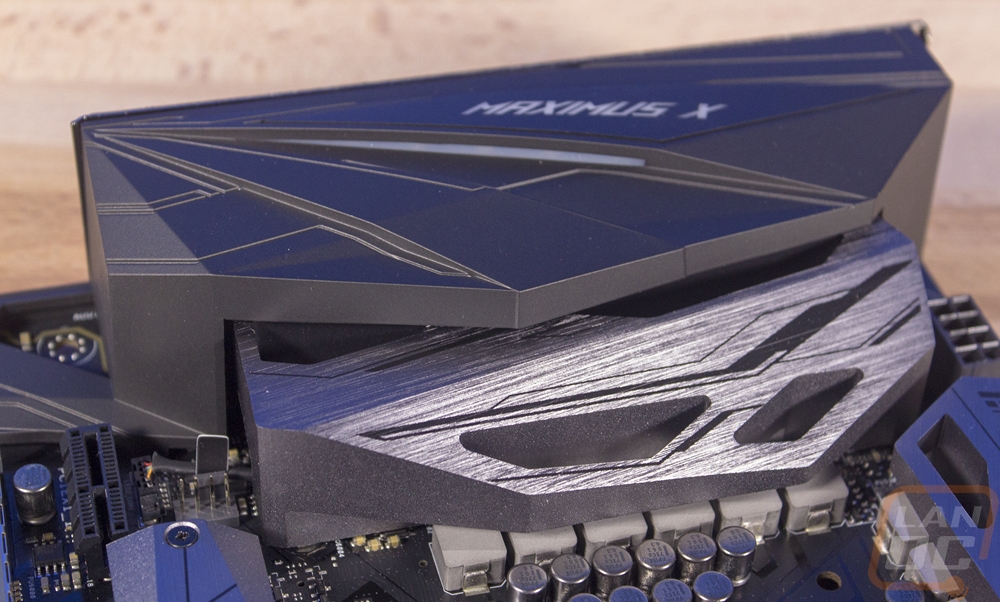
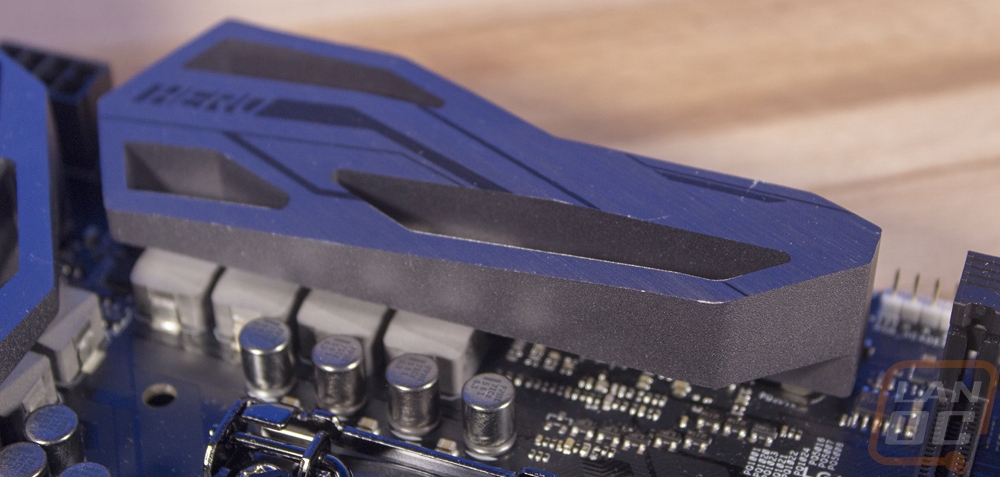
The heatsinks that Asus designed for this board are surprisingly stout. Initially, they look to be completely CNC’ed because they are thick and not anything like a traditional heatsink design but when looking close I think they might be extrusions initially that are then CNC’ed. Either way, they have a lot of meat on them, especially the two around the CPU socket to keep the VRMs cool. They are both gray with black trim but the top heatsink also has the Hero branding on it. The left heatsink integrates right in with the rear I/O shield. This is a plastic cover that hides all of the less aesthetic looking metal covers over the rear I/O then it also runs all the way down the left side of the Hero covering up some of the audio as well. The I/O shield does have a Maximus X logo in it and that part is backlit with RGB lighting, just like on the previous Hero board.
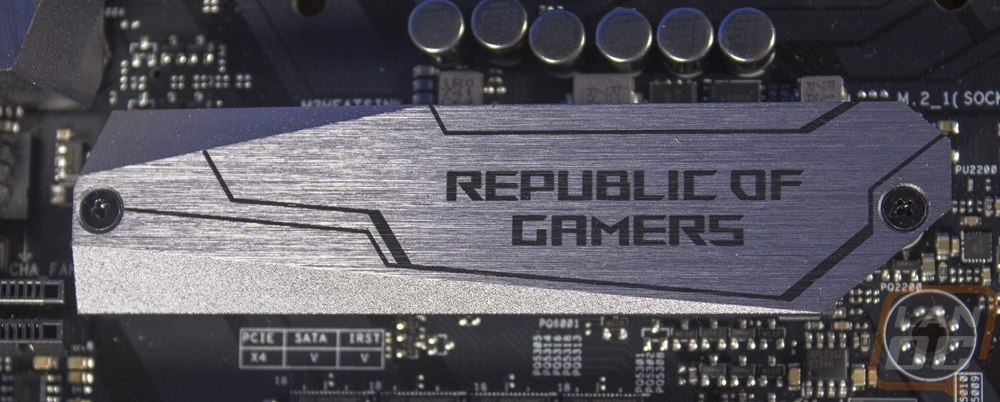
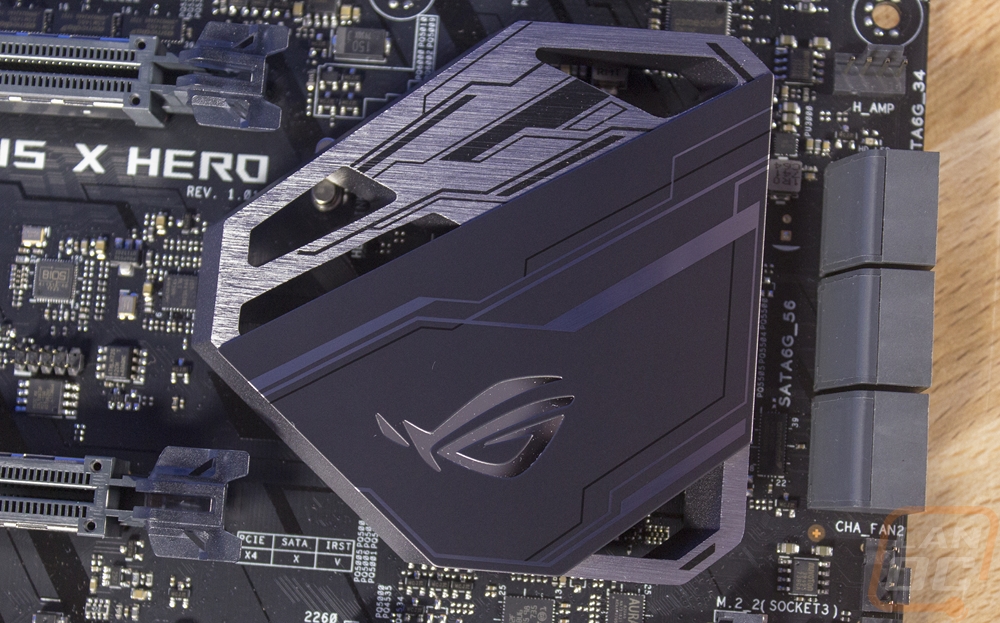
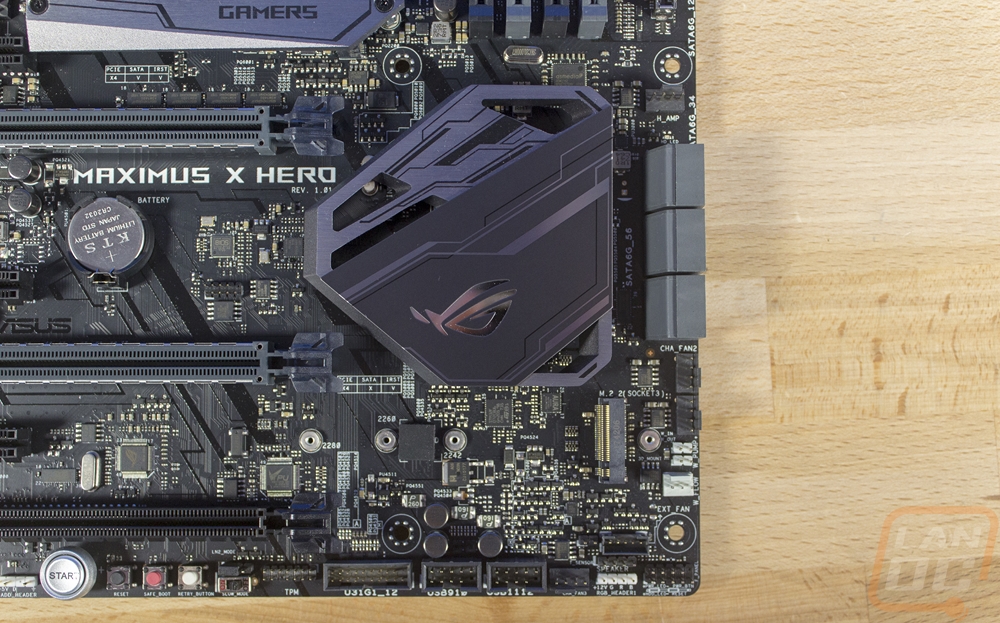
Down at the bottom of the CPU socket, the new heatsink is this M.2 cover/heatsink with the ROG branding on it. It is held in place with two screws. It sits over the top M.2 slot and as you can see on the board itself this is an x4 PCIe slot with SATA support and it should be used first. The last heatsink is the chipset cooler and it has a similar design to the VRM heatsinks only it is wider and lower profile to be able to sit up under long cards in the PCIe slots. This has a second darker gray plate on top of it as well as the lined black styling and the reflective ROG logo is backlit when the board is powered up.
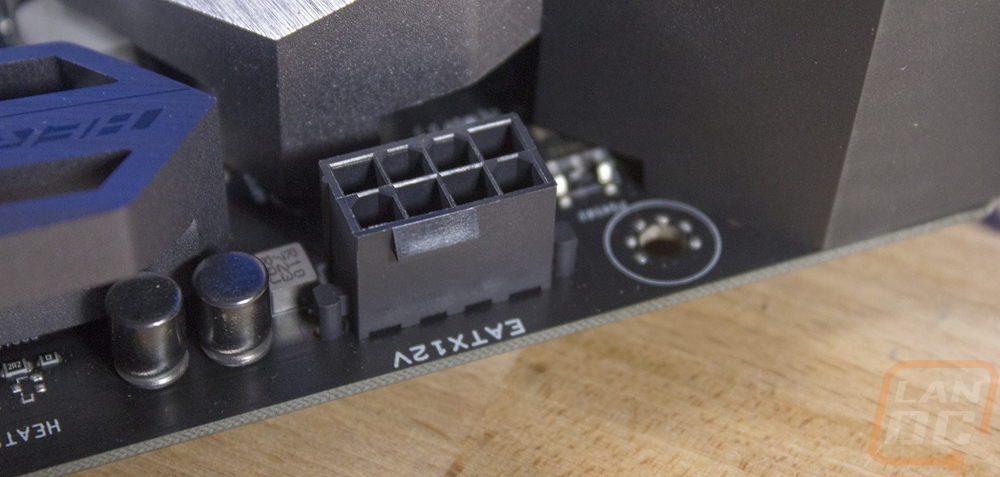
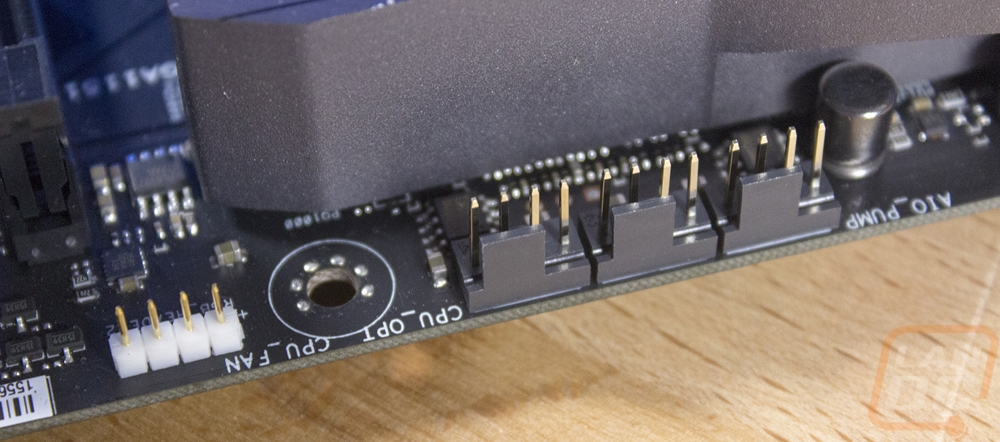
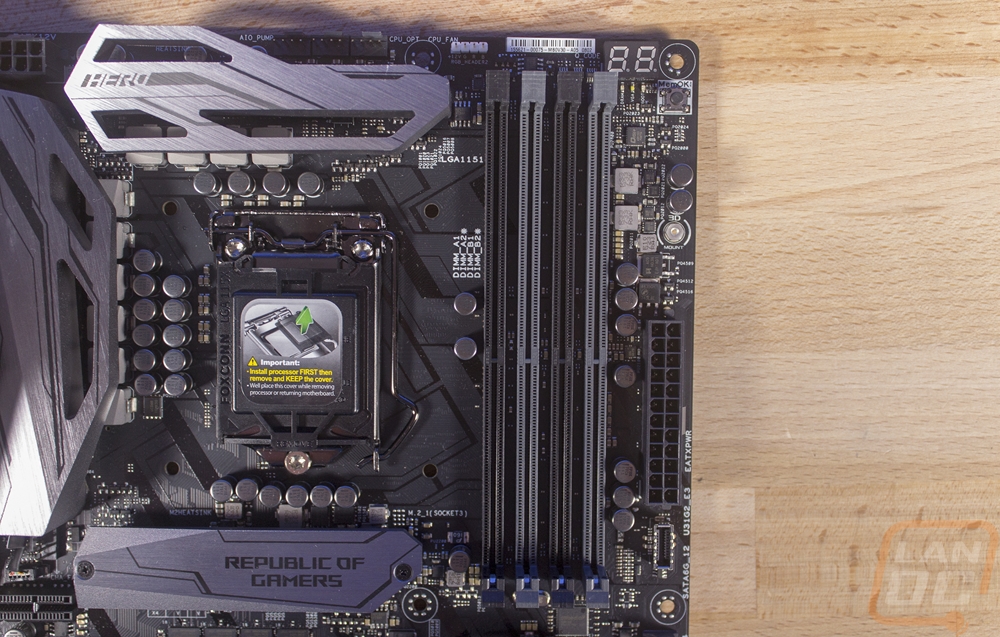
Starting up in the top left ¼ of the board, let's take a look at what features the Hero has. Now this section has a majority of the space covered by the rear I/O and shield as well as the VRM cooling and the CPU socket. But up along the top edge, Asus did slip in a few things. Right at the tip of the left VRM heatsink, there is an 8-pin CPU power connection. Then over along the top of the top heatsink, there are three 4-pin fan headers. This includes an All In One pump header that has a little more amperage support and then the CPU fan and an optional second CPU fan header. Then just past those is a 4-pin white RGB header for traditional RGB lighting to be hooked up and controlled by Asus Aura. There is also a PWM fan header all the way at the bottom left tip of the CPU socket area for a rear fan in your case.
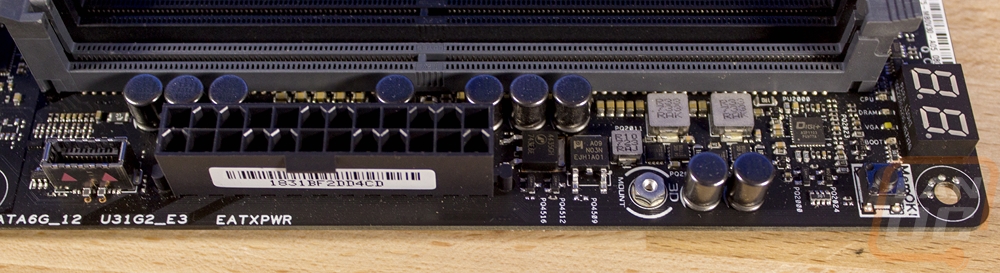
The top right corner has a lot more going on. For starters, we have the four DDR4 ram DIMMs. Asus has support for up to 4133 MHz listed in their specifications. From there the right edge has a lot packed into a small space. The status LED is up in the top corner next to the screws and just under that, there are a few other LEDs, all with small labels to show where you are in the boot process and to help point to where an issue might be if you don’t boot. To go with that this is also where the MemOK button is, this will restart your PC if you are having memory issues and downclock the memory over and over again until it will boot. That comes in handy when you have a fast set of memory that won’t boot. Sliding down there is a small mounting location for some of Asus’s 3d printable designs and then below that is the 24 pin EATX power connection. Lastly, there is an internal Gen 2 USB 3.1 header for the new style front panel USB connections to allow for Type-C with the ultra-fast Gen 2 speeds.
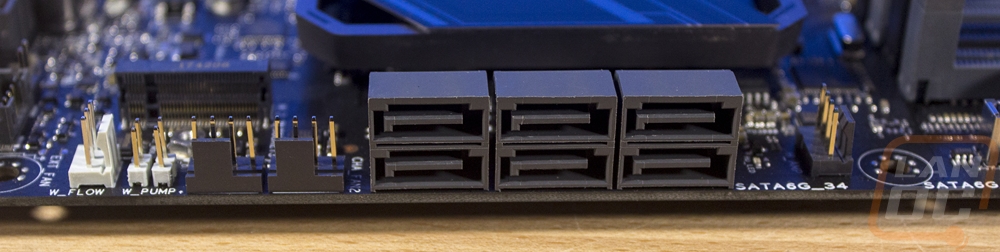
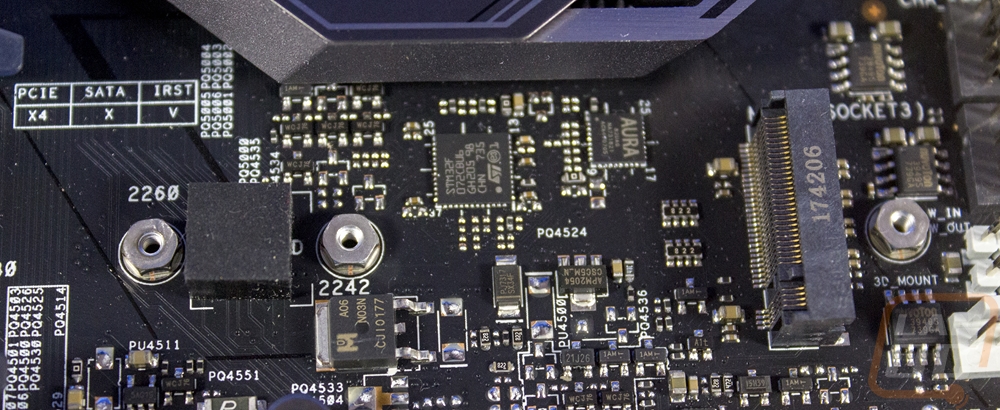
Moving down to the bottom right corner, the chipset heatsink is in the middle of this area, but there is a lot going on. Starting along the right edge at the top there is a 4-pin fan header turned sideways. This is labeled as the H_AMP, well that stands for high amperage, so if you want to hook up a high powered fan or a custom loop pump this is the header to use. There are two more regular PWM headers down lower as well but the six right-angled SATA ports are in between. Down below the fan headers, there are two 2-pin headers for hooking up thermistors to read temperatures and then a 3-pin connection that looks like a fan header. This is actually a water flow meter header, you can hook a flow meter up to this or the pump readout cable. Right next to those on the left is a second M.2 socket, this one supports full length as well but this one will only support PCIe based SSDs, no SATA. There is also another 3d printed part mount right next to the M.2 on the right.
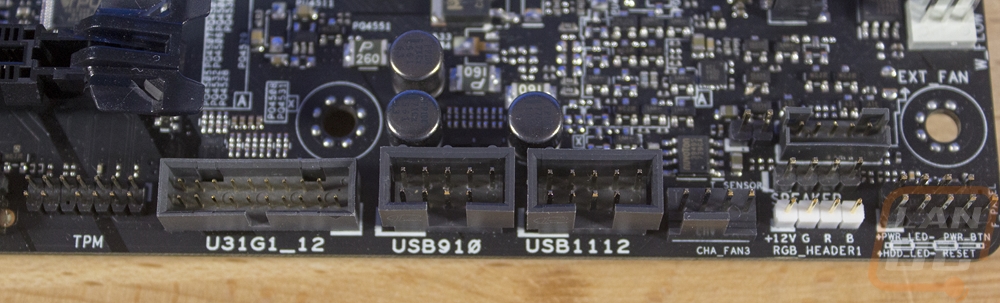
Still down in the bottom right corner, the bottom edge has enough going on that I had to split it from the rest. Asus has most of the main connections down here. This includes the front panel connections that start in the right corner. They are labeled on the PCB but I do wish they were color coded as well to make things even easier. Next to that is the second RGB header and our eight PWM fan header. There are two internal USB 2.0 headers and then one Gen 1 USB 3.1 header to go with the Gen 2 port up in the top right section. Lastly, there is a TPM header, this is the trusted platform header. Most people won’t need it but they are used for bitlockers.
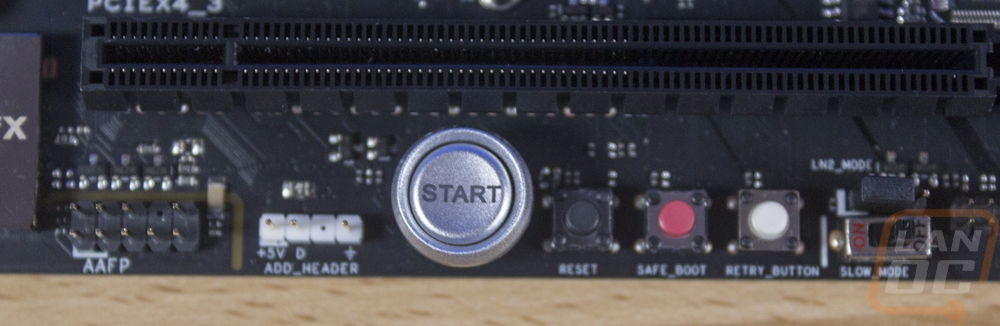
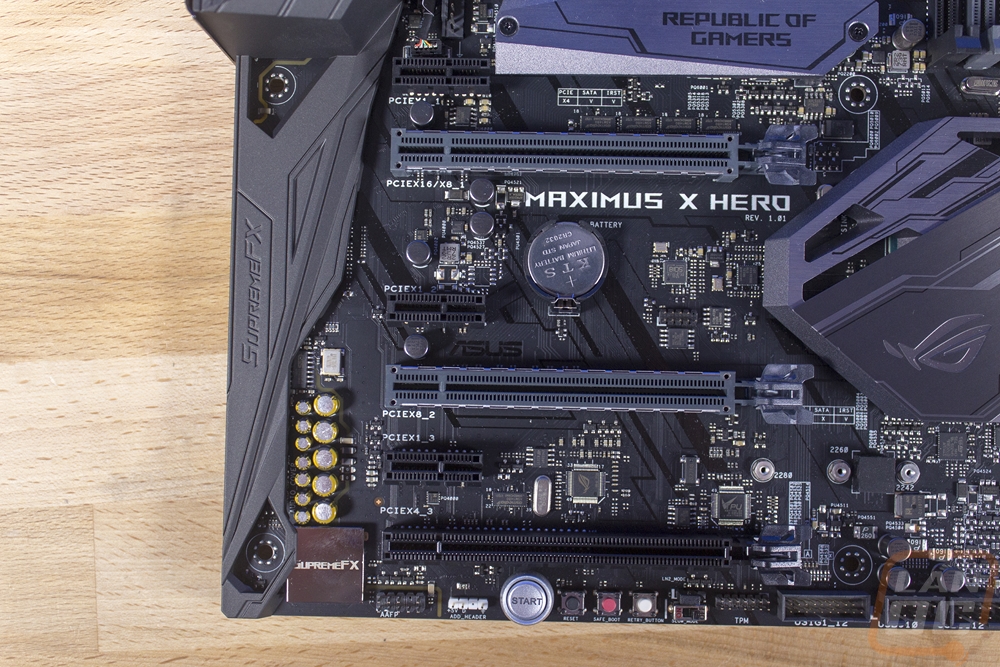
The bottom left portion of the Hero mostly has all of the PCIe slots but first, let me run through the last few things along the bottom edge. So this is where Asus put the power button. I still prefer them along the right edge but I’m just happy there is one. It looks like a car start button and is backlit. There is a reset button next to it as well as a safe boot button. The Safe Boot button is for when an overclock fails but you want to boot with stock settings but save the overclock you had to be able to make a few small changes. The retry button next to that is related as well, letting you retry your overclock boot. Then you have slow mode and the LN2 jumper. These are tied together as well, LN2 mode turns things down during boot to get past weird bugs that happen when you are sub-zero and the slow mode only works with LN2 mode is on, allowing you to quickly turn the CPU clocks down to their bare minimums. Now next to all of the buttons is the Hero’s one addressable LED header and next to that the front panel audio connection.
As for the PCIe slots, the Hero has a total of 6, Three are 1x length but with an open end to allow for longer cards if you want. Then the other three are x16 length. The x1 slots all run at x1 but the x16 slots are a little more complicated. The two gray slots are x16 if you run only one card or x8 with both filled, they also have a metal shield to cut down interference and to strengthen those slots to hold heavy video cards. The bottom x16 length slot runs x4 all of the time, if you look closely you can actually see how there aren’t pins on the right half.
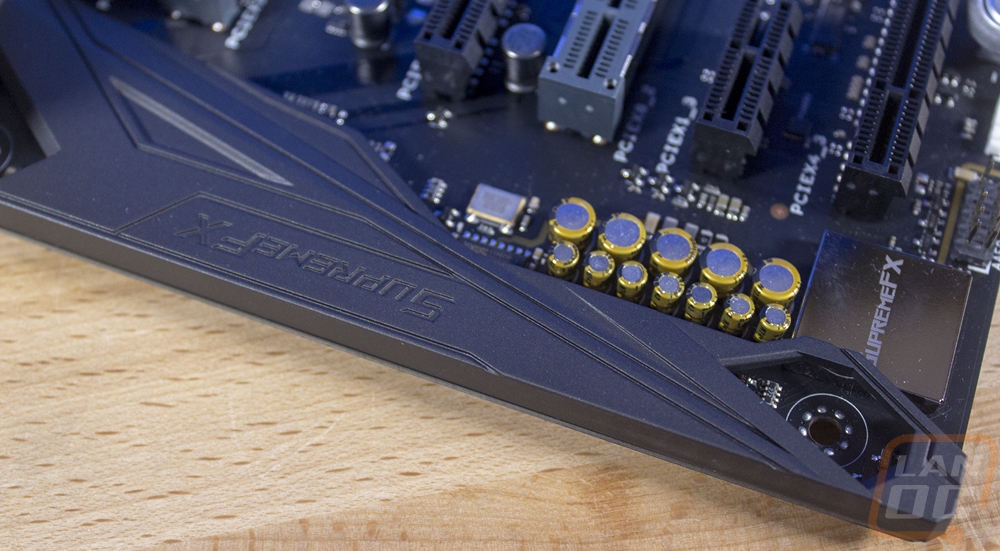
Now the onboard audio looks jammed into a tiny space but a lot of it is up under the plastic I/O cover that runs the length of the board. There is also the metal cover with the SupremeFX branding on it that shields from interference. This is all for the ROG SupremeFX 8 channel audio that the Hero has. It is running an S1220 Codec and it has a few nice features. For starters, you can see the high-quality caps, but what you can’t see is the ESS ES9023P DAC. It has a 120 dB signal to noise ratio on playback and 113 dB signal to noise ratio on input, this isn’t amazing if you were looking at high-end external DACs but that is great for onboard. There is also front and rear impedance sense for headphones in the built-in headphone amps. Then Asus split the PCB up, as usual, they pioneered this, to give that gap between the audio PCB and the rest of the motherboard to keep noise down.
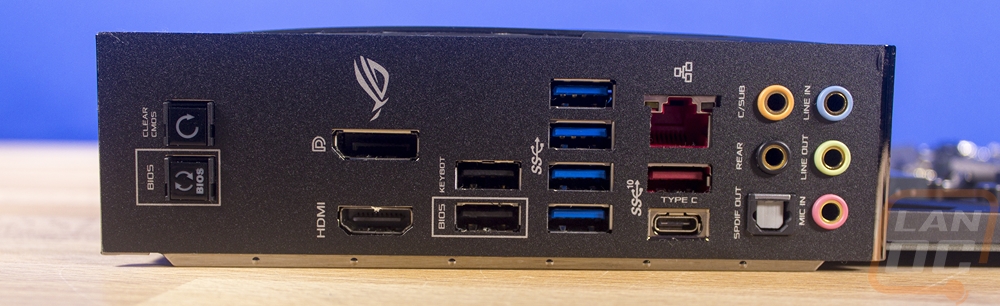
Okay, so I’m a little bit of a sucker for the pre-mounted rear I/O shields and the Maximus X Hero has one. It is one less thing to worry about when building your PC and for some custom mods, it also means you don’t have to build the ring that will hold the panel in place. Beyond that, the Hero does have a clear CMOS button over on the left and a BIOS upgrade button. There is a big gap from there where the wireless would normally go (they sell two versions of this board, one with and one without). Then we have an HDMI and a DisplayPort connection for use with the onboard video. Next, there are two standard USB 2.0 ports, these both have secondary functions as well. The top one is a keybot port, so if you plug your keyboard into this one you can get macros that can turn on overclocks in the BIOS and when paired with the software you can also program F key macros or functions, here is more information. The bottom USB port is where you plug in your USB drive with your new BIOS update if you want to use the push button update. From there you have four USB 3.1 ports from the Intel controller in blue. Then next to that there are two faster USB 3.1 Gen 2 ports. One is red and the other is a Type-C connection. Then above that you have the NIC, Asus used the Intel I219V and the red plug means it has Asus’s Anti-surge LANGuard as well. Then from there, the audio layout is a standard 5+optical configuration.
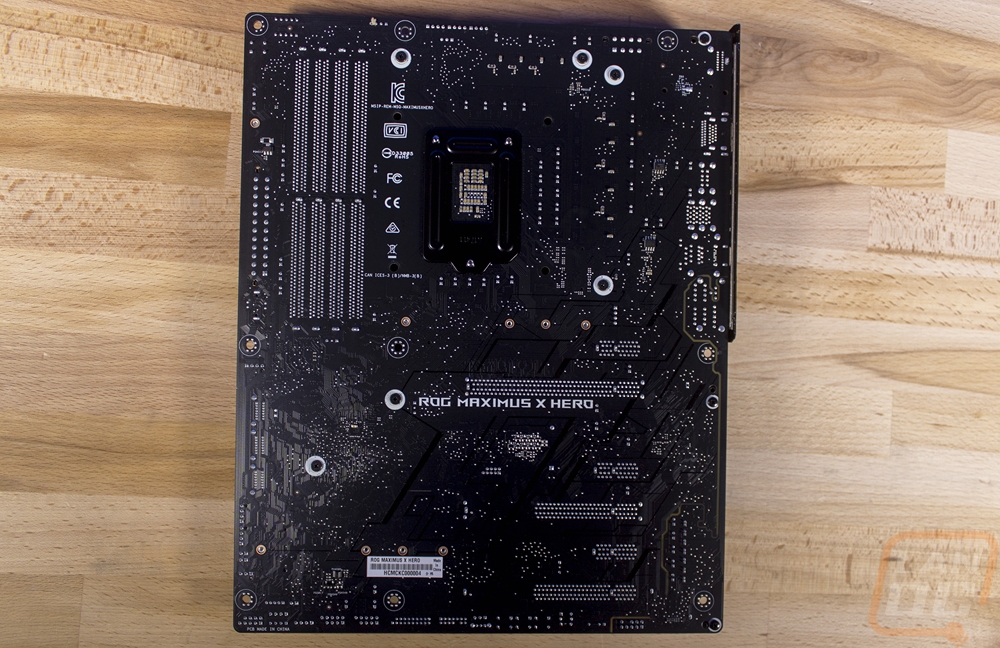
The back of the Hero has a few things going on. For starters, it does give us a better look at that black PCB. But more importantly from back here, we can see that Asus did mount all of their heatsinks with screws from behind and they labeled them with a white ring around them. The I/O shield that runs down over the audio is also marked with smaller rings around them as well. All of the branding and required certification logos are hidden back here as well to keep things clean up on top.
BIOS
So to take a look at the BIOS, rather than use photos I recorded a basic video. I just run through the UEFI and try to open up every option that way you can see all of the options available and trust me there are a lot. This video ended up being much longer than most of my past videos purely because of the options the Hero has available.
As usual, you have the ROG logo in the middle of the screen when booting up. When I landed in the UEFI I) was in the advanced mode on the extreme tuner page. For overclocking you couldn’t ask for a better landing page to keep things simple. That said I would still prefer that the first time in the UEFI that it should go to the EZMode just to keep people who don’t know what they are doing from getting into anything damaging. The EzMode is a single page that gives you a lot of information on the CPU and memory, fan speeds and things like that. Then you have the option to turn on XMP profiles and change the boot priority with a drag and drop setup. Those are the two main things most people will need to mess with.
Back in the Extreme Tweaker section, I was blown away at the options available. Obviously, this is an ROG board and you have all of the normal stuff, but digging into it you will also find lists of profiles already made up for you depending on the ram configuration all the way down to what chips and if it is single sided or dual sided. Of course, you can go in and manually set every option yourself if you prefer as well.
The Advanced page is basically the home for every other chipset, CPU, or peripheral option that isn’t overclocking specific and a few that are like Hyperthreading. That includes all of the SATA setting options for things like naming your SATA ports. You can also turn off all of the options that you aren’t using. The Monitor page lists out every sensor reading from fan speeds, temperatures, and voltages. Speaking of a few of those things, there is a hardware monitor on the right side of the screen for all of the pages that show clock speeds and voltages for the CPU and memory. Then the Boot page has your boot order options, boot options like turning the logo on or off, windows fast boot, and also options to override and force a one time boot to a specific device.
The Tool page is where you will find some of the most useful things though. Here you can access the EZ Flash 3 utility, this allows you to update the UEFI from the internet or even directly from a windows folder where you downloaded the file without a flash drive at all. There is Secure Erase to wipe old hard drives. And then the Overclocking Profile lets you name and save 8 different profiles to help when overclocking to flip between different profiles or to save an overclock you are working on.
Overall the UEFI for the Hero isn’t really changed when compared to other Asus ROG boards but that is because this setup works well and is easy to navigate. There aren’t issues with mice not feeling right and you can use your keyboard to do it old school as well. But the Hero does have a LOT of options available, especially for overclocking.
Test Rig and Procedures
Test System
CPU: Intel i7-8700K- Live Pricing
Cooling: Noctua NH-U12S for cooling - Live Pricing
Noctua NT-H1 Thermal Paste - Live Pricing
Memory: HyperX Fury DDR4 2666MHz - Live Pricing
Storage: Kingston HyperX 240GB SSD - Live Pricing
Video Card: Nvidia GTX 1080 Ti - Live Pricing
Power Supply: Corsair TX750M - Live Pricing
Case: Dimastech Test Bench - Live Pricing
OS: Windows 10 Pro 64-bit - Live Pricing
Performance
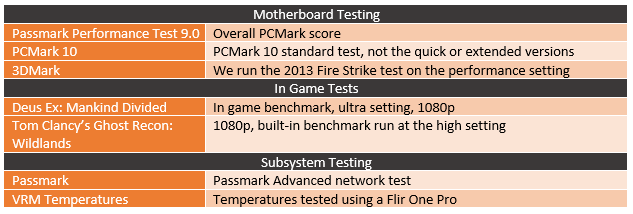
For performance testing, I ran the Hero through our normal tests. Most of these are just to confirm there aren’t any weird performance issues or funny business like auto overclocking going on. Beyond that, the 8700K and the 1080Ti do most of the work, at stock settings and with the same chipset, the performance between boards isn’t really an issue. That said the Hero Did perform really well, the 3DMark score was a little out of wake but was related to updated performance from drivers on the video card. Everything else was in line. I also tested the network performance and with our Hero not having the wireless it was just the Intel I219V and those results were in line with the other boards tested. Most also had the Intel I219V though lol.
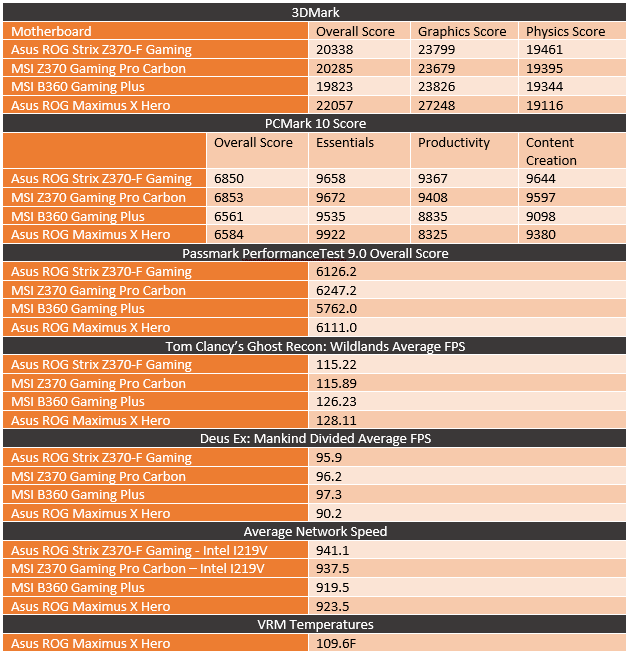
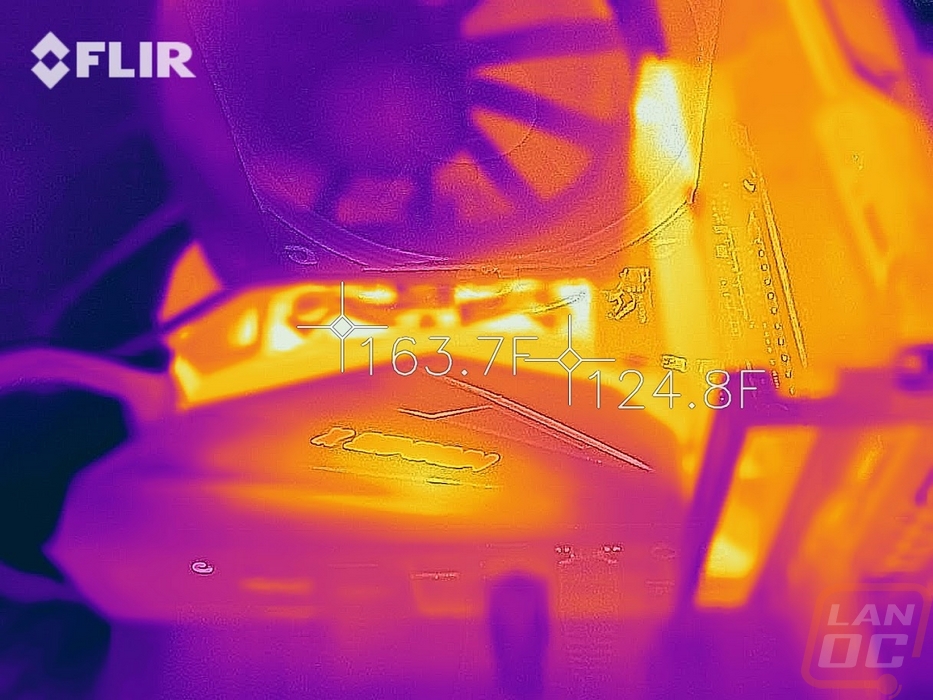
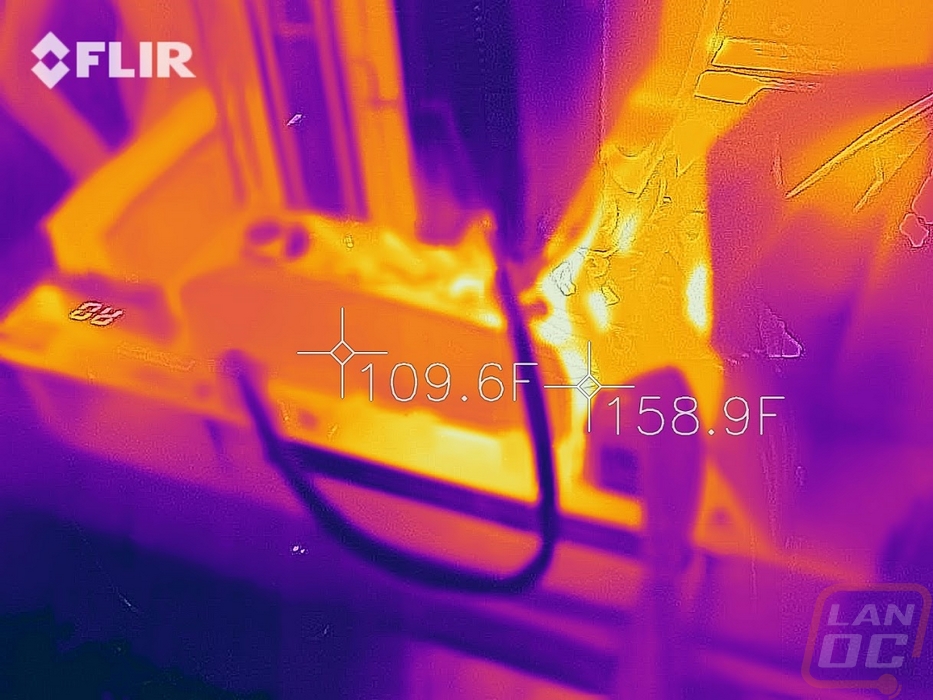
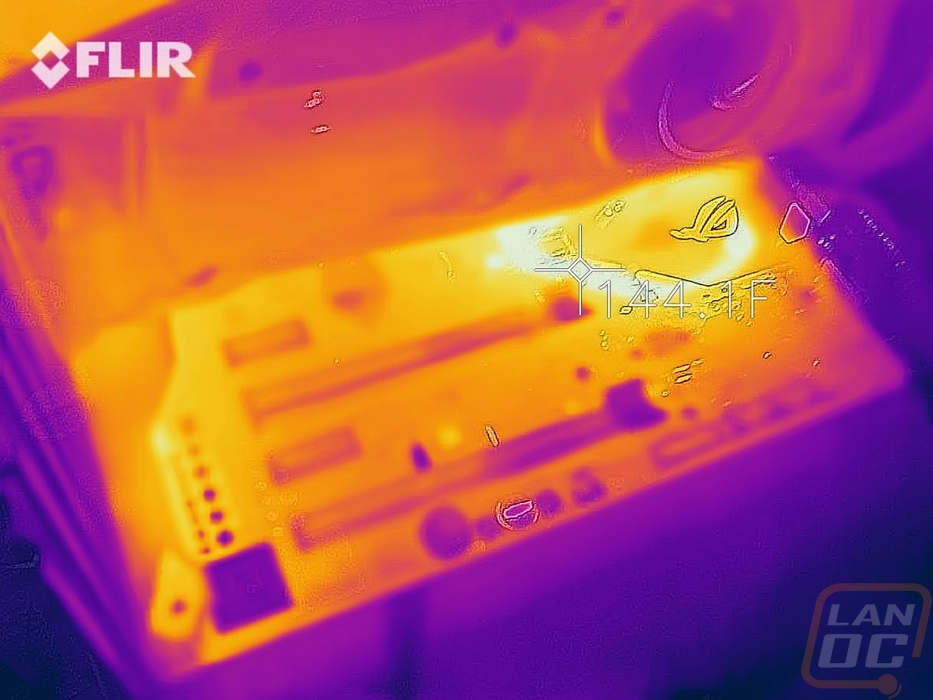
I also took a look at temperatures. To do this testing I used our Flir camera while running the AIDA64 stress test on the FPU setting. The VRM heatsink up on top was running at 109.6 degrees while the area around it was 158.9F. I included the pictures below of all of the thermals including the chipset. That area got a lot warmer than I expected, but you can see the heatsink is dissipating some of the heat.
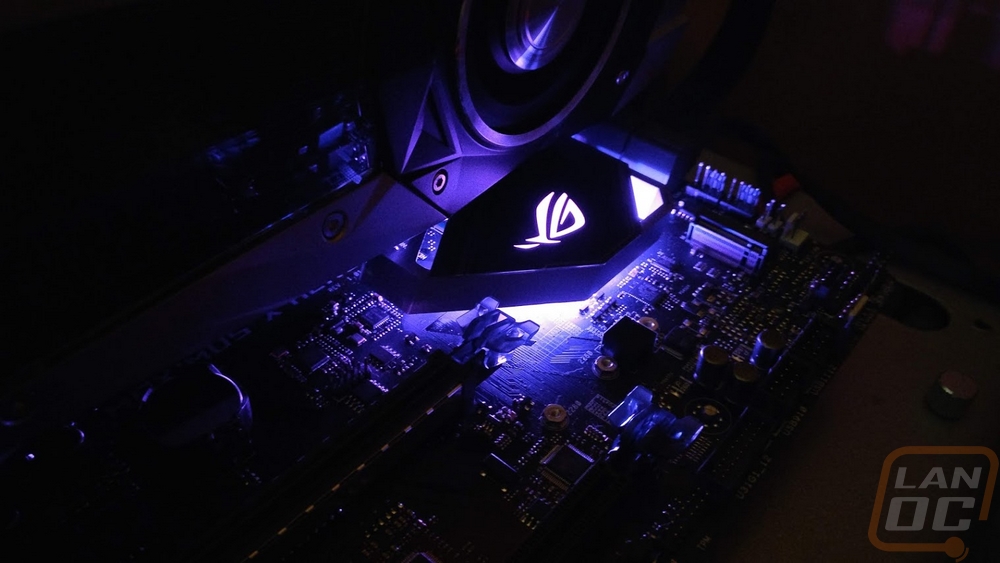
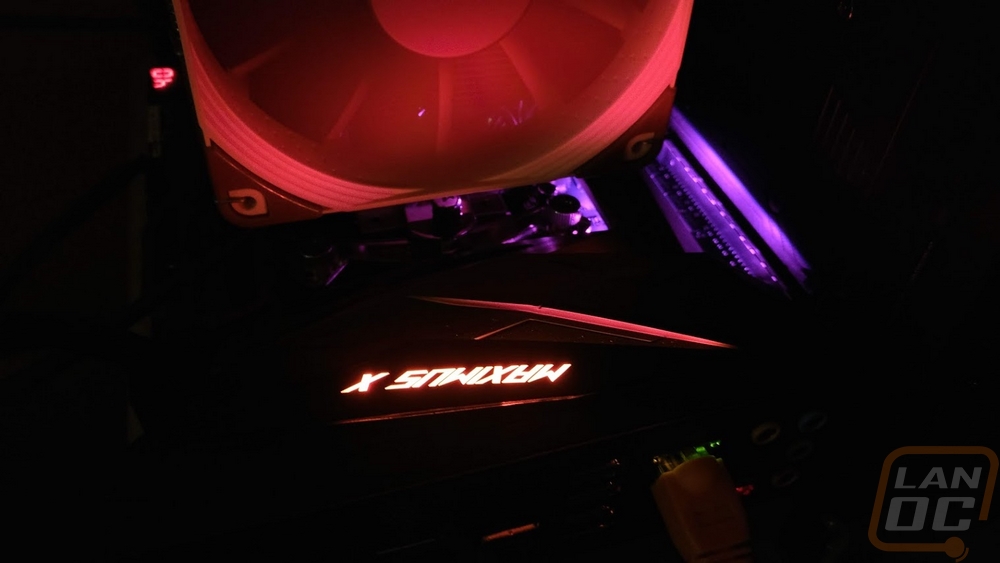
I also got a few pictures of the boards lighting. The I/O cover has the Maximus X branding backlit along with a strip under it that glows. There is lighting around the top M.2 slot that also glows the top of your video card. Then the chipset heatsink has lighting coming from under it and up through the holes and it also lights up the ROG logo in that heatsink. All of the lighting, as well as the two normal RGB headers and the one addressable RGB header, are all controllable in the Aura software. Asus also does a good job of working with other companies to have integration for RGB memory and some fans as well to all tie into the system.
Overall and Final Verdict
So you are in the market for a Z370 board for your new Intel build. Well there are a LOT of options to pick from, hell I’ve already taken a look at a few and I have more to check out still. But the Asus ROG Maximus X Hero has been on my short list of boards to check out. It was a launch board with Z370 so we are a little late to the party, but that gives me a chance to look at it on its own and then again comparing it to what is on the market to see if it’s a good option to go with.
After diving through the features and performance, there were a few things that stood out to me with the Hero. For one, I love the way this board looks. Asus didn’t stray too far from what has been working for them and I’m glad because it looks good and being color neutral means it should fit any theme. To go with that the Hero has its own lighting in a few spots, not too much and not too little. That ties in with Asus Aura that has good integration with 3rd party products as well. The cooling on the Hero was solid, both in performance an in the best description of the heatsinks as well. They are thick. The UEFI on the Hero is packed with options and Asus always seems to have easy to use BIOS’. Then there is the onboard audio. Personally, I prefer to run an external DAC but for it being onboard it is a great setup. Asus does a lot in the audio market so no big shocker there as well.
As for downsides? Not as many as you might expect. I wouldn’t mind seeing more USB ports on the rear I/O, but that goes for just about every board on the market. Not to mention you do get a USB 3.1 Gen 2 header inside and two on the rear. I also am not a big fan of having the Debug LED up in the top right corner, its harder to see unless you have the PC up above you. Swapping that with the power button would kill two birds, putting that in an easier to reach spot as well.
So overall the Maximus Hero is a great board but where does it fit in the market? Well, the non-wireless version I have here today is a little harder to come by for some reason. The one that should be more expensive, the one that includes Wireless AC is cheaper both on Amazon and Newegg so keep that in mind when shopping. It might be cheaper to get that version if the supply for this one is still limited. That said the MSRP of this board is $239.99 and at that price, it does put it up in the higher end of the Z370 boards available. The Formula is still more, but the Hero is fighting with the best options from every company. That includes the Gigabyte Aorus Gaming 7 that has a similar onboard audio configuration, USB options, and lighting. But the Hero does still stand out on the software side. The gaming 7 does have the built-in Optane and an extra M.2 drive over the Hero though. If I had to pick between the two I would still lean towards the Hero, simply because the user experience is better. But before running out and getting the Hero make sure you can find it at a decent price, $239.99 isn’t a great value but it is okay, anything more than that though would have me looking at other options.


Live Pricing: HERE


