With a small B550 break out of the way, I did still have another Z490 motherboard come in after the Z490 launch that I wanted to check out. That board is from EVGA and unlike all of the other board manufacturers, EVGA doesn’t have 15 or 20 different options. They always like to keep things a little simpler. They have two Z490 motherboards and only one available just yet, the Z490 FTW WiFi. I’m excited to see what EVGA has going on for this generation so let’s dive in and take a closer look then put it through its paces.
Product Name: EVGA Z490 FTW WIFI
Review Sample Provided by: EVGA
Written by: Wes Compton
Amazon Affiliate Link: HERE
|
Specifications |
|
|
Chipset |
Intel Z490 |
|
SLI |
NVIDIA SLI Ready |
|
SATA |
4 Native SATA 6.0Gbps Ports / 2 ASMedia SATA 6.0Gbps Ports |
|
RAID |
0, 1, 5, 10, JBOD |
|
USB |
5x USB 2.0 (1 SPI to USB port, 4 from Internal Headers) |
|
Memory Support |
4 DIMM Dual-Channel DDR4 4400MHz+ (up to 128GB) |
|
Capacitors |
100% Solid State |
|
Ethernet |
Intel i219V Gigabit NIC |
|
Audio |
Realtek ALC1220 7.1 Channel HD Audio + SV3H615 |
|
Display Outputs |
DP 1.2, HDMI 1.4 |
|
Fan Headers |
8 (2 CPU PWM, 6 PWM/DC) |
|
PCB |
6 Layers |
|
PCI-E Slot Arrangement |
2x16, 1x1 |
|
NVMe Support |
Yes (PCIe + SATA) |
|
Form Factor |
ATX Form Factor Length: 12in - 305mm Width: 9.6in - 244mm |
|
Features |
100% Solid State Capacitors 150% Increased Socket Gold Content 3 Year Warranty EVGA ELEET X1 Software Support HDMI 1.4 and DP 1.2 Highly-Efficient 14 Phase Digital VRM Intel® Optane™ Memory Ready Onboard Clear CMOS, Power and Reset Buttons Onboard Temperature and Voltage Monitoring Realtek 7.1 Channel HD Audio + EVGA NU Audio Reinforced PCIe slots RGB LED Heatsink Synchronizes with Onboard ARGB and RGB Headers SafeBoot button resets the motherboard and goes into the BIOS with last known good settings without clearing CMOS SPI flashing via USB allows you to flash your BIOS without a CPU Switchable Dual BIOS |
|
Operating System Support |
Windows 10 32/64bit Windows 8 32/64bit* Windows 7 32/64bit*
*Intel Kaby Lake-S CPUs only support Windows 10.
Intel Skylake CPUs support: Windows 10 Windows 8 Windows 7 |
|
Warranty |
3 year |
Packaging and Accessories
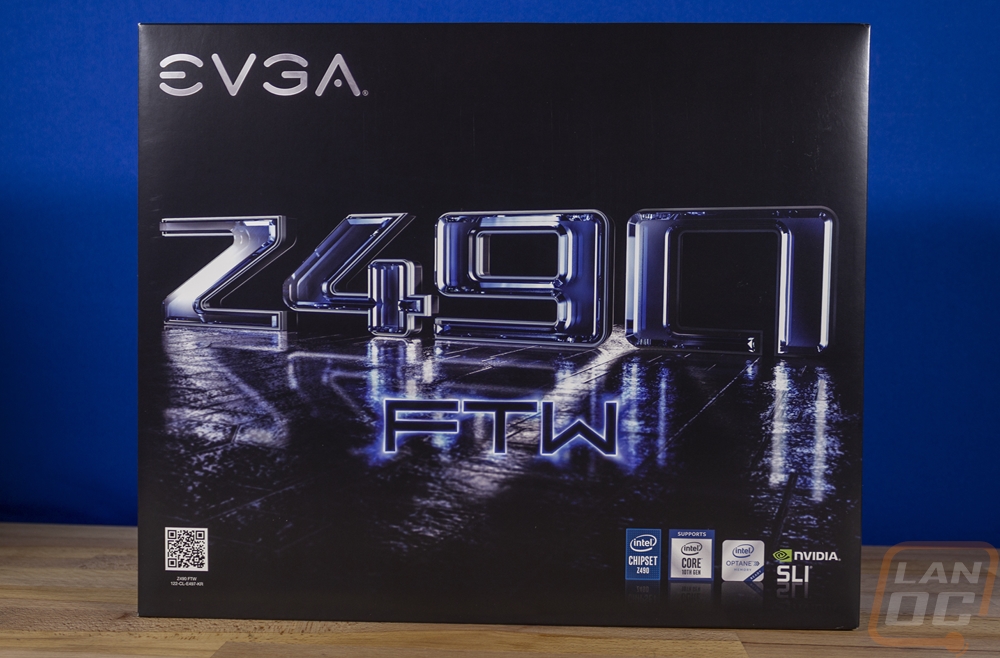
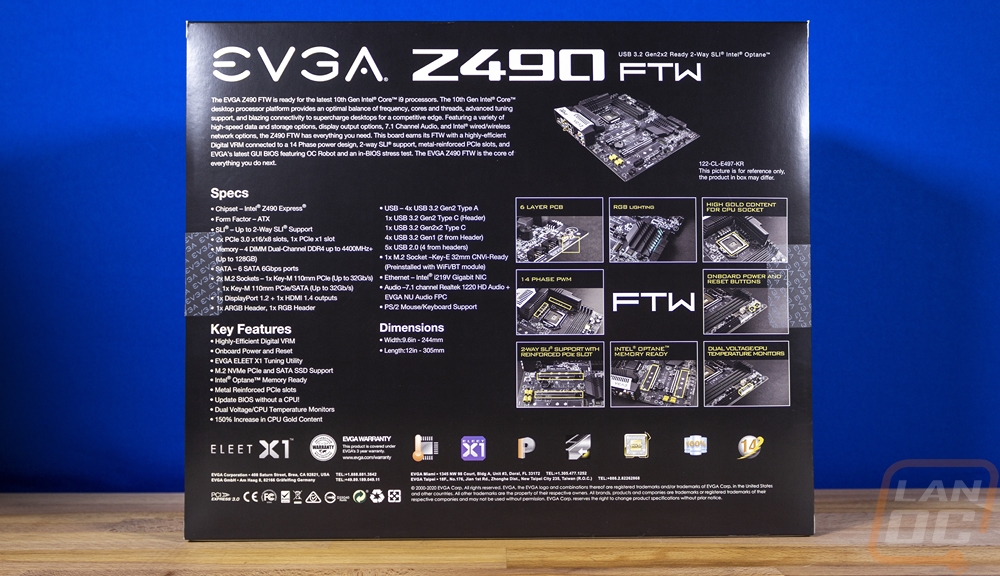
EVGA’s packaging of the Z490 FTW has a full black background and then the model name in HUGE letters across the front with the Z490 having an interesting reflection as well. It is simple and easy to spot, the only downside is there isn’t a picture of the board. The EVGA branding is up in the corner then they have Intel’s required badges as well as one for Nvidia for the SLI support down on the bottom. Around on the back, they do finally have a picture of the board but it is small, along with that they have zoomed-in photos of 8 different board features as well. EVGA also includes a specification listing which is nice but I would also love to see a drawing or picture of the rear I/O as well. You can figure it out from the one photo and the specifications though.
Inside the inside box opens up and EVGA has the accessories and documentation up on top in their own tray which is a change of pace.
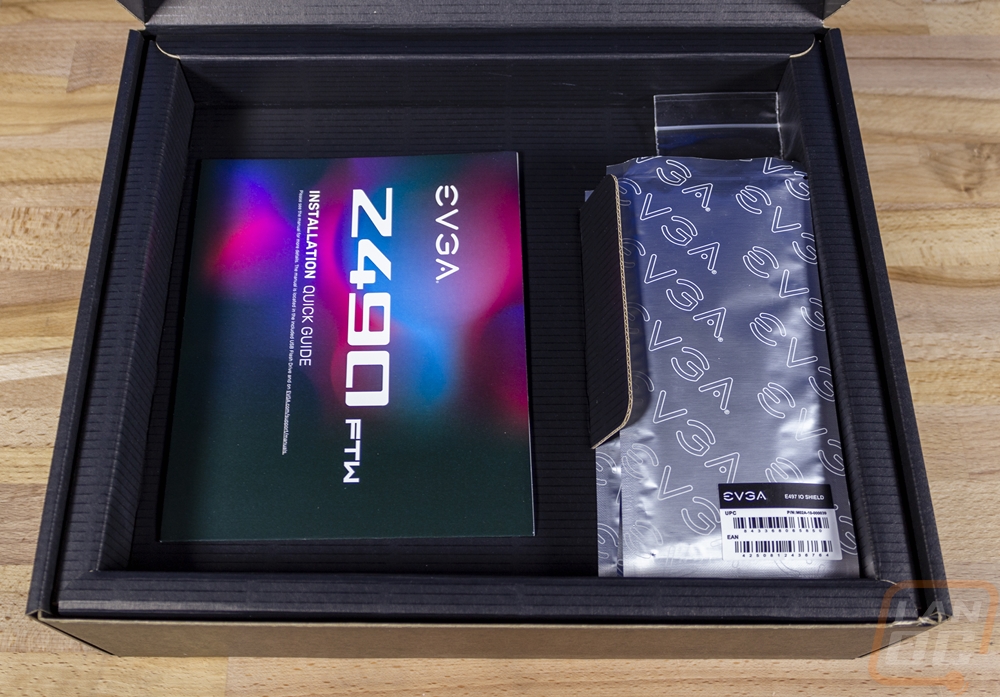
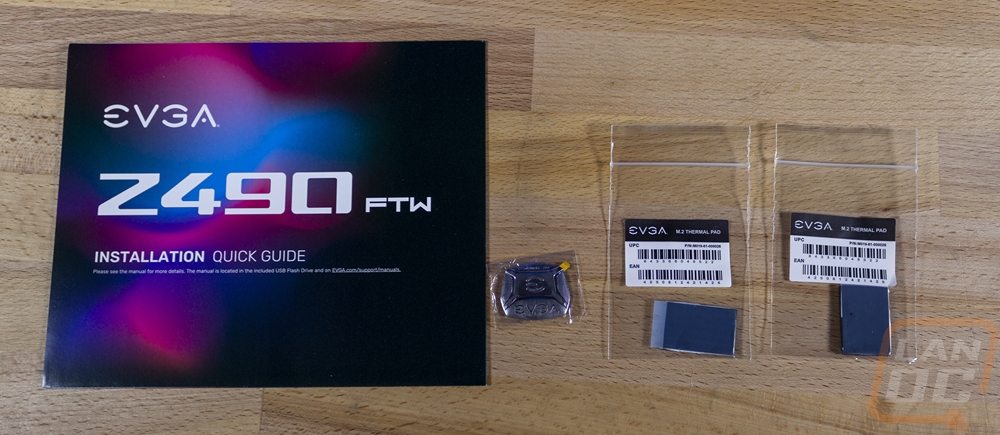
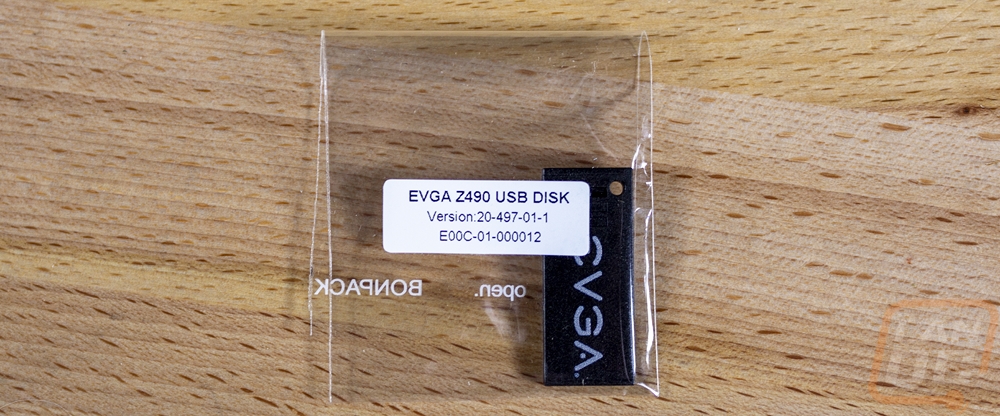
For documentation they don’t include a full user guide, you just get a quick installation guide which covers most of the details you might need. They also give you a metal case badge and two thermal pads for the M.2 drives. They also slipped in a tiny USB drive which has the software and drives and is a welcomed change from driver discs.
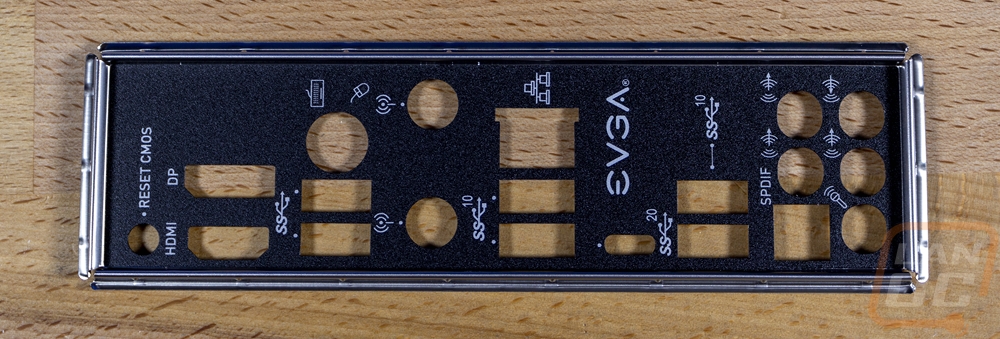
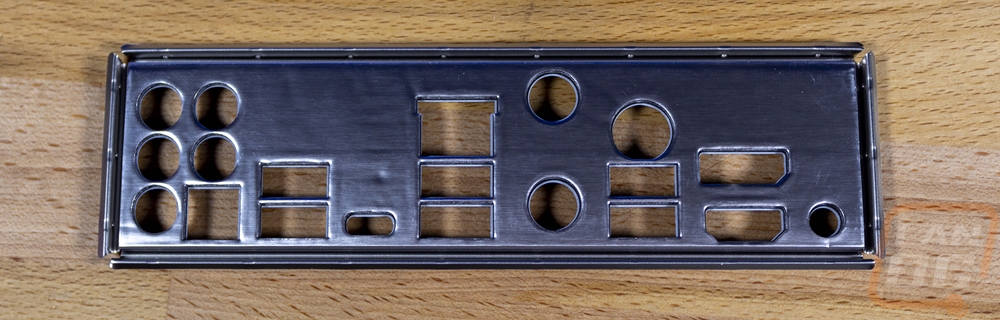
EVGA hasn’t moved to a preinstalled rear I/O cover so that comes in the accessories as well. It is blacked out with white legends. They have the EVGA logo slipped in there and for the most part, the legends are all icons, not text which I’m not sure that I/ a fan of. It does use the padding rather than the metal springs which is nice and should save at least some headaches.
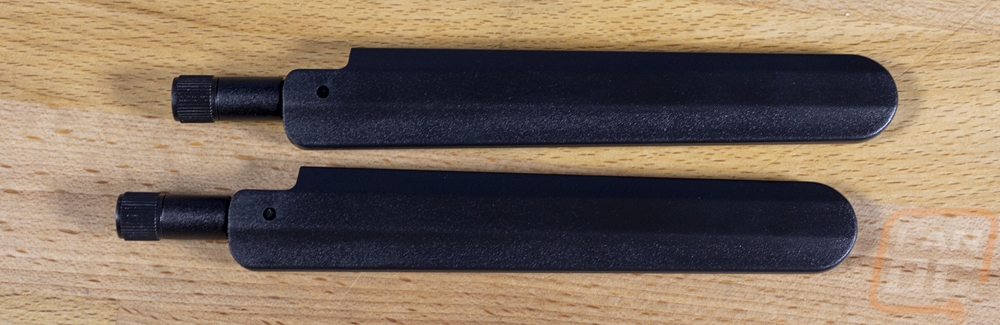
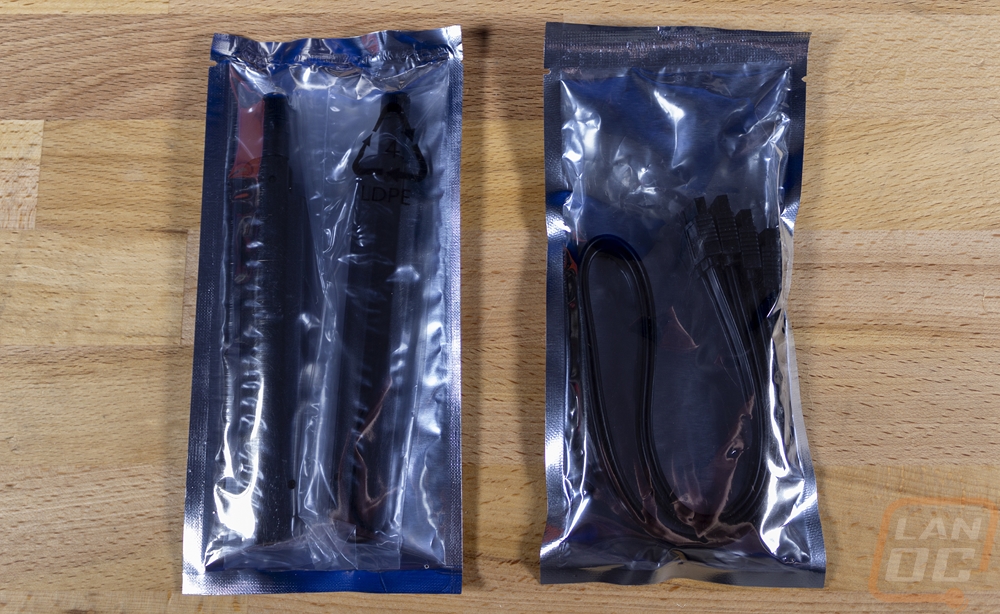
In addition to a bag with two black SATA cables. EVGA also included two wireless antennas. I’ll talk a little more about them later but this is significantly different from any other board. Everyone else is using an antenna that has cords to get up and away from your PC but EVGA just went with two simple screw-on antennas. It will be interesting to see how they perform.
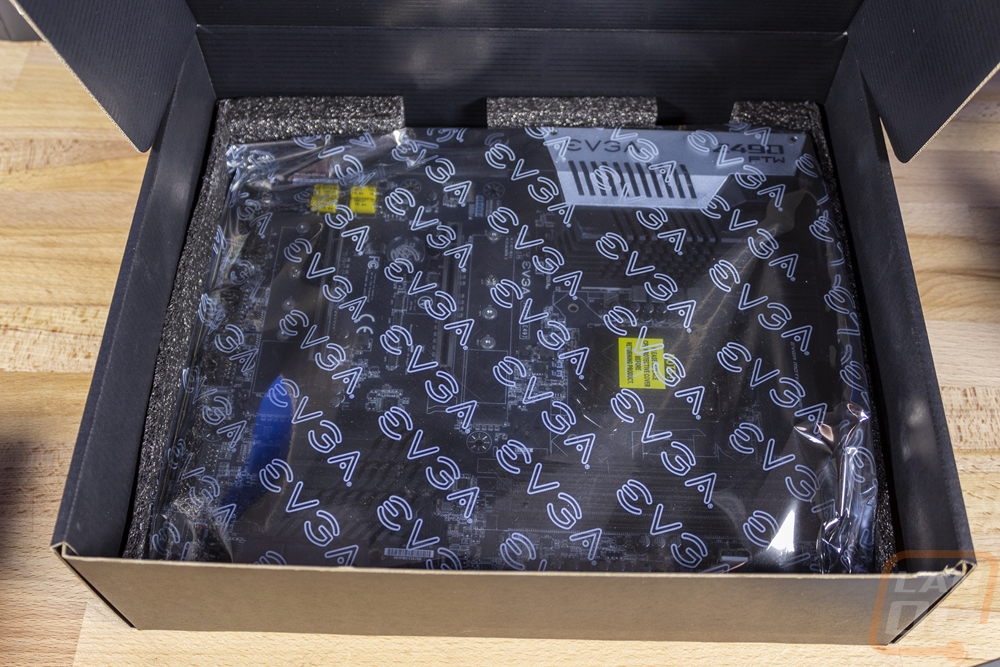
Once you pull the accessory and documentation tray out up under everything, the board is wrapped in its static protective bag and sits in a foam tray to keep it safe.
Board Layout and Pictures
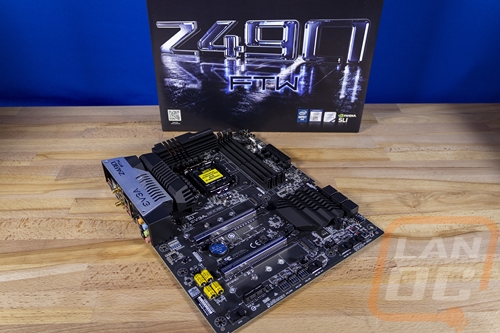
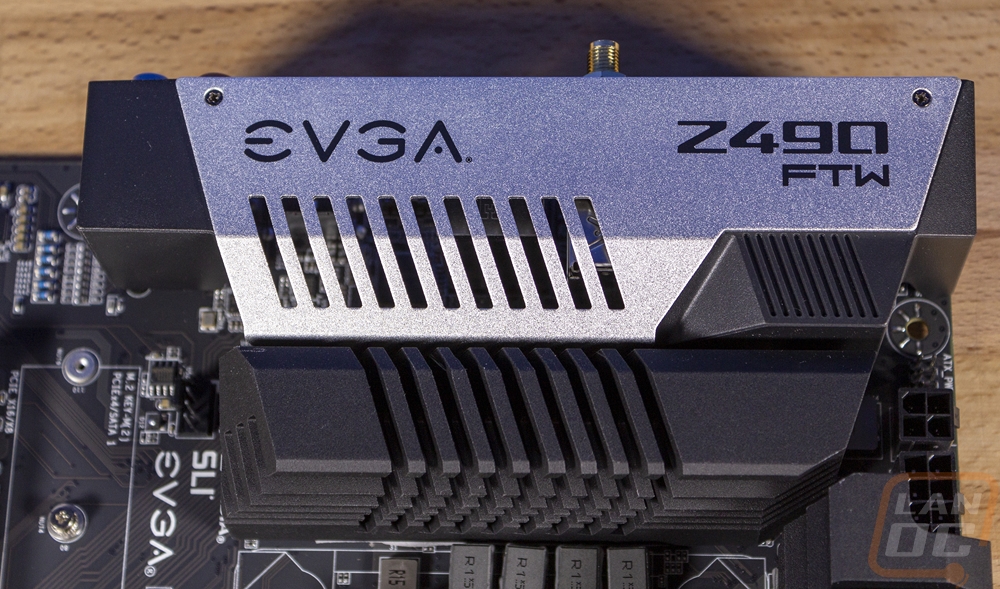
EVGA has always gone their own direction and the Z490 FTW isn’t any different. In a lot of ways, this board looks a lot like previous FTW boards like the Z390 and Z370 models. Mostly because of the silver metal cover over the rear I/o and the otherwise plain styling on the rest of the board. EVGA has always been about simple and black and they always avoid lighting which makes the inclusion of RGB lighting an interesting addition. The FTW is a full ATX board with one notch on the right side. It has a black PCB, black plastic bits, black heatsinks, and even a dark tinted LGA socket bracket as well.

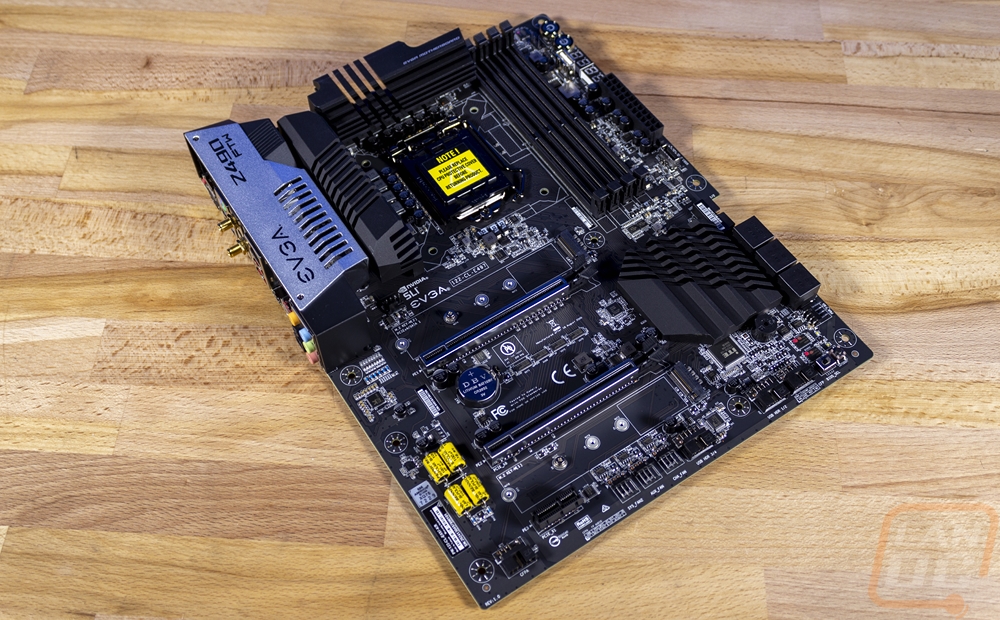
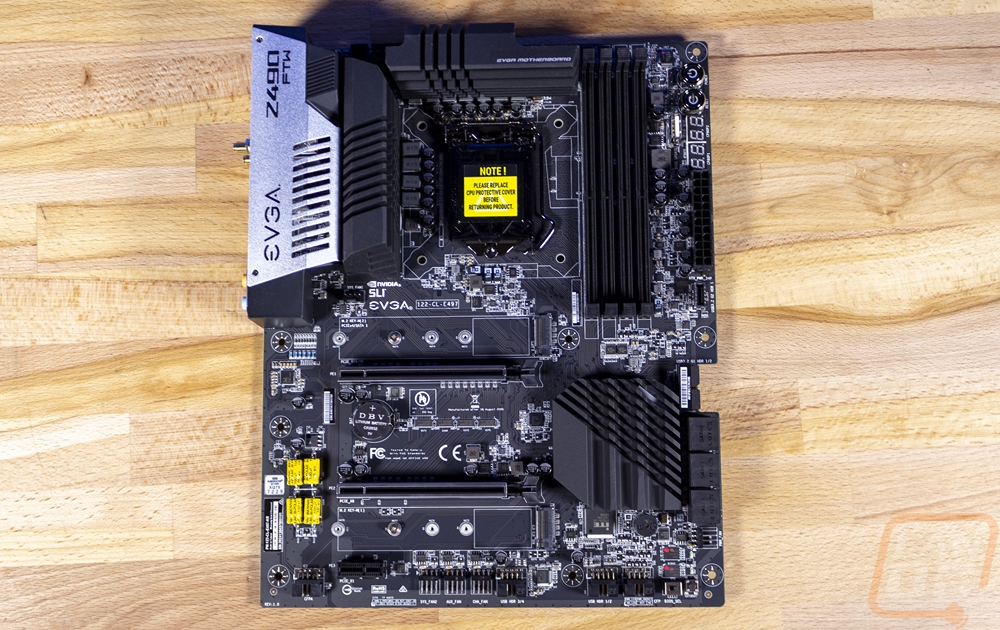
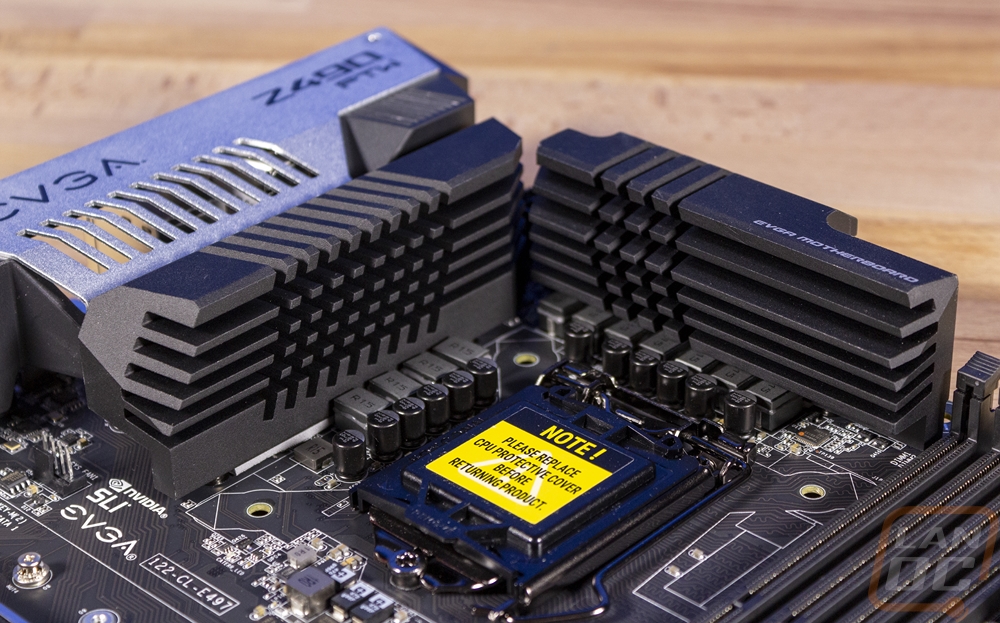
They didn’t skimp on the heatsinks. There are two thick aluminum heatsinks at the top and left side of the CPU socket for the VRM cooling. Both have deep fins on the one side which faces in at the CPU which isn’t completely ideal unless you have a cooler that is blowing air into that area, but an AIO wouldn’t. There is some additional surface area on the back of the top heatsink. You can see 11 caps and chokes on the inside and EVGA has three more up at the top under that extra cooling to make the 14 phase digital VRM that they have listed. The chipset cooler is smaller than most you will see but has that same blacked-out styling with slices in it for additional surface area. This is also where EVGA slipped in their RGB lighting, up under/around this heatsink. I should also note how they didn’t use the chipset cooler as yet another area for branding like most companies, they keep all of their branding simple and in the one area.
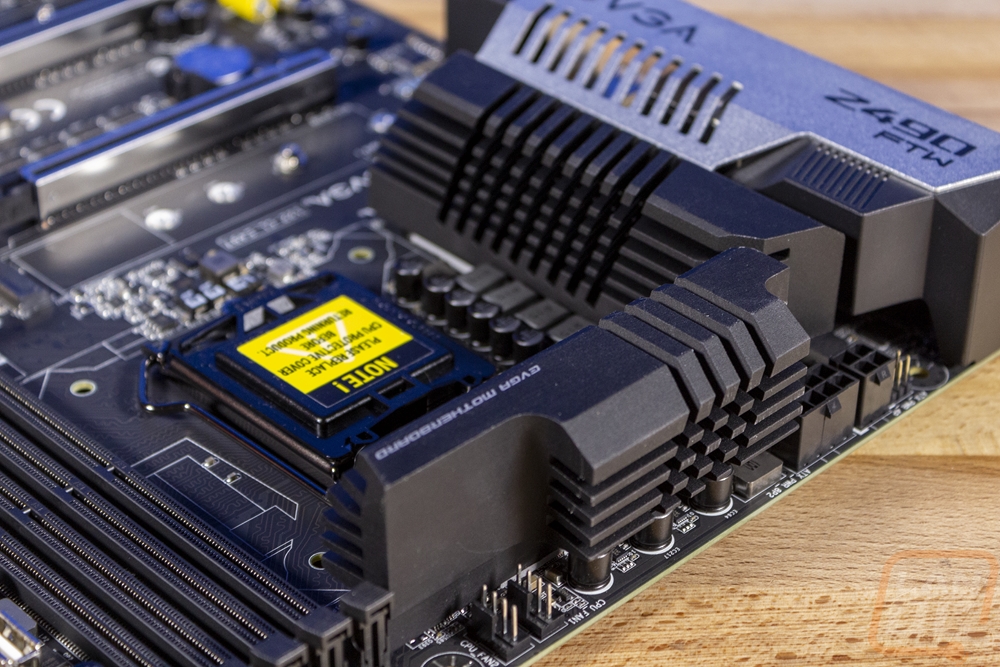
Speaking of, this is the area I was talking about. They have the EVGA logo and the Z490 FTW name on the metal cover that goes over the rear I/O. This is the only non-black part of the board as well. You can also see one fan header tucked up under the heatsink for a rear case fan if needed.
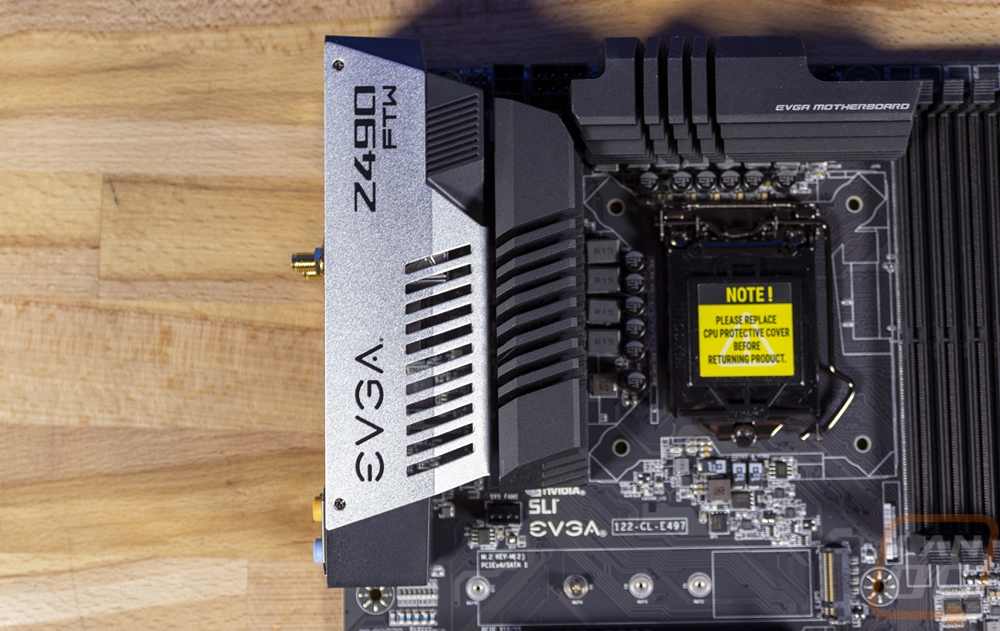
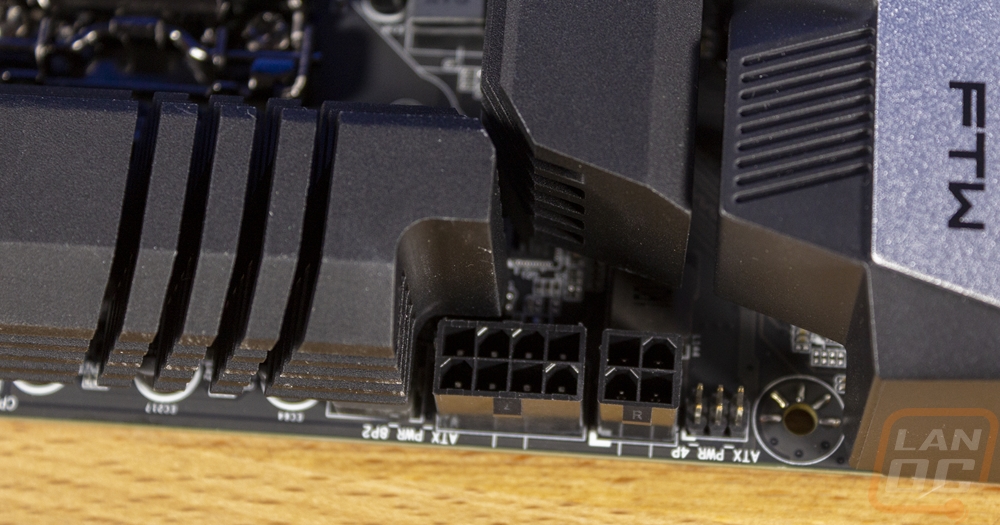
So let’s look around the board to see what all EVGA has hidden away starting in the top left ¼ of the board. This is mostly dominated by the rear I/O, the VRM cooling, and the CPU socket itself. There is that one PWM fan header under the heatsink. Then up on the top edge, you also have the two CPU or EPS power connections. One is an 8-pin and the second is a 4-pin. There is a small 6 pin array next to these but the manual doesn’t cover what they are and I didn’t see any obvious legend as the legend above it is for the 4 pin CPU power.
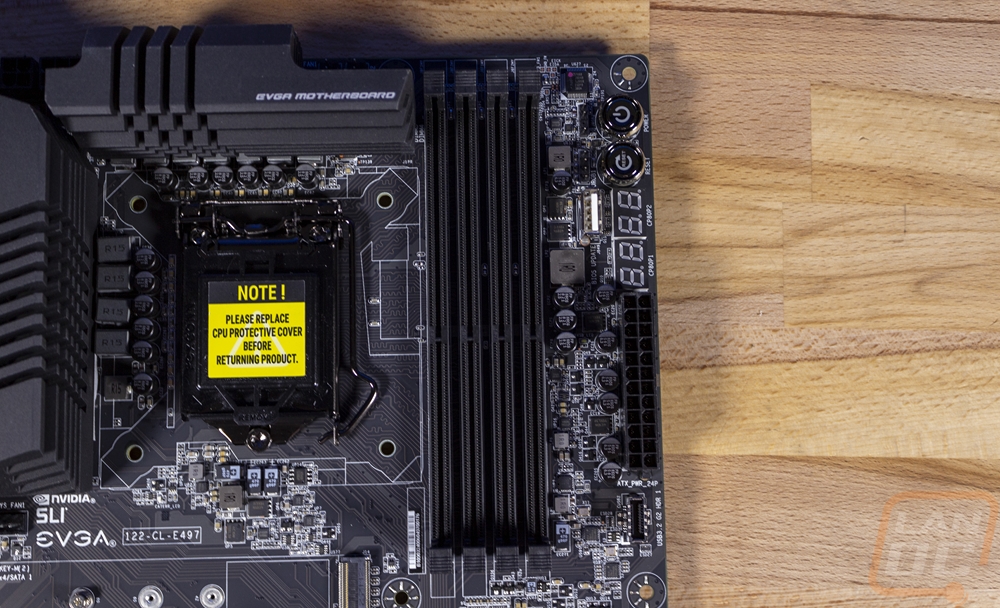
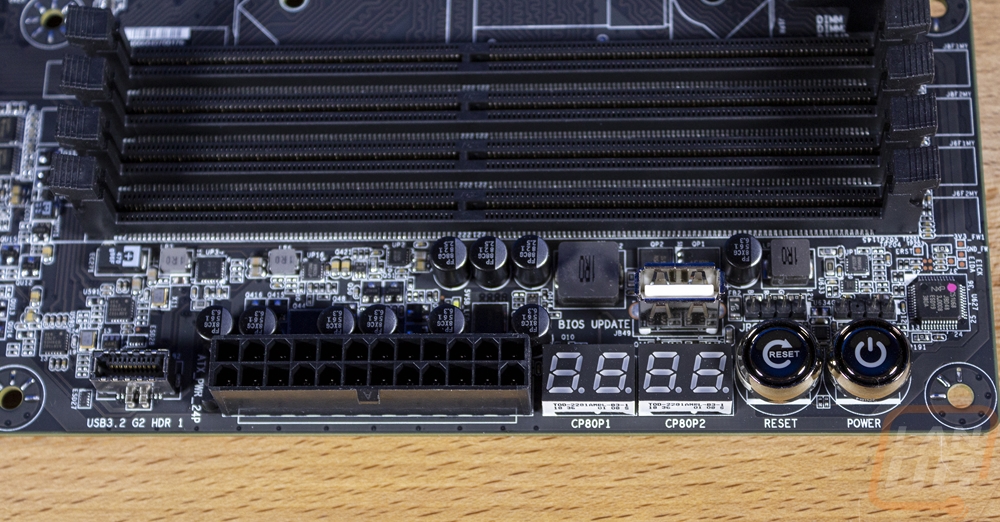
In the top-right section the four DDR4 slots which run up to the top edge so everything is on the right edge. This includes two large buttons for power and reset which are backlit. Next to that, there are two LED readouts. This gives you temperatures and voltages when running. Right with that there is a single USB port that sticks up, this is for BIOS updates. Right above that with the power and reset buttons EVGA also included an RGB header and an addressable RGB header. There is also a 24-pin motherboard power and a USB 3.2 Gen 2 header for cases with Type-C connections on the front panel.
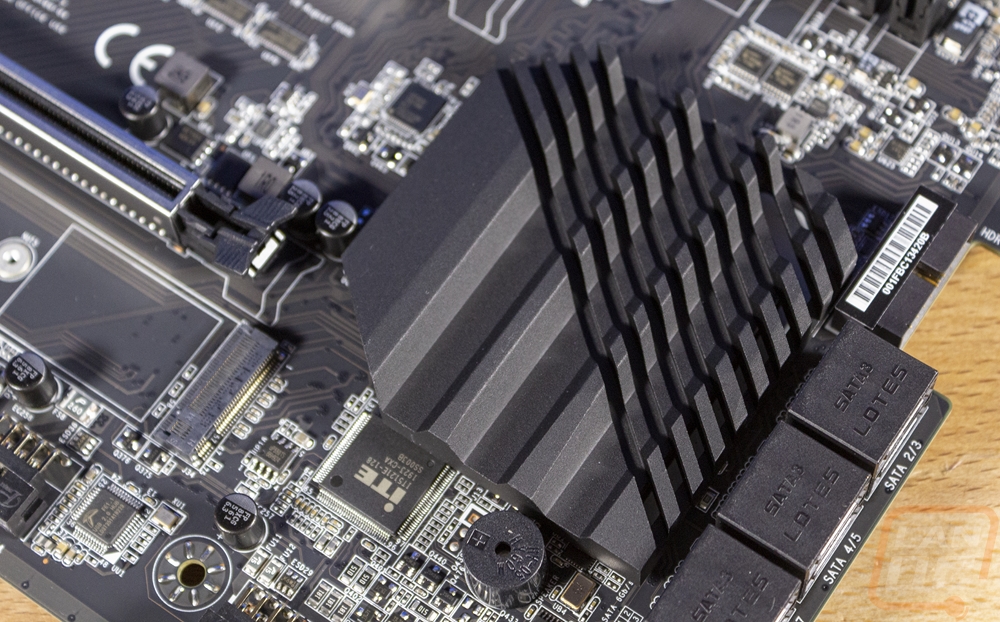
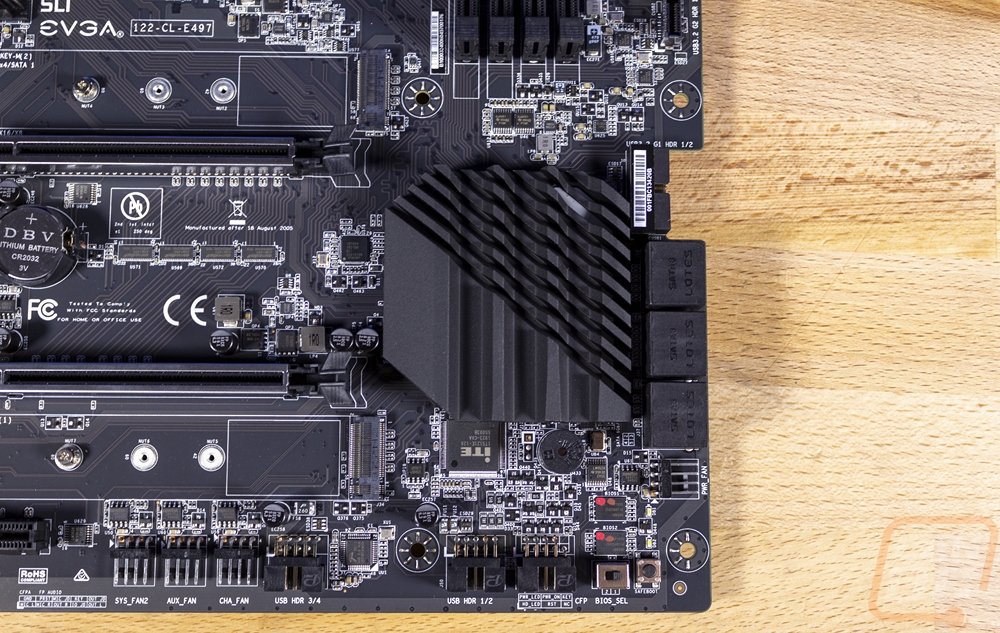
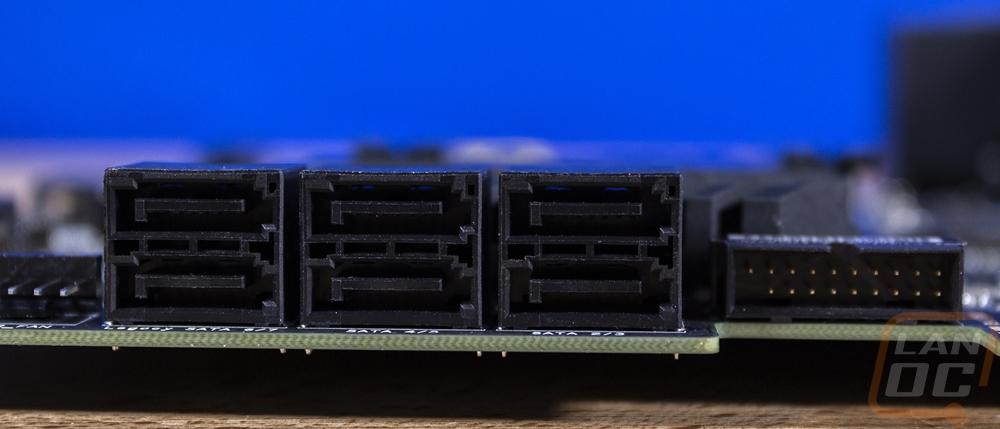
Down in the bottom right corner, normally the chipset heatsink would dominate this area but the smaller heatsink that EVGA went with is nice because it leaves a little extra room. Next to it, they went with a right-angled USB 3.2 header which is where they notched the PCB to help with the always hard to bend USB 3.2 cables. Next to that, there are six right-angled SATA ports as well as a four-pin fan header. Down on the bottom edge in the corner, there is a BIOS select switch to switch between two BIOS’ and a safe boot button as well. Next to that, the front panel header is set at a right angle which is interesting and it has all of the labels right in front. To the left of that is a USB 2.0 header and there is a second slightly to the left of that as well. Both are set at a right angle.
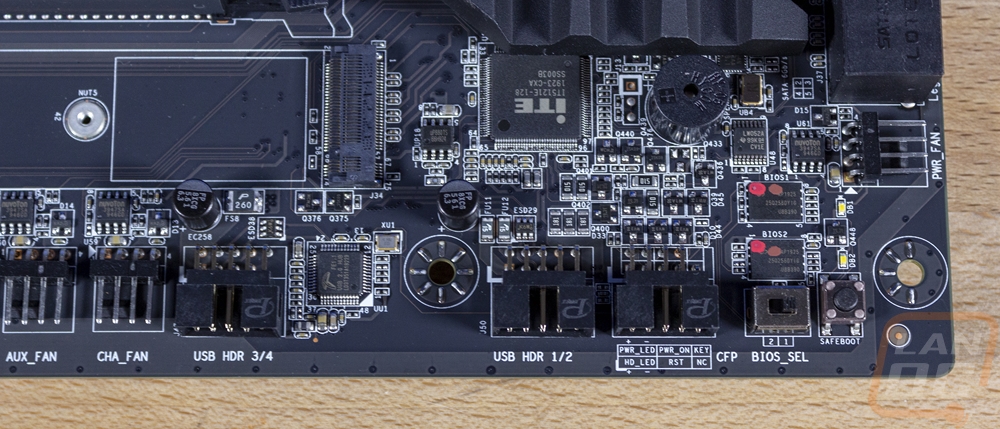
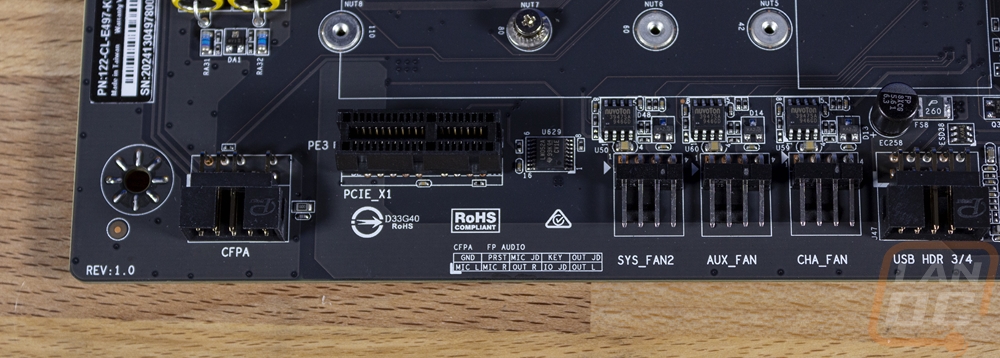
Continuing to the bottom left corner, still, on the bottom edge, there are three more PWM fan headers all at a right angle which makes for a total of 8 on the board. Then on the far left is the front panel audio connection. The main thing going on in the bottom left is of course all of the PCIe slots. EVGA went with two x16 length slots and then one x1 down at the bottom. Due to the limited PCIe lanes on the Intel platform, the two x16 length slots drop down to an x8 bandwidth if you decide to use both, which is standard for the Z490 boards. Both x16 slots have metal shielding that helps strengthen the hold for your heavy video cards as well. The two x16 slots run at a PCIe gen 3 speed but the x1 slot drops down to PCIe gen 2 so keep that in mind as well.
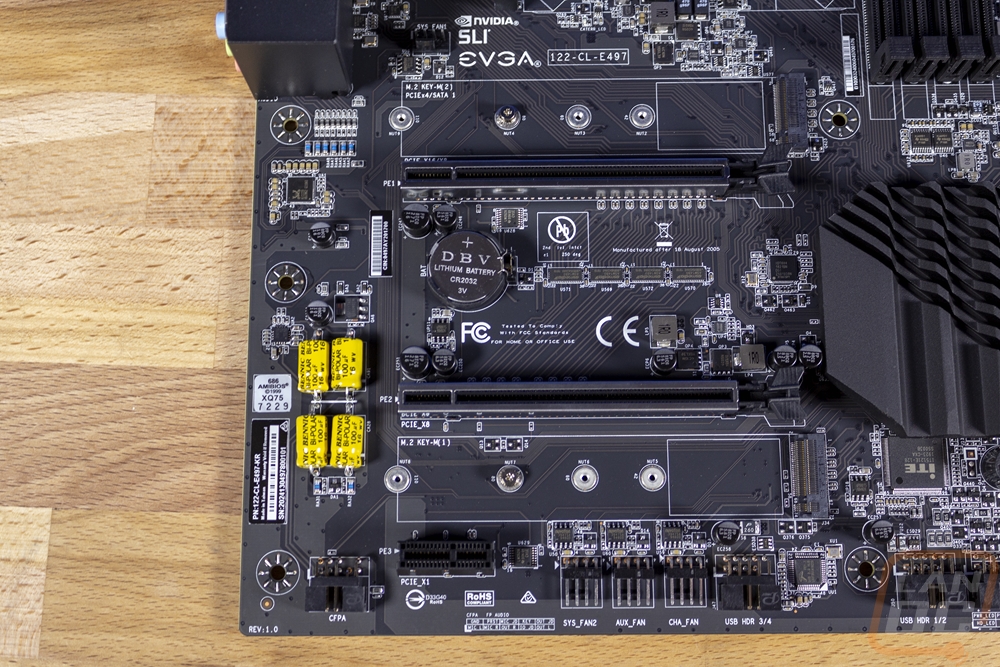
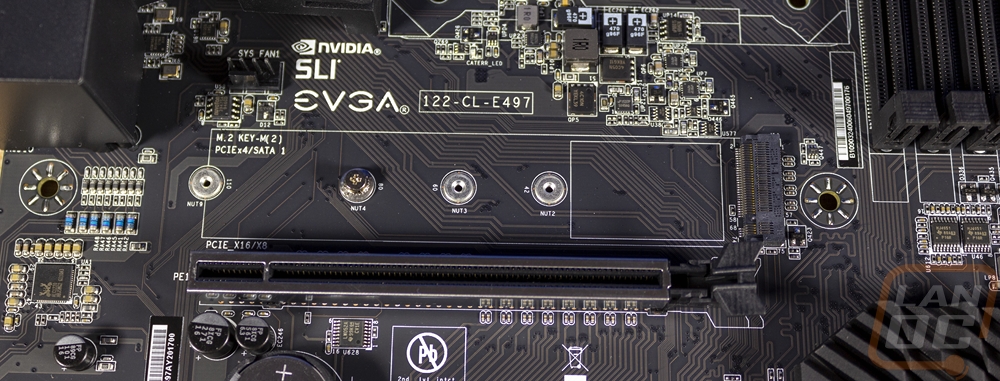
EVGA of course slipped in a few M.2 slots in between all of the PCIe slots. One of the two M.2 slots on the Z490 FTW is up above the top PCIe slot which I love. This still gets some heat from your video card but isn’t up under it in the real heat zone. Both slots support PCIe x4 but only the top slot can handle a SATA drive if you need to run an older SATA M.2. Unlike nearly everyone else EVGA also doesn’t go with a crazy “heatsink” or cover over their M.2 slots. In fact, they include thermal tape and it is for the BOTTOM of the drive in the white line box area in the photos below to still pull heat away but it leaves the top still open. This also means drives with their own heatsinks are also supported.
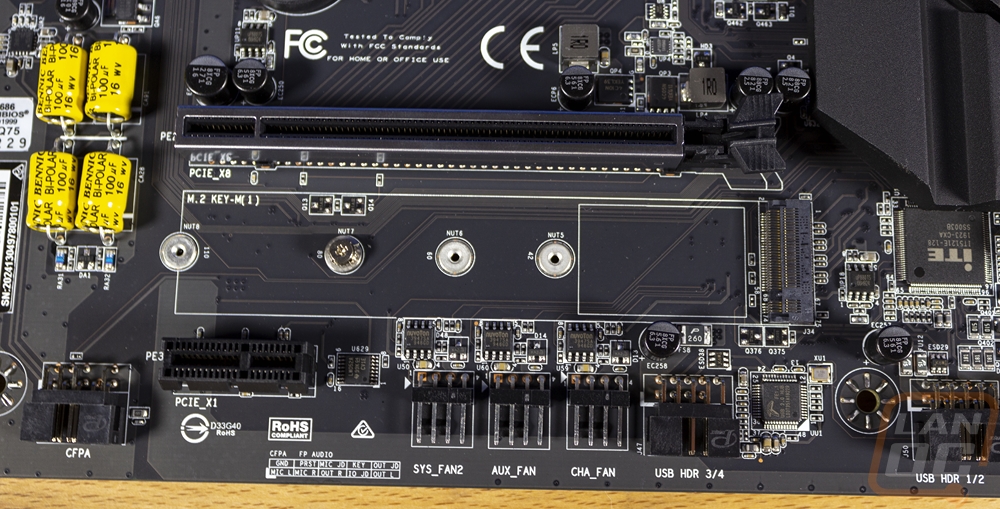
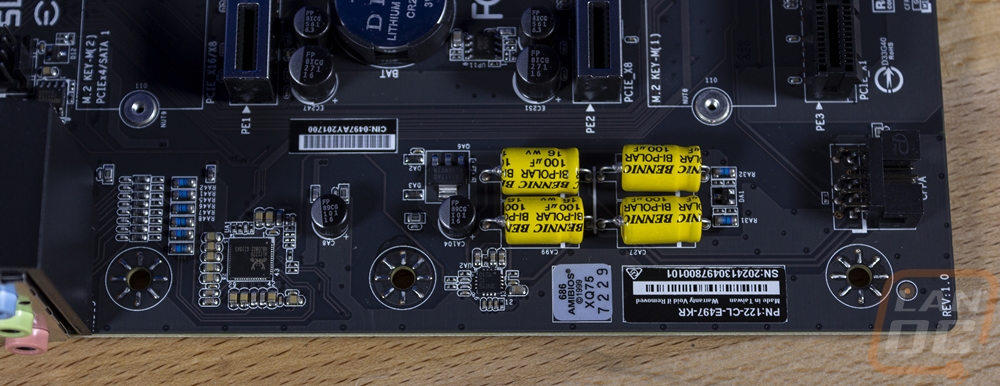
The onboard audio circuitry stands out, especially if you compare it to any other board on the market. Most companies have been moving toward using Nichicon solid capacitors with that signature gold finish so the side-mounted. EVGA went a completely different direction with Bennic yellow polys which are still high quality. Beyond that, they aren’t using a (visibly) split PCB or any shielding over the Realtek controller. The front panel audio header is set at a right angle and down at the bottom which is nice for wiring.
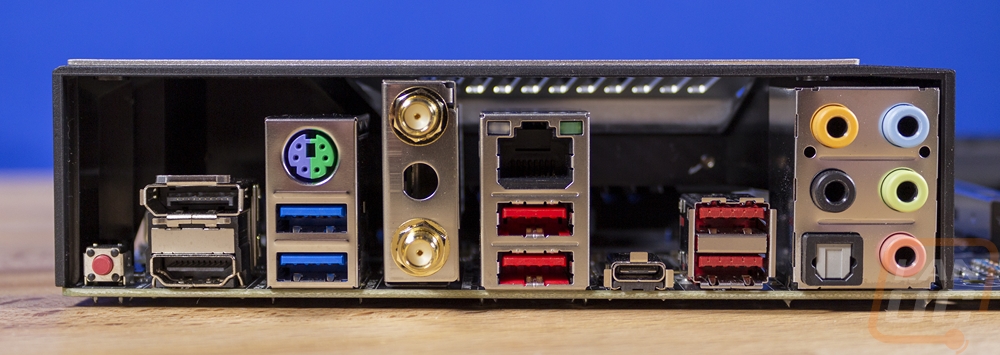
It’s a small detail but I was hoping to see the Z490 FTW have an integrated rear I/O cover. They make installation much easier and open up options for a few unique cases that don’t have mounts for a shield as well. Beyond that, the FTW does have an interesting combination of connection options. Mainly because of that PS2 connection, you rarely see those anymore. It also has two display connections with a DisplayPort and an HDMI for the onboard video. Down at the end, the small red button is a CMOS reset which is great to have and you don’t have to find a hidden jumper or even open up your case at all. However, that is just one of the areas with a lot of extra space not being used. For USB ports there are a total of six Type-A ports and one Type-C. The two blue ports are a standard USB 3.2. Then all four of the red ports are all USB 3.2 Gen 2 or SuperSpeed 10 and the Type-C is a USB 3.2 Gen 2x2 or a Superspeed 20. There is room for more above the Type-C and on the right ports as well. I would be more than happy with more USB 2.0’s even. T two wireless antenna jacks are for the WiFi 6 controller, specifically the Intel AX201. Then the wired NIC is an Intel I219-V which is an interesting choice, this is the NIC that everyone was using previous to the Z490 launch but the Z490 chipset has the option to use the Intel 2.5G NIC, I don’t know why EVGA would skip that one. Then over on the far right, the audio layout is your standard five jacks and one optical SPDIF jack.
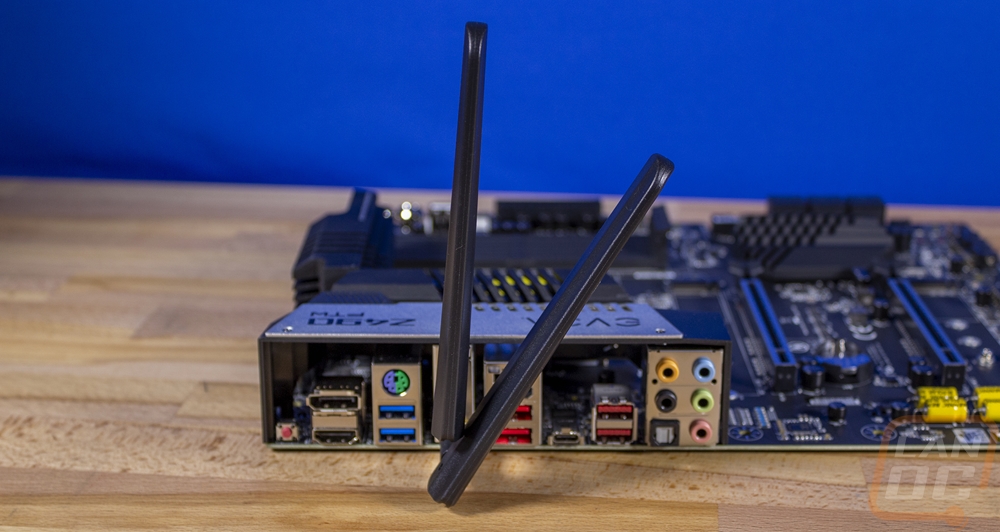
Now I mentioned earlier that the board mounted antennas were a weird choice. It remains to be seen how they perform. But because the jacks are mounted above each other and both antennas are the same length they get in each other's way as you can see below.
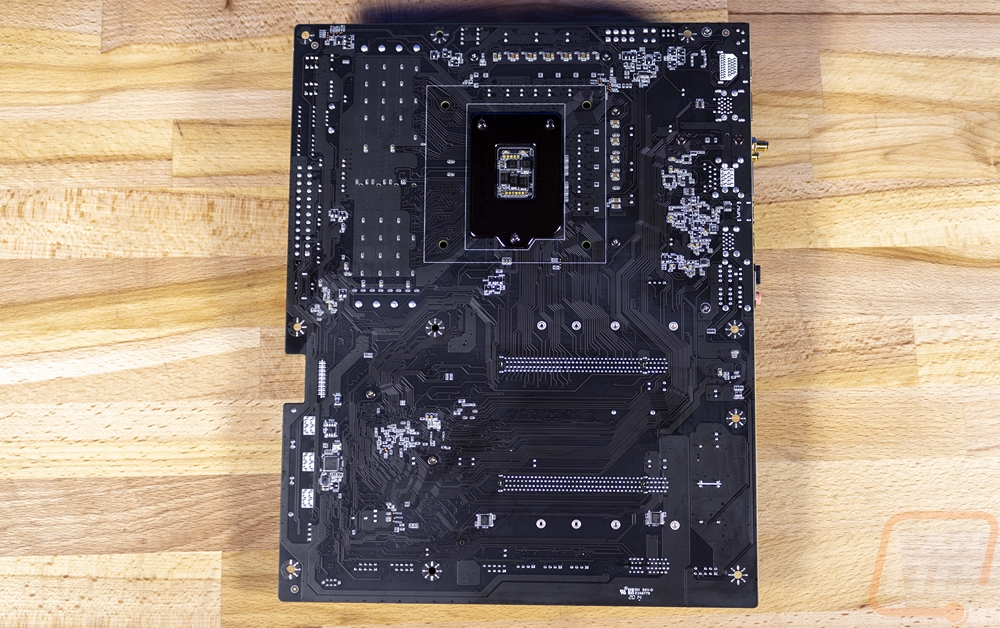
The backside of the FTW gives us a great look a the sexy black PCB finish and a lot of the traces. There isn’t much going on back here though. It does give us a good look at the notch on the right edge of the board, however.
BIOS
We used to get lots of pictures to show some of the BIOS functionality but I’ve found that it is a lot easier just to have a video clicking through all of the options where you can pause and check anything out. Like with a lot of the board features, EVGA went a completely different direction from what every other BIOS has done. So when you boot into the BIOS you will find an EVGA logo and four options to pick from. You can go to the advanced mode, run a default mode with default settings, set a small gaming overclock, and us the EVGA OC Robot to auto overclock. Where everyone else is including an EZ mode for the BIOS EVGA dropped all of that and before you get into anything important they say hey if you want an overclock and you don’t know what you are doing here are a few options. I really like it.
Once in the advanced mode, EVGA drops you right into the OC tab. This has your CPU, clock speed, and CPU temperature right at the top. Then you can get into overclocking it right below that with multiplier and BCLK then voltages. I did find it interesting that the OC page is only CPU specific, everyone else ties the CPU and memory all into the one. Over on the right, they show short descriptions of whatever option you are mousing over and up top, you can see what memory slots are being used and the same for your PCIe slots as well.
Memory is all split off into its own page with the current memory information up at the top. Then XMP options are the first option to make that simple. You then have manual frequency and voltage with all of the timings below that. There are a TON of options here. The advanced tab is split up into 11 different pages. EVGA does a good job of splitting things up into logical sections like the CPU and then the GPU. Some of you will be interested to know that the dark mode is tucked away in the power management section. This is how you can turn off all of the lighting on the board other than the diagnostic LEDs but they can also be turned off in another area (the H/W Monitor Configuration section).
The boot tab has the basic boot options like a fast boot, turning your number lock on or off at boot, and so on. You can also set the boot order as well as hard disk priority as well. Everything you need and exactly what you would expect. Then the extra section is similar to Asus’s Tools section. EVGA has their stress test here, the OC Robot that was also accessible on the original landing page, and this is where you can get into the BIOS updater.
Overall EVGA’s BIOS is easy to use. They do a good job of keeping inexperienced users out of the advanced features while offering simple overclock options. Then when you do get into the advanced settings you are right into the overclocking options. When compared to the ROG Maximus XII Extreme, there aren’t nearly as many small overclocking details but no one other than Asus is really going to that level.
Test Rig and Procedures
Test System
CPU: Intel Core-i9 10900K – Live Pricing
Cooling: Noctua NH-U12S for cooling - Live Pricing
Noctua NT-H1 Thermal Paste - Live Pricing
Memory: Corsair Dominator Platinum RGB 16GB 3000 MHz – Live Pricing
Storage: WD Black SN750 1TB – Live Pricing
Video Card: Nvidia RTX 2080 FE - Live Pricing
Power Supply: Corsair TX750M - Live Pricing
Case: Dimastech Test Bench - Live Pricing
OS: Windows 10 Pro 64-bit - Live Pricing
|
Motherboard Testing |
|
|
Passmark Performance Test 9.0 |
Overall PCMark score |
|
PCMark 10 |
PCMark 10 standard test, not the quick or extended versions |
|
3DMark |
We run the 2013 Fire Strike test on the performance setting and Time Spy on its regular setting |
|
In Game Tests |
|
|
The Division 2 |
1080p, In-Game benchmark, Ultra detail with v sync turned off |
|
Tom Clancy’s Ghost Recon: Wildlands |
1080p, built-in benchmark run at the high setting |
|
Shadow of the Tomb Raider |
1080p, In-Game benchmark, High detail setting |
|
Far Cry 5 |
1080p, In-Game benchmark, High detail setting |
|
Subsystem Testing |
|
|
Passmark |
Passmark Advanced network test |
|
VRM Temps |
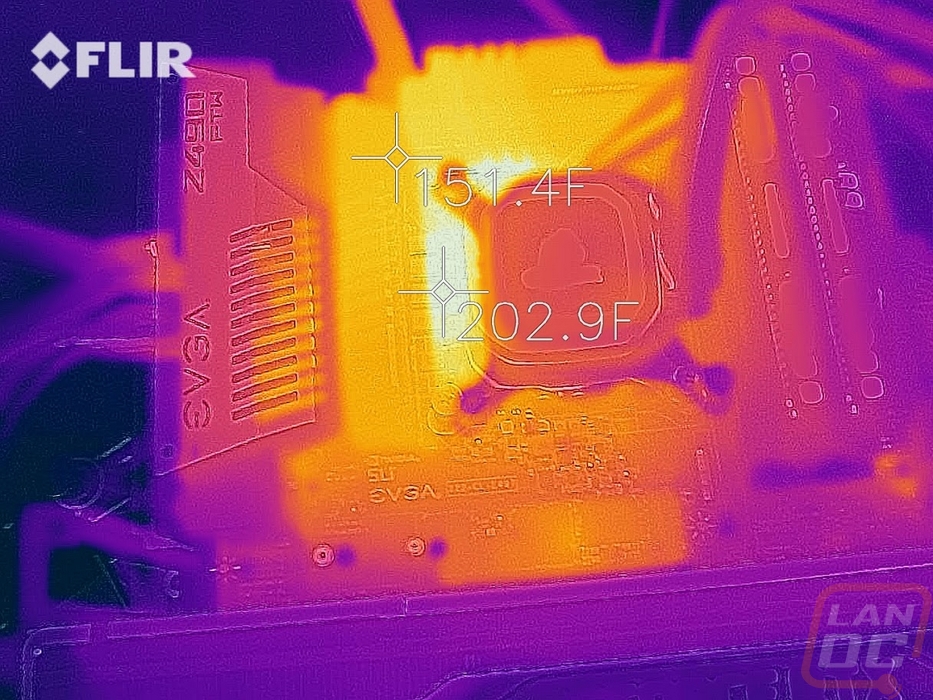
Temperatures tested using a Flir One Pro while running AIDA64 stress test on the FPU setting |
Performance
For testing, I have been saying for years that motherboard benchmarks don’t hold much weight because you are still using the same CPU, memory, and GPU and those are what play big roles in how fast your PC is. But I do run a few tests just to make sure everything is running the way it should and it also lets us see what the system can do. In this case, everything was running well. In fact, in the short time between testing the three original Z490 boards and the Z490 FTW performance in Ghost Recon jumped up. But everything else was still in line.
My focus was on the network performance because that is where you can sometimes see more variation and that is the case here. All of the other Z490 boards came with 2.5G NICs with one also having a 10G but EVGA only went with the Intel i219V NIC which is a 1G. The performance was on par with the others in my test on a 1G network. But on a 10G network that wasn’t still the case. All four boards have the same Intel AX201 wireless NIC but they all have different wireless performance. I was really curious here because EVGA decided to go with the direct antennas, not one on a cable to sit up on your desk or away from your PC. The performance ended up being better than the Asus and Gigabyte boards and just a little behind the MSI.
|
3DMark – Fire Strike |
|||||
|
Motherboard |
Overall Score |
Graphics Score |
Physics Score |
||
|
MSI MPG Z490 Gaming Carbon WiFi |
20727 |
23120 |
29879 |
||
|
Z490 Aorus Master |
20396 |
22915 |
31001 |
||
|
ROG Maximus XII Extreme |
21168 |
23177 |
29574 |
||
|
EVGA Z490 FTW WIFI |
21220 |
23429 |
29343 |
||
|
3DMark – Time Spy |
|||||
|
Motherboard |
Overall Score |
Graphics Score |
CPU Score |
||
|
MSI MPG Z490 Gaming Carbon WiFi |
11179 |
10907 |
13021 |
||
|
Z490 Aorus Master |
11142 |
10807 |
13524 |
||
|
ROG Maximus XII Extreme |
11175 |
10874 |
13261 |
||
|
EVGA Z490 FTW WIFI |
11309 |
11029 |
13217 |
||
|
PCMark 10 Score |
|||||
|
Motherboard |
Overall Score |
Essentials |
Productivity |
Content Creation |
|
|
MSI MPG Z490 Gaming Carbon WiFi |
8041 |
11286 |
9964 |
12548 |
|
|
Z490 Aorus Master |
7878 |
11298 |
9342 |
12570 |
|
|
ROG Maximus XII Extreme |
7978 |
11169 |
9894 |
12471 |
|
|
EVGA Z490 FTW WIFI |
8121 |
11261 |
10123 |
12749 |
|
|
Passmark PerformanceTest 10.0 - Overall Score |
|||||
|
MSI MPG Z490 Gaming Carbon WiFi |
8981.5 |
||||
|
Z490 Aorus Master |
9129.2 |
||||
|
ROG Maximus XII Extreme |
8921.1 |
||||
|
EVGA Z490 FTW WIFI |
8955.5 |
||||
|
Tom Clancy’s Ghost Recon: Wildlands – High Detail - Average FPS |
|||||
|
MSI MPG Z490 Gaming Carbon WiFi |
114.24 |
||||
|
Z490 Aorus Master |
113.15 |
||||
|
ROG Maximus XII Extreme |
113.98 |
||||
|
EVGA Z490 FTW WIFI |
129.20 |
||||
|
Shadow of the Tomb Raider – High Detail - Average FPS |
|||||
|
MSI MPG Z490 Gaming Carbon WiFi |
150 |
||||
|
Z490 Aorus Master |
148 |
||||
|
ROG Maximus XII Extreme |
149 |
||||
|
EVGA Z490 FTW WIFI |
148 |
||||
|
Far Cry 5 – High Detail - Average FPS |
|||||
|
MSI MPG Z490 Gaming Carbon WiFi |
147 |
||||
|
Z490 Aorus Master |
149 |
||||
|
ROG Maximus XII Extreme |
146 |
||||
|
EVGA Z490 FTW WIFI |
149 |
||||
|
Average Network Speed- Wired on a 1G Network - Mbits/Sec |
|||||
|
MSI MPG Z490 Gaming Carbon WiFi - Realtek RTL8125B |
950.9 |
||||
|
Z490 Aorus Master – I225-V |
950.9 |
||||
|
ROG Maximus XII Extreme – I225-V |
949.4 |
||||
|
ROG Maximus XII Extreme – Aquantia 10G |
947.4 |
||||
|
EVGA Z490 FTW WIFI - Intel i219V |
941.6 |
||||
|
Average Network Speed – WiFi 6 - Mbits/Sec |
|||||
|
MSI MPG Z490 Gaming Carbon WiFi – Intel AX201 |
616.5 |
||||
|
Z490 Aorus Master – Intel AX201 |
811.7 |
||||
|
ROG Maximus XII Extreme – Intel AX201 |
614.6 |
||||
|
EVGA Z490 FTW WIFI – Intel AX201 |
794.7 |
||||
|
Average Network Speed – wired on 10G Network - Mbits/Sec |
|||||
|
ROG Maximus XII Extreme – Intel AX201 |
2375 |
||||
|
ROG Maximus XII Extreme – Aquantia 10G |
9488 |
||||
|
EVGA Z490 FTW WIFI - Intel i219V |
943.7 |
||||
|
VRM Temperatures |
On Heatsink |
On VRM |
|||
|
MSI MPG Z490 Gaming Carbon WiFi |
131.1F |
159.7F |
|||
|
Z490 Aorus Master |
139.6F |
161.1F |
|||
|
ROG Maximus XII Extreme |
109.9F |
113.7F |
|||
|
EVGA Z490 FTW WIFI |
151.4F |
202.9F |
|||
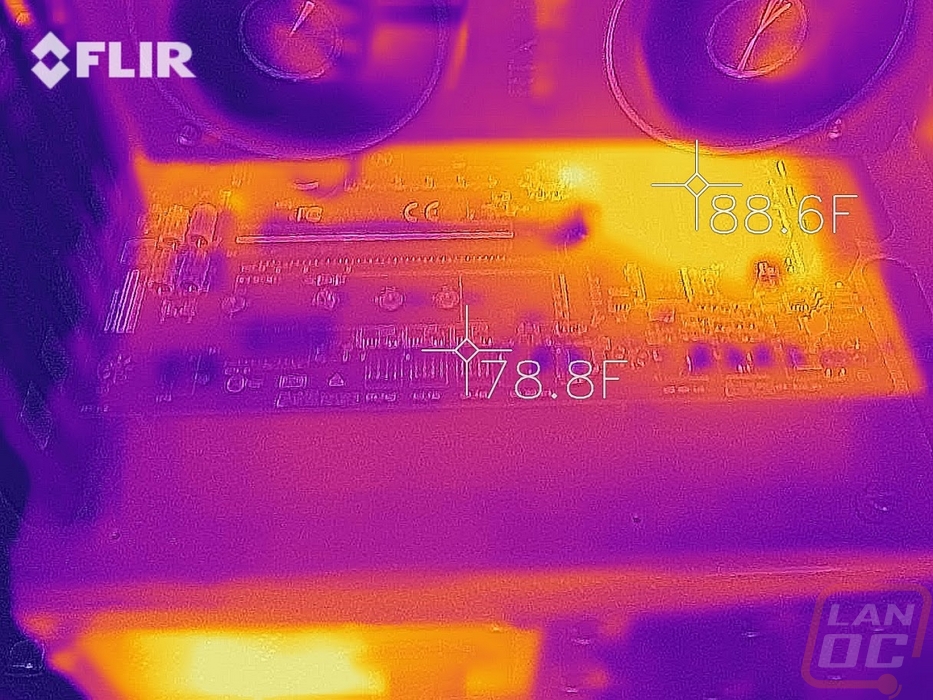
I also took a look a look at the VRM’s when testing. For this I used the AIDA64 FPU stress test to heat things up for 30 minutes then I took our Flir images. What I was looking for here was to see how well the cooling was working. Which you can see in the pictures that the cooling was 50 degrees cooler than right at the PCB. This was a lot warmer than the other Z490 boards in general which I think is partially because the VRM heatsinks were designed to have more airflow at the CPU socket but we are using an AIO cooler.
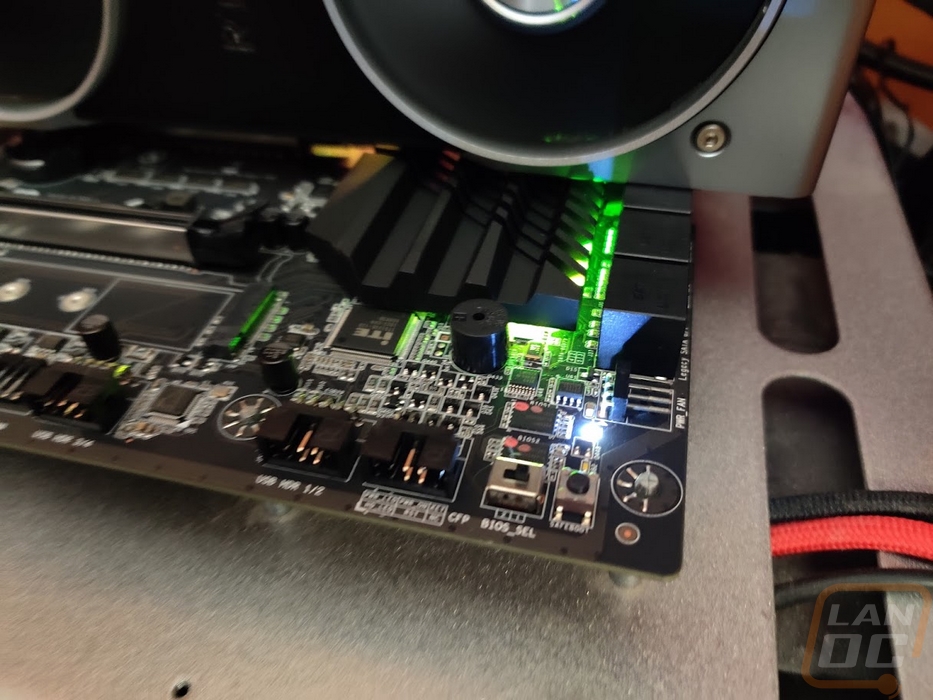
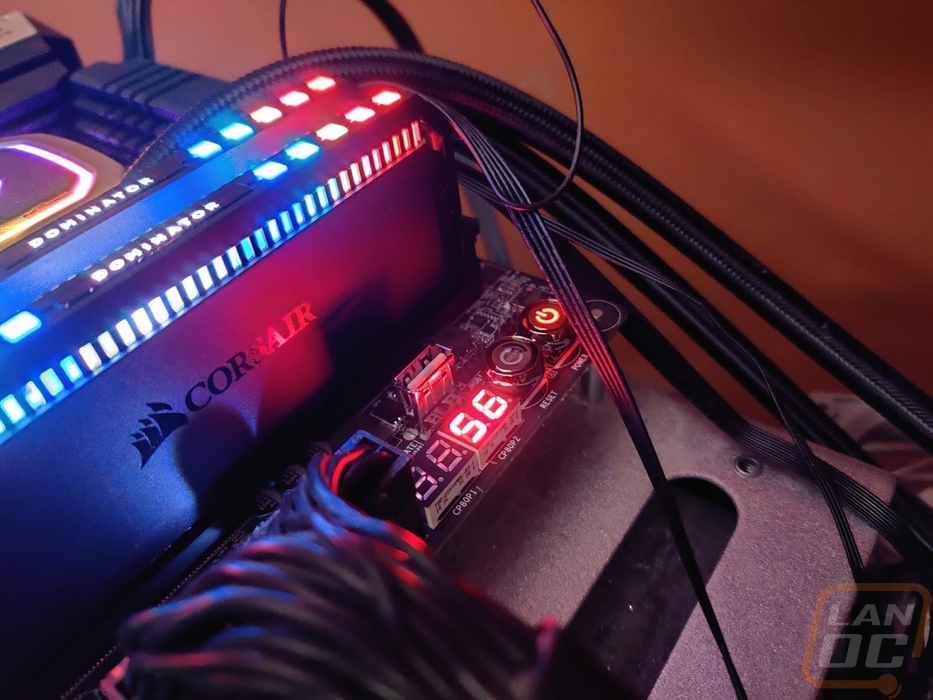
I also always take a look at board lighting. Normally this wouldn’t even exist with other EVGA boards but the Z490 FTW shocking does have some RGB lighting. They included a glow around the chipset heatsink. I also included a picture of the power button and the dual diagnostic LED readouts as well up in the top right corner. EVGA’s lighting is still significantly less than any other comparable board. I’m really surprised that they would go against their normal all blacked out look only for just a touch of lighting.
Overall and Final Verdict
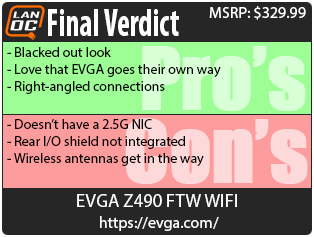
It feels like it has been a while since I took a look at an EVGA motherboard so going in I was excited to see what they have going on with the Z490 FTW. One big thing hasn’t changed. EVGA loves their blacked-out styling, the entire board is black except for the metal shield over top of the rear I/O that has the EVGA branding and the Z490 FTW model name on it. This simple approach is something EVGA does well and as a reviewer with all of the boards that I see over time they all start to blend together because features, styling, and ideas all get picked up and shared. But EVGA, like the Fleetwood Mac song implies, goes their own way. This looks nothing like any of the other Z490 boards and EVGA has a completely different focus. Even with the onboard sound, they didn’t go with the standard Nichicon gold capacitors. Beyond that, every single connection on the board around the outside edge is right-angled for easier wiring with the exception of the 24 and 8 pin power connection. EVGA including RGB lighting was a little weird, at least for them. I personally would prefer it to be behind the rear I/O shield than around the chipset. But if you are going with an EVGA board there is a good chance you prefer no lighting anyhow.
Now with EVGA going their own way, there were a few things I didn’t like. The choice to go with a 1G wired NIC when all of the other Z490 boards are using the 2.5G as a minimum. I know switches are still expensive, but getting it out into the market more should help push 2.5G and 10G integration faster. Not integrating the rear I/O shield is a small detail that is also available on other Z490 boards in this price range that helps make the install easier. I also think the wireless antennas that attach right to the rear I/O are a little weird because they get in each other's way and the way of other connections.
For pricing, the Z490 FTW has an MSRP of $329.99 and that seems a little expensive when you aren’t even getting a 2.5G NIC. EVGA does at least include thick metal for the I/O cover and large VRM heatsinks. But this is the best direction to go if you don’t like the flashy features that other upper mid-range Z490 boards have.
Live Pricing: HERE


