
My office space has been evolving for a few years now, going back to when I first upgraded my desk to a solid wood desktop and cleaned everything up with new audio hardware, monitors, and a monitor stand. Recently I also upgraded my photo area and added a proper workbench as well. Both of those are set to a standing height to get me on my feet more during the day. With testing and writing though I still spend far too much time sitting each day and over the past few years of me doing all of this full time it has played a big role in my health. To start working on that, a while back, I reached out to Autonomous about upgrading my desk to a SmartDesk 2 Business Edition. I’ve been living with it for a while now and I want to sit down, or in this case, stand and talk a little about how the whole process has worked so far.
Product Name: Autonomous DIY SmartDesk Kit Business Edition
Review Sample Provided by: Autonomous
Written by: Wes
Pictures by: Wes
Amazon Affiliate Link: HERE
Before getting into everything I want to talk a little about the decision to go with this specific model. Autonomous offers a wide variety of desk options. There are two base frame designs, one is the normal model and the second is the business edition that I went with. I went with the upgraded model simply because with a 4 monitor stand on my desk along with speakers and everything else I needed the additional weight capacity. The base model has a motor just in one leg and this one has them in both legs. Beyond that, I decided to stick with my original wood table top. They offer a lot of different to options and they aren’t much more than the base itself but what I have is almost an inch and a half thick and is solid wood, plus it goes better with the rest of the office. They also have different base colors available, I wanted gray to match most of the office but they were out of stock, black ended up being my backup color because it does match the base on my wife's desk.
|
Specifications |
||
|
Frame Option |
Home Edition, 29" - 47" Single Motor System |
Business Edition, 24" - 51" Dual Motor System |
|
Electric Sit-to-Stand |
Yes |
Yes |
|
Motor System |
Single Motor |
Dual Motors |
|
Motor Speed |
1 inch / second |
2.3 inches / second |
|
Smart Keypad |
Yes |
Yes |
|
Height Adjustable Range |
29” - 47” |
24” - 51” |
|
Frame Extendable Width |
42” - 72” |
42” - 72” |
|
Max. Capacity |
220 lbs |
300 lbs |
|
Material |
Industrial-grade Steel |
Industrial-grade Steel |
|
Color Options |
Black, White, Grey |
Black, White, Grey |
|
Warranty |
1-year warranty |
5-year warranty |
Packaging and Assembly
So I don’t know if LanOC or Autonomous did something wrong to the shipping company in the past but they really put the packaging to the test on our kit. I was really worried that it was going to be damaged but after opening everything up I didn’t find any damage. The control panel was a little scuffed up and that was about it. The desk base comes in a normal brown box with the A2 SmartDesk branding on the side along with the frame color. There are a couple straps to keep everything together. The box was ripped open in a few areas but nothing fell out and when I opened it up there was thick foam still around each component. Better luck next time shipping company (I can’t remember off hand if it was FedEx or UPS now lol. The overall package weight is 67 pounds so plan on a partner to help bring it in when your desk comes in if possible, especially if you get a table top as well.


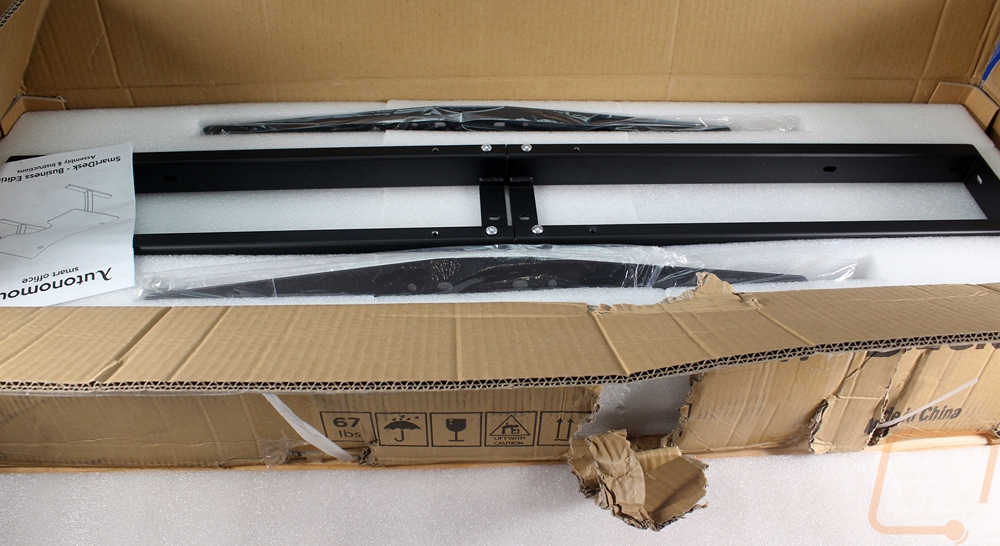
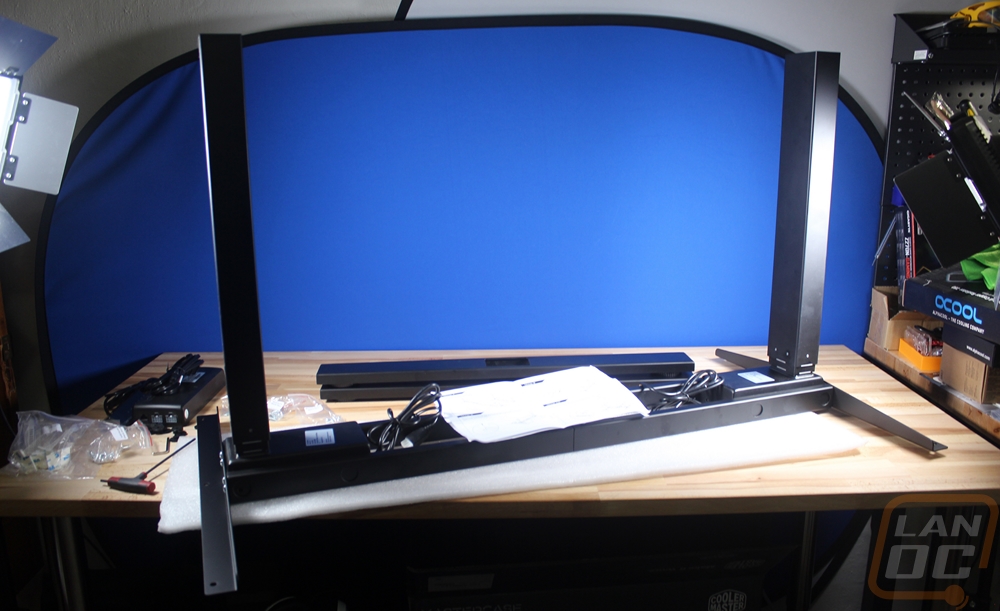
So to get started on everything, before I could really check out the desk I did need to put it all together. To do that I pulled all of the components out of the box, making sure everything was in good shape and that I had everything. The instruction manual was right up on top when I opened up the box and it had a parts list inside. For main components, there are two powered legs, two feet that attach to the legs, a long frame and two brackets that go onto that frame and attach to the desk.
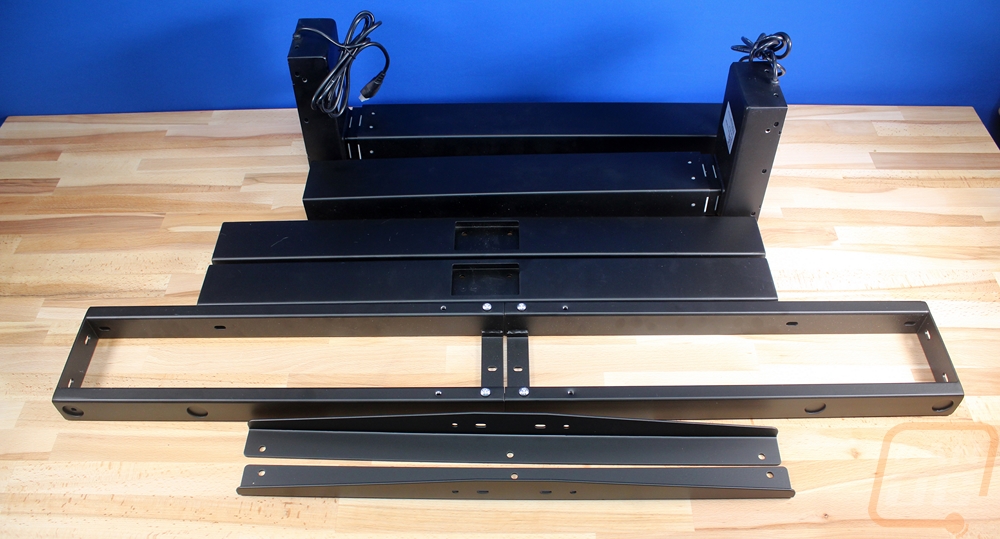
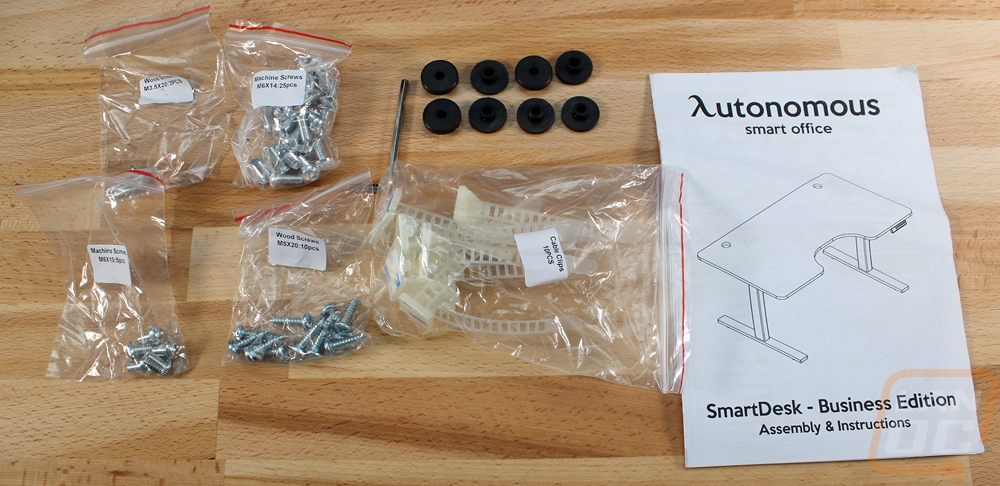
Along with the instruction manual, I love that each screw type was in its own bag and labeled, sometimes the hardest part about building something is figuring out which screw is figuring out which screw is which, this avoids that all together. On top of the screws, you get a bag full of reusable wire ties, rubber bumpers, and an Allan wrench. The instructions btw are really easy to read, they have a diagram at the start along with the part listing and then everything is broken down into simple steps with multiple diagrams showing how it goes together.
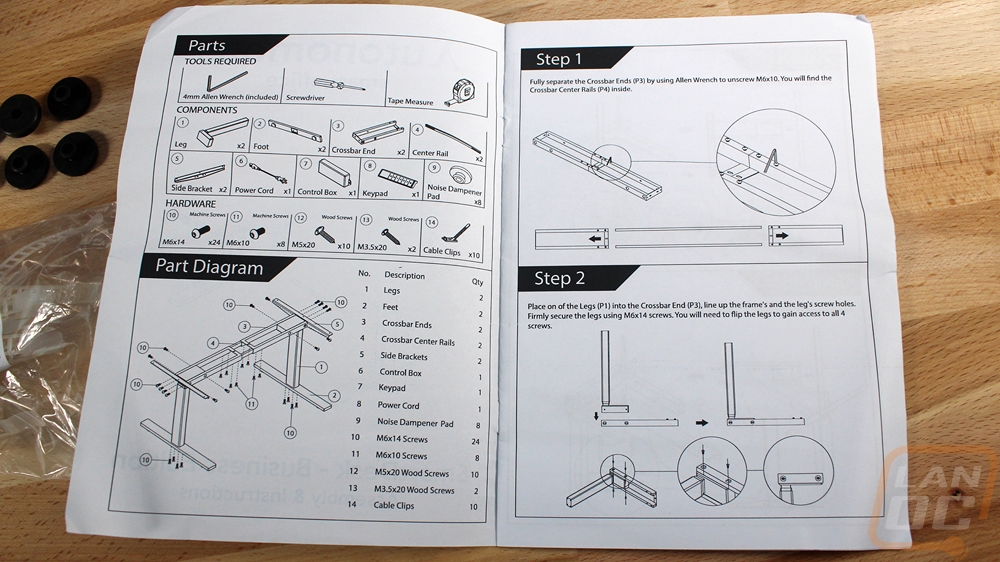
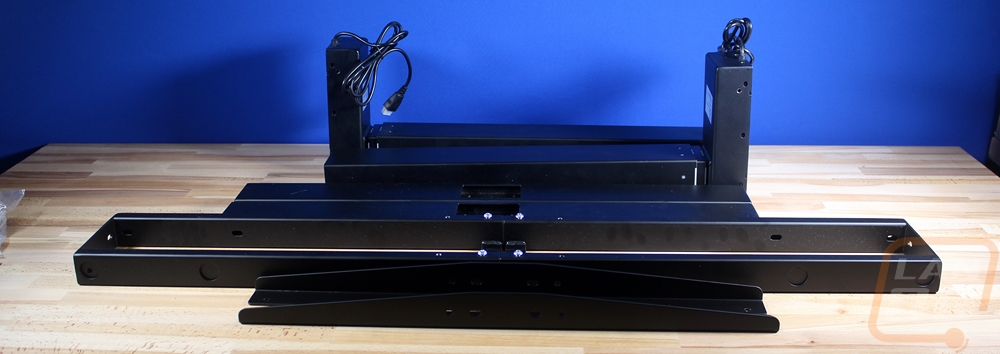
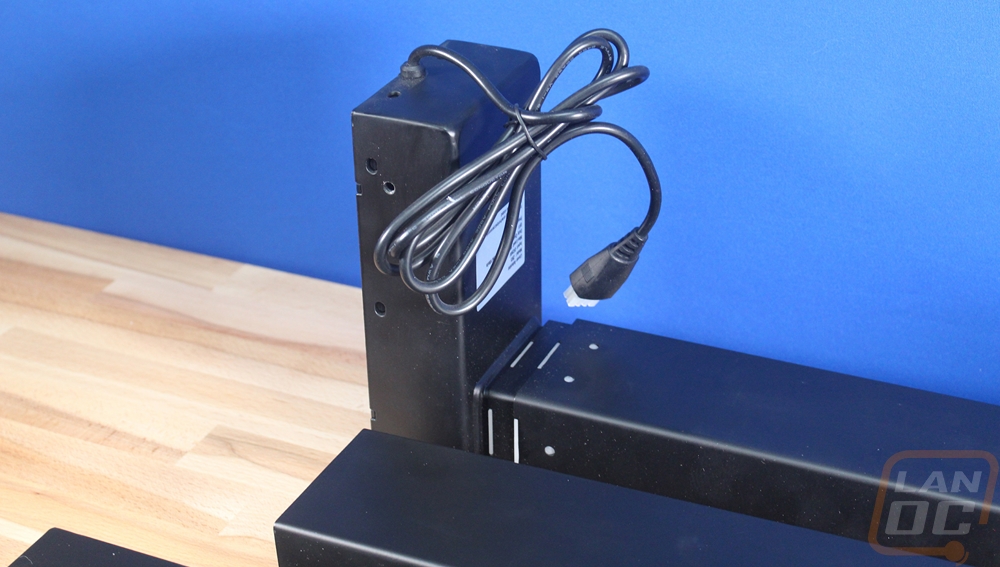
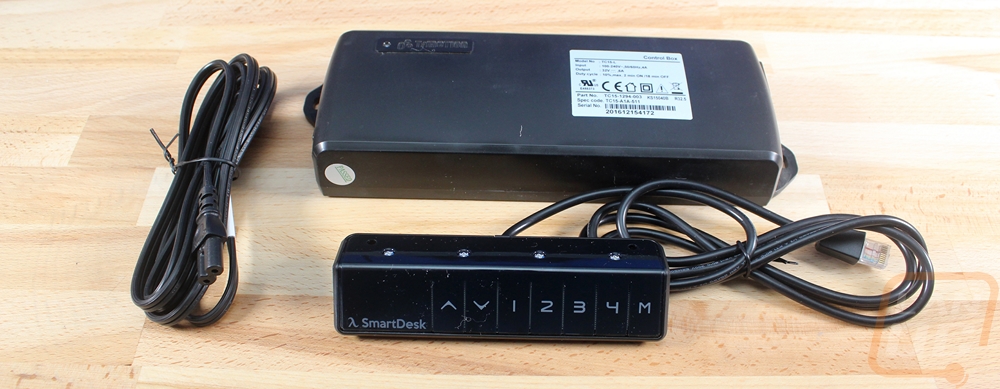
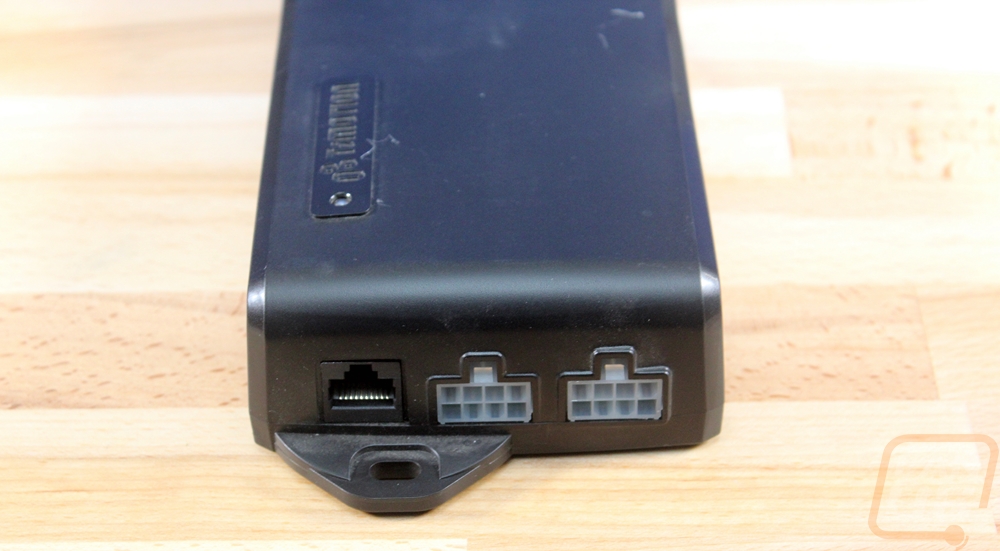
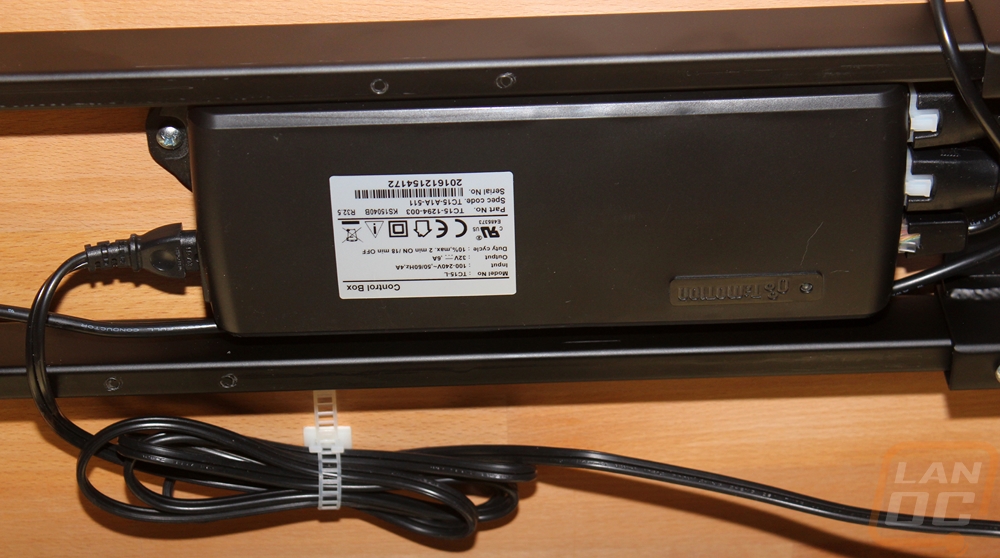
You can kind of get a feel for how everything works just looking at the last few parts. The legs have three layers to them and then at the top in the L-shaped part of the leg is the motor assembly. This has a cord coming out to hook to the controller. The controller box was a lot bigger than I expected and it has a power plug on one end and on the other you have the connections for both legs and the front control panel. The control panel connects via something close to an ethernet plug and the two motors use a connection that is very close to a PCI power plug in a PC.
Getting the base together was extremely simple. I put down foam across our table to keep from damaging it and started by installing the two legs into the frame. You have to pull the frame apart a little to be able to use the holes on the sides to access the four bolts per leg. I grabbed a T-shaped Allan wrench to speed things up over the included L-shaped one and went to town on all eight bolts. From there you have the table brackets that go on both ends of the frame. They also use an Allen wrench and there are four bolts per side. From here they suggest mounting the base to your table top but I skipped that step and I will explain why later. So that just left installing the two feet to the already installed legs. These take four more bolts each and the T-handle made quick work of them as well.
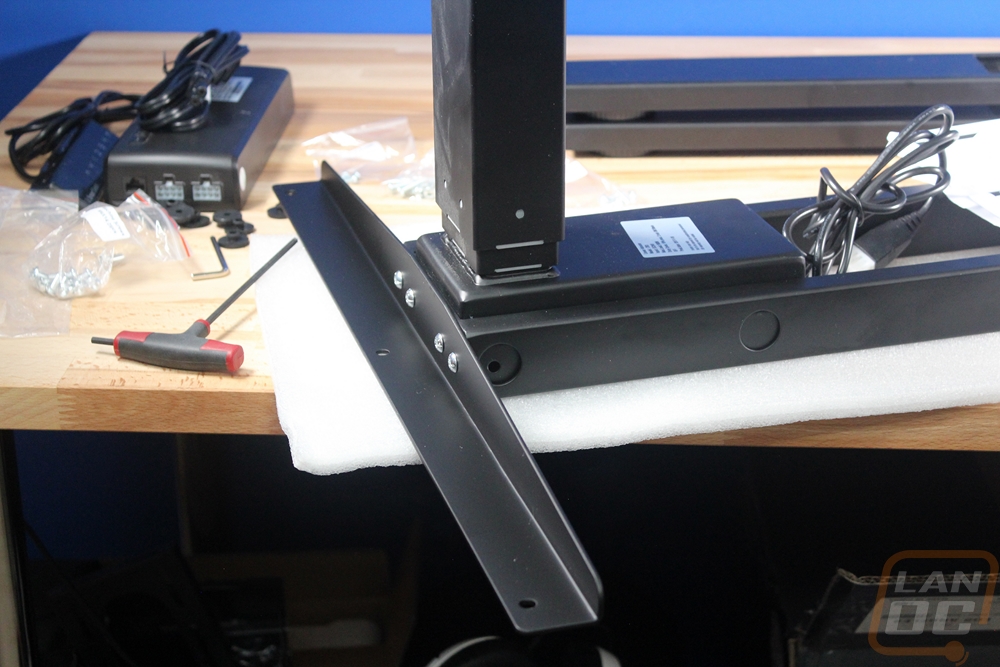
So like I said I did things a little differently with my install and I wouldn’t recommend this way. You should install the desktop by flipping it over and mounting the base using the rubber dampers and screws. With my setup though I have my entire desk wired up and with the huge monitor stand installed I didn’t want to pull it all apart. What I did was build the base, slide it under my already built desk, then power it up and raised it up. Before doing this I extended the width of the base to match my desktop width and I spent a lot of time making sure I had it perfectly lined up. Once I had it in the right spot I installed the base and then removed my old legs. Basically, I hot swapped the base in.
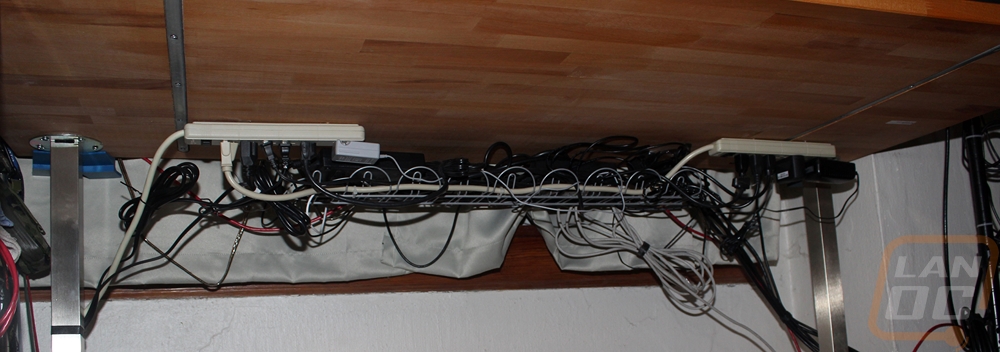
With the base installed, I then set out to get everything wired up. The included wire ties made this really easy. I installed the control box in the middle of the frame to keep the wiring simple. This kept the wires coming from both legs in the middle. So I just had to run the power over to the power already installed on my desk and of course the wire for the front buttons.
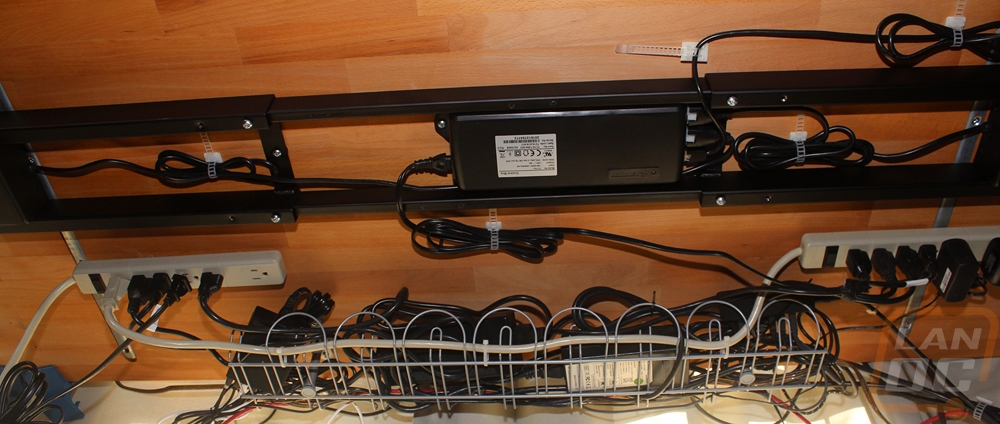
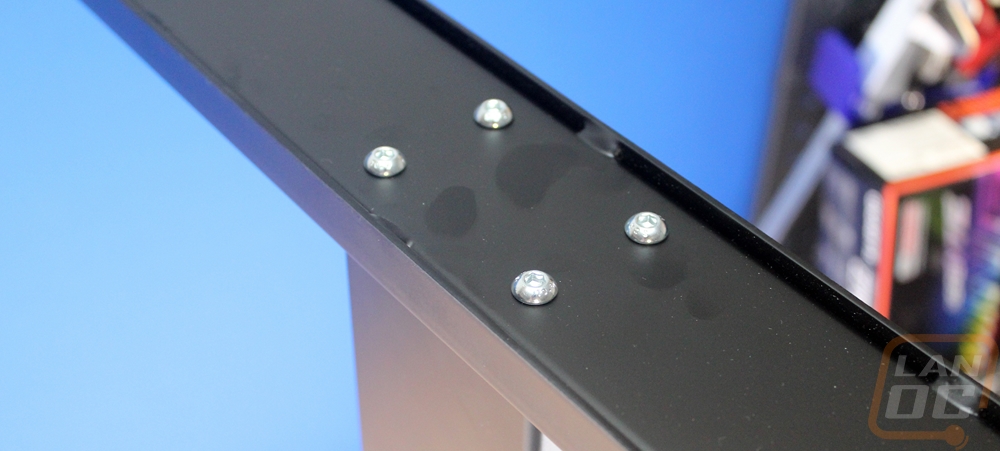
Speaking of the front control panel, you have to install this one as well with two screws. For a DIY setup like mine, you do need to predrill all of the screw holes for the base and for the controller. I could have done a little better job here, I lined everything up and drilled it but I was an 1/8 of an inch off left to right making one side stick out a little. More of an oval shape to the mounting holes would be nice to adjust out any small mistakes like this. All in all the install wasn’t too difficult.
Photos and Performance
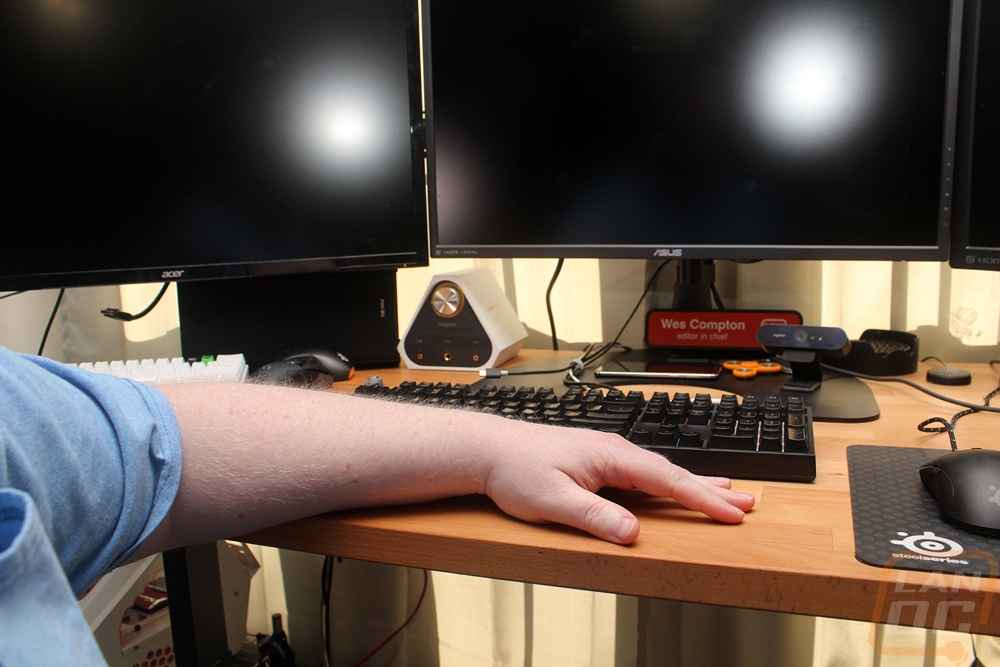
So before I show the upgraded desk, I did want to give a few comparison shots of what my desk looked like prior to adding the new Autonomous SmartDesk base to it. The setup is a build your own desk from Ikea with the top being their Gerton table top and then four square stainless steel legs. When I originally built the desk I also added two power strips and a hanging wire management tray under the desk as well. Now over time, the wires have become a bit of a mess, but the hanger has done a good job of keeping everything in one place and out of the way from hanging down and getting kicked. The tray also allowed me to quickly transition to the sit/stand base because most people don’t consider their wiring when looking to move to this configuration. You need to have a setup that has the leeway to move with the desk. In my case, I have a powered hub under my desk just for charging phones and other devices and a second USB hub for everything on my desk that is USB to keep it to just one USB cable going to my PC. So going from my desk to my PC are four display cables and the USB, then, of course, there is a power cable going from the desk to the wall as well.
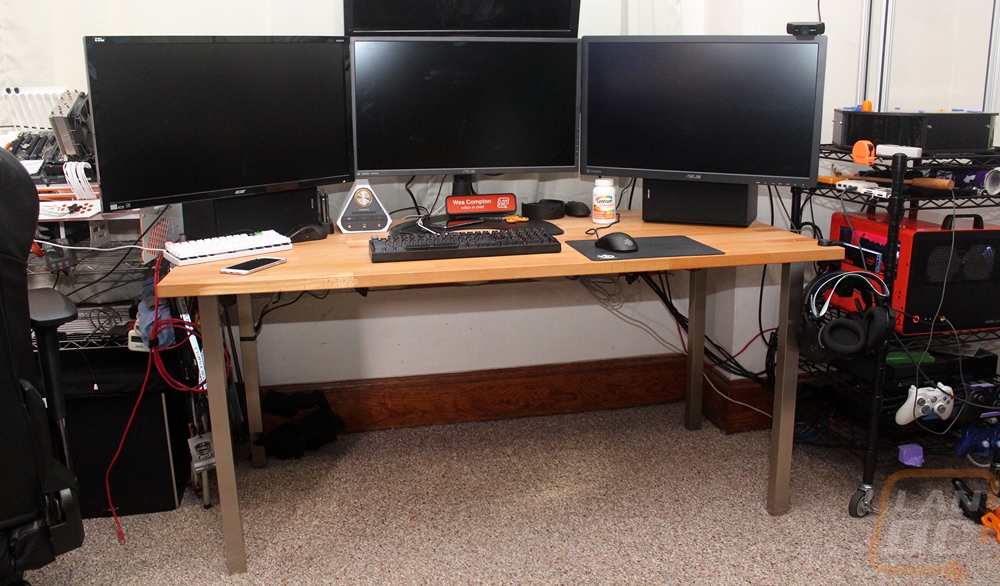
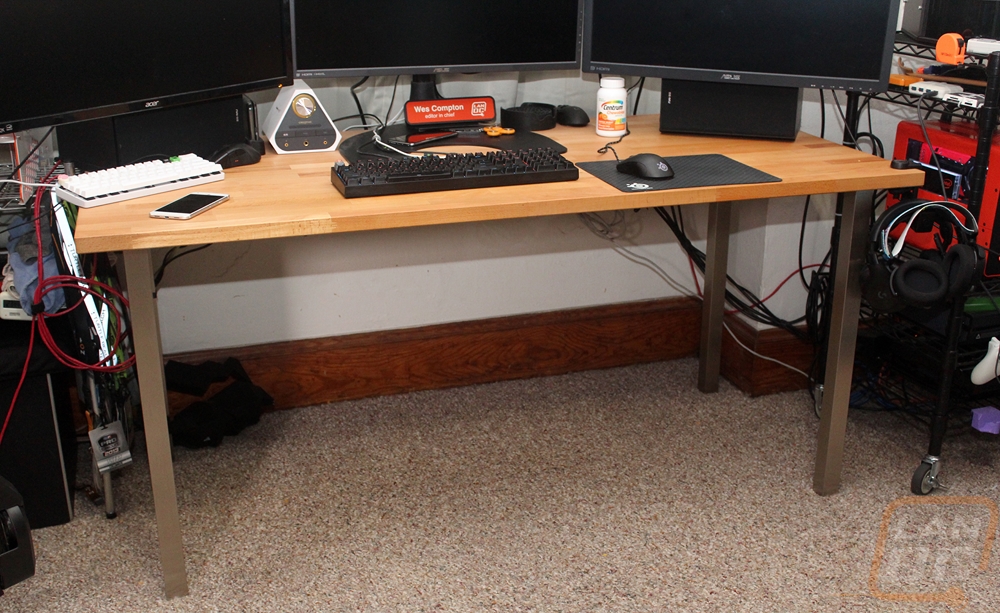
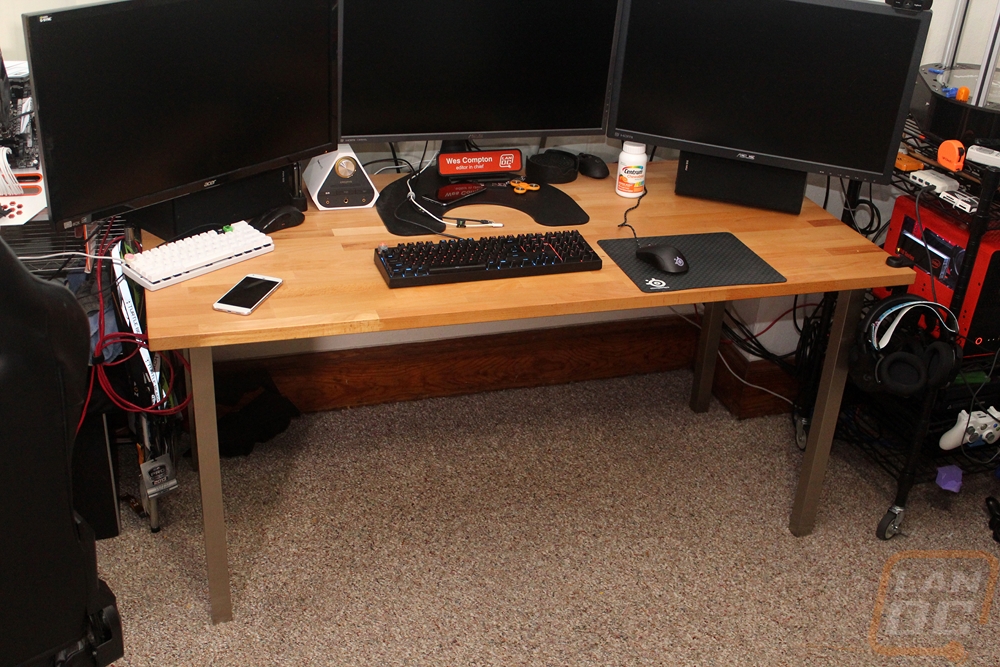
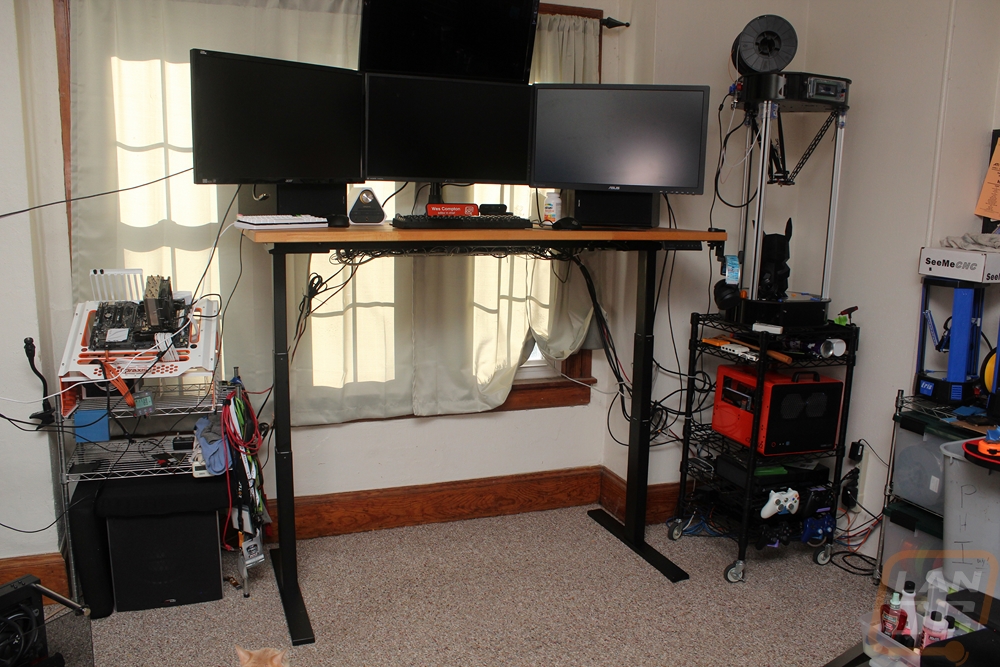
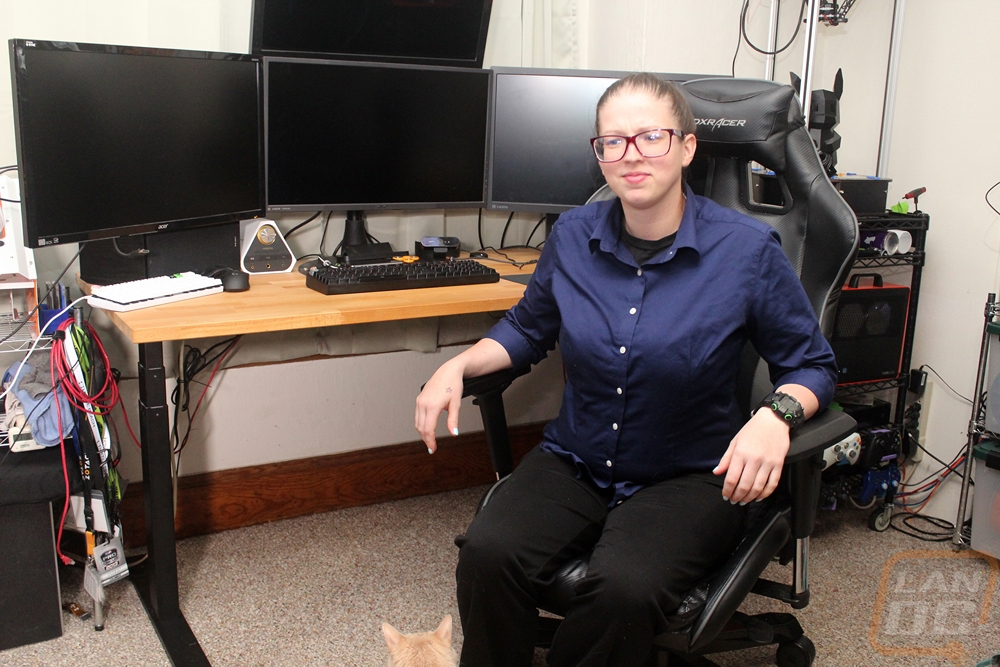
The new base once installed looks amazing. The black ended up being a good choice when though gray was my primary color and it went well in the office and with the light colors solid wood table top. With the base just using two legs where my desk previously had four, it actually opened up room for me as well when moving my legs around or turning my chair. The wiring is still in need of more cleaning up so please don’t judge me too much but it was at least functional right out of the hole.
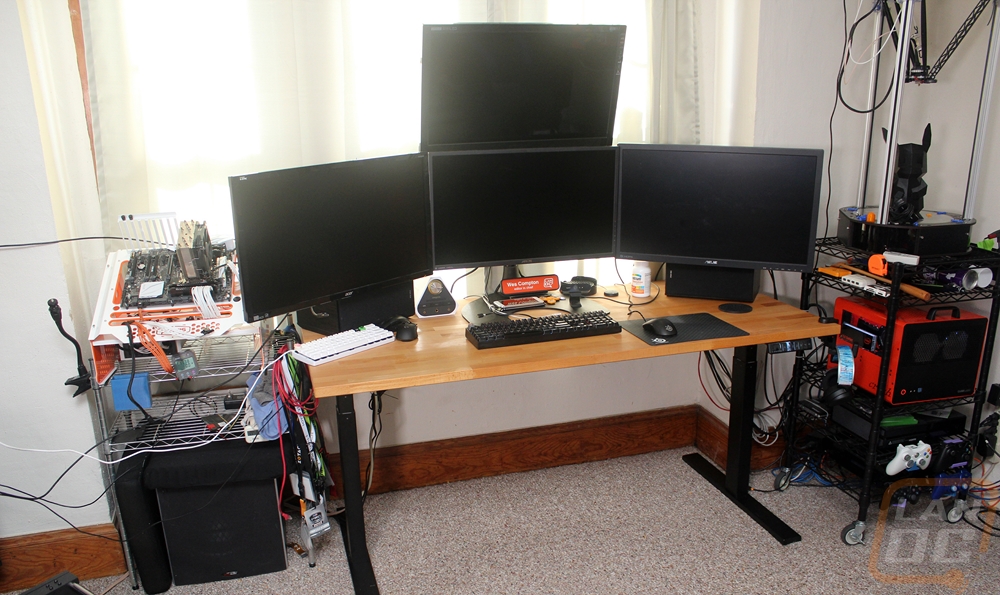

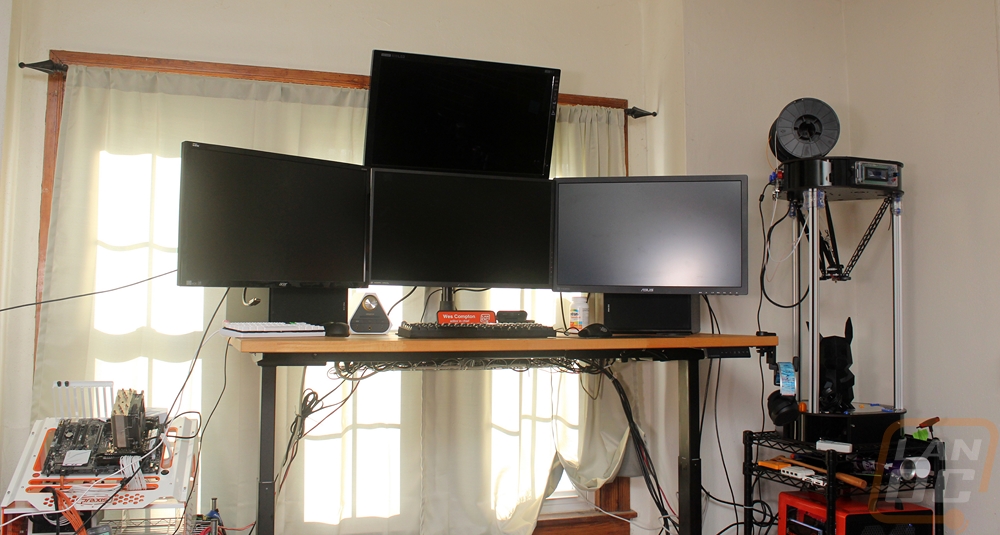
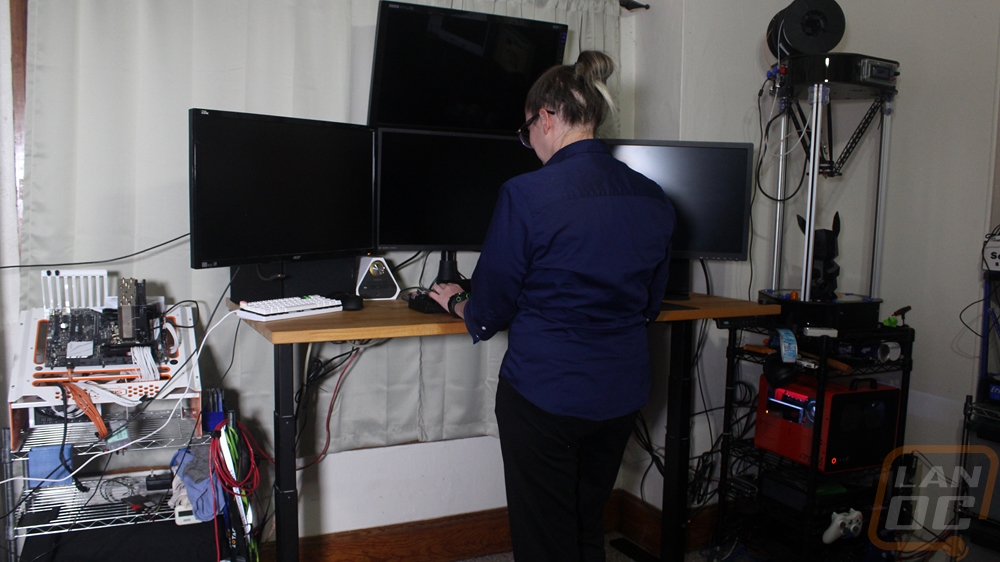
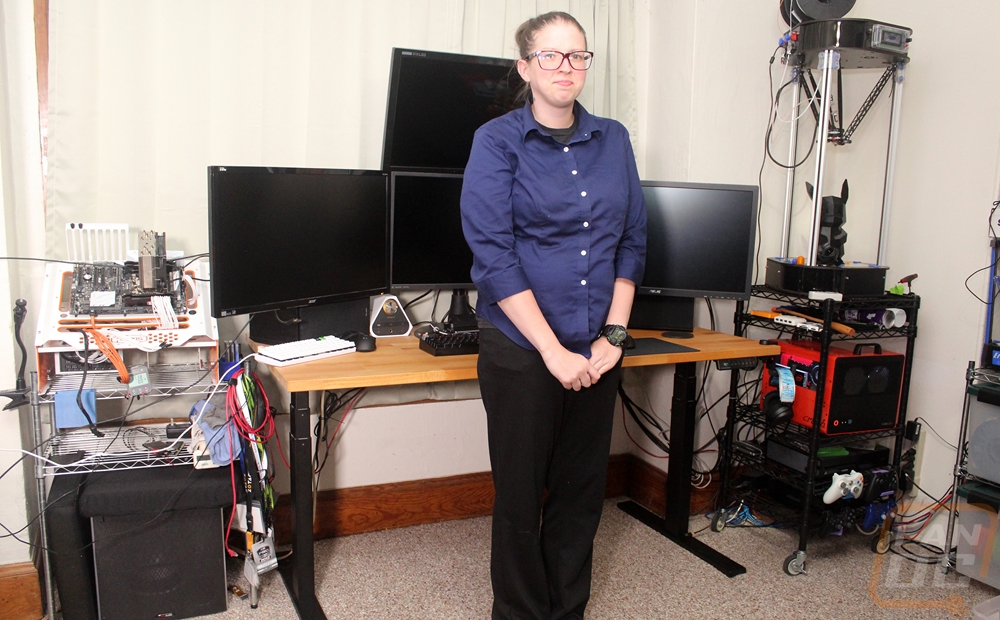
I was able to set my sitting height a little higher than my desk was originally to be more comfortable for me but what really impressed me was the overall range. The business edition that I went with has a lower base height and a higher total height than the Home Edition with it going down to 24 inches and up to 51. At 24 inches it Is actually functional to sit on the floor or for a small kid to use the table and at its full height I was starting to get worried about my top monitor getting up to the ceiling. Look at the photos below, it actually started to make my SeeMeCNC Rostock MAX v3 look short when the spools on top are hard for me to reach sometimes.
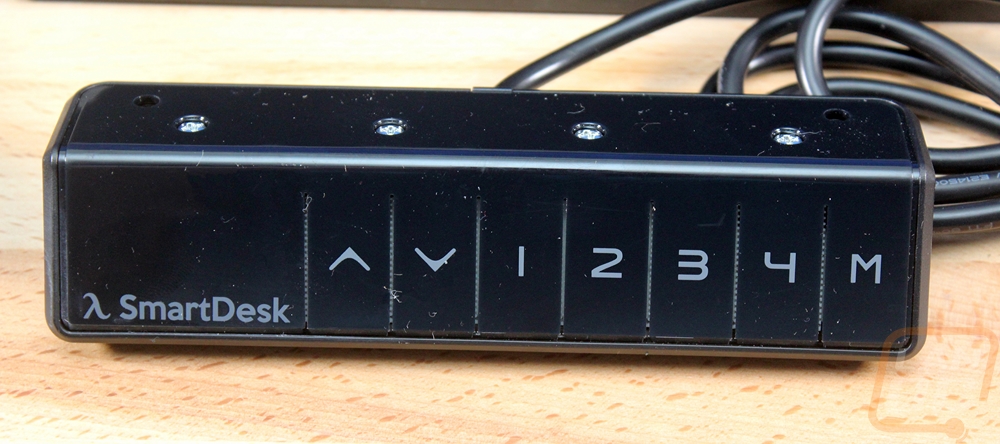
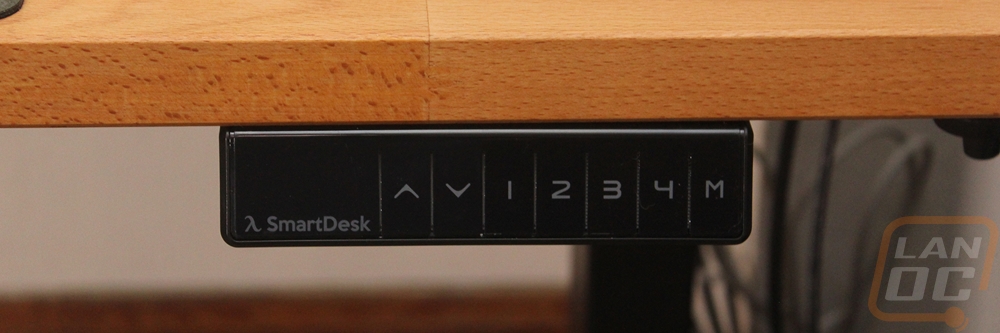
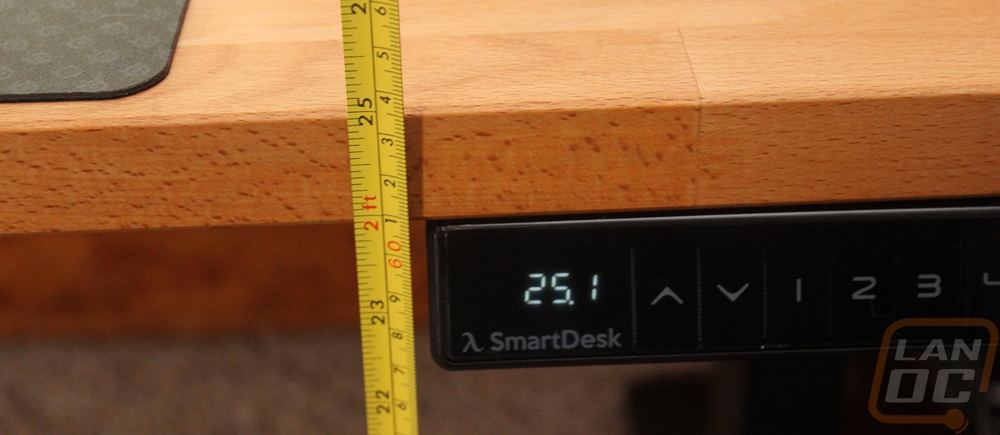
The controller was simple to use right from the start. You have a height readout over on the left, up and down buttons for manual control, four presets, then a programming button. You set the height you want, hold M for a few seconds then pick the preset you want that height to be programmed. My wife has her own desk and rarely needs to use mine so I programmed both sitting and standing heights for me as 2 and 3 and then just to mess around I programmed 1 to the lowest point and 4 to the highest. I will most likely find other uses for those later but they are mostly so a desk can be used by two or more people. You could have sit and stand heights for two people or one sit height for everyone and three stand heights if the desk gets used by more people.
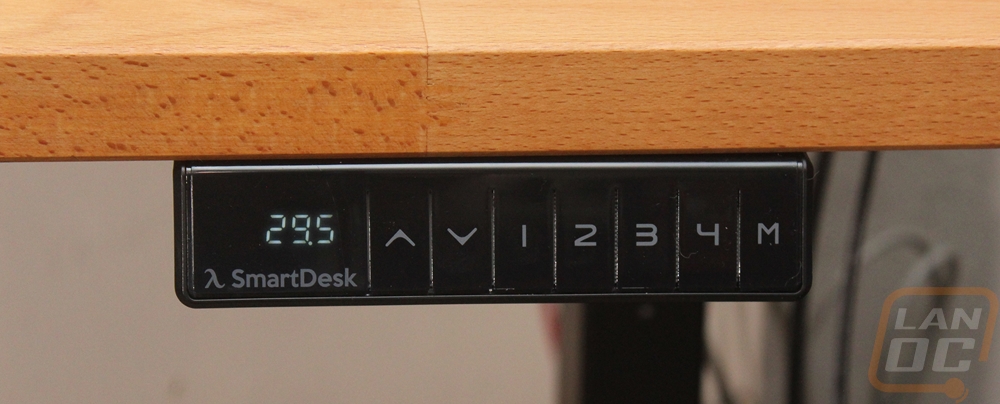
With the digital readout, I was just expecting some random numbers or a 0 – 100% height but I was surprised that they went with a reach height measurement. I busted out the measuring tape to see how close it was and I was surprised to find it so close with the difference easily counted for by the adjustment in the feet or the carpet this desk was installed on.

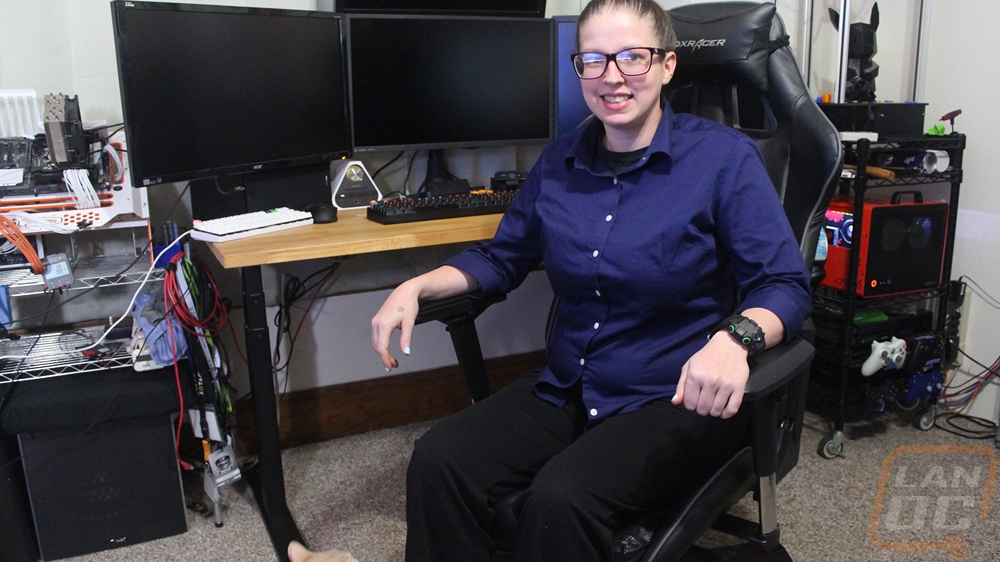
So how did it all perform? Well obviously this is my main desk that I am at almost day and night so I spent a lot of time with the configuration prior to writing this. After initially setting everything up I noted that the new desk was noticeably more solid than my previous setup. There is still a small amount of wiggle, especially at full height but I wasn’t expecting it to be perfect. It is on padded carpet and with all of the monitors on the desk, there is a lot of weight. Even before getting into the standing portion of testing I did love that I could finally set the height perfectly for me when sitting.
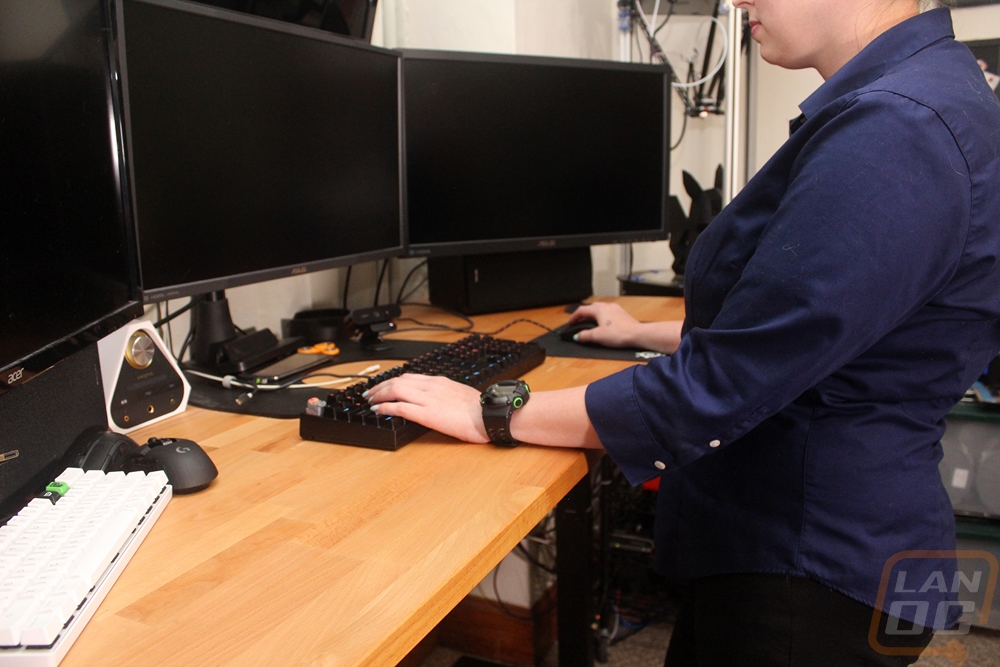
I also had my wife try it out, not giving her any instructions on how everything worked and she had it all figured out in no time at all. She looked better in the photos as well so most of our action shots are with her using the desk, though I did most of the testing.
For me when I started off I really wanted to toy with it moving it up and down often and for any reason at all. After a few weeks that calmed down and I started to get into more of a pattern. The truth is I want to spend more time standing but it has been a slow transition for someone who is used to sitting all day and night. What I did though was go to standing mode after coming back from a break or when working in other areas in the office. For example, when taking photos I would come back to my computer and start editing while standing. I did the same when doing light browsing, why sit down when I just need to look something up. Then from time to time, I could also swap to standing mode just to get me out of the chair and to get some blood pumping. In the past, I would just walk around the house, and I still do that, but this way I could also stand while continuing what I was working on.
On the other end of the spectrum, I did also find the lower heights useful as well. If watching a long video I could quickly drop the desk down and kick back with my feet up. Of course this would completely set off my wife and frankly, it is the exact opposite of what the desk should be bringing out, but it did work. The big range allowed my wife to walk up and set the desk to her height and when I had kids visiting I could even drop it down to a height that worked perfectly for them to game. The only issue I ran into there was with the control panel because it sticks out it can be bumped. One of the kids was pointing out something on the screen and bumped the control panel and raised us into standing mode. But that was the only time that ever happened, otherwise, the buttons were easy to use.
I was really concerned with how things would work when transitioning the desk between modes. Obviously, I planned out my cables ahead of time, knowing they would need to be able to reach to the standing height or drop down low. But how would things on my desk work, would they move around? Well, when moving there wasn’t any vibration or movement that caused things to move. The business edition does move at a faster speed than the home edition, 2.3 inches a second over 1 inch a second so the moves were quick. They were also surprisingly quiet, you can hear the motors but it wouldn’t disrupt work in a shared office or be any worse than someone typing. I did find the stops to be a little jarring though with the additional speed. It was enough to shake my monitors a little but not bang anything around. I did notice that the controller does slow down the move when you get close to the top and bottom, it would be really cool if it did the same when getting close to your presets. It seems like it could be a firmware update even given that the hardware is already capable of it. The only other issue I noticed in testing was that keeping the desk in one specific mode for a while did sometimes mean when you first move it again it would stick just a little bit. It would always come free but it was noticeable each time it happened.
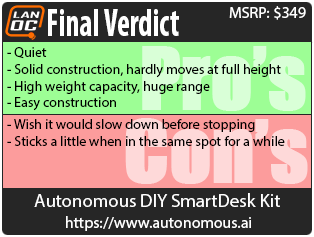
Overall and Final Verdict
Part of making changes in your lifestyle is making changes around you. For me, as someone who spends all day working at his desk and typically all night gaming, browsing the internet, or working a big problem in my own lifestyle is sitting day and night. So having the chance to check out the Autonomous DIY SmartDesk Kit Business Edition has been eye opening. For starters, I expected myself to be standing all of the time almost immediately but the truth is after years of sitting standing all day didn’t work as well. So I don’t get an immediate change in lifestyle but a sit/stand desk is a good tool to help. That is where Autonomous comes in, if I could stand all day I would but having the ability to quickly transition between sitting and standing was very helpful. I even swapped just now while in the middle of writing. I was able to set my desk to what I needed and not just work around my desk.
Now Autonomous has a few interesting things going. Their full desk options are a great way to go if you are starting fresh or don’t like your current setup. For me, I wanted to keep my desktop and just replace the base. While I didn’t follow the directions completely, the installation went smoothly. The first thing I noticed was the solid construction. It was actually more solid than the four steel legs I had previously, even when I have the desk at full height. The 300-pound weight capacity of the business edition helped hold my solid wood desktop and my four monitor setup along with everything else on my desk. While the range of the Home Edition would have been more than enough, the extra range of the Business Edition means the desk will work with the tallest of people all the way down to children. I was also expecting the dual motors to be louder than they were and the movement overall to be more jarring.
I do think they could improve how quickly the desk comes to a stop when using the programmed buttons, a little slowdown from the 2.3 inches a second of the Business Edition would keep my monitors from shaking a little when it reaches the desired height. I also found that if I kept the desk in on mode for a while there would be a little sticking when I moved it, this might be an issue with our specific kit but it is important to keep in mind.
What really surprised me was the pricing. For the Home Edition DIY kit, you are looking at $249 and $349 for the Business Edition that I took a look at today. Adding a table top adds $50 to the cost and Autonomous has a whole selection of top colors, sizes, and shapes. So even with the higher end kit, you aren’t looking at any more than the Arozzi Arena Desk that I previously took a look at. Pairing the solid wood table top that I went with and the base would be a little at $439. That’s still less than the $529 price tag of Ikea's sit stand desk and you would have a better construction. At those prices, I wouldn’t consider this cheap, but for anyone who spends the amount of time at a desk that I do, it isn’t an unreasonable amount to spend. That’s ignoring how much better it is for your health to mix in standing while you work.


Live Pricing: HERE


