Packaging and Assembly
So I don’t know if LanOC or Autonomous did something wrong to the shipping company in the past but they really put the packaging to the test on our kit. I was really worried that it was going to be damaged but after opening everything up I didn’t find any damage. The control panel was a little scuffed up and that was about it. The desk base comes in a normal brown box with the A2 SmartDesk branding on the side along with the frame color. There are a couple straps to keep everything together. The box was ripped open in a few areas but nothing fell out and when I opened it up there was thick foam still around each component. Better luck next time shipping company (I can’t remember off hand if it was FedEx or UPS now lol. The overall package weight is 67 pounds so plan on a partner to help bring it in when your desk comes in if possible, especially if you get a table top as well.


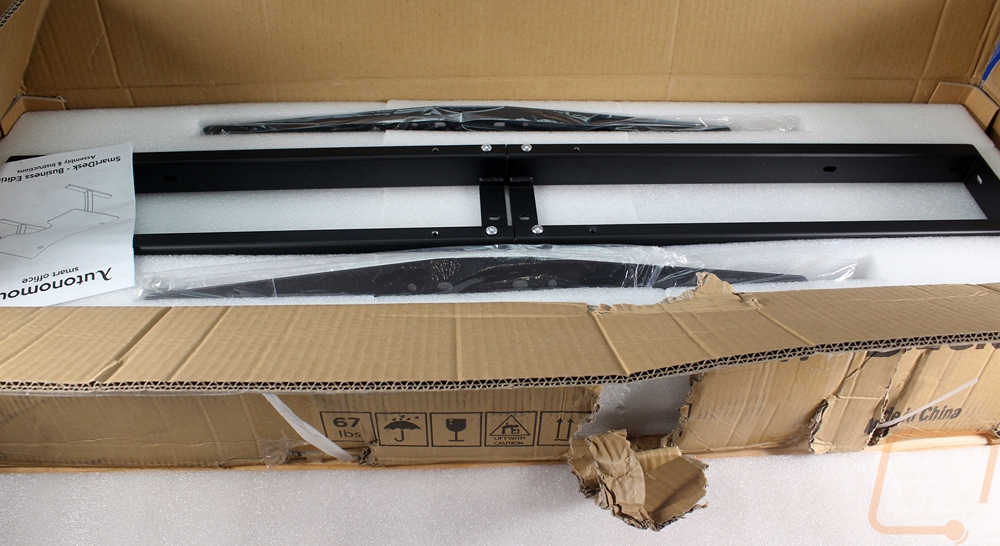
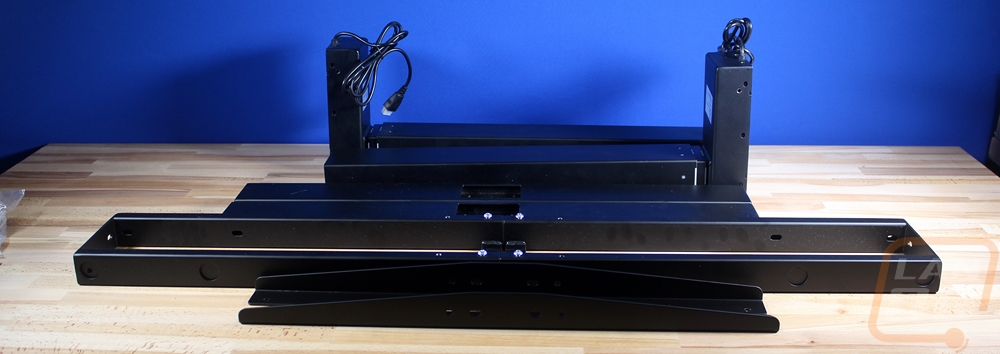
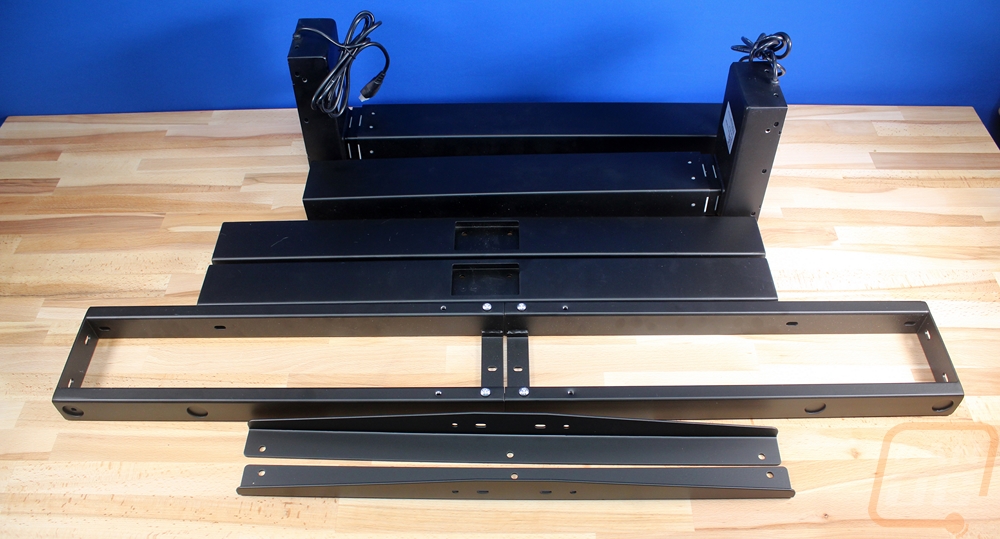
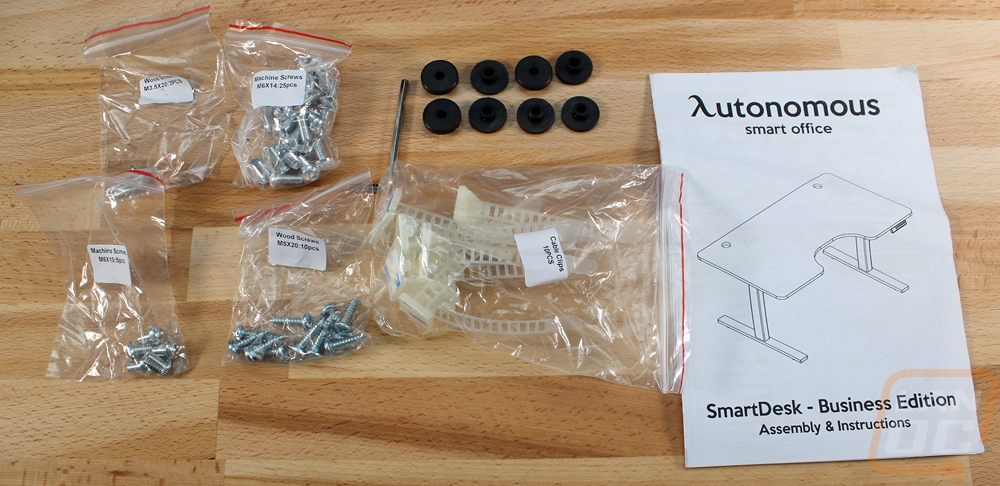
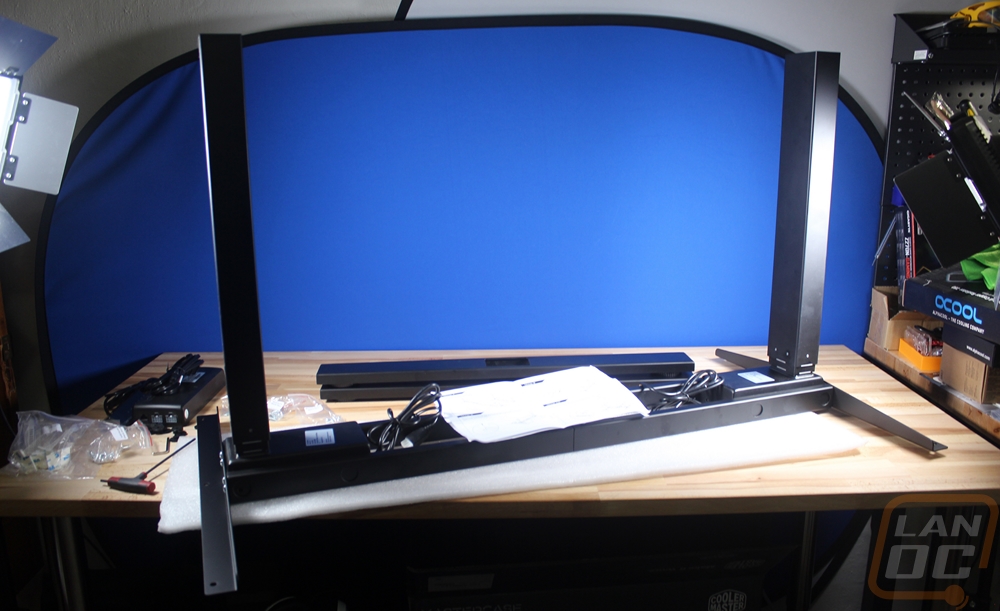
So to get started on everything, before I could really check out the desk I did need to put it all together. To do that I pulled all of the components out of the box, making sure everything was in good shape and that I had everything. The instruction manual was right up on top when I opened up the box and it had a parts list inside. For main components, there are two powered legs, two feet that attach to the legs, a long frame and two brackets that go onto that frame and attach to the desk.
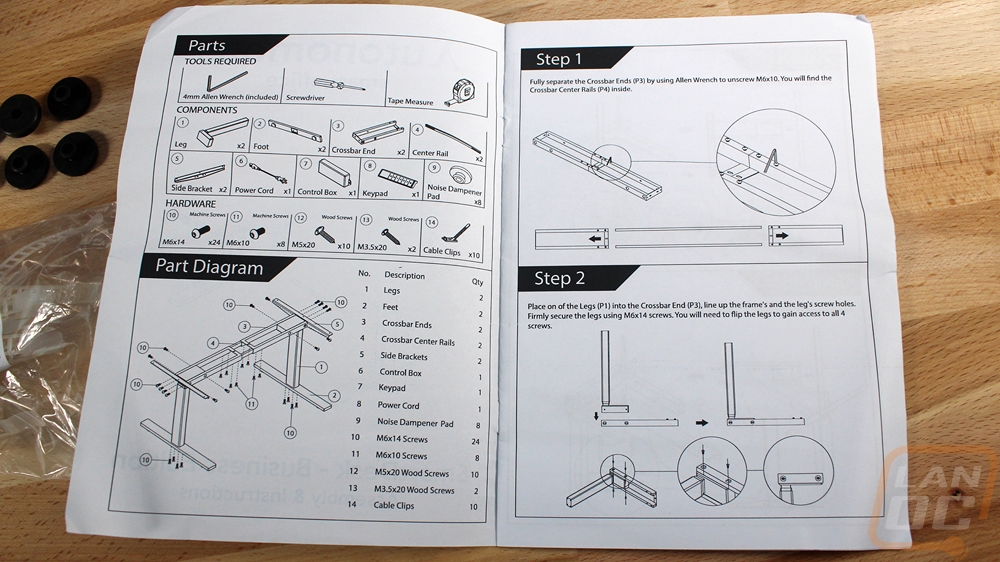
Along with the instruction manual, I love that each screw type was in its own bag and labeled, sometimes the hardest part about building something is figuring out which screw is figuring out which screw is which, this avoids that all together. On top of the screws, you get a bag full of reusable wire ties, rubber bumpers, and an Allan wrench. The instructions btw are really easy to read, they have a diagram at the start along with the part listing and then everything is broken down into simple steps with multiple diagrams showing how it goes together.
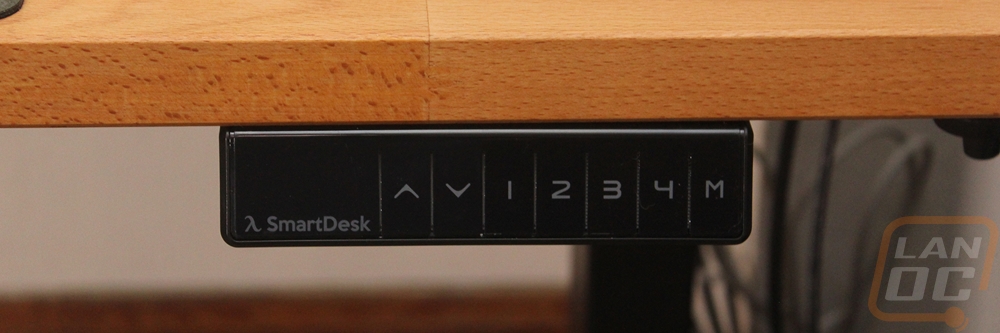
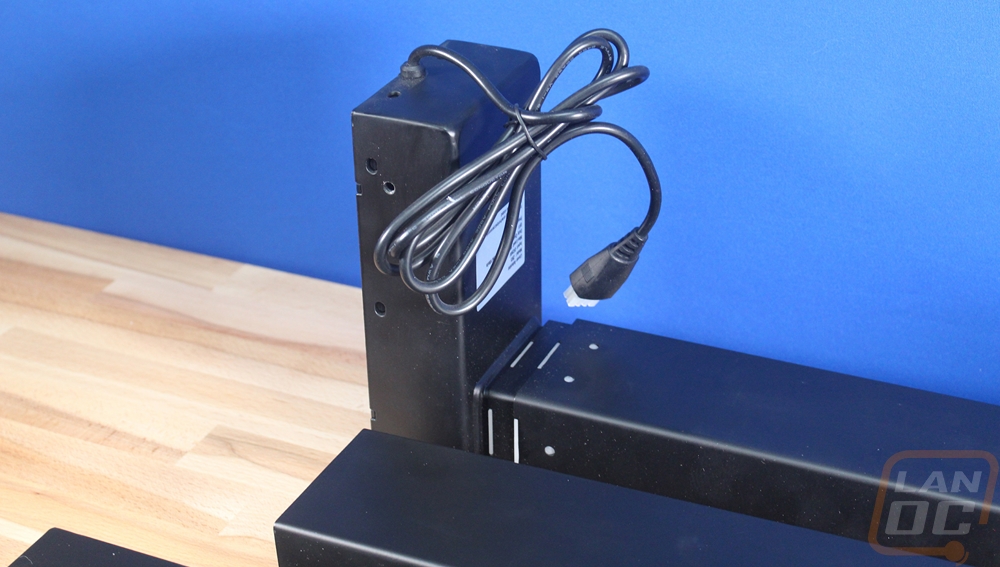
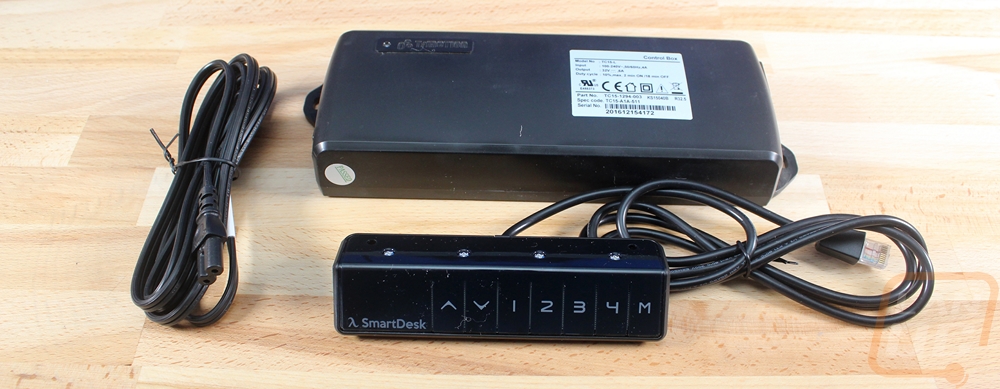
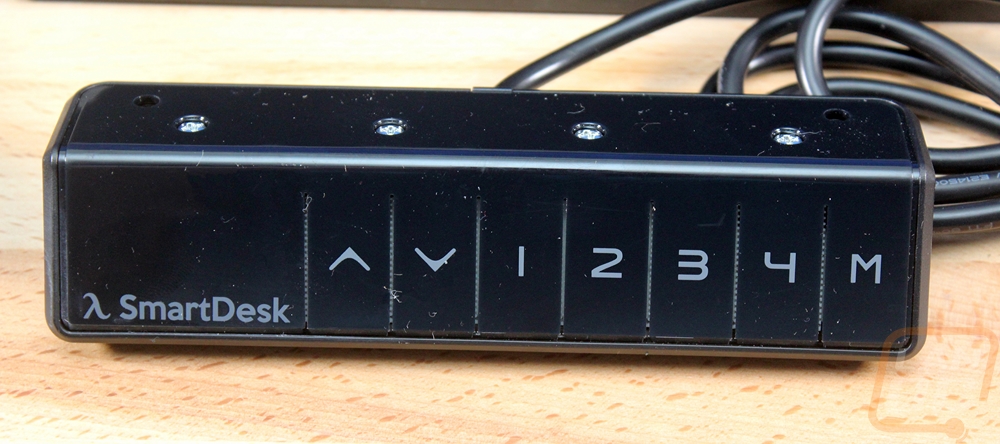
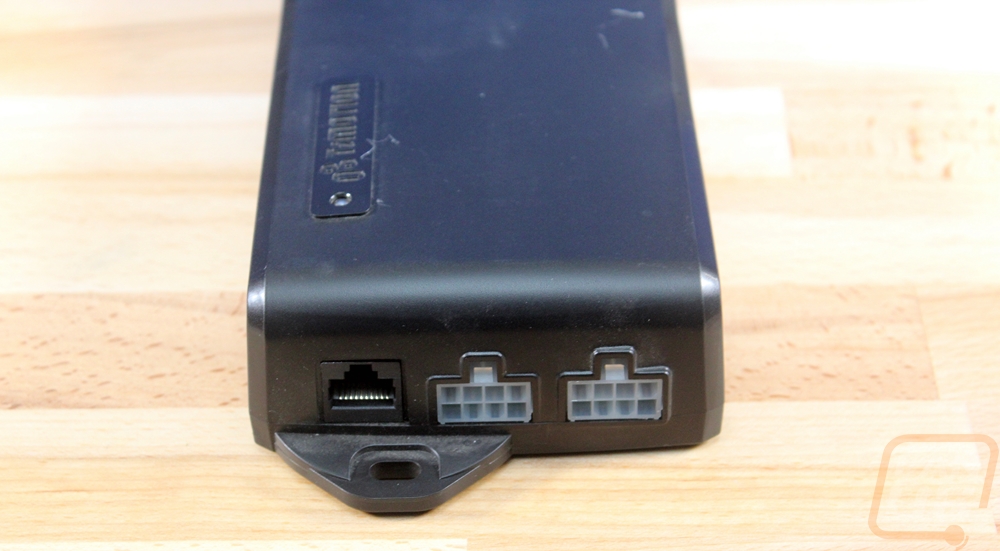
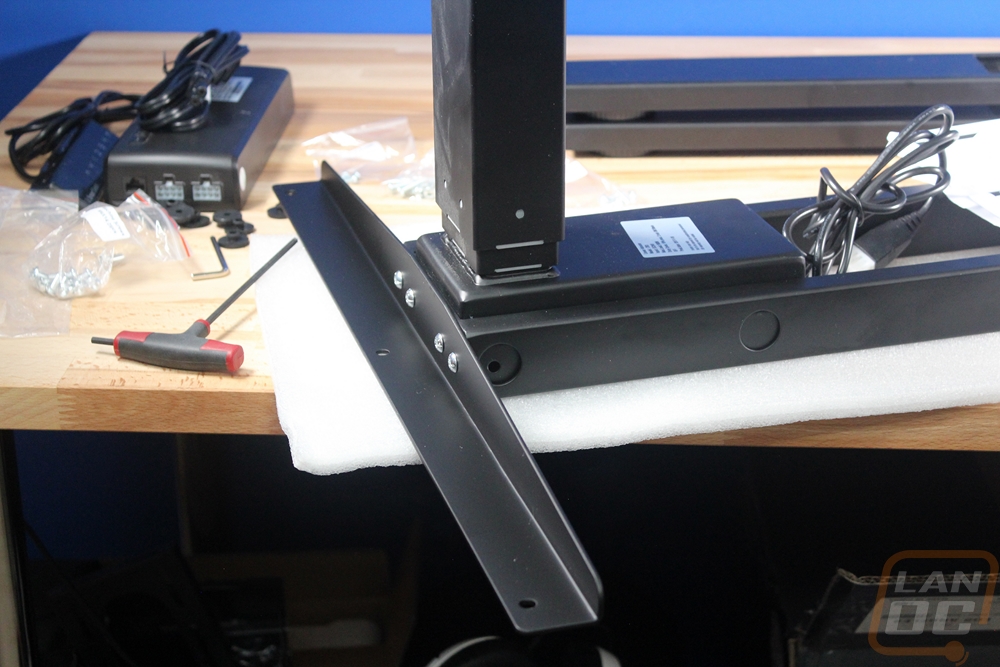
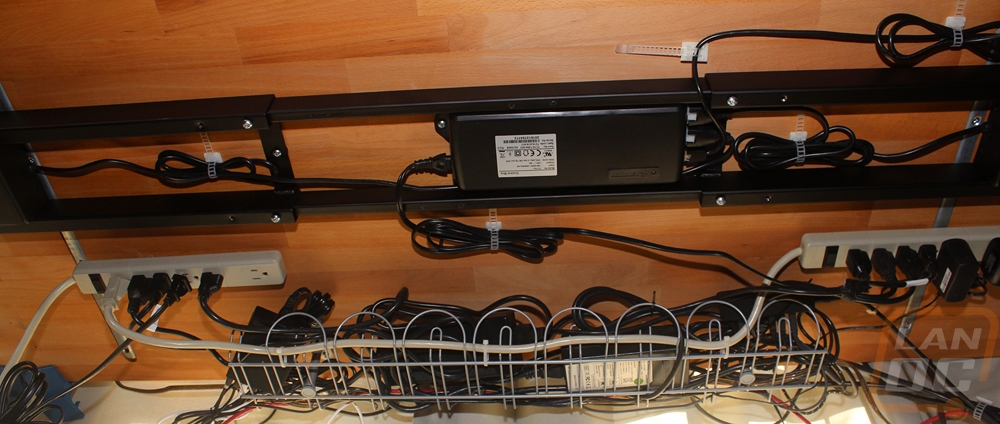
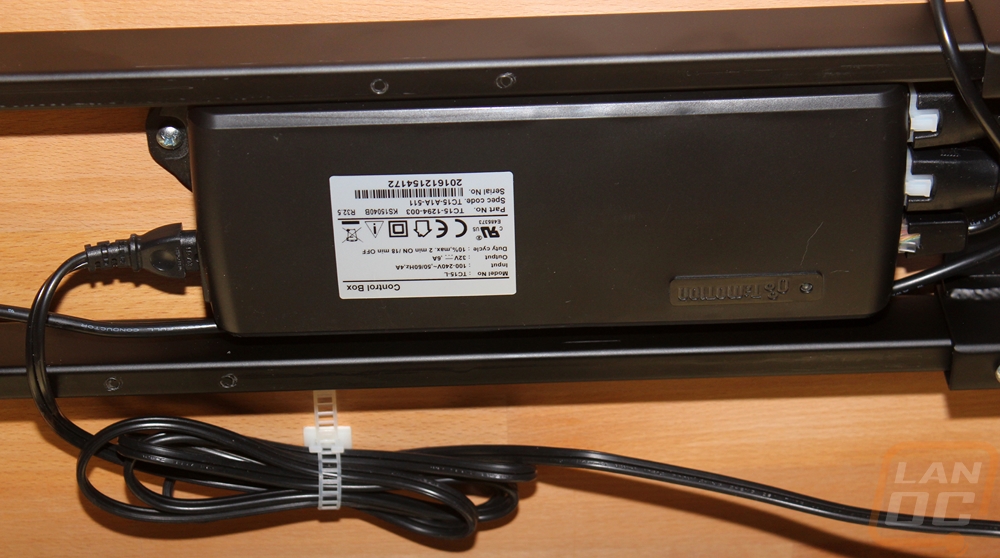
You can kind of get a feel for how everything works just looking at the last few parts. The legs have three layers to them and then at the top in the L-shaped part of the leg is the motor assembly. This has a cord coming out to hook to the controller. The controller box was a lot bigger than I expected and it has a power plug on one end and on the other you have the connections for both legs and the front control panel. The control panel connects via something close to an ethernet plug and the two motors use a connection that is very close to a PCI power plug in a PC.
Getting the base together was extremely simple. I put down foam across our table to keep from damaging it and started by installing the two legs into the frame. You have to pull the frame apart a little to be able to use the holes on the sides to access the four bolts per leg. I grabbed a T-shaped Allan wrench to speed things up over the included L-shaped one and went to town on all eight bolts. From there you have the table brackets that go on both ends of the frame. They also use an Allen wrench and there are four bolts per side. From here they suggest mounting the base to your table top but I skipped that step and I will explain why later. So that just left installing the two feet to the already installed legs. These take four more bolts each and the T-handle made quick work of them as well.
So like I said I did things a little differently with my install and I wouldn’t recommend this way. You should install the desktop by flipping it over and mounting the base using the rubber dampers and screws. With my setup though I have my entire desk wired up and with the huge monitor stand installed I didn’t want to pull it all apart. What I did was build the base, slide it under my already built desk, then power it up and raised it up. Before doing this I extended the width of the base to match my desktop width and I spent a lot of time making sure I had it perfectly lined up. Once I had it in the right spot I installed the base and then removed my old legs. Basically, I hot swapped the base in.
With the base installed, I then set out to get everything wired up. The included wire ties made this really easy. I installed the control box in the middle of the frame to keep the wiring simple. This kept the wires coming from both legs in the middle. So I just had to run the power over to the power already installed on my desk and of course the wire for the front buttons.
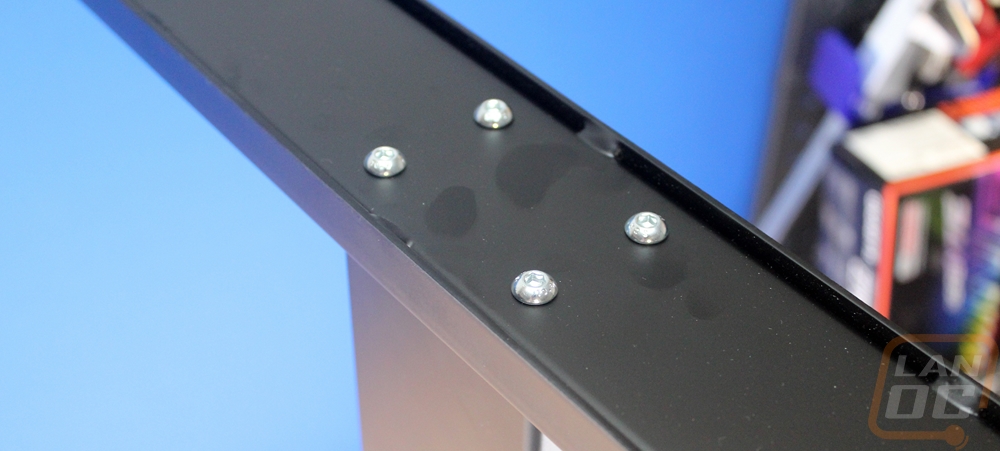
Speaking of the front control panel, you have to install this one as well with two screws. For a DIY setup like mine, you do need to predrill all of the screw holes for the base and for the controller. I could have done a little better job here, I lined everything up and drilled it but I was an 1/8 of an inch off left to right making one side stick out a little. More of an oval shape to the mounting holes would be nice to adjust out any small mistakes like this. All in all the install wasn’t too difficult.