
Moving to WiFi 6 in my house and office did get us improved performance when it comes to transfer speeds and it also better handles having a lot of devices on the network. But the one big downside for me was a little less range, especially when running through our old plaster over plasterboard walls which are twice as thick and denser than drywall, not to mention who knows what kind of lead paint might be on there. This lead to wireless issues in a few areas in the house at the farthest points and also issues out in my yard and detached garage. This became a bigger issue when mowing as I listen to music on the wireless and it would drop at the farthest parts of my lawn. I also had trouble opening and closing my smart garage door from the mower when on the far side of the garage. Lucky for me EnGenius introduced their ECW260 WiFi 6 2x2 outdoor access point which matches the ECW230 I’m using inside. Our winter hit and I struggled to get it mounted out and get outside testing done but today I’m finally going to check out the ECW260 to see what it is all about.
Product Name: EnGenius ECW260 WiFi 6 2x2 Outdoor Access Point
Review Sample Provided by: EnGenius
Written by: Wes Compton
Amazon Affiliate Link: HERE
|
Specifications |
|
|
Standards |
IEEE 802.11b/g/n on 2.4 GHz IEEE 802.11a/n/ac on 5 GHz |
|
Antenna |
2 x 2.4 GHz: 5 dBi 2 x 5 GHz: 5 dBi External Omni-Directional Antenna |
|
Physical Interface |
1 x 10/100/1000/2500 BASE-T, RJ-45 Ethernet Port 1 x DC Jack 1 x Reset Button |
|
LED Indicators |
1 x Power 1 x LAN 1 x 2.4 GHz 1 x 5 GHz |
|
Power Source |
Power-over-Ethernet: 802.3af/at or Proprietary 54V IEEE 802.11e Compliant Source Active Ethernet (PoE) |
|
Maximum Power Consumption |
15.9W |
|
Wireless & Radio Specifications Operating Frequency |
Dual-Radio Concurrent 2.4 GHz & 5 GHz |
|
Operation Modes |
Manage Mode: AP and Mesh |
|
Frequency Radio |
2.4 GHz: 2400 MHz ~ 2472 MHz 5 GHz: 5150 MHz ~ 5250 MHz, 5250 MHz ~ 5350 MHz, 5470 MHz ~ 5725 MHz, 5725 MHz ~ 5850 MHz |
|
Transmit Power |
Up to 23 dBm on 2.4 GHz Up to 25 dBm on 5 GHz |
|
Radio Chains/Spatial Stream |
2×2:2 |
|
SU-MIMO |
Two (2) spatial streams Single User SU-MIMO for up to 574 Mbps wireless data rate with HE40 bandwidth to a 2x2 wireless client device under the 2.4GHz radio. Two (2) spatial stream Single User SU-MIMO for up to 867 Mbps wireless data rate with VHT80 to a 2x2 wireless device under the 5GHz radio |
|
MU-MIMO |
Two (2) spatial streams MU-MIMO up to 1,200 Mbps wireless data rate for transmitting to two (2) streams MU-MIMO 11ax capable wireless client devices under 5GHz simultaneously. Two (2) spatial streams MU-MIMO up to 574 Mbps wireless data rate for transmitting to two (2) streams MU-MIMO 11ax capable wireless client devices under 2.4GHz simultaneously |
|
Supported Data Rates (Mbps): |
802.11ax: 2.4 GHz: 9 to 287 (MCS0 to MCS11, NSS = 1 to 2) 5 GHz: 18 to 1200 (MCS0 to MSC11, NSS = 1 to 2) 802.11b: 1, 2, 5.5, 11 802.11a/g: 6, 9, 12, 18, 36, 48, 54 802.11n: 6.5 to 300 Mbps (MCS0 to MCS15) 802.11ac: 6.5 to 867 Mbps (MCS0 to MCS9, NSS = 1 to 2) 802.11b: 1,2,5.5,11 802.11a/g: 6, 9, 12, 18, 36, 48, 54 |
|
Channelization |
802.11ax supports high efficiency (HE) —HE 20/40/80 MHz 802.11ac supports very high throughput (VHT) —VHT 20/40/80 MHz 802.11n supports high throughput (HT) —HT 20/40 MHz 802.11n supports very high throughput under the 2.4GHz radio –VHT40 MHz (256-QAM) 802.11n/ac/ax packet aggregation: A-MPDU, A-SPDU |
|
Supported Modulation |
802.11ax: BPSK, QPSK, 16-QAM, 64-QAM, 256-QAM, 1024-QAM 802.11ac: BPSK, QPSK, 16-QAM, 64-QAM, 256-QAM 802.11a/g/n: BPSK, QPSK, 16-QAM, 64-QAM |
|
Multiple BSSID |
8 SSIDs on both 2.4GHz and 5GHz radios. |
|
VLAN Tagging |
Supports 802.1q SSID-to-VLAN Tagging Cross-Band VLAN Pass-Through Management VLAN |
|
Spanning Tree |
Supports 802.1d Spanning Tree Protocol |
|
QoS (Quality of Service) |
Compliant With IEEE 802.11e Standard WMM |
|
SNMP |
v1, v2c, v3 |
|
MIB |
I/II, Private MIB |
|
Wireless Security |
OWE WPA2 Personal WPA3 Personal (SAE) - WPA3 Only WPA3/WPA2 Personal Mixed WPA2 Enterprise WPA3 Enterprise Suite B Hide SSID in Beacons MAC Address Filtering, Up to 32 MACs per SSID Wireless STA (Client) Connected List SSH Tunnel Client Isolation |
|
Environment & Physical Temperature Range |
Operating: -4º~140ºF/-20ºC~60ºC Storage: -40Fº~176ºF/-40ºC~80ºC |
|
Humidity (non-condensing) |
Operating: 90% or less Storage: 90% or less Outdoor Rating: IP67-Rated Enclosure |
|
Dimensions & Weight |
Weight: 1.54 lbs. (0.7 kg) Length: 7.48” (190 mm) Width: 4.07” (124 mm) Height” 2.07” (52.5 mm) |
|
|
1 – ECW260 Cloud Managed Outdoor Access Point 1 - Pole-Mounting Brackets 1 - Wall-Mount Screw Set 2 - 2.4GHz 5dBi SMA Antennas 2 - 5GHz 5dBi SMA Antennas 1 - Quick Installation Guide |
|
Warranty |
2 Year |
|
Certifications |
CE FCC IC |
Photos and Features
The packaging for the EnGenius ECW260 is in typical EnGenius style mostly just a brown box. They didn’t go with a universal box though, the front of the box does have the model name printed on it down in the bottom corner. Normally with something like this in a brown box you might only have the brand printed on and then a sticker with the actual model name to share it across a few models. It also has the EnGenius cloud branding in the middle as well to let us know that this is one of their cloud-enabled models.
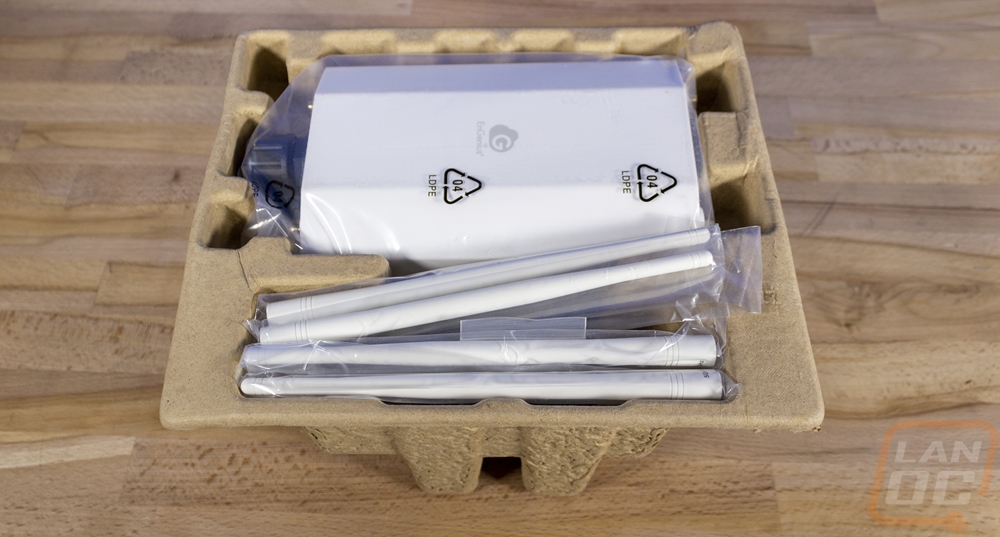
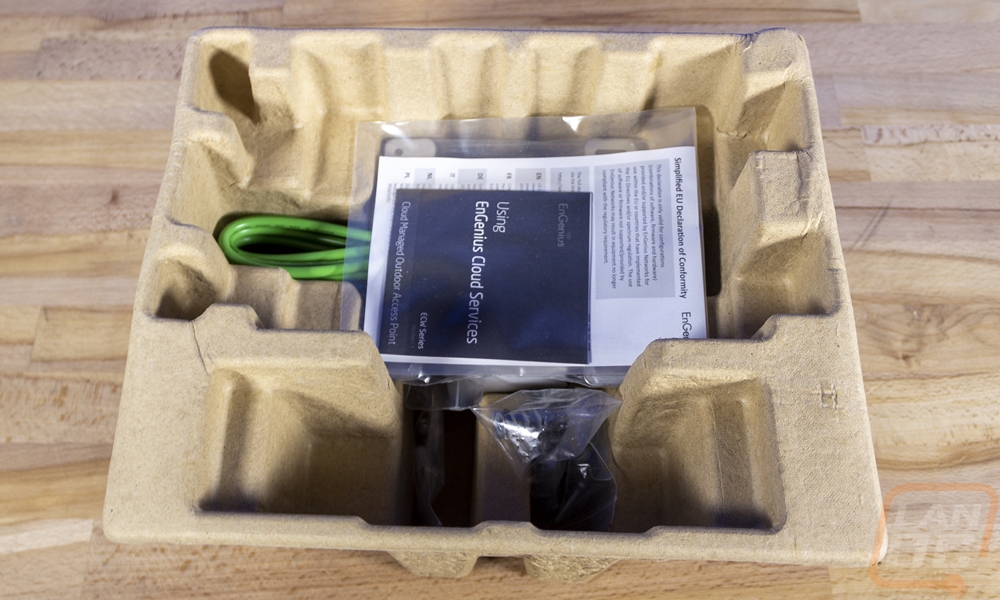
Inside the box, you have a formed cardboard tray that is formed around each of the components. Each component also comes wrapped in its own plastic bag with the AP itself up on top as well as four antennas. Then when you pull those out you can see everything including the documentation up under it locked in with the formed tray.
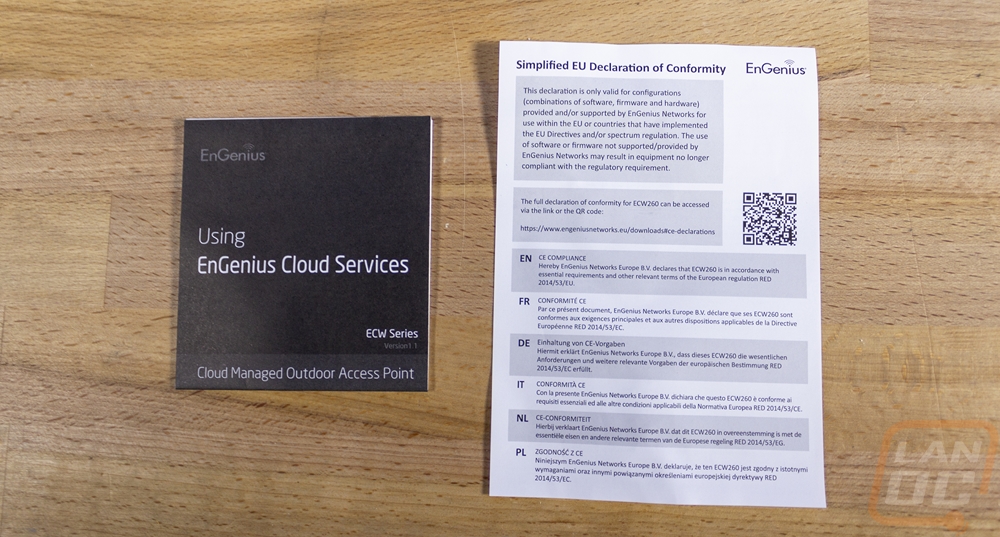
The ECW260 comes with a surprising amount of accessories as well as the standard documentation. You get a paper on the EU compliance then a book explaining how to get your new cloud-managed outdoor access point setup on the cloud.
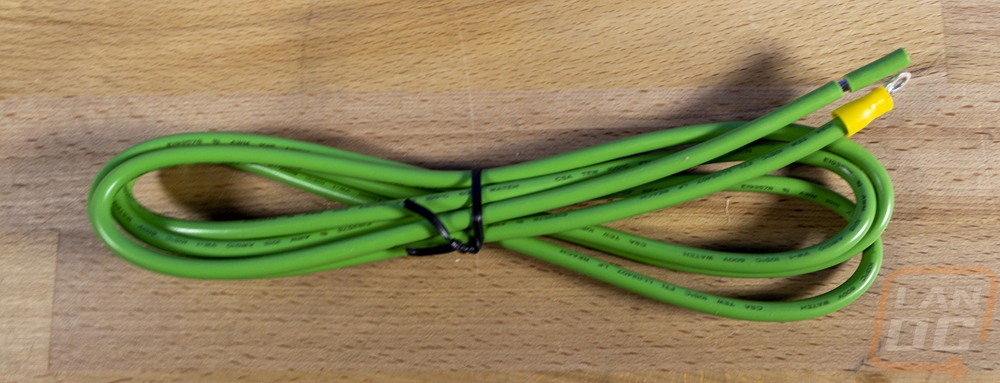
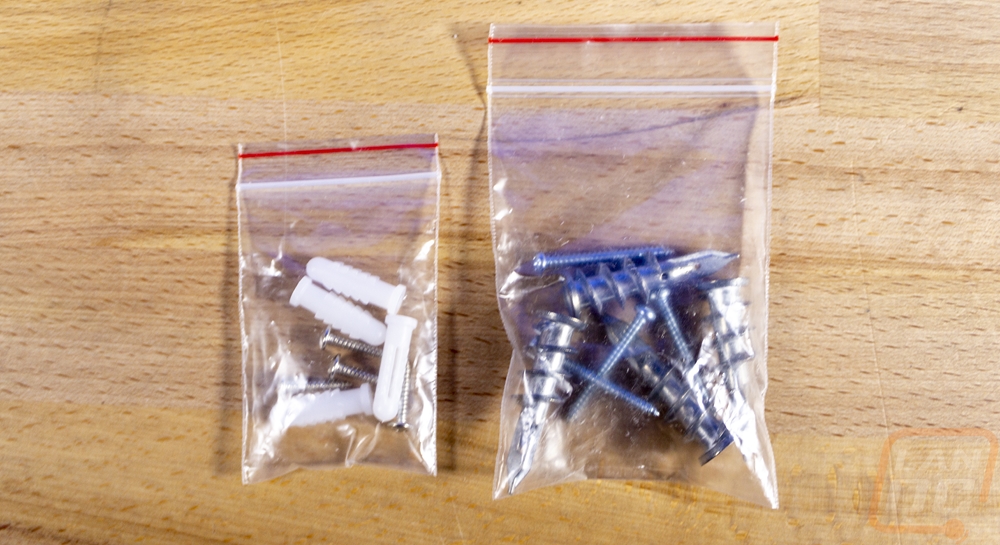
Like I said there are a lot of accessories, this starts with the thick green ground wire. The wire can be mounted to the metal mount to help give at least some protection to your equipment inside from static and lighting. The cable looks to be around an 8 gauge wire and it comes with a ring end on one end and then the cable pre-trimmed so you can attach the other end to ground if possible. For mounting options you get two baggies, the left bag has plastic anchors and smaller screws then the bag on the right has a heavy-duty metal sell tapping anchor with larger and longer screws. Both are typical for drywall mounting, I personally wouldn’t use either on an outside wall but we can touch on that later when I talk about installation.
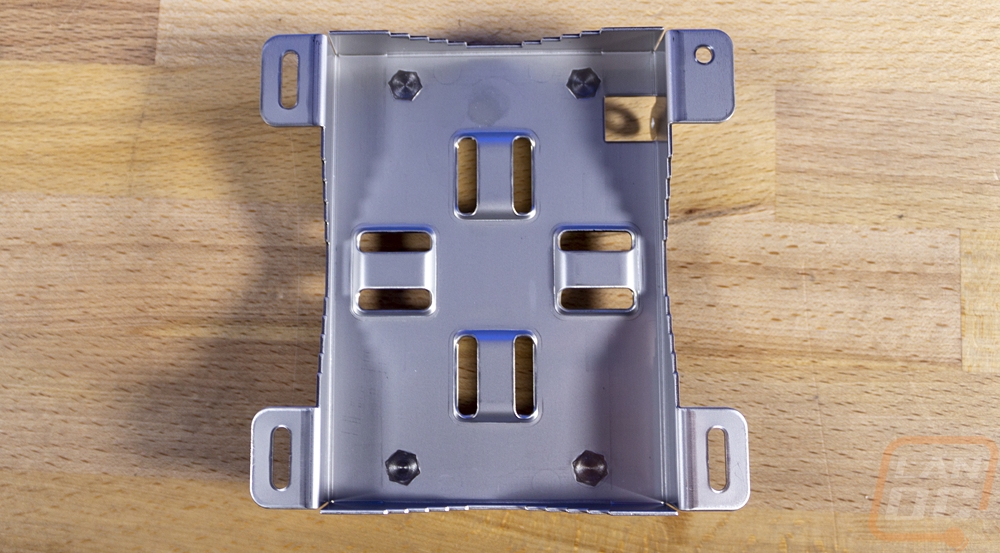
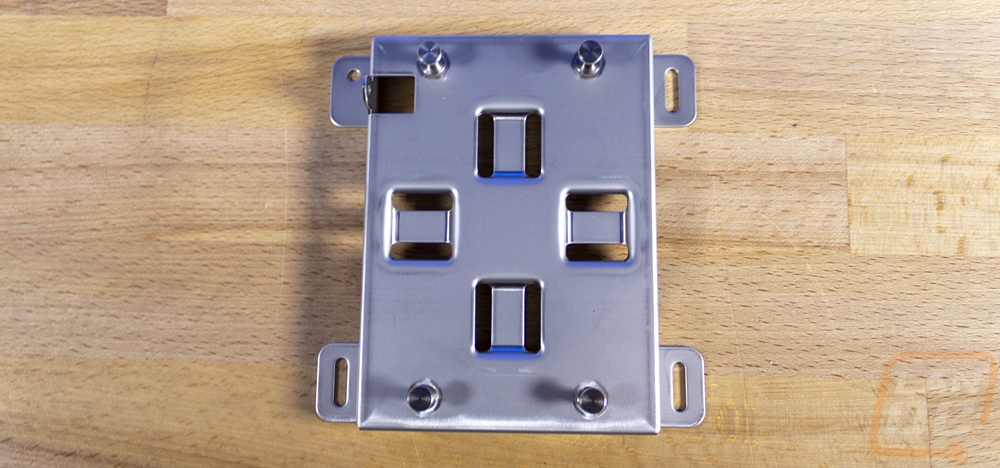
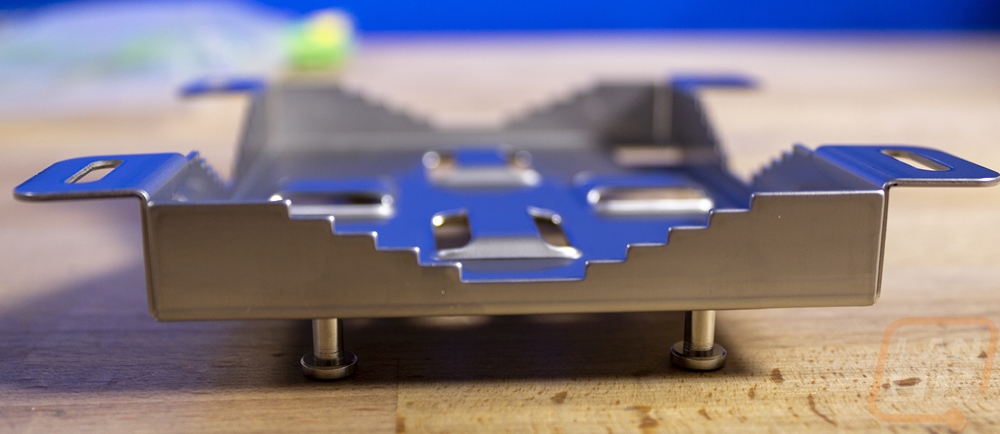
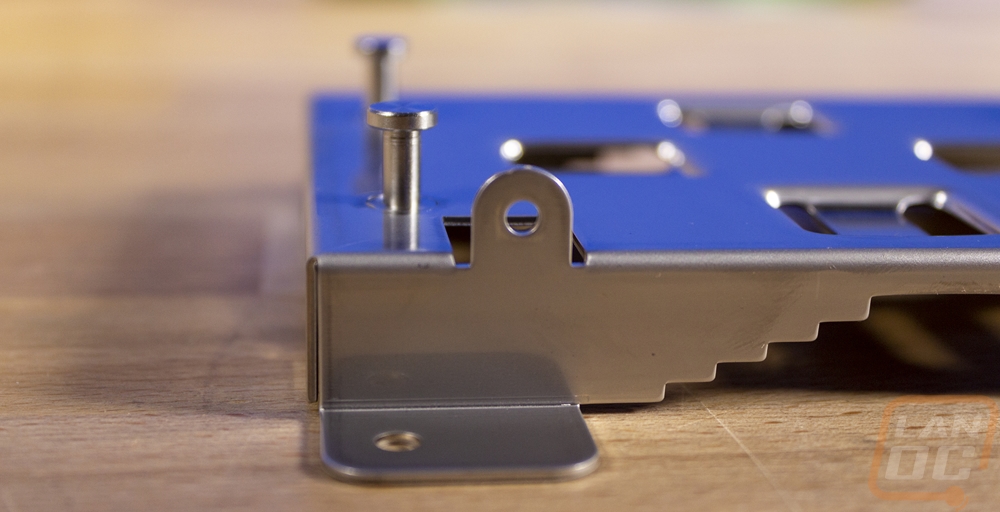
This is the mounting bracket provided with the ECW260. The access point actually can be mounted without the bracket at all, but I love the design that EnGenius came up with here. This design gives you a LOT of mounting options. First off for a traditional wall mount you have the four mounting tabs with the one small hole and the other three are slotted to allow some adjustment once mounted. Then the mount itself has a step-down area in the middle of each side, these are for mounting the ECW260 to different sized poles which isn’t that rare with an outside AP installation. The stepped-down design means it can work with a small 2-inch pole like any antenna mast or you can mount to larger poles all the way up to a light pole. Then on the inside, there are four tabs with slots on each side where you can slide in a large clamp for pole mounting giving you the option to mount horizontal or vertical. Then on the front side of the mount, there are four thick mounts that slide into the mounting holes on the back of the AP. It is then locked into place with the small tab on the top left that lets you put one screw into the side of the ECW260.
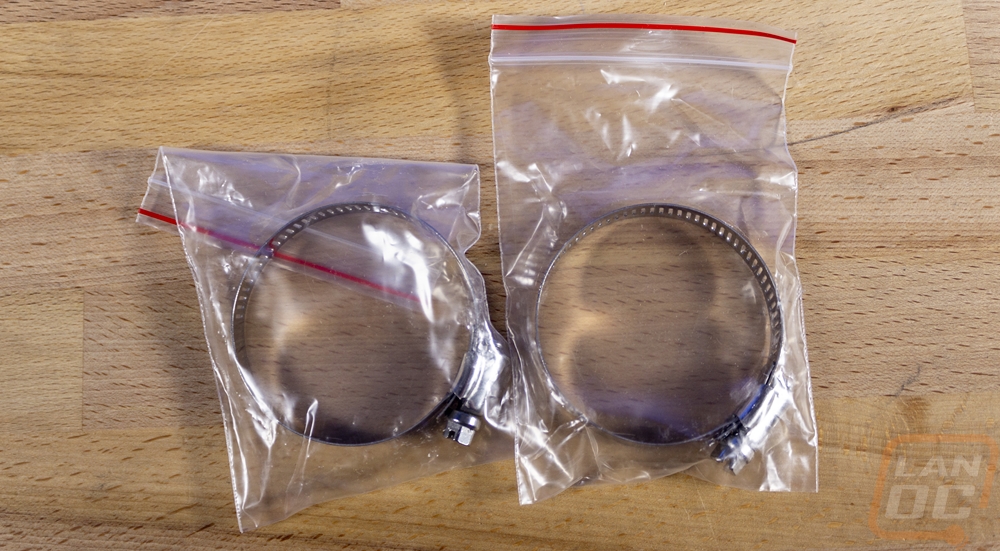
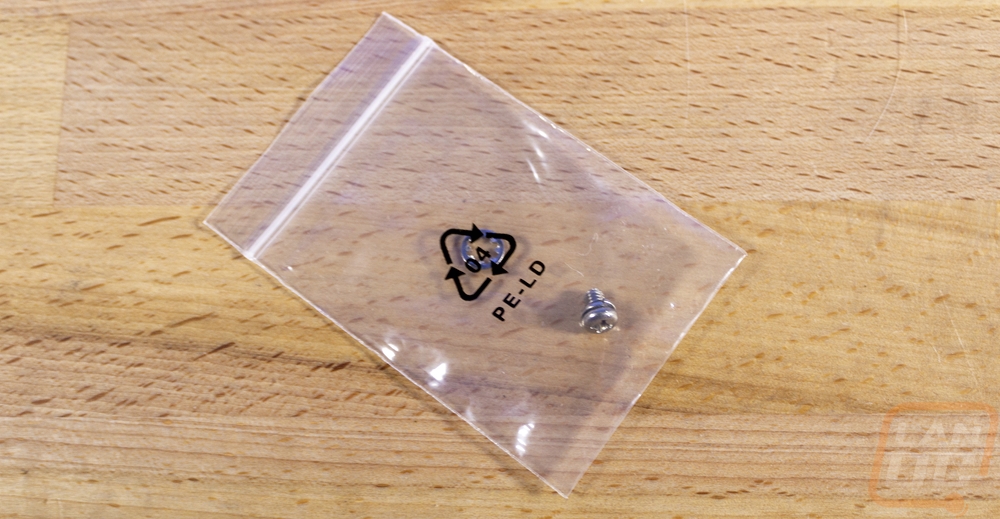
For the rest of the mounting hardware, EnGenius even went out of the way in my opinion and included heavy-duty clamps for pole mounting the mount. Then the small bag with the single screw is for the ground cable installation.
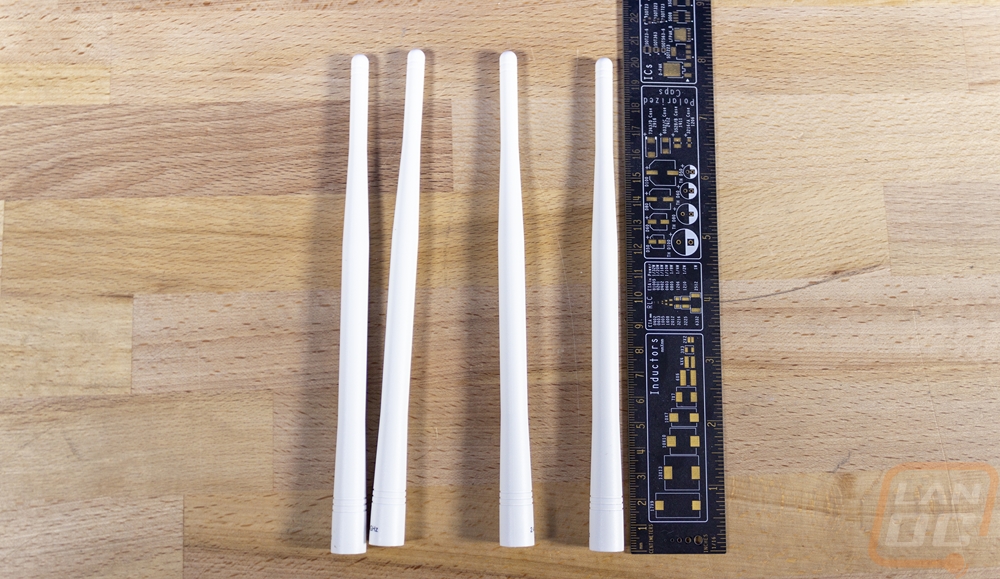
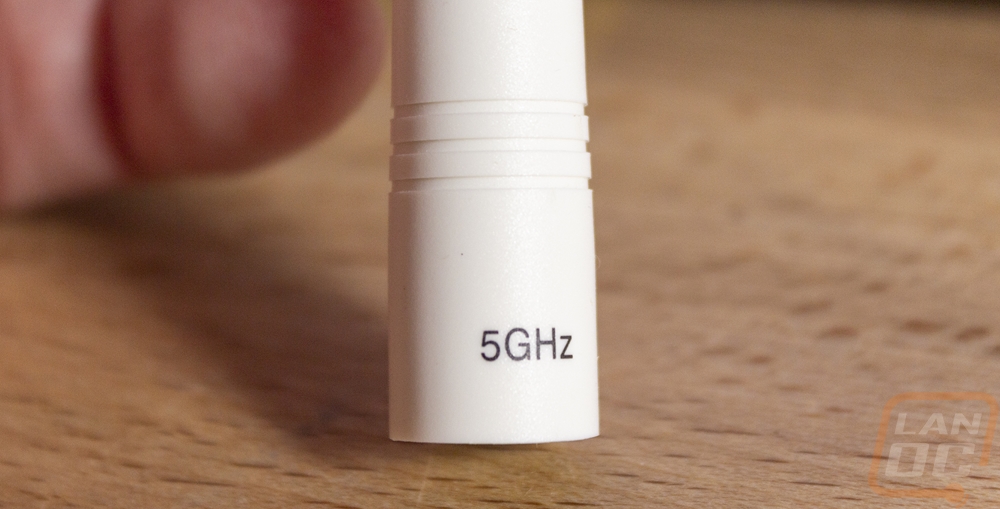
Also include of course are the actual antennas. The ECW260 runs four antennas, two on top and two on the bottom. They are eight inches long and you do have to be careful here. They are labeled for 2.4 GHz and 5Ghz use so you do want to get them in the correct spots on the access point to get the best performance. They are otherwise a standard looking antenna design and could most likely be swapped out if needed, though I don’t know if you could see a performance improvement with that.

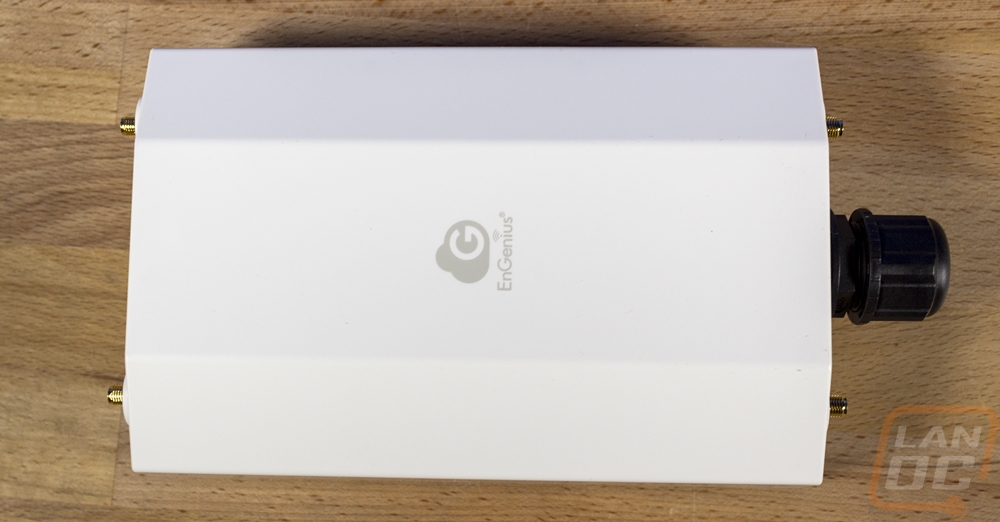
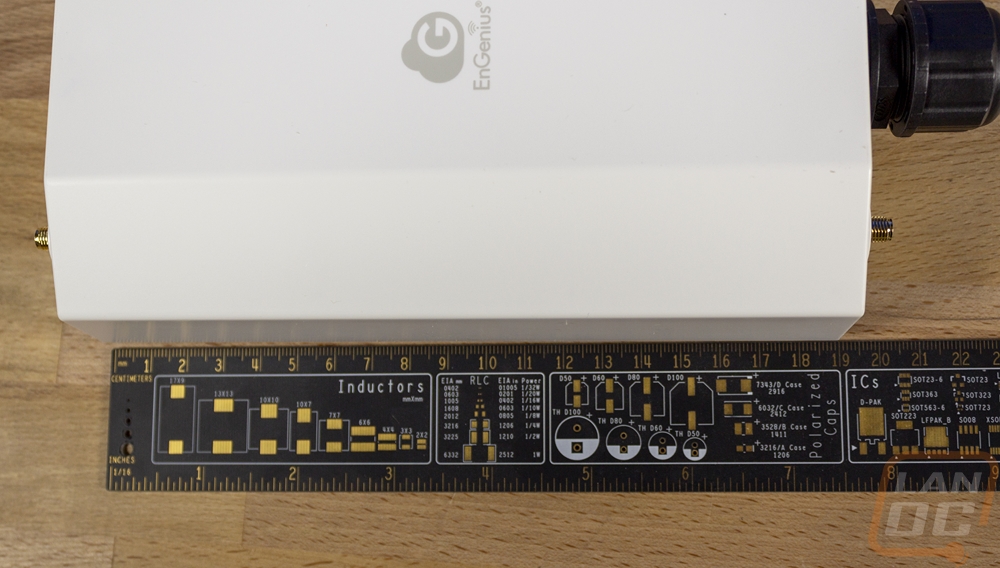
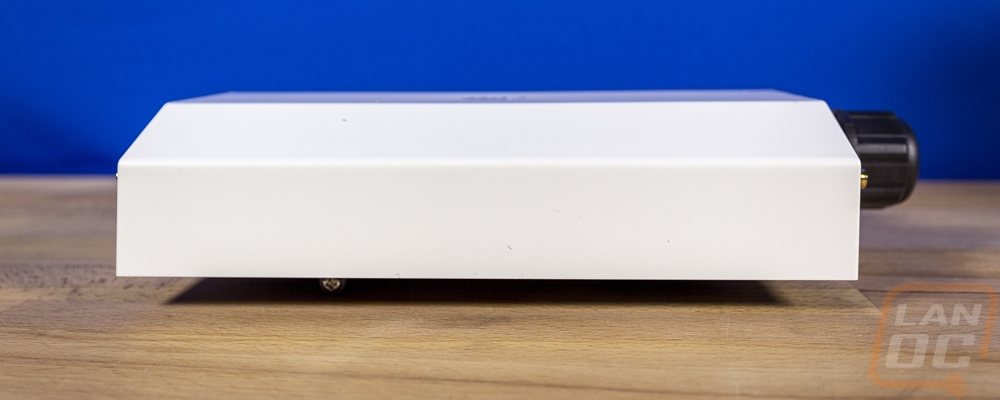
So here is the base ECW260 and it is a relatively unassuming design with a flat front and 45-degree angles on both of the side edges. It is 190mm to just under 7 and a half inches long, 124mm or just over 4 inches side, and 52.5mm or 2 inches thick. It is all except for the weather sealing cap on the bottom and the front just has the EnGenius logo on it without any lights facing out that might draw attention.
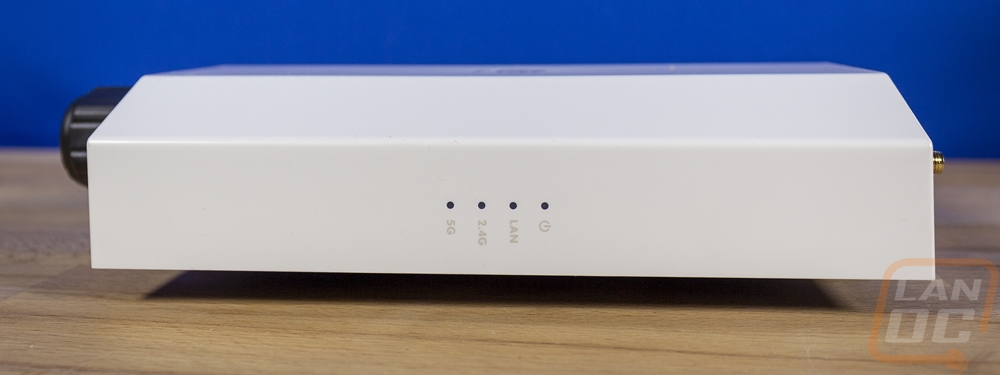
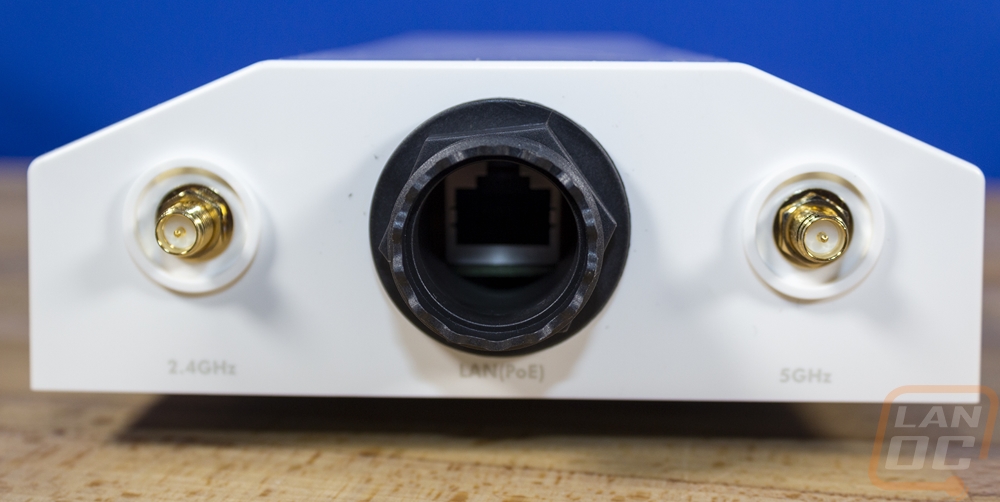
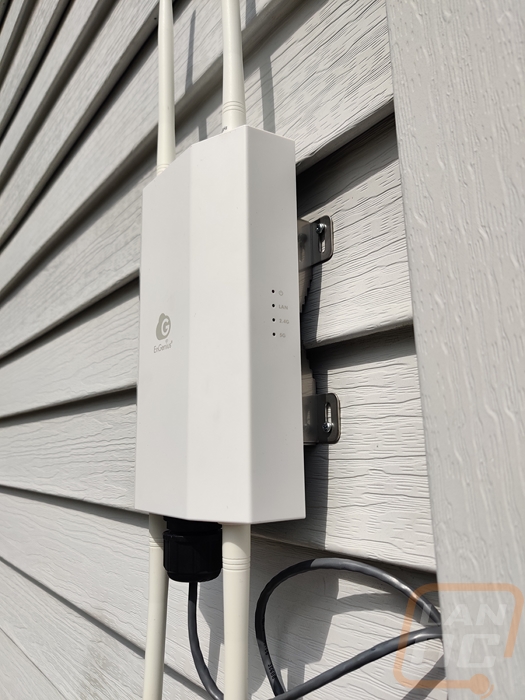
The left side of the ECW260 is black but the right side does have all of the status LEDs on it. I like that these aren’t facing the front so they are a little less obvious but you can still see them when you need them. The top LED is the power indication, then you have LEDs that show network traffic on the 2.5G ethernet connection and then 5G and 2.4G wireless bands with those split across two different lights.
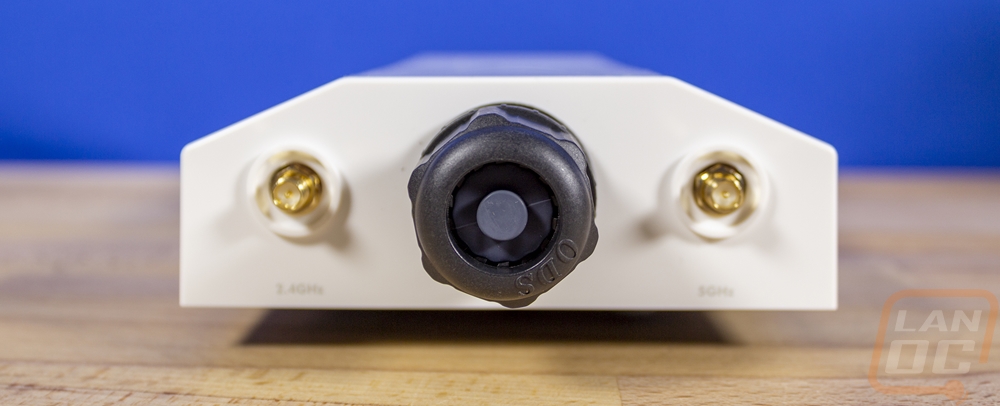
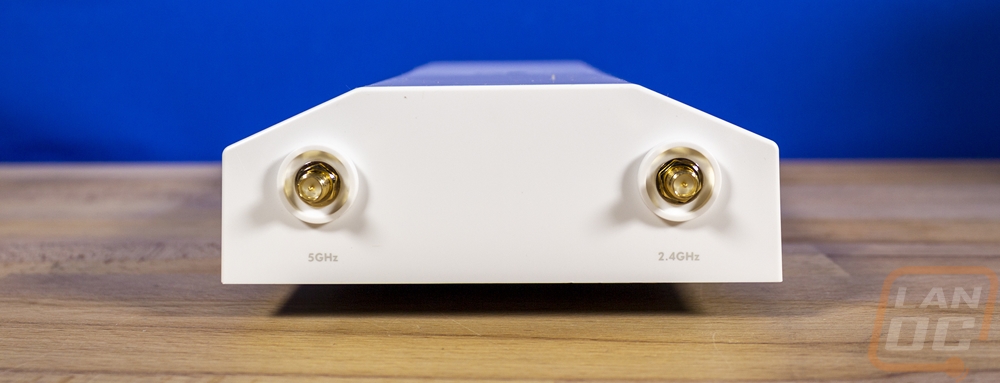
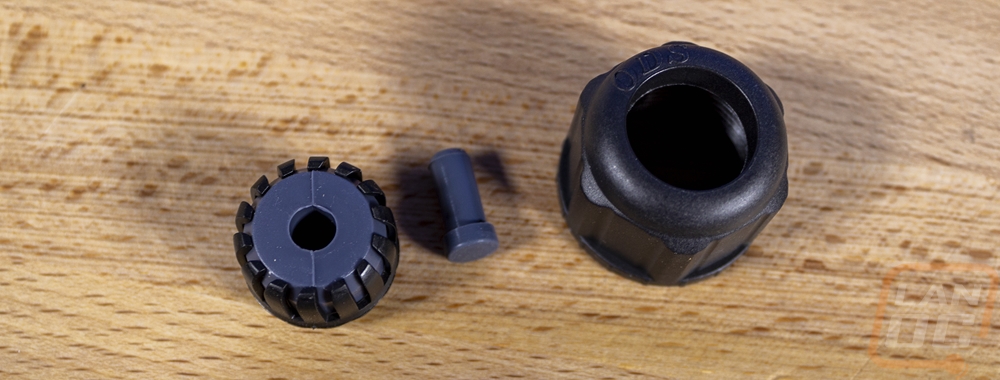
Then for the top and bottom, you have the four antenna mounts. You can see the labels for 5Ghz and 2.4Ghz on each. Then on the bottom in the center is the only actual connection. The ECW260, like most access points, is a PoE-powered device which keeps the installation very simple. There is just one 2.5G ethernet connection which is behind the weather seal and way up inside. This can be a pain to plug into and even worse when you need to unhook so I would recommend only hooking up when you need to. The weather seal comes with a plug in the hole that you will need to remove then the plug itself squeezes down on the cable when you tighten the outer cap. This along with the tight fit around the antenna connections is how it gets its IP67 rating. It can operate in a humidity of 90% or less and it has an operating temperature of -4ºF to 140ºF which for me here in Ohio covers most of what I might see though we do see a few days a year that are under that -4 at times. The ECW260 has a wider storage temperature range at -40ºF and up to 176ºF, so I have faith that if nothing else on those ultra cold days it should still hold up. I was going to say that I wouldn’t even want to be outside at that temperature anyhow, but it did occur to me that I may need it when snow blowing.
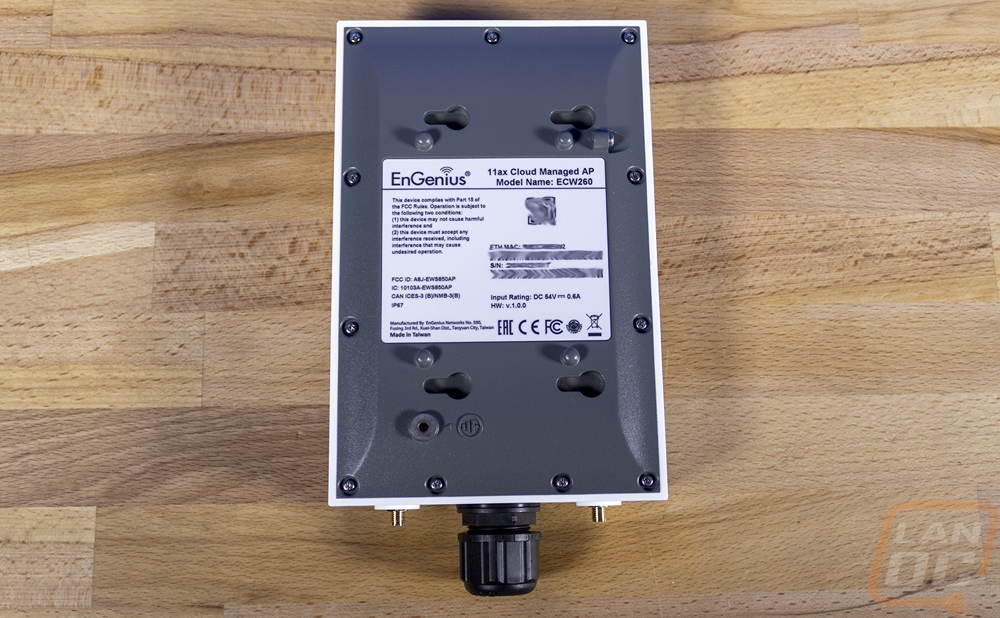
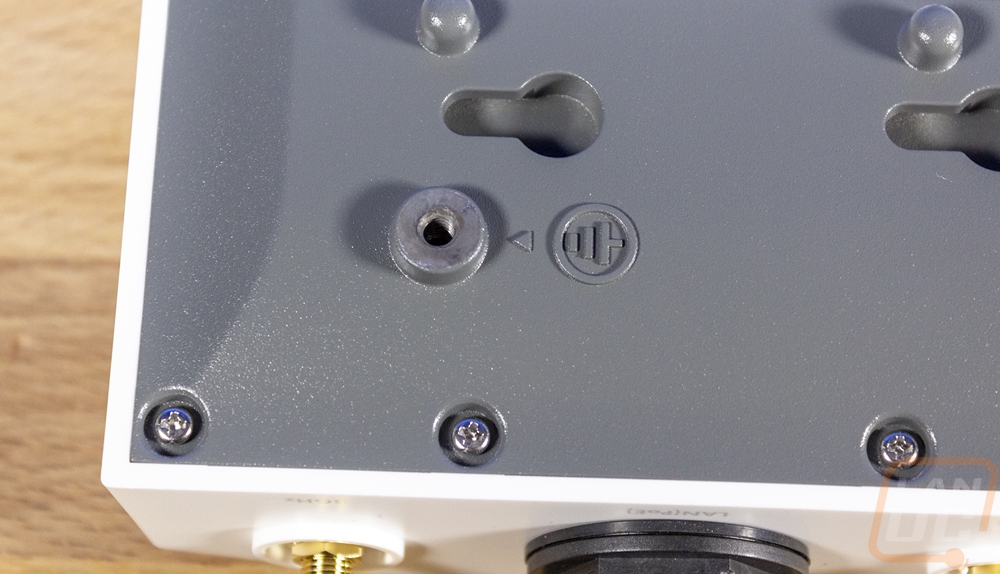
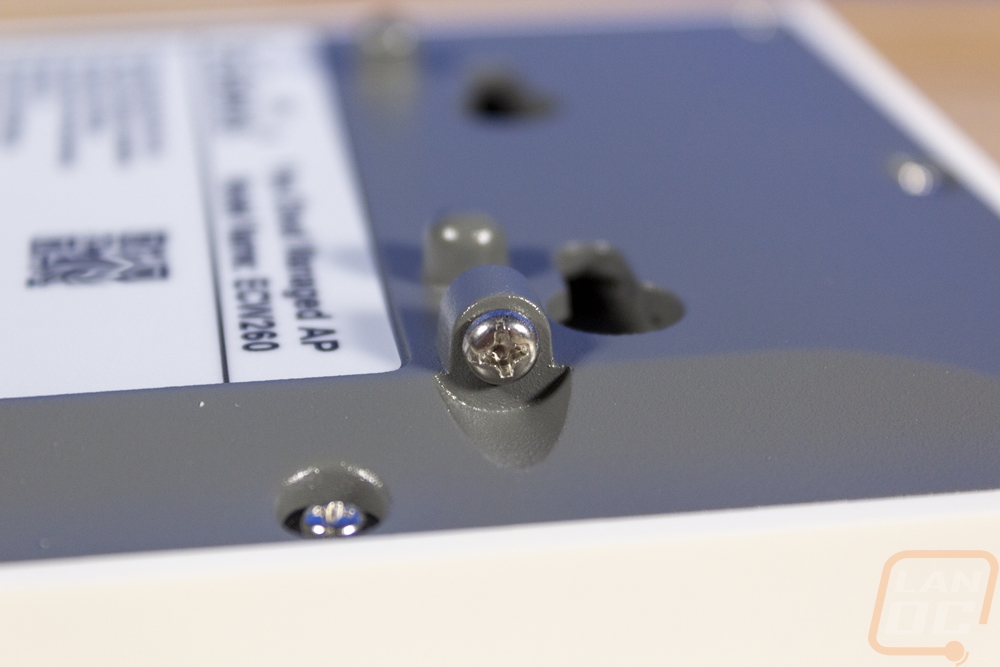
The back of the ECW260 starts to explain what I was talking about with the mount design. You have four slot mounting holes and you could use a normal screw to mount to them if you mounted the AP horizontal. Then you have the one side screw that locks it in place, the screw for that comes pre-installed in the hole. There is also a larger screw hole down at the bottom, this is the ground location and it has a metal liner inside. Then in the center on the back, you have a large white sticker which has the model information as well as a QR code for the easy cloud setup with EnGenious’s mobile app, and below that, you have the serial number and a mac address.
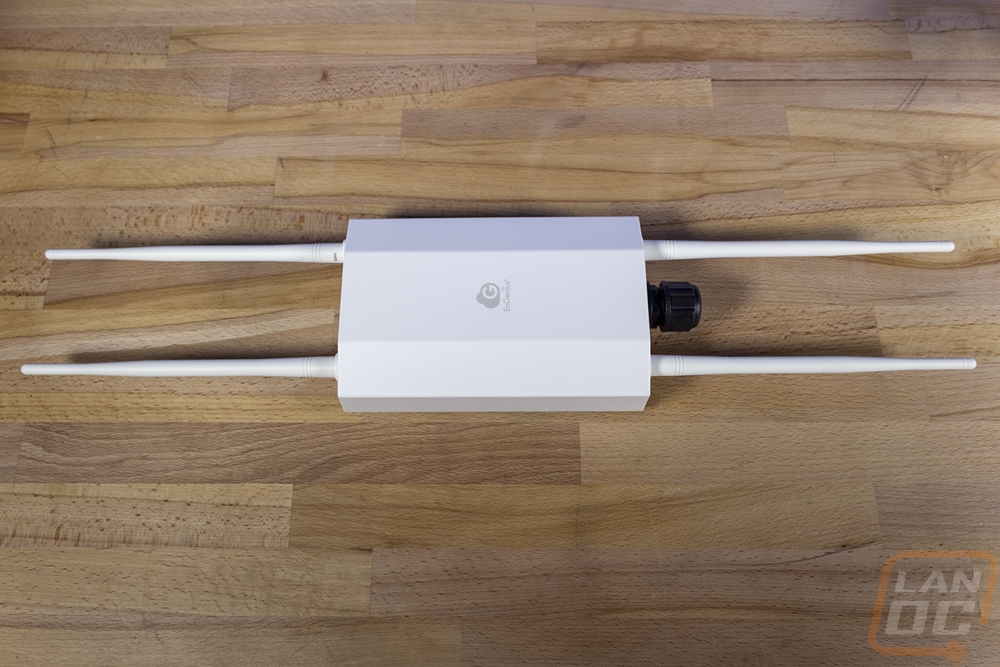
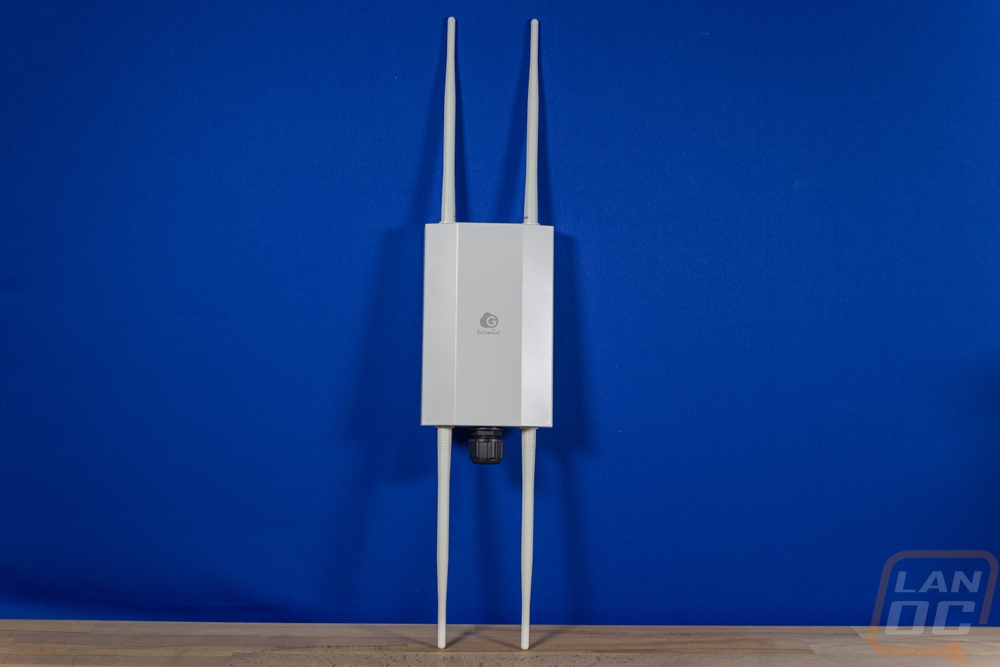
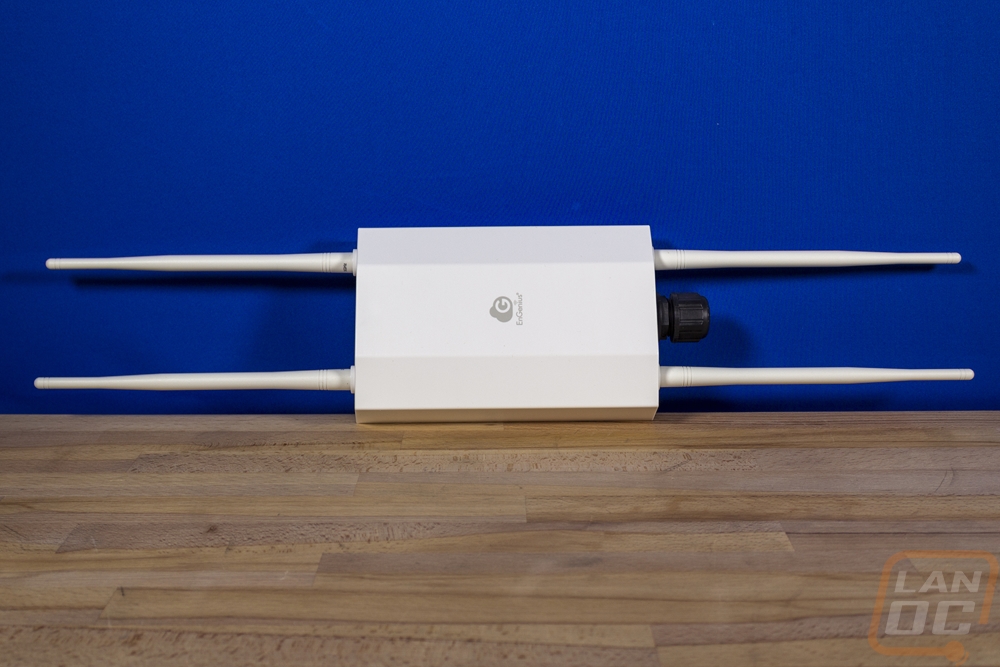
Here is a look at the ECW260 with all four antennas installed. You do have both vertical or horizontal mounting options depending on what you might need. Adding the 8 inch long antennas to the 7.5 inch ECW260 means it does end up being just under two feet long altogether.
Software
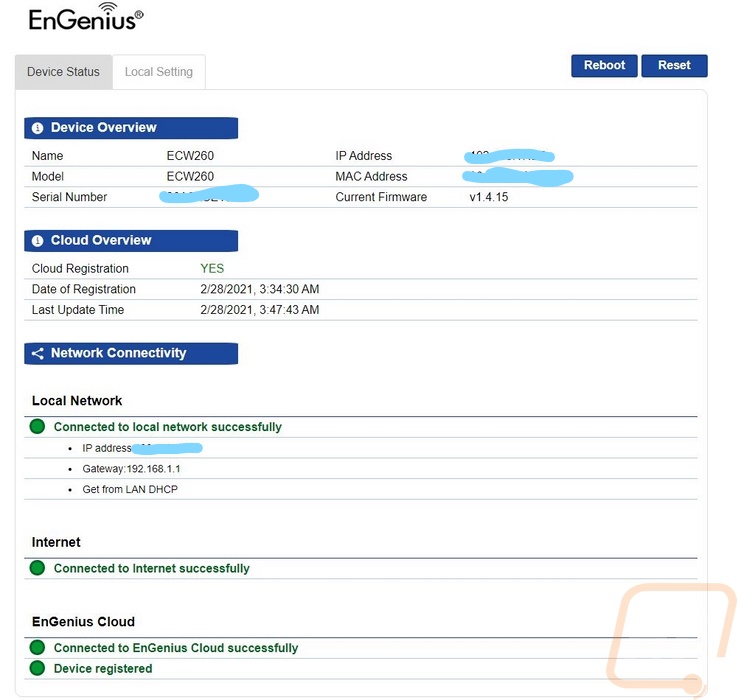
I’ve said it countless times and it applies just as much for an access point as it does for a motherboard or even a mouse. Software can make or break an otherwise amazing product. You might not think so and I’m even the type of person who prefers to avoid having to install software or an app whenever possible. But this is where EnGenius has stood out for me, especially with their cloud-enabled devices like the ECW260. These are enterprise-focused products, but they have a mix of cloud features that you might find more on home hardware that can make things simpler to set up and to manage over time. So the ECW260 does have a direct webpage that you can access when you go to its IP on your network but unlike with the EnGenius switches I have tested out, they haven’t packed this with advanced features that you won’t see on the cloud. You have a basic landing page that gets you the main information like your serial number, IP address, and the status of your local network, internet, and cloud connections.
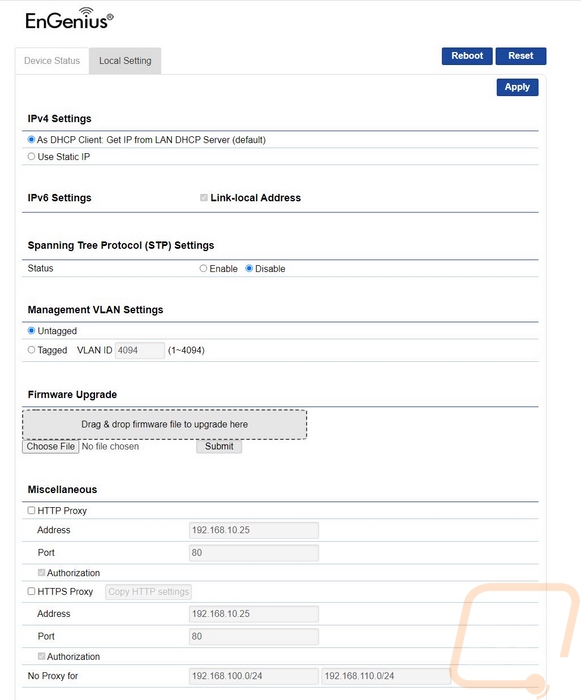
The second page up top gets you access to the network settings. So you can log into this and set a static IP or set up a proxy address. You can also upload firmware updates here as well. Firmware on the cloud side of things is more automated, but this is a good way to override things if needed. You can also reboot or do a full reset on the ECW260 as well up on the top edge. I was surprised that you don’t get at least basic SSID setup information here, but they really do want you to handle that all in the cloud software.
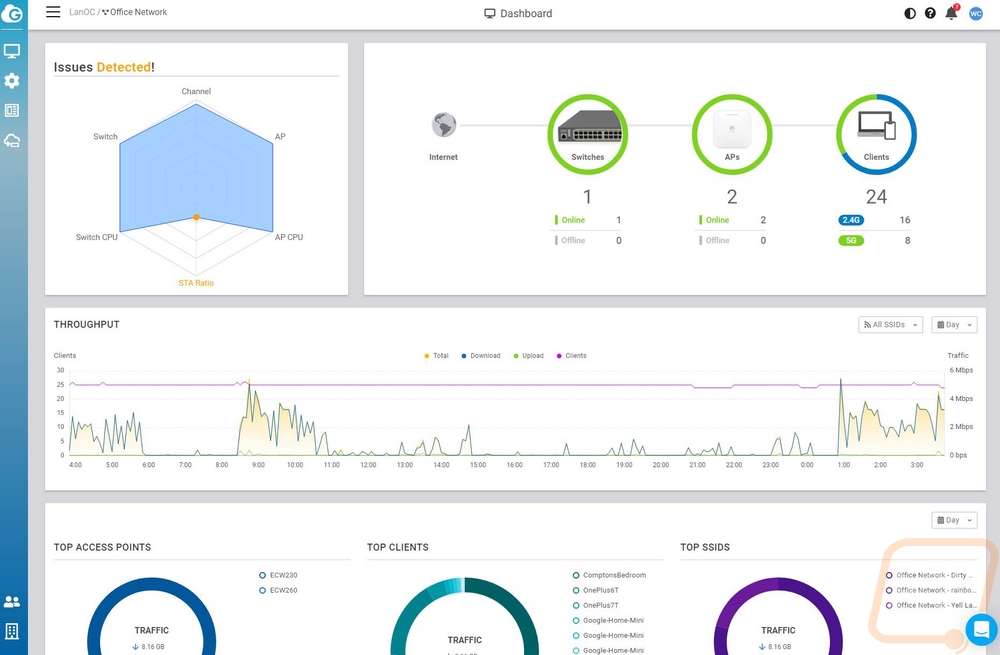
So the EnGenius Cloud is the same setup that I took a look at on my ECW230 and ECS2512FP Switch reviews and that is because they want to tie everything all together. In our case for example I have the ECS2512FP handling the main backbone of our network to get a few important devices connected at 2.5G and 10G then branching down to a main switch and a POE switch for our cameras and formerly for APs as well. But we now have the ECW230 and ECW260 here for wireless and they are both hooked up to the ECS2512FP for POE and to get a 2.5G connection. Sticking with the same product line has the benefit of being able to control everything together in one interface. We are just one ECS1552P away from getting our entire network all together but that is an expensive upgrade right now. So the main landing page once you get signed in and assuming you have everything connected is going to look like this. You can see it lists off your devices which for us is the two APs and one switch and it has the number of clients connected to wireless. Your overall traffic is graphed out and you can see your top access point, top clients, and top SSIDs for those running more than one. You have notifications up at the top right and on the left, you have a menu to dive into your settings that can be expanded.
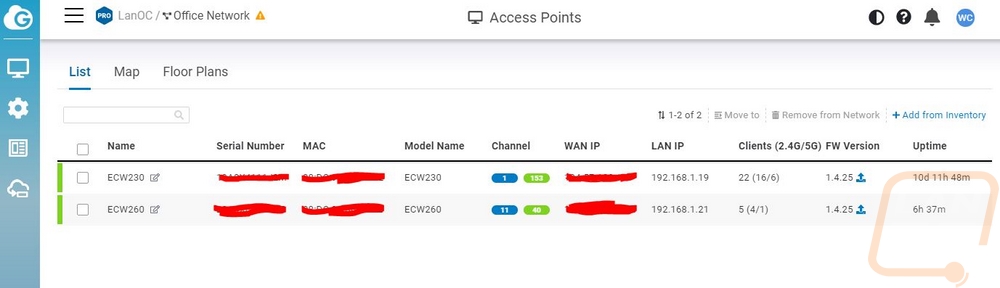
The first part of the menu gets you a link to a list of your switches, then another for APs.This will list out all of the important information as well as the number of clients and even the uptime and firmware version. Here you can also add to your network using the add to inventory button though I think it is even easier with the mobile app which has all of the same settings but you can scan the QR code and instant add devices. You can switch from the list view to a map or a floor plan which can show you where each device is located if you set it up. The map can use google satellite images and you can drop your APs to their locations which is huge when you are dealing with outside access points like the ECW260 that I am taking a look at today.
With this being an AP you don’t have to worry about having to deal with too many options. You basically have two pages where you can get into the details. The first is the radio page. This is where you can set radio frequency options for all of your APs. EnGenius has it split between inside and outside APs and this applies to any device you have attached to your cloud account and the “location” as you can set up and control multiple locations with different settings on one account. You can see that in the picture below I even have the outdoor APs turned off completely, don’t do that. It took me way too long to figure out why I couldn’t get the ECW260 up and running when I must have turned those options off months before. But this is a nice way to be able to lower the chances people can access your network when you are closed but there is a better way to handle that which I will show in a minute. You can play with how channels are picked and even turn on mesh if you want to expand your wireless network to places you can reach a cable.

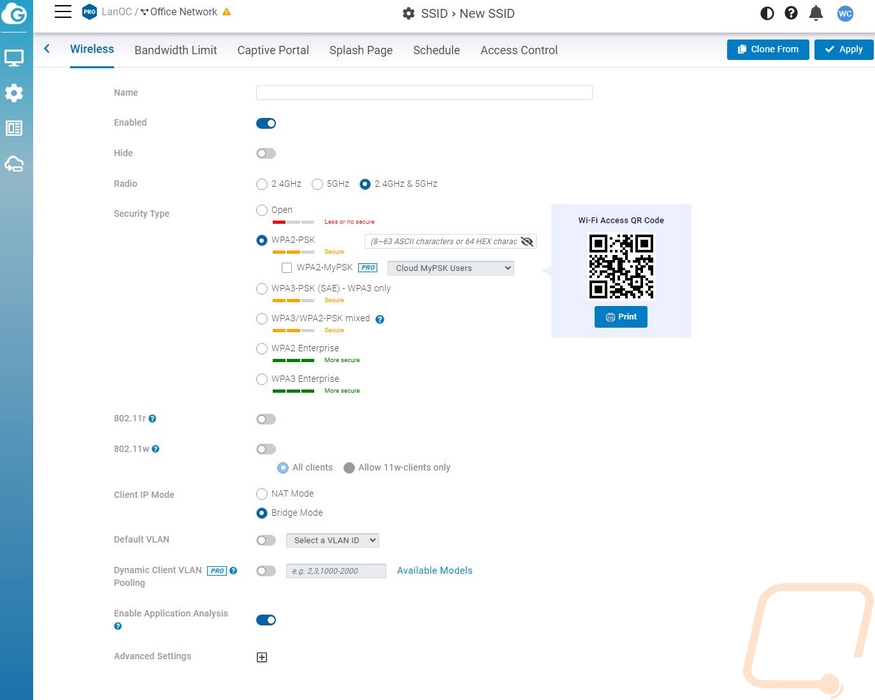
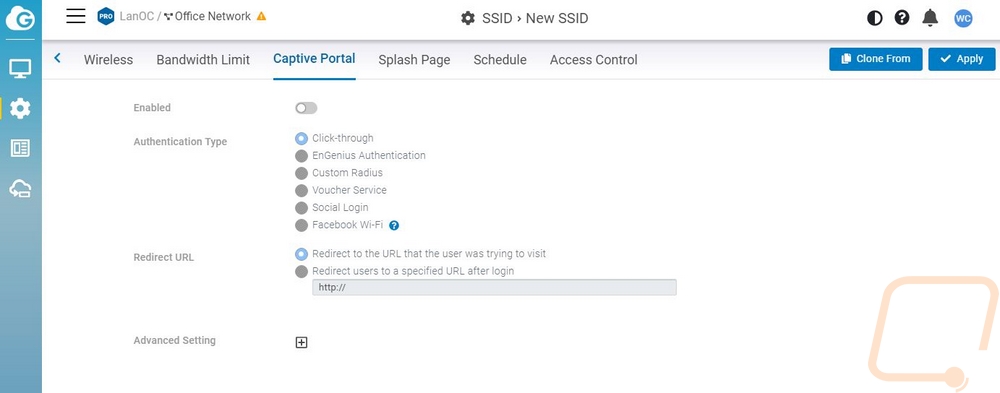
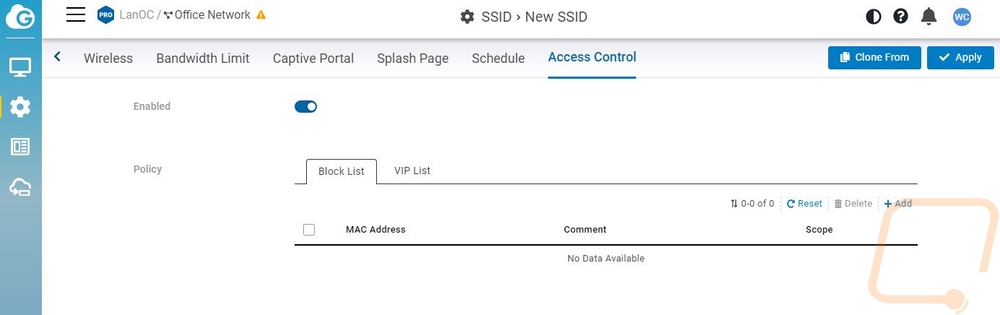
The other big page for access point settings is the SSID configuration page and this one has multiple sub pages in the tabs at the top. Here you can create multiple SSID networks and even go as far as to set a specific VLAN for each if you are running a VLAN to isolate things. This is great for splitting up a guest network and your main network or if you want to isolate some specific staff members or devices (like smart devices) without setting VLANs per port or per mac address which can both also be done. You have a whole page dedicated to setting bandwidth caps which can be per client or for the entire SSID which can be the entire SSID one can be nice if you are running a guest or customer network. The captive portal ties into that as well, you can have people sign off liability or log in using social media as well as other options. On the access control page, you can dive into block and VIP lists to shape who you want or don’t want on each SSID as well.
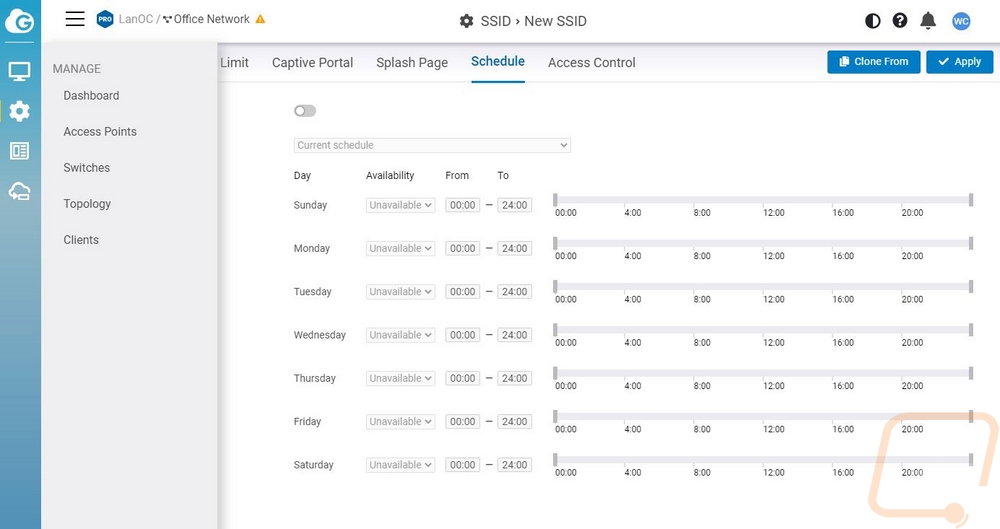
There is also a schedule where you can set up your business hours and turn your wireless network on and off at those times. This is a nice security feature to keep from having someone leeching off of a guest network while you are gone or giving someone access to your network to try to access it overnight. The downside is that this is only going to turn off that specific SSID. That works well as a way to turn off a guest network without taking the boss offline or turning off a family/kids SSID for specific times. But I would love to see this expanded and have an option to turn off an entire radio on a schedule for a much more secure way to block access. Or for a large building, maybe just turn off all outside access point radios when you are closed.
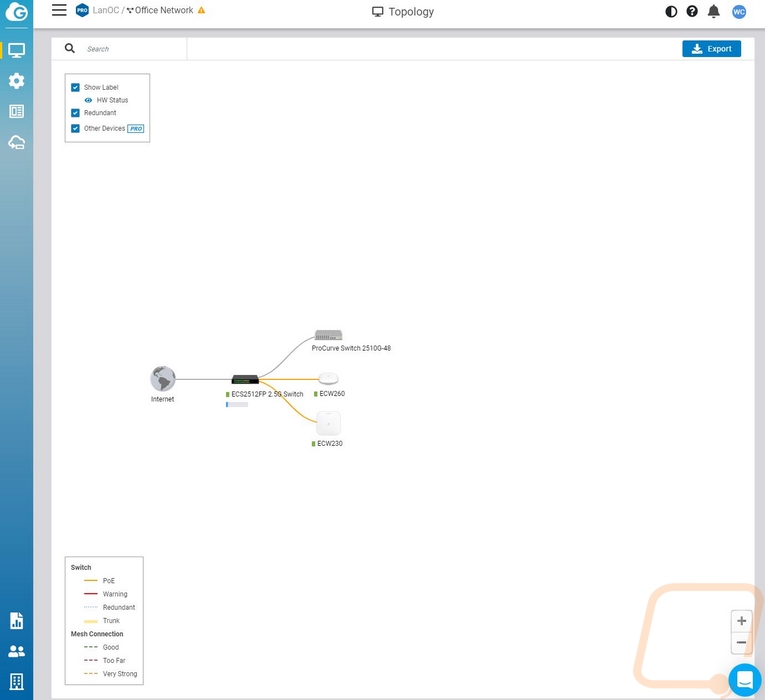
Another cool feature of the EnGenius Cloud that I wish worked a little better for me. You can look at a topology map of your network and as you guys know I am running the 2.5G/10G switch with the two APs hooked up and a few key devices and my other switches are hooked up to the backbone switch. Sadly even with the pro-level feature to turn on other devices, it isn’t picking up too much. We can see the internet coming in from our router to the switch, the two APs, one of the two switches, and that is it. It doesn’t pick up the other 4 devices I have hooked up to our switch and none of the wireless devices.
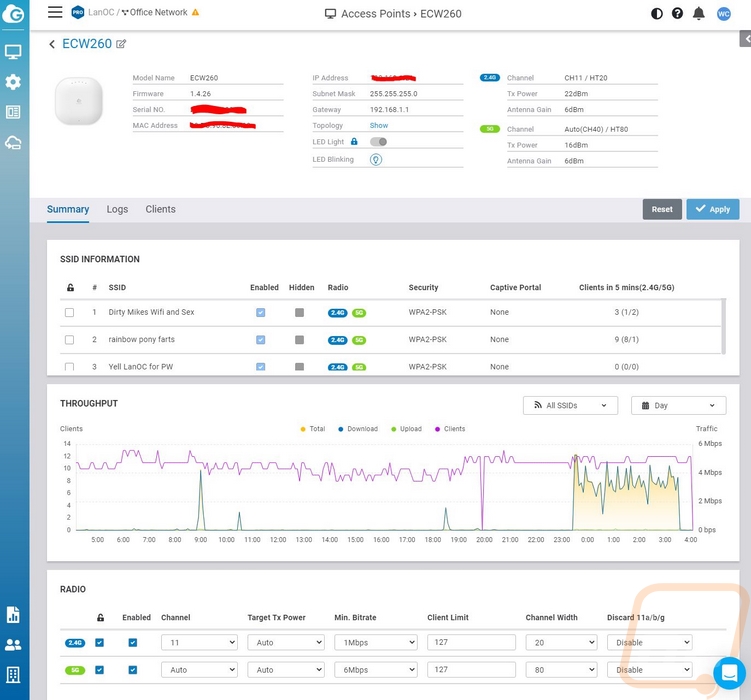
You can also go to the full access point listing and click on details of each AP or be able to one-click reboot each device. The detail page lists mostly the same information you will find on the home page but only specific to that device. You can also see logs and client lists as well which give you details like the connection strengths which if you know where devices are you can map out and find some weak spots in your network for example. The only downside that I have run into which can be frustrating when you are diagnosing issues is that the logs here reset when the device resets. It seems to be the opposite of what you might need, but I can never see anything prior to the latest boot up.
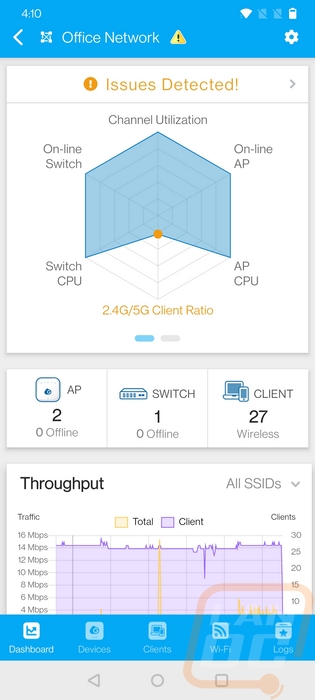
Here is a quick look at the android app, you have the same access as you do with the web cloud interface but on the go even away from the office (the cloud website can be accessed away from the network as well).
Performance
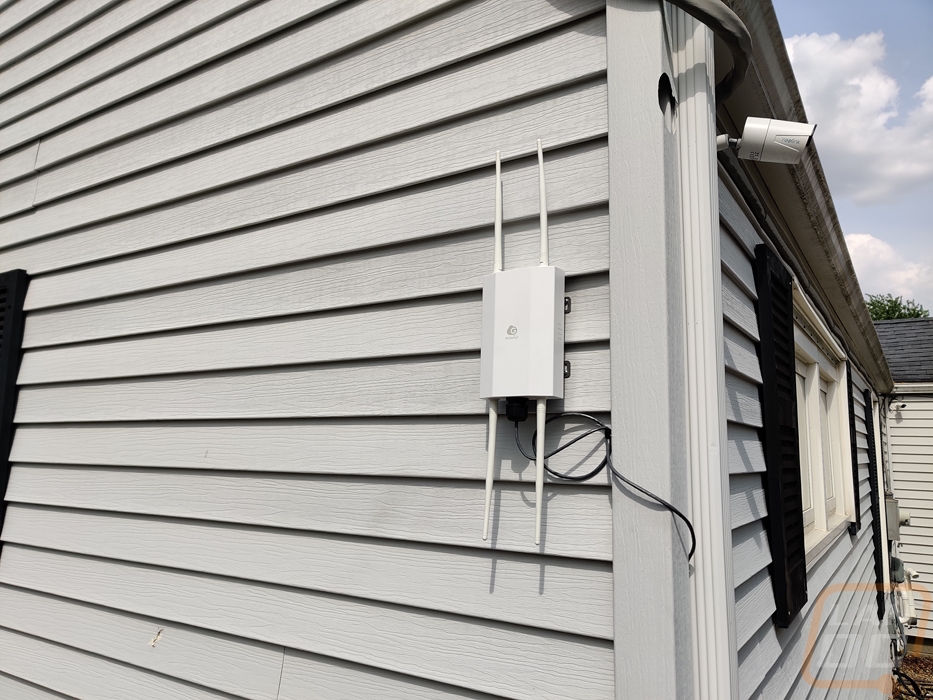
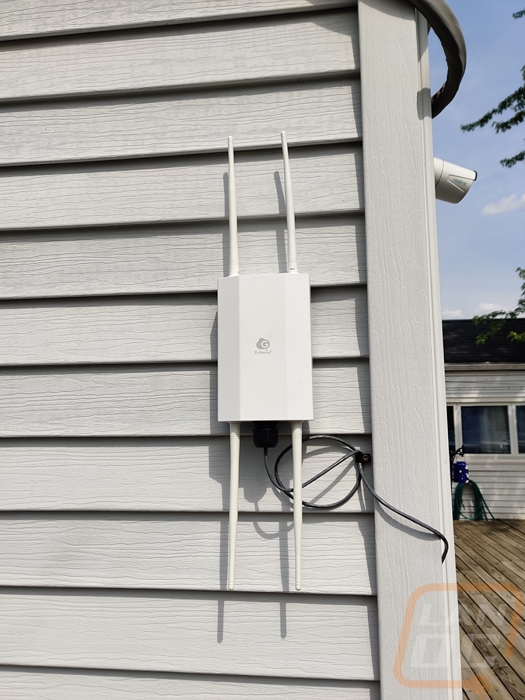
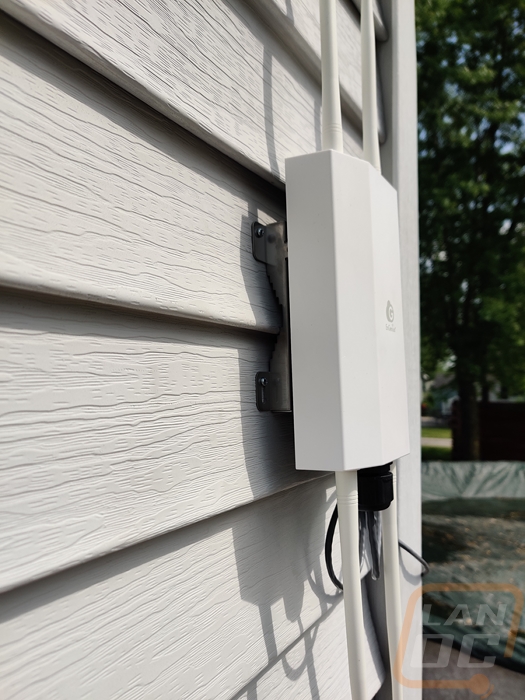
Well, the first part of the performance is getting the ECW260 installed. In my specific case, I was aiming to improve our network coverage on the far side of our lawn and the other side of my garage when the garage door is down. That garage issue was especially interesting because when I’m mowing because I close the door so cars don’t get dusty or damaged but I then can’t open the door back up with my mobile app. But truthfully placing the ECW260 anywhere at all outside would most likely fix both of my issues. I used to have coverage with WiFI5 but 6 had a little more trouble reaching through our thick plaster walls, just getting the AP outside without any walls in the way would give LOTS of range. So I put it at the end of the house right in the middle of our wrap-around deck and near the pool to get the best possible speeds out on the water. But I wall mounted the ECW260 right onto the siding. Interestingly enough the stepped sides to the mount made it very easy to flush mount to the siding as well. The only thing I am missing is the heavy-duty ground wire which I will need to get a longer cable to get that up and running. The bright white color of the AP blends in a little with the light grey finish, but if this wasn’t in my back yard which has a tall fence and locked gates and cameras I would want to mount it up higher and out of reach.
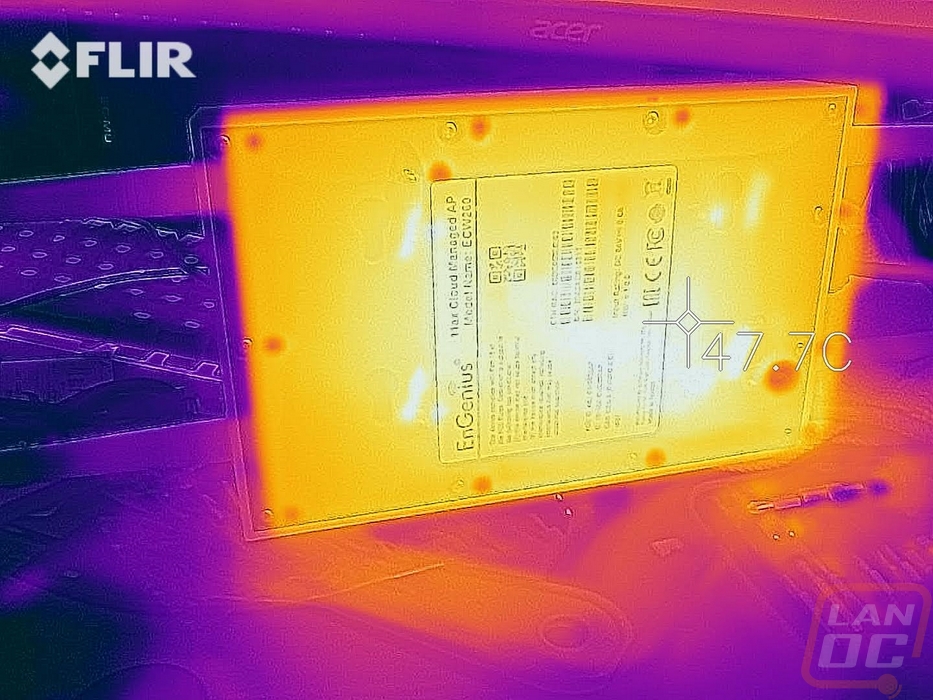
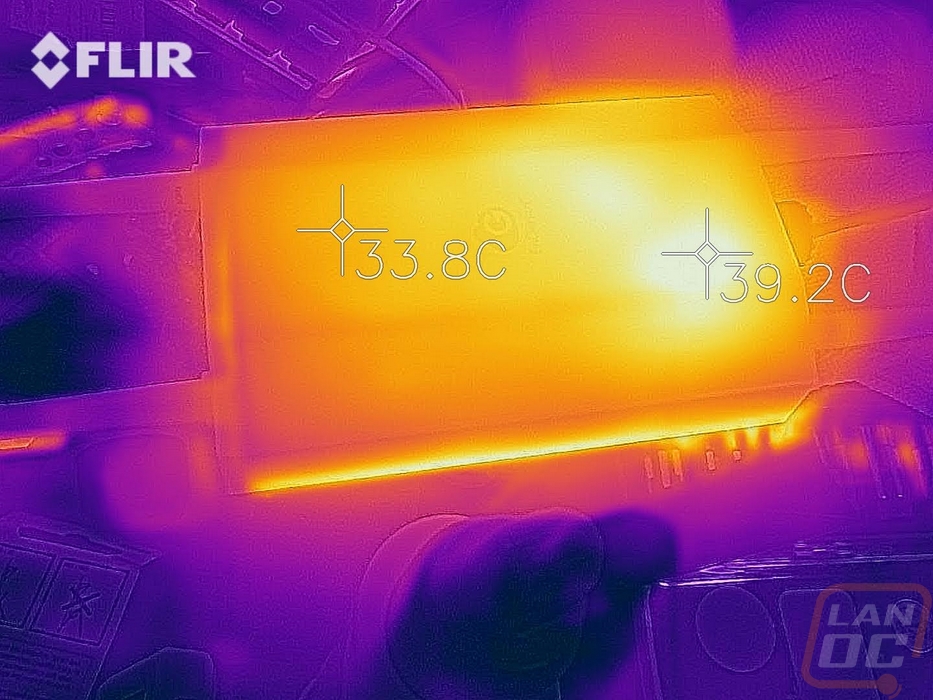
Before diving into my experience with the ECW260 as far as wireless range and performance goes I did do some thermal imaging of the AP while it was in the house and up and running. While we can't see inside, you can see that the bottom area near where the network connection is the hottest on the front but it runs a lot warmer on the back. The back image was done after running it on its side like this for a full day.
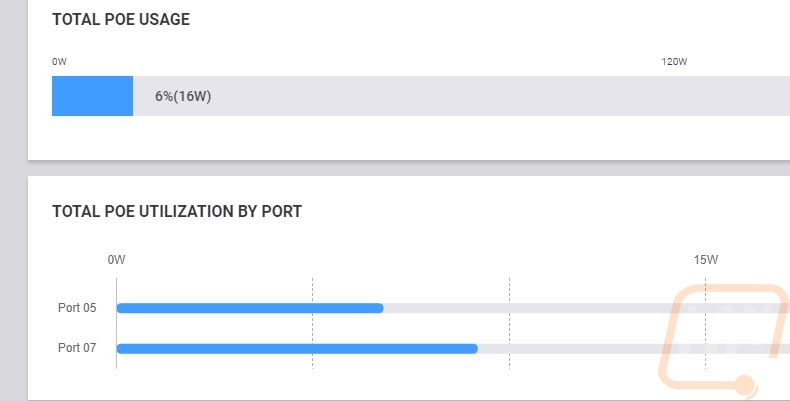
As for power, the ECW260 did well. In my testing with 11 clients on it at the time the ECS2512FP switch from EnGenius shows 6.8 watts of power being drawn to the ECW260. The ECW230 which we have inside was pulling more at 9.2 watts but it also had 16 clients in total on the network for a total of 16 watts for both.
So feature wise, the ECW260 sits in between the ECW230 and ECW220 from their indoor access point lineup. That is because it has the 2x2 AX1775 dual-band wireless that the 220 has but it has the same 2.5 Gigabit network connection that the 230 has. The ECW230 has a 4x4 which means twice as many radios and more potential bandwidth. So my performance expectations for the ECW260 were less than that of our inside access point. Frankly, my goals with adding the ECW260 into the network was about getting better coverage farther out, not bandwidth. Inside I am sometimes doing network file transfers but outside I’m mostly just looking to stay online and not lose my music when mowing, in the pool, or when working in the garage.
So what I experienced on the ECW260 for transfer speeds was in the 550 Mbps range which is a little under our internet connection which normally will see 650-680 Mbps down, but still more than enough to handle anything I need on my mobile phone and WELL beyond what I get on 4g/5g at my house. The ECW260’s Qualcomm quad-core ARM Cortex A53s processor didn’t run into any issues, even when I ran our entire wireless network of devices on it and I found that switching between the two APs in our network was smooth and painless most of the time. The only exception to that was with our 8th gen iPad which was a little slower to want to switch from one to the other unless I got completely out of range of the AP that it first connected to. Having the two MU-MIMO channels helped get good performance across multiple devices at the same time and truly made our wireless network performance smooth and painless. You don’t have to worry about having too many devices and it overloading your network or having one high-use device causing slowdowns for other devices.
As for the range, the ECW260 handles our issues, and mowing and moving around the property wasn’t an issue. In fact, it may have done it too well, I can connect way down the street.
Overall and Final Verdict
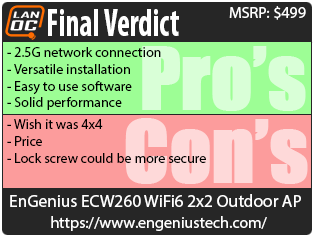
Given my experience running the ECW230 access point on our network already, the ECW260 was a very easy addition to our network. I was already used to running EnGenius Cloud to control things and given that everything was already set up for the ECW230 adding the ECW260 was as simple as scanning the QR code and getting going. It was up on our network from that point on as long as it had a POE network connection. But even the physical installation was surprisingly easy really, once you get your networked POE connection to the device which you would need to do for any outside AP the supplied mount was great. I really like that EnGenius gives a lot of different options for the mount, especially for pole mounting. They even include the extra hardware like the clamps for the poles, screws, and even wall anchors if you need them. My only complaint there would be maybe using a rarer screw head for the locking screw or even just a loop to put an actual lock for situations where the AP might be easy to reach.
Performance was solid both in file transfers and range and you don’t have to worry about overloading the network connection with the 2.5G connection speed. I wouldn’t be against seeing a similar model that has a 4x4 radio configuration like the ECW230 if for no other reason than to keep the overall network more consistent. Basically letting you “match” your inside and outside APs.
The only other issue is with the price, the ECW260 is a pro-focused product not your typical home access point so you can expect to pay pro prices. But the price gap between the two is large with the ECW260 running $499 and with something like the Netgear WAX610Y being $160. I will say that EnGenius does make up for at least part of that with their customer service. Their software has a chat integrated down in the bottom right corner where you can give their support access and they can run through any issues you have.


Live Pricing: HERE


