Logitech Harmony Smart Keyboard
To go along with the NUC and to help with HTPC use I contacted Logitech and they sent over a Harmony Smart Keyboard. The Smart Keyboard was only recently introduced and it combines Logitech’s Harmony Hub with one of their HTPC keyboards.
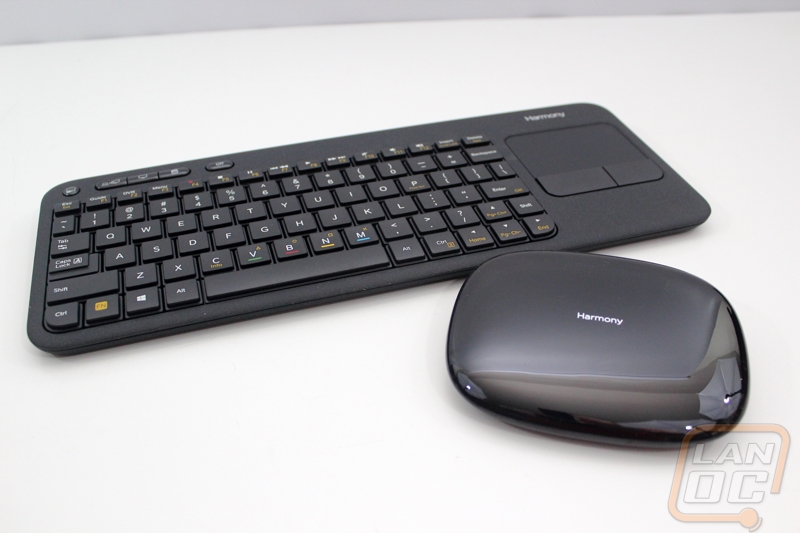
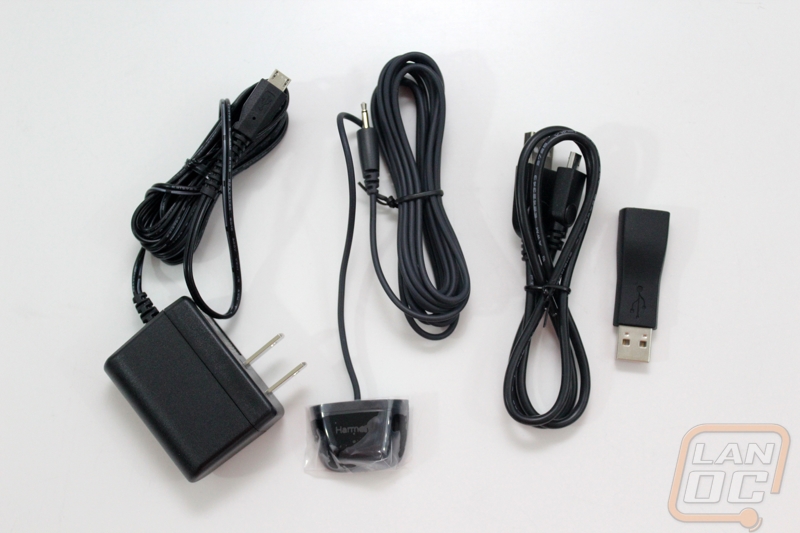
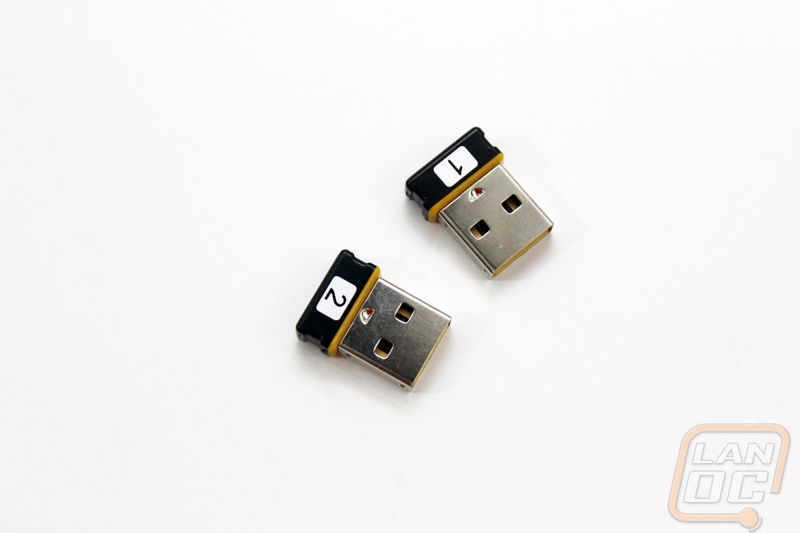
The Smart keyboard comes with a power cord for the Hub as well as a USB cord for hooking it up directly to your PC. You also get an IR blaster than you can hook up and run into or your of cabinets to make sure you can control all of your devices. The also include two USB dongles and a USB extender. The Extender is useful when trying to plug the dongle into an Xbox 360 for example, where the door closes and blocks the signal some.
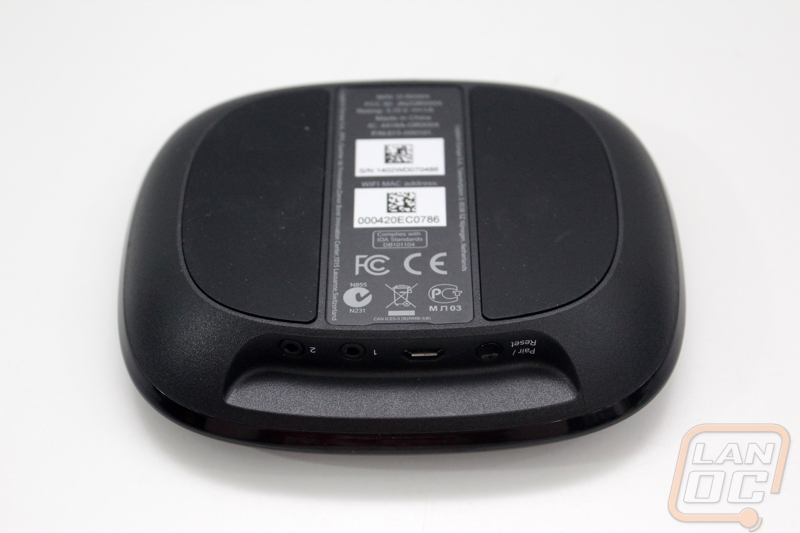
All of the cords above plug into the back of the Harmony Hub, a glossy black device. All of the connections are hidden from above, you have to flip it over like in the picture below to really get a good look at them. You have the USB power connection and two IR Blaster plugs. It only comes with one, but you can add another if you have a complicated setup. There is also a reset/pair button that you use to pair the device to your phone via Bluetooth log into the device and set it up. To keep it from sliding around most of the bottom is covered in rubber as well.
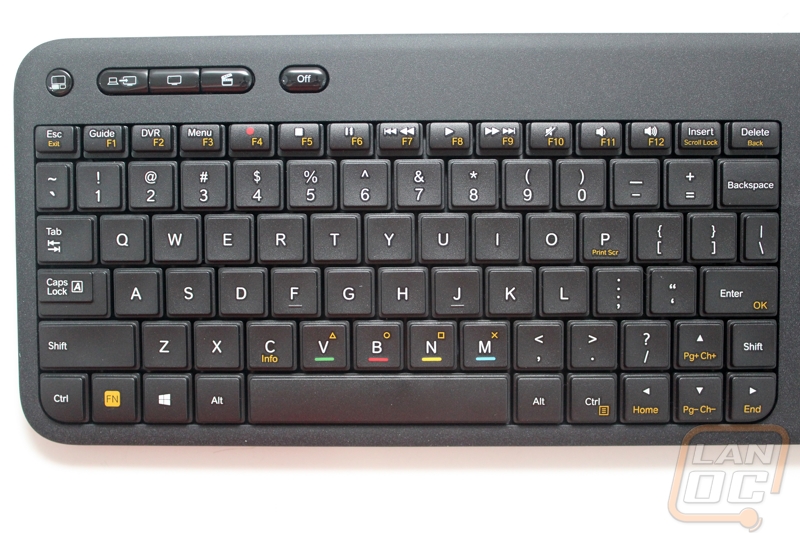
It wouldn’t be a Smart Keyboard without well, you know, a keyboard. The keyboard is a tenkeyless membrane design with a touchpad on the right side. There isn’t backlighting, or any lighting to let you know the keyboard is powered on. The rough finish that they went with is amazing, it is going to be very hard for anyone to drop the keyboard accidentally.
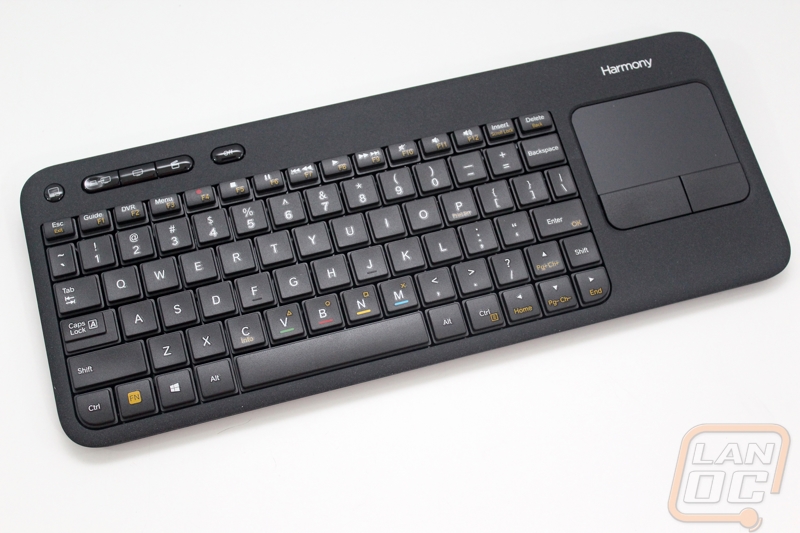
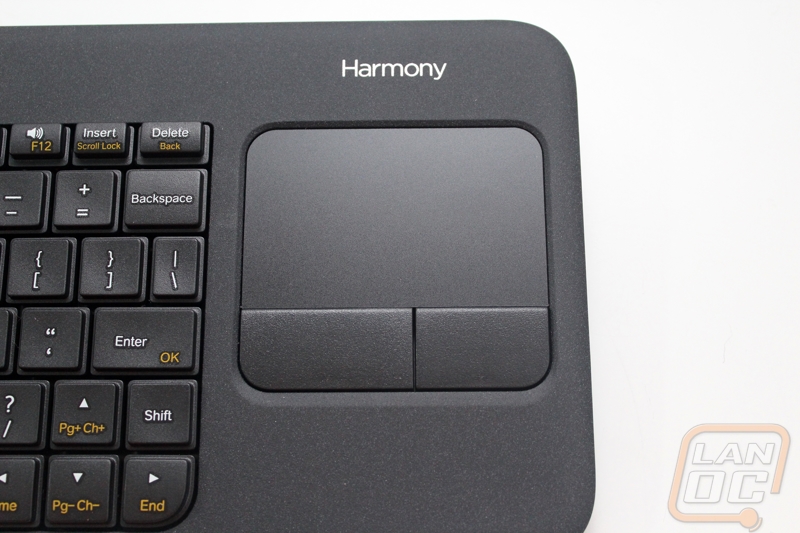
The Touchpad on the right side is simple, around 3 inches diagonal with two buttons for right and left click.
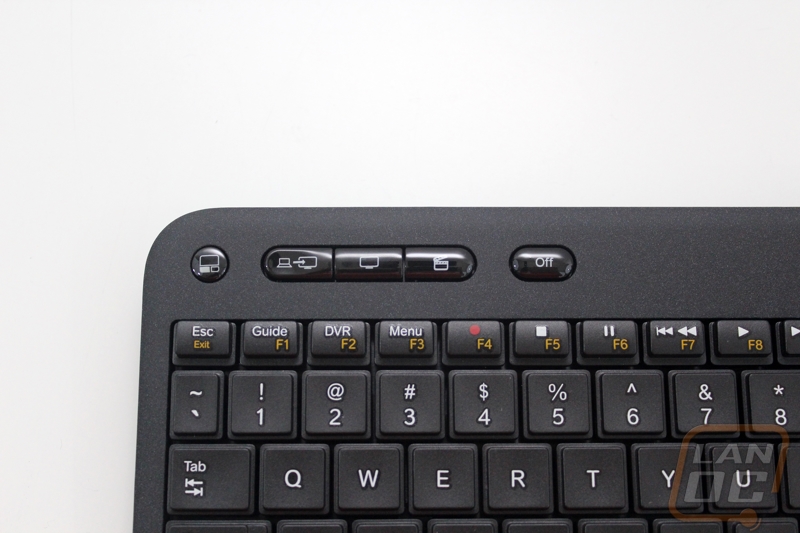
Up in the top left corner there are a few non standard buttons. There is a button that says Off, three next to each other with a PC, TV, and Movie on them, then a trackpad button. The trackpad buttons turns on the trackpad obviously. The three buttons together allow you to turn on everything you have configured for that device. For example if you had a projector, pushing the movie button might turn on your projector, lower the powered screen, turn on the Blu-Ray drive, and set the Projector to the proper input. You can even go farther by pairing up LED lighting, you can set the movie mood as well.
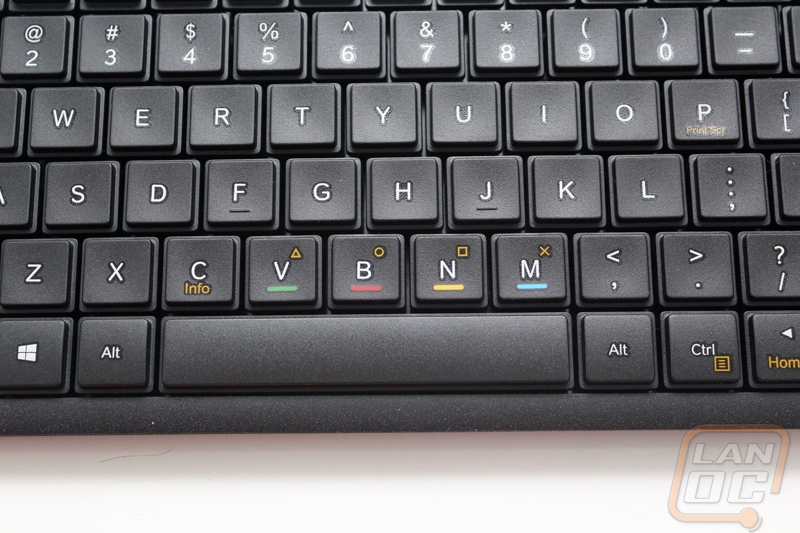
All over the keyboard the keys have additional functions. The four colored keys in the picture below are for use with your PS3.
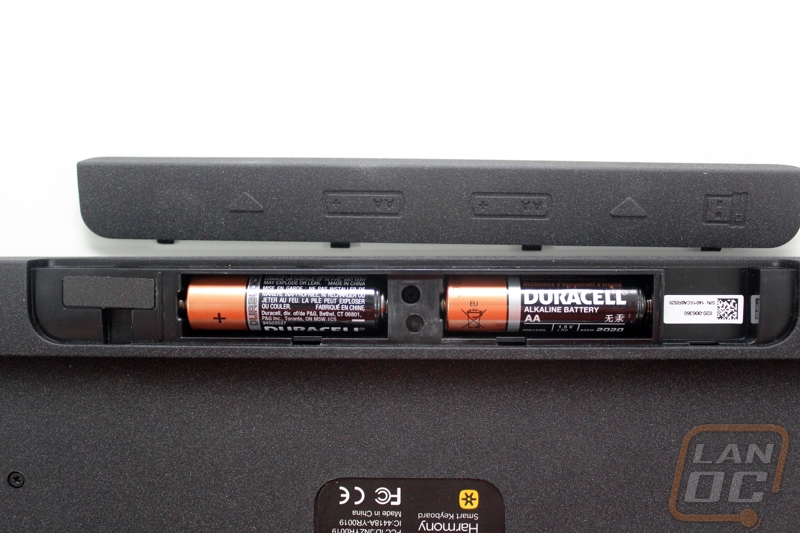
On the back side of the keyboard we can see the rough finish a little better. There are also four rubber feat to give you the best grip on your coffee table and to prevent the finish from scratching your new wooden tables. Along the back edge the keyboard is thicker where the batteries install. It takes two AA batteries to power. Also inside the battery compartment is a spot to store your second USB dongle should you not need it in your current configuration.
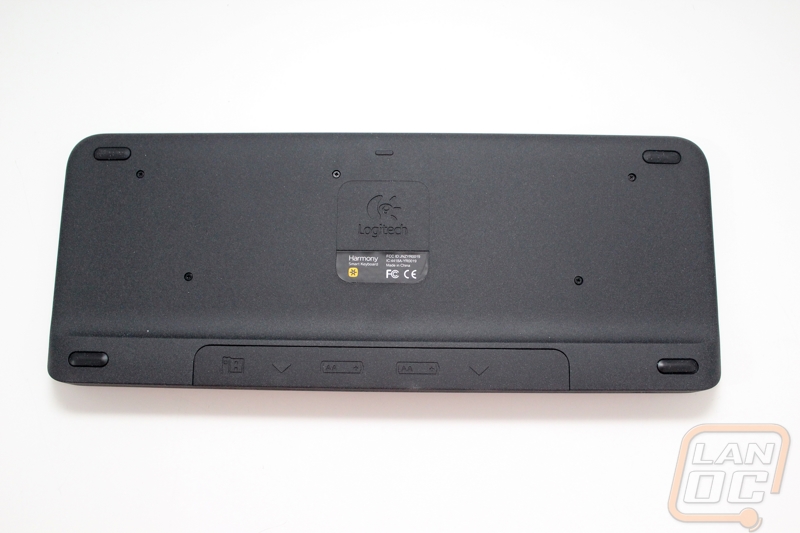
Slipped in along the top edge is a power switch to turn the whole keyboard off when you aren’t planning on using it for a while.

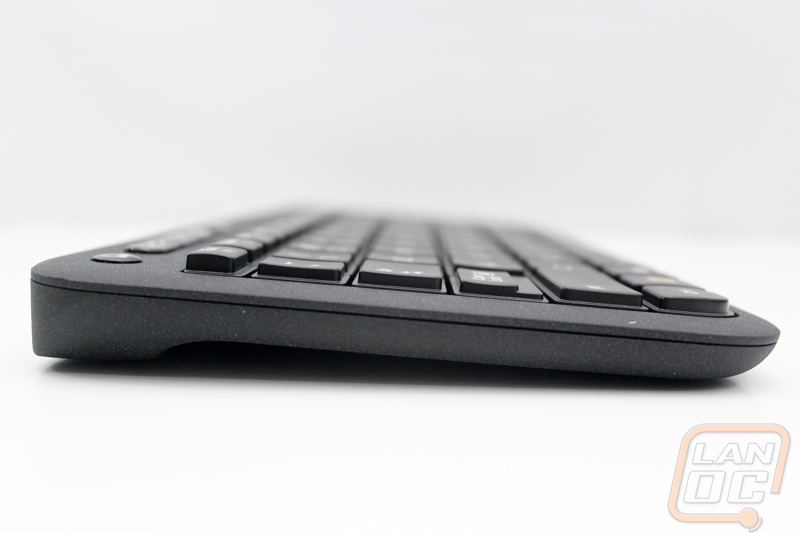
Here is a shot of the side profile with the battery compartment helping angle the keyboard slightly.
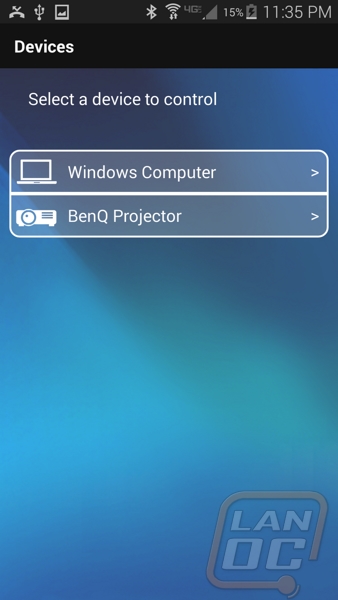
The Harmony Hub and Keyboard are only 2/3rd of the picture though. Without the Harmony mobile app it’s just a keyboard and a hub that does nothing. The app is what brings everything to life. The app is available on iOS and Android. Once installed you can link to the hub via Bluetooth and setup the Hub’s wireless settings as well as configure it to work with nearly any device. The Hub can control devices via IR, Blutooth, WiFi, and even using USB with the provided USB dongles. For our use we are just pairing it up with a TV and the NUC.
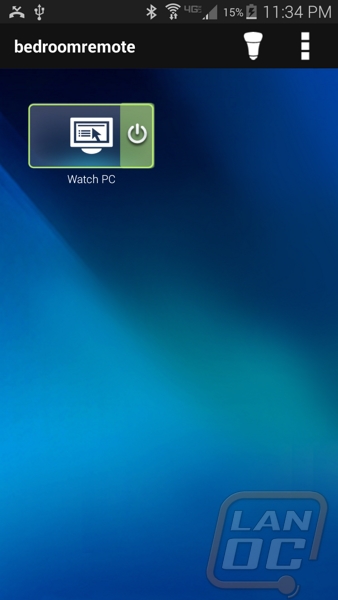
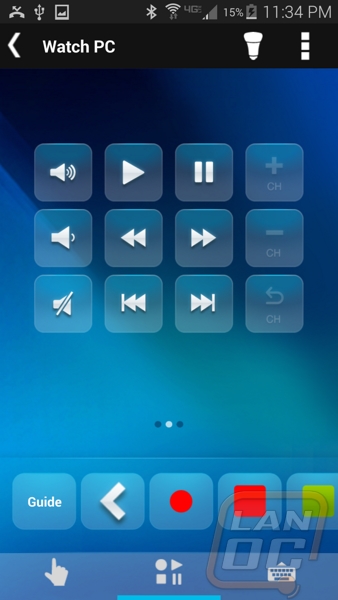
Once setup, the launch page lists all of your device configurations. In our case we are only working with the NUC, if you setup other devices you would see them all listed here. Pushing the green power button will turn everything on, if it is already on pushing on the left side takes you right to the controller for that device.
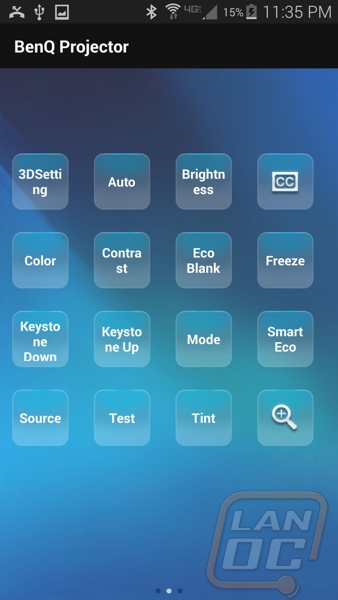
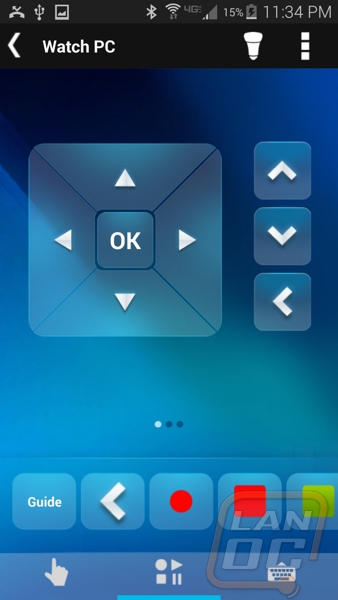
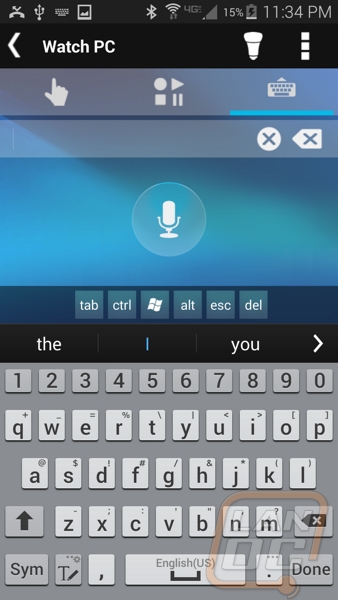
I took the screen shots using an S5. For mobile phones more of the controls are split up. On our tablets you have more buttons and at the same time you get access to the touchpad that lets you control the mouse curser. For the S5 I did have to flip through things to get to the touchpad. When you select the keyboard option the app launches your default keyboard making it easy to type without even using the smart keyboard. I still prefer the keyboard over using the app, but if you need to search for something or type in a web address really quick you don’t have to dig out the full keyboard. For those of you who keep your phone or tablet on your nightstand this is perfect. You can hide your remotes away keeping your bedroom clean.
Living room use is even more convenient as well, especially for larger familys. Everyone has a tablet or smartphone these days. Each family member has their own personal remote. I remember growing up my brothers would loose the remote in the strangest places, this should hopefully cut down on that. It does introduce the possibility of more fighting about volume and channels though now that anyone can change it at any point (even if they aren’t in the room at all!)
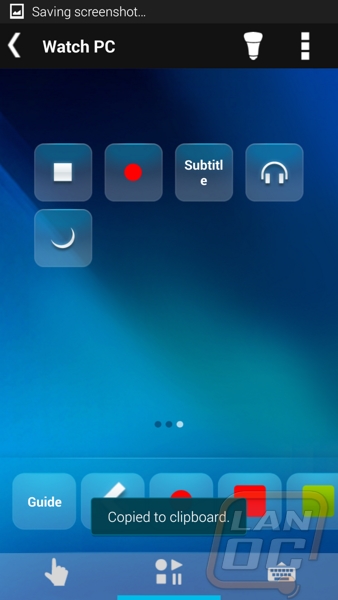
While the general controls just have the basics that you will need. If you open up the device listing you can find pages with all of the “other” buttons on your remote that you most likely rarely use. This is the benefit to this design over a universal remote, none of these options are going to be on a universal remote normally, but being an app they can include them here.