Performance
With everything picked out I did still need to get it all installed in the Helios case then test everything out. I already had the memory and CPU installed into the motherboard, as well as the M.2 drive as well. So to finish that up I wanted to preinstall the ROG Ryujin 360 as well. This meant installing the fans on the radiator in the orientation that I had planned. Then mounting it to the motherboard. It came with thermal paste pre-installed which was nice. It also had the Intel bracket installed. So getting it mounted was as simple as installing the backplate with the standoffs. From there I could mount the pump/waterblock using the included thumb nuts. I left all of the wiring for later, so from there it was time to install the motherboard into the Helios.
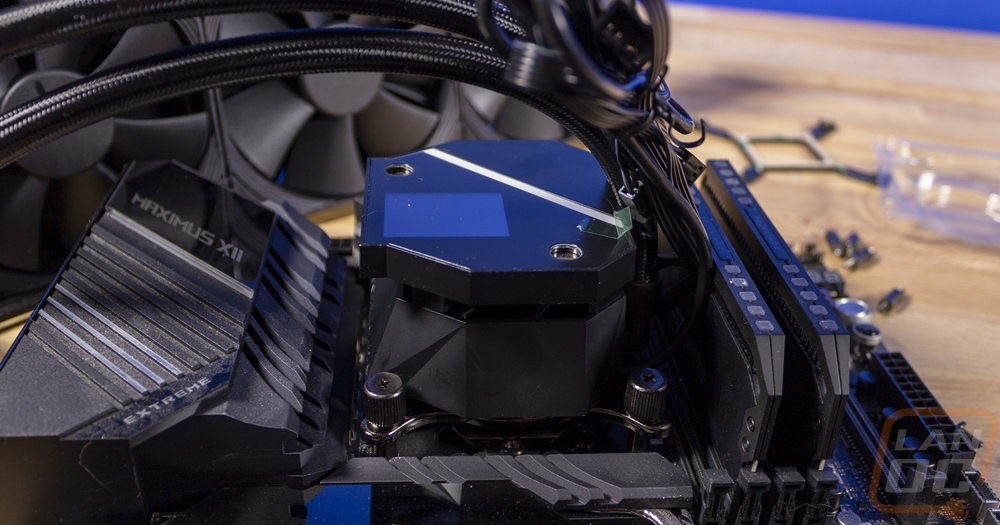
Once the motherboard was installed, I had to mount the radiator into the top of the Helios which you do have to work around the carry straps or remove them. You also have to take out the top dust filter, which slides right out. I also removed the protective coating on the OLED on the ROG Ryujin 360 and snapped the square cover on.
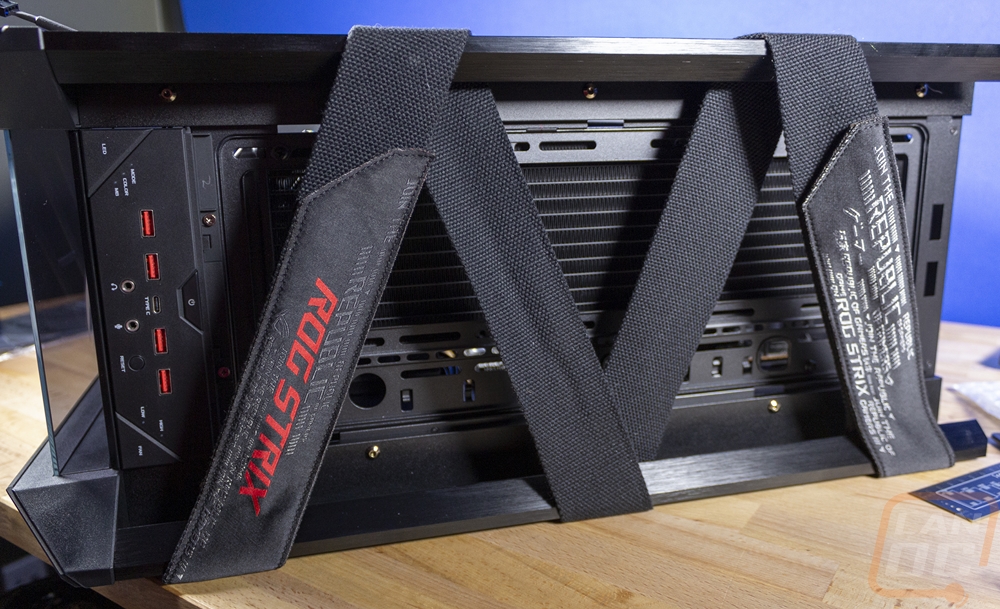
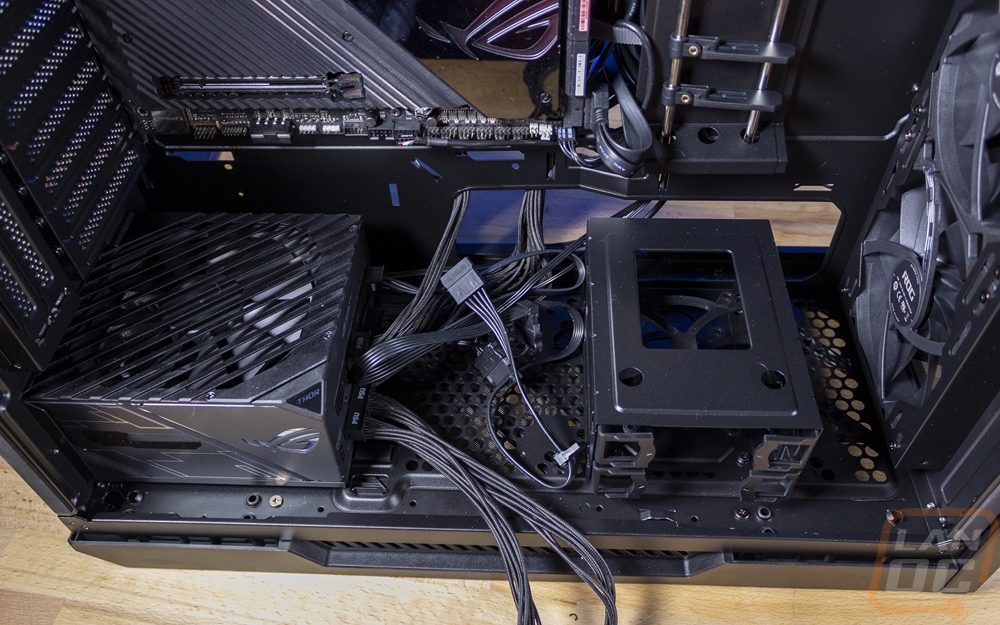
So you can install the power supply without removing the PSU area shroud, but it is only a few screws, and having the shroud out makes the installation and wiring a lot easier. I did however go through the wiring for the Thor power supply ahead of time and install all of the cables that we would need because that is always easier outside of the case. Running all of our wiring there were a few things that stood out. For one, that 8-pin EPS/CPU power cable was just barely long enough to reach, I had to unplugged it from the Thor until I had it hooked up and then plug it back in and as you can see on the back of the case, it goes right across to get to the plug at the top. With the Helios using both USB 3.2 headers and one of the Gen-2 plugs as well I did have to use the one right-angled USB 3.0 plug from the Helios and because Asus already put the plug at a right angle on the motherboard I ended up with a weird layout that had the cord sticking up. On any motherboard with a normal USB plug, this would have worked great, but it's an interesting interaction where Asus tried to fix the same problem on both the motherboard and case, and it ended up making it worse. The other weird wiring issue I ran into was with the front panel audio connection, it was too short to reach while running it in the hidden PSU shroud.
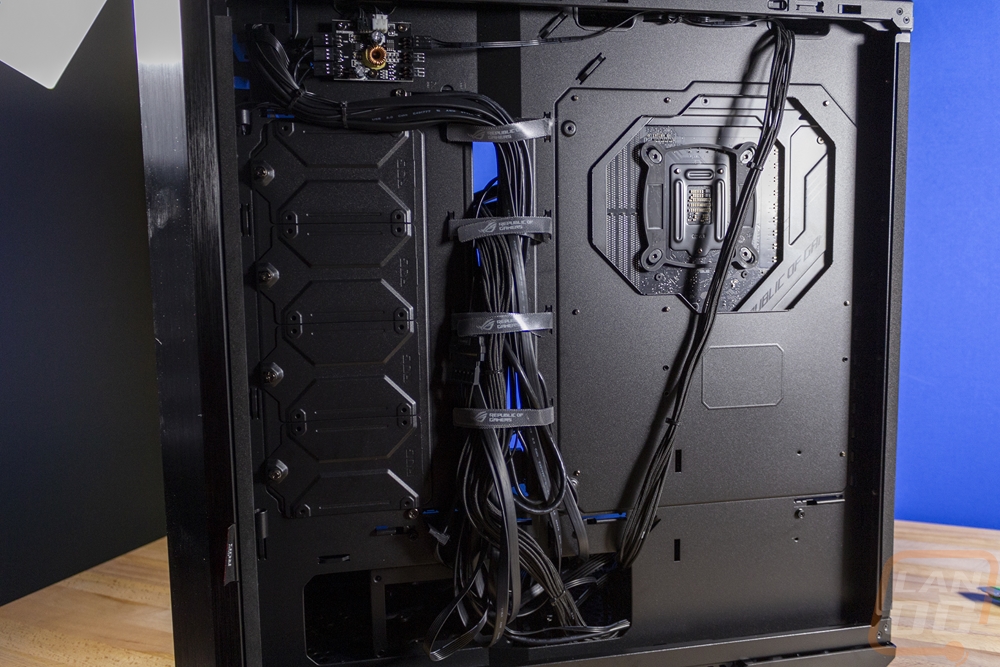
Once I had everything wired up, I reinstalled the plastic wiring cover behind the motherboard tray. It does look a little weird with that EPS power not being hidden by it though.
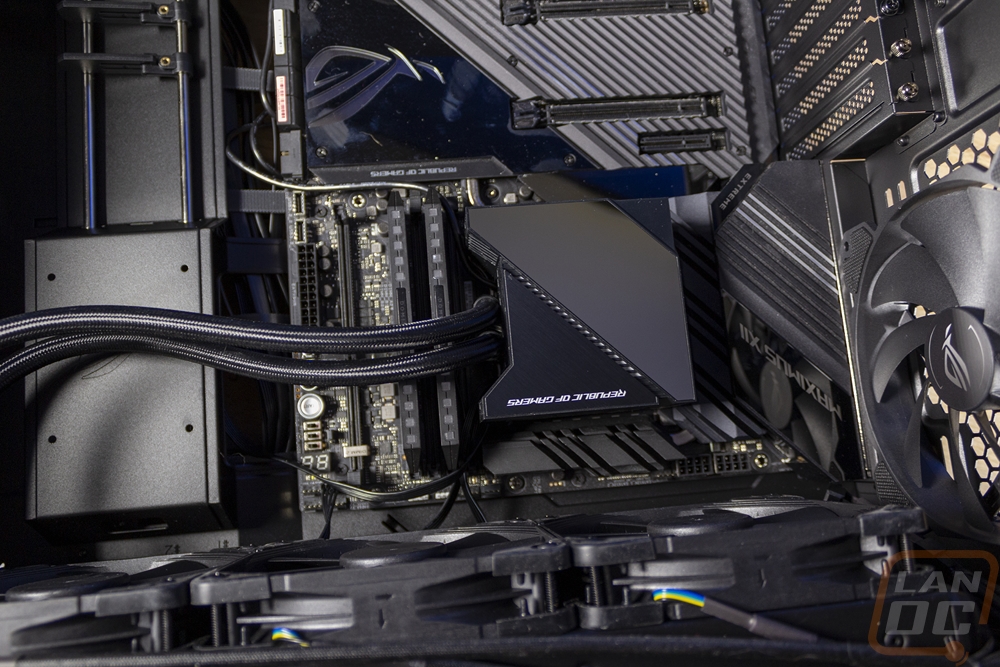
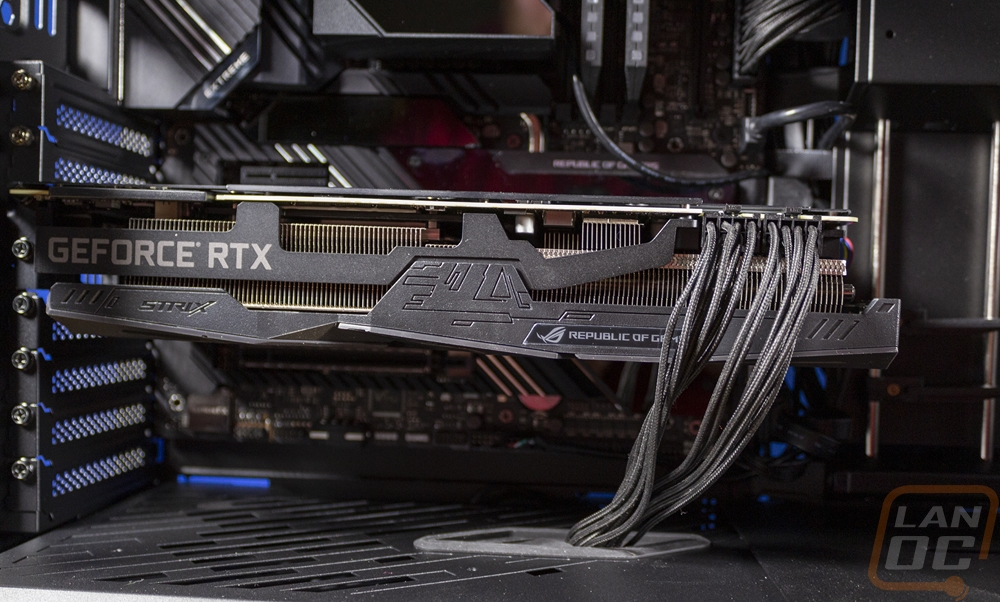
All that was left was to install the Strix RTX 2080 Ti and when I reinstalled the PSU shroud I ran the wires out of the top making it easy to plug in. But before getting it installed I did have to remove the vertical GPU mount so I could even access the normal horizontal screws. I would have preferred to go vertical mount, especially with the Helios coming with two different options for that. But sadly for a $300+ case, it doesn’t come with a PCIe riser.
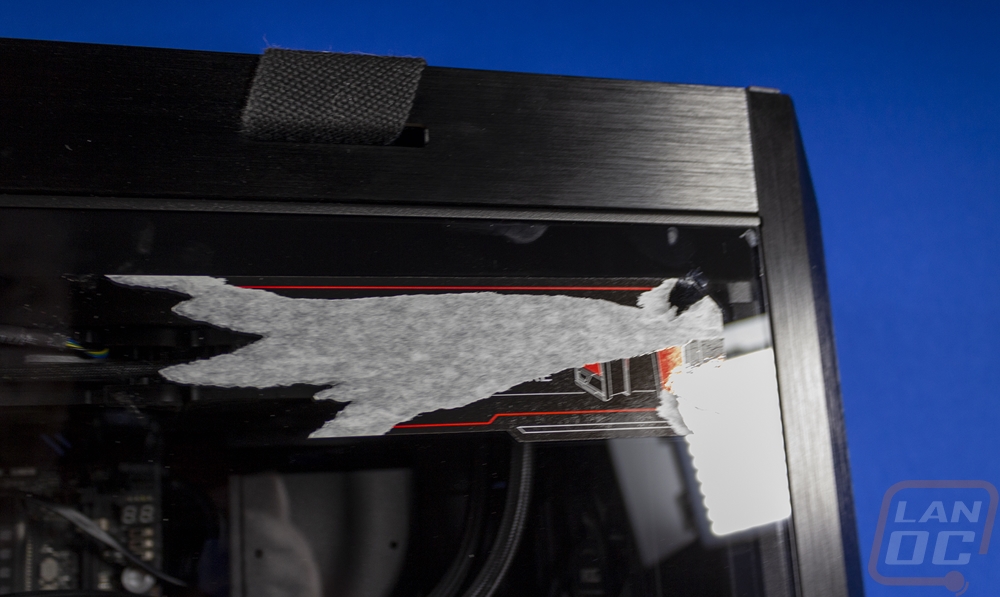
I just have to point out how frustrating the warning sticker on the tempered glass was as well. It was paper backed and took forever to get removed, then required a lot of cleaning to get the adhesive off as well. Installing that on the removable plastic, or using a better sticker would save a LOT of frustration.
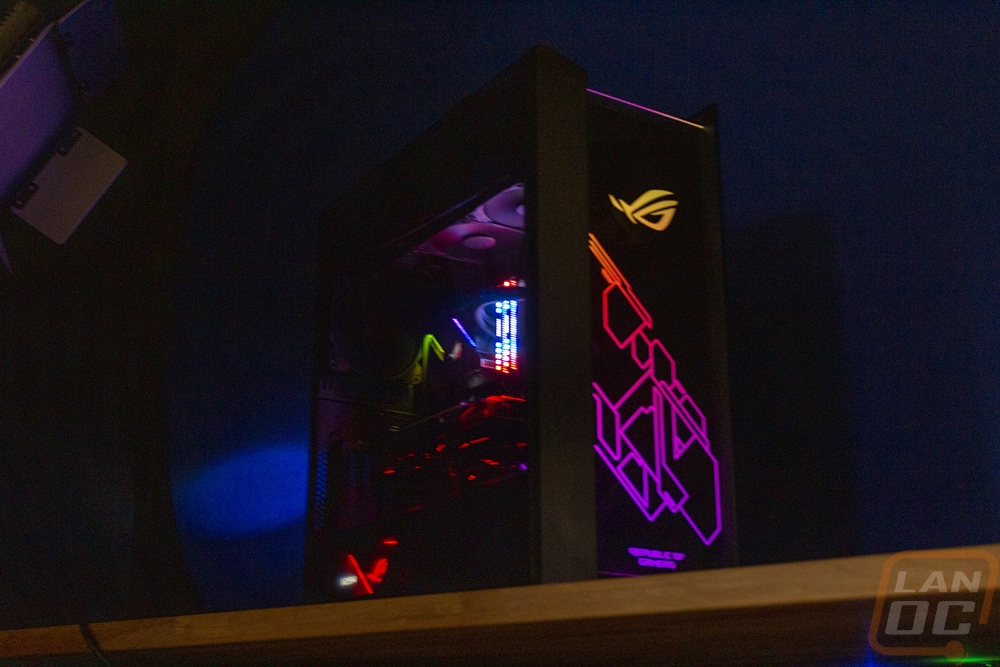
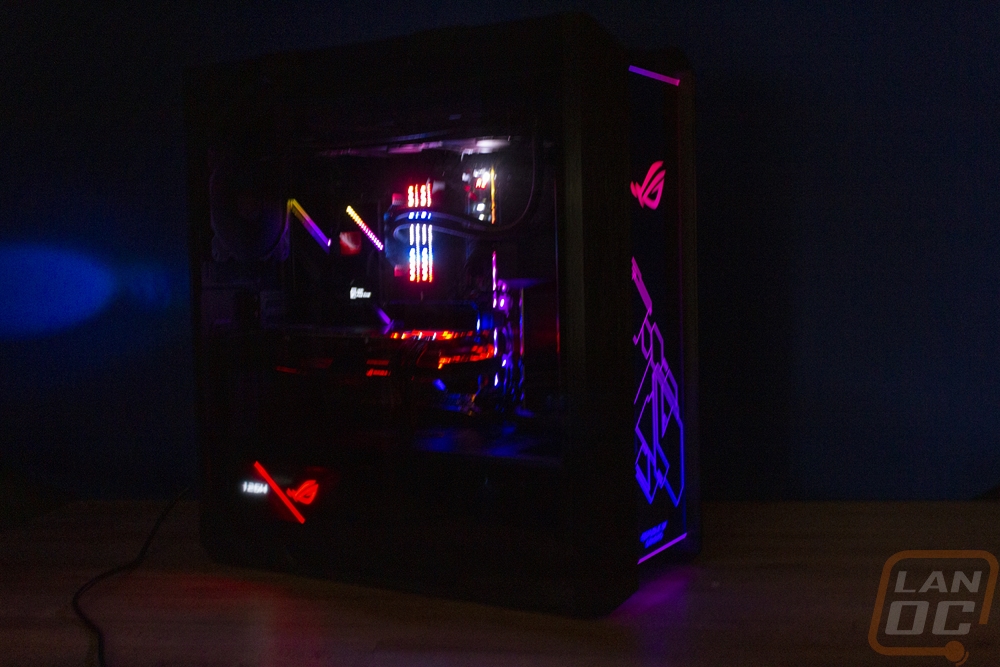
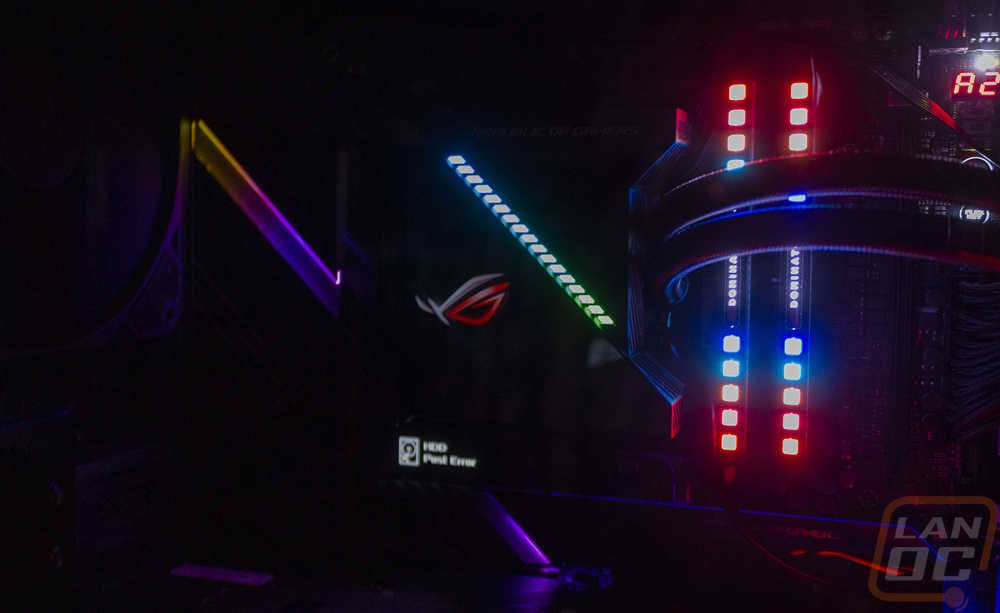
After that, I could get everything up and running and one thing is for sure, by going with nearly all ROG products, everything matches well. My only complaints would be with just how much tinting stacked on tinting seemed to hurt the visibility of the OLED screen on the ROG Ryujin 360 water cooling. Look at how much better you can see the screen under it on the motherboard itself. The same goes for the screen on the Thor PSU, the plastic panel on the PSU shroud would be much better if it was also tempered glass and I would swear that there is still a plastic film on there somewhere causing it to be extra blurry but I can’t find it.
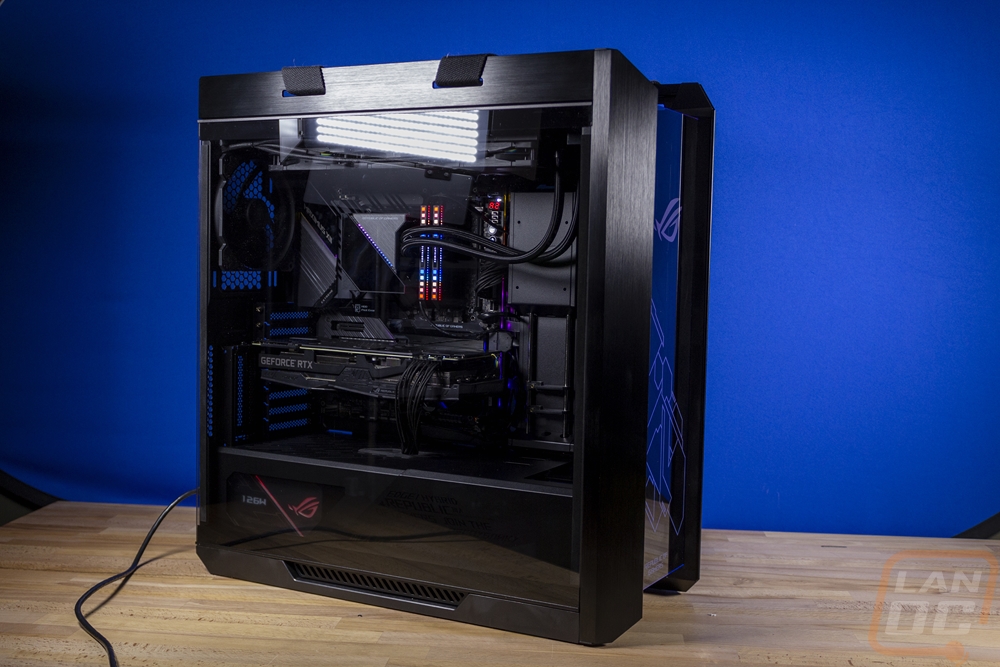
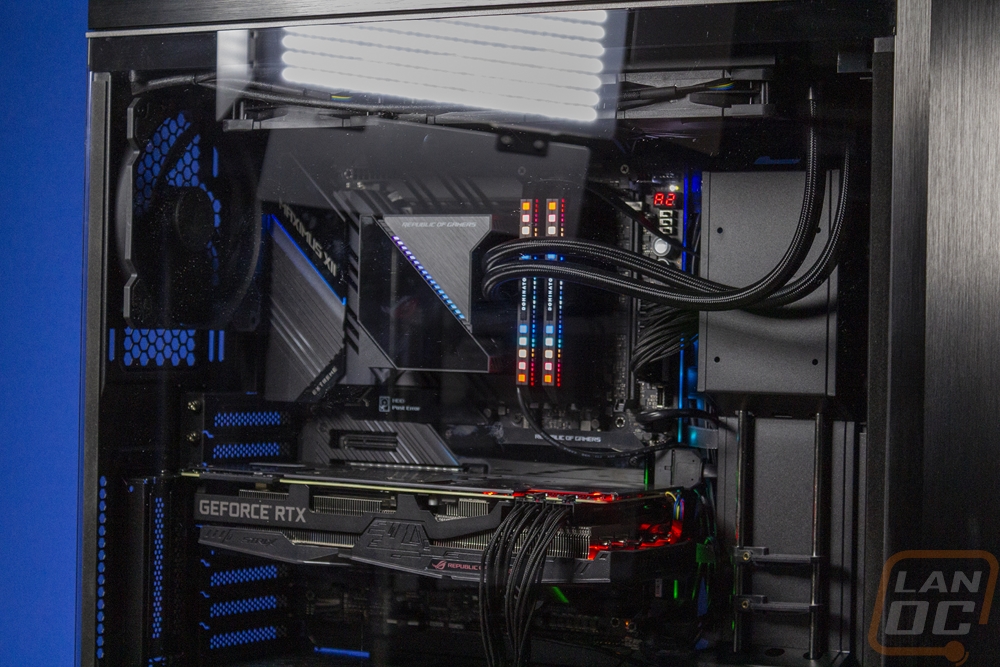
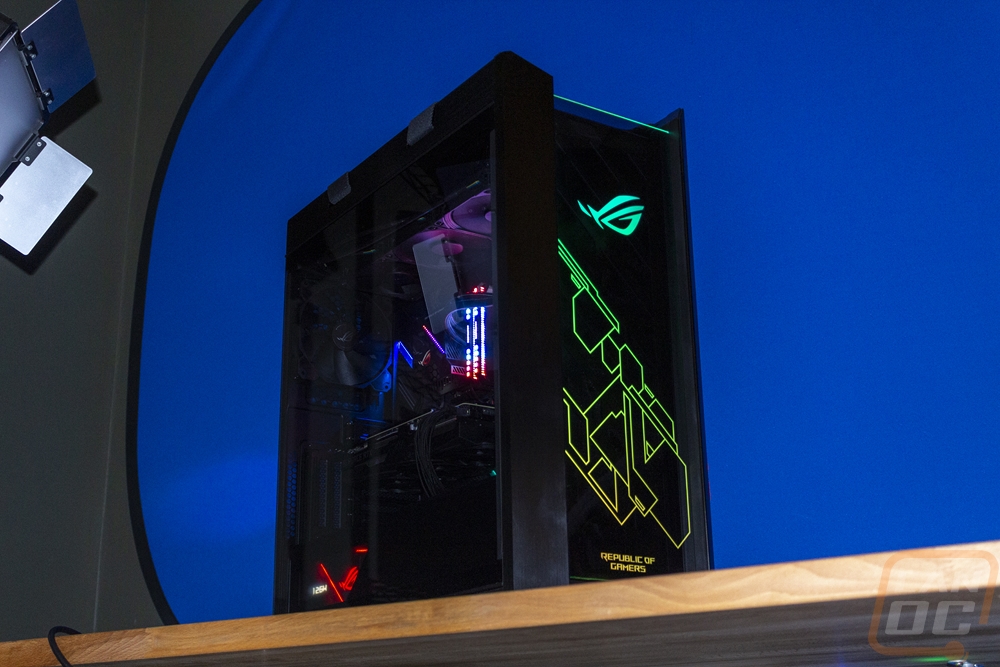
Now the lighting on the Helios looks great, especially the front panel. It doesn’t tie into your motherboards controlled lighting without a little extra work, however. You need to use the RGB connection to hook it up to your motherboard, I initially thought it might work using the USB connection. I also think it could benefit from more interior lighting. Asus does sell Aura Sync lighting kits if you are looking for that and want it to tie in with everything else.
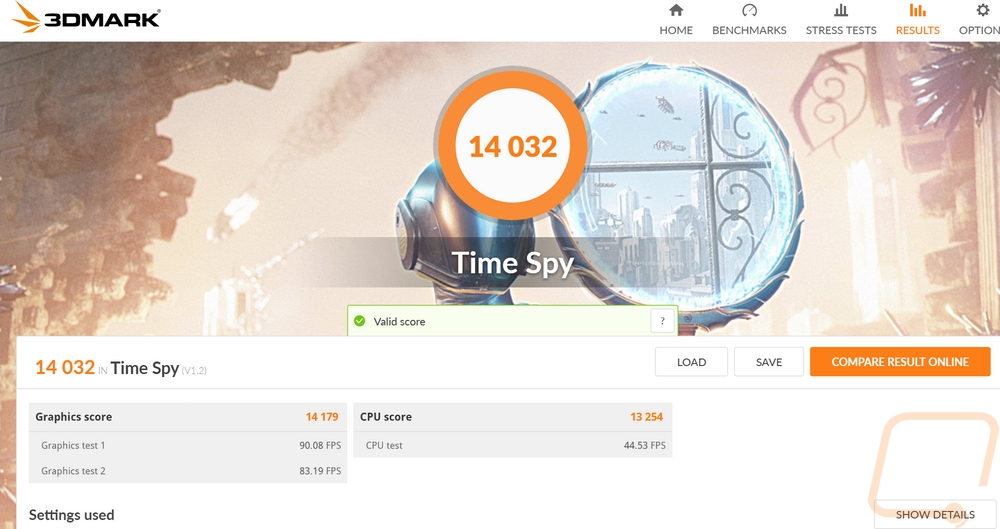
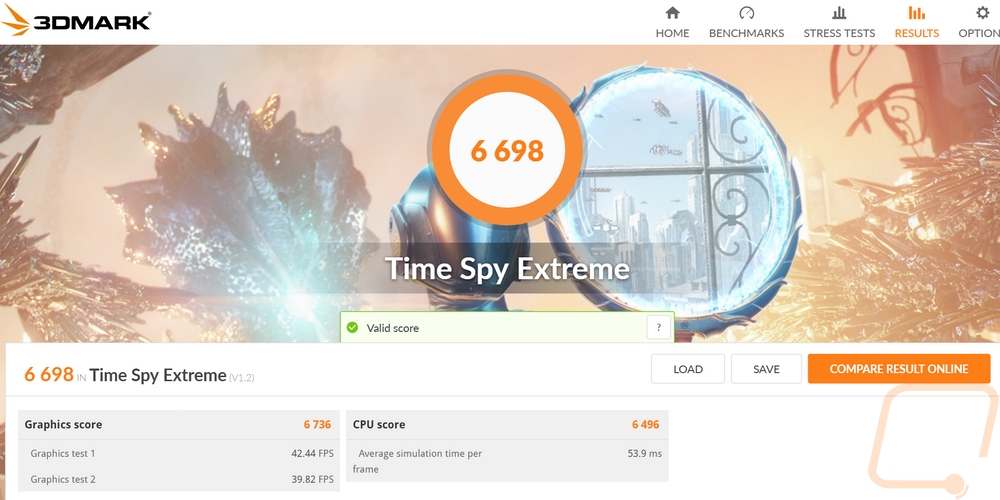
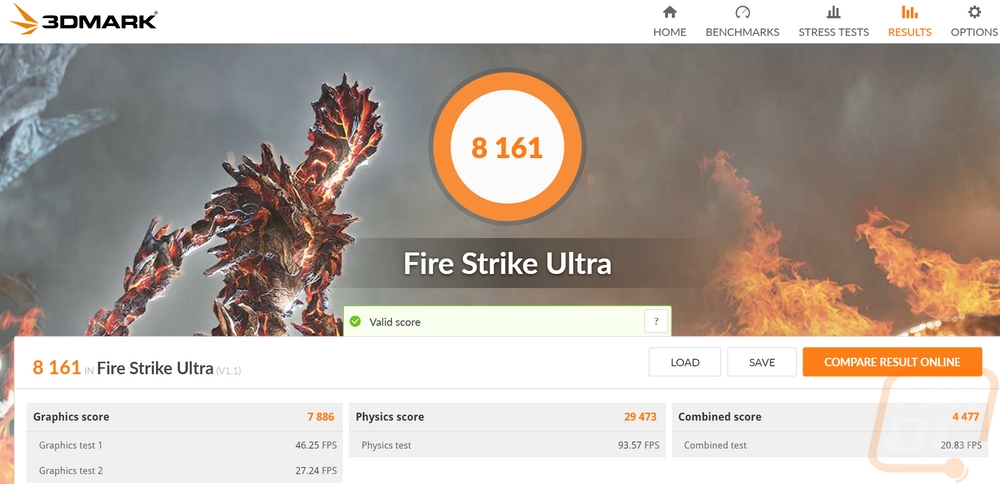
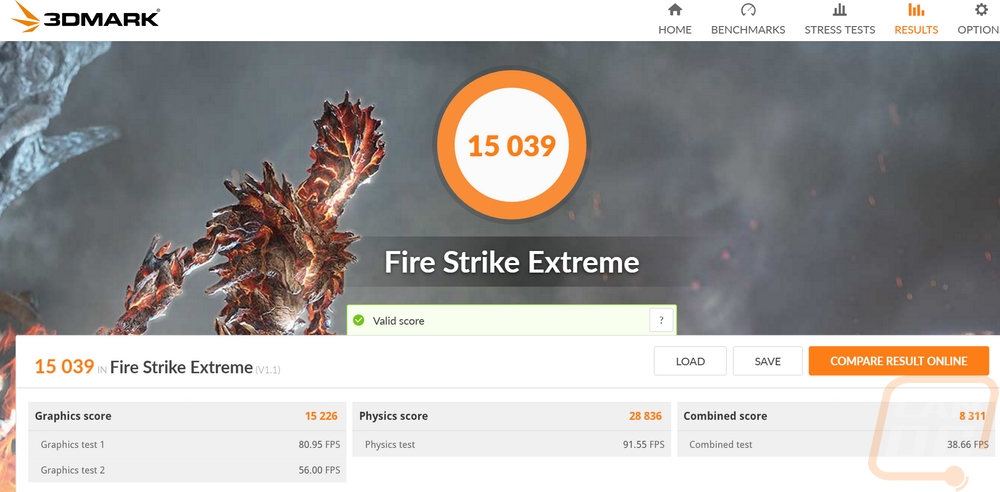
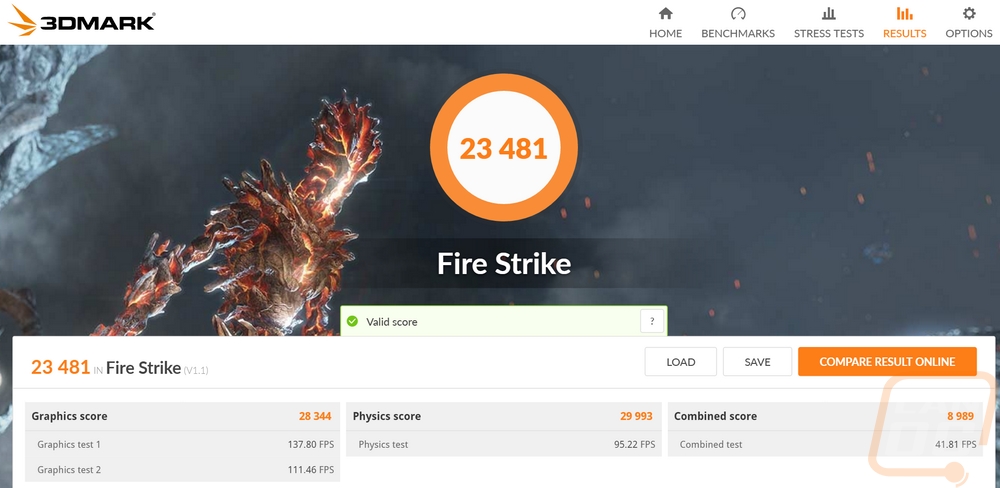
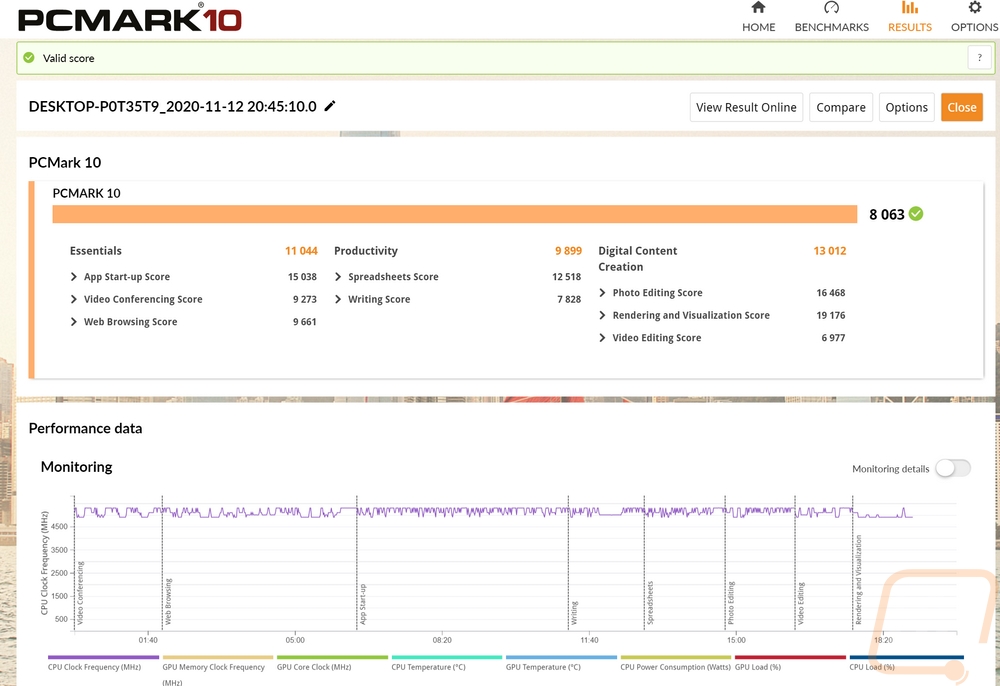
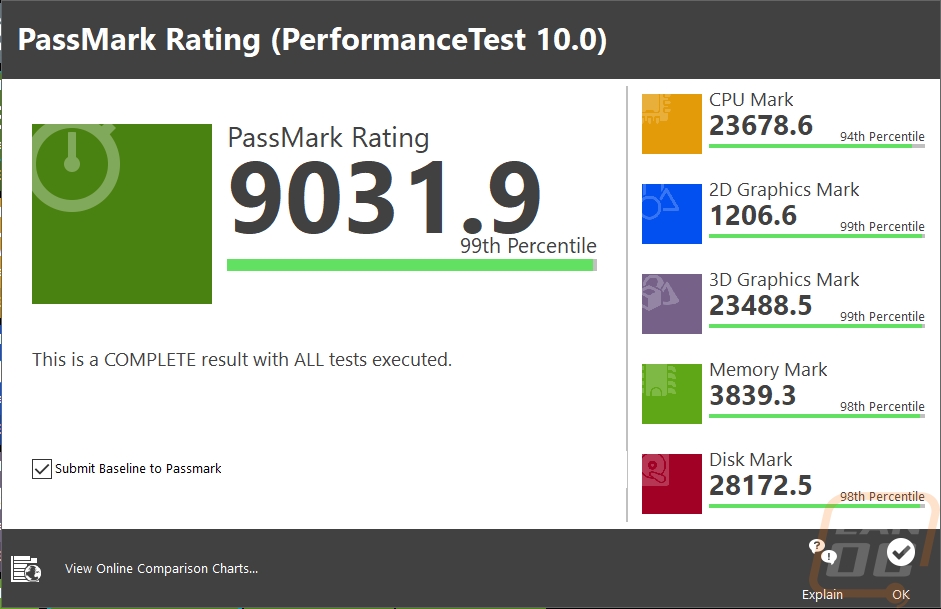
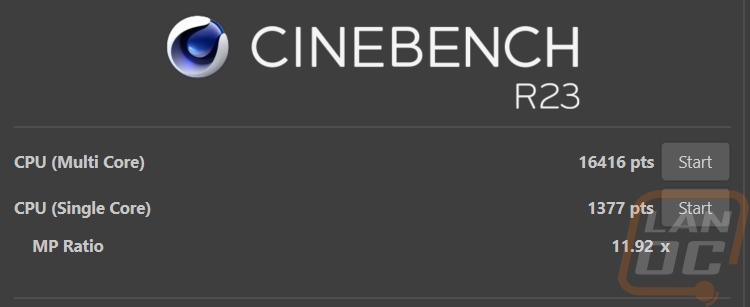
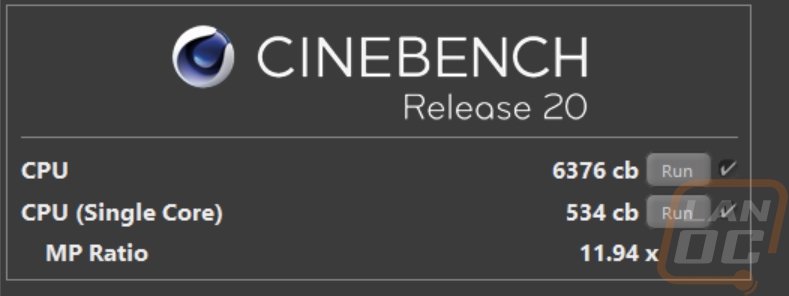
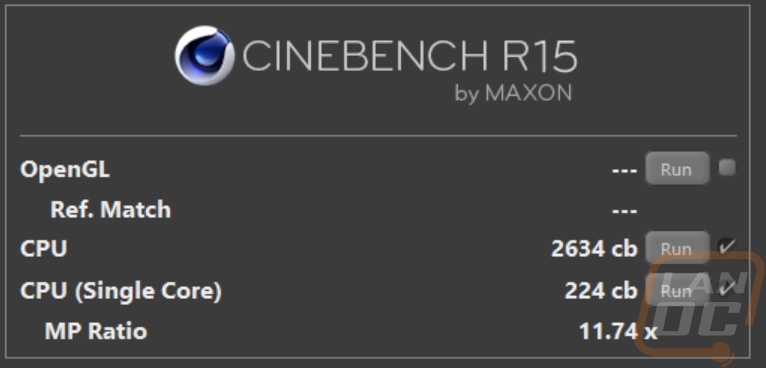
Now I think most people looking to do an Asus ROG build at this point would be looking at the new Nvidia 3000 series cards or the upcoming AMD 6000 series and a lot of you might be looking at AMD for the CPU so a lot of this won’t really apply. But I did go ahead and run some tests on the build as a whole just to see how it performed with the Intel Core i9-10900K and the RTX 2080 Ti Strix.
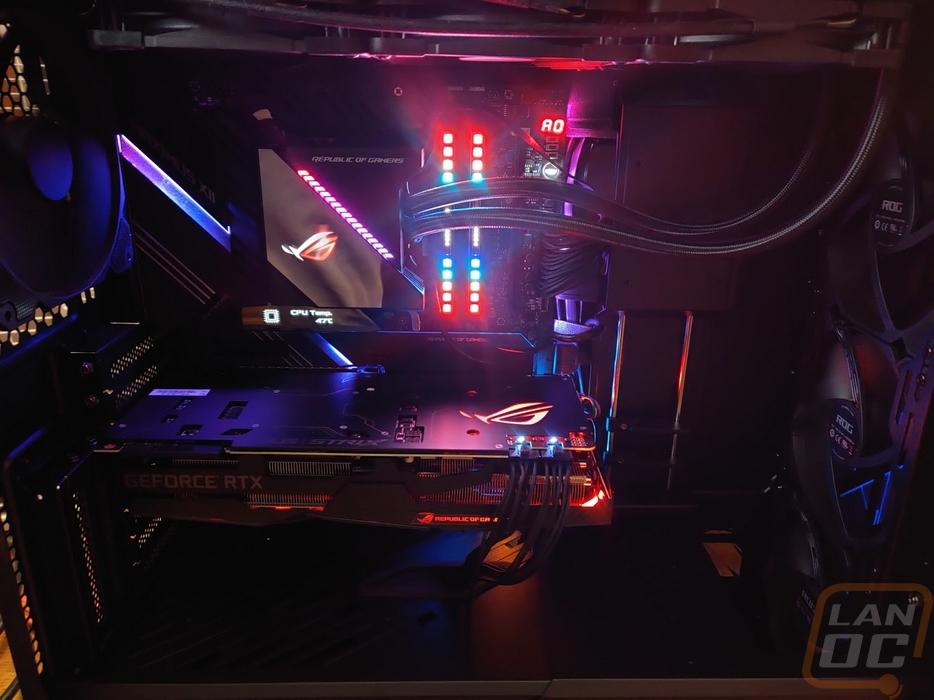
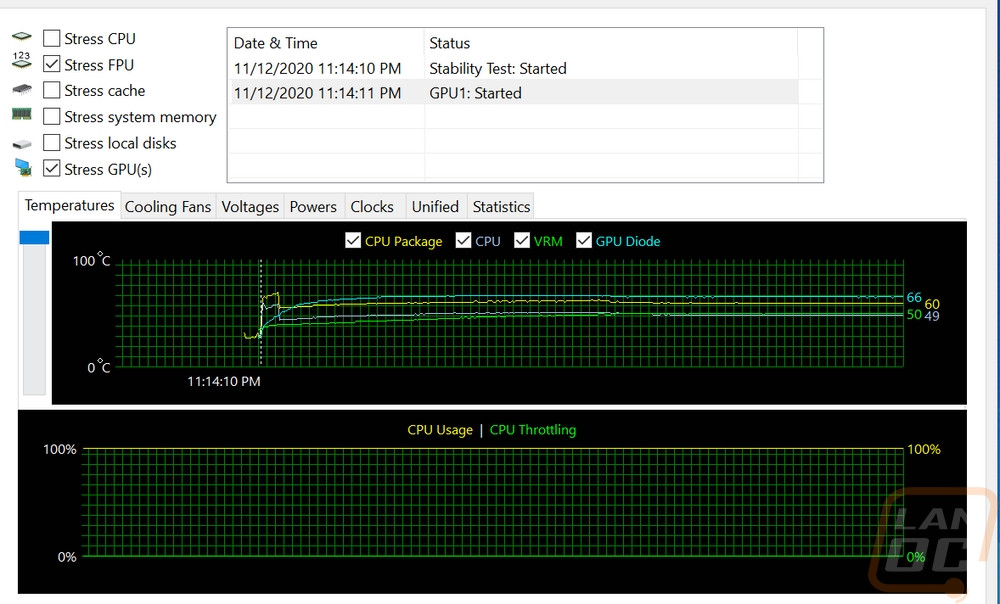
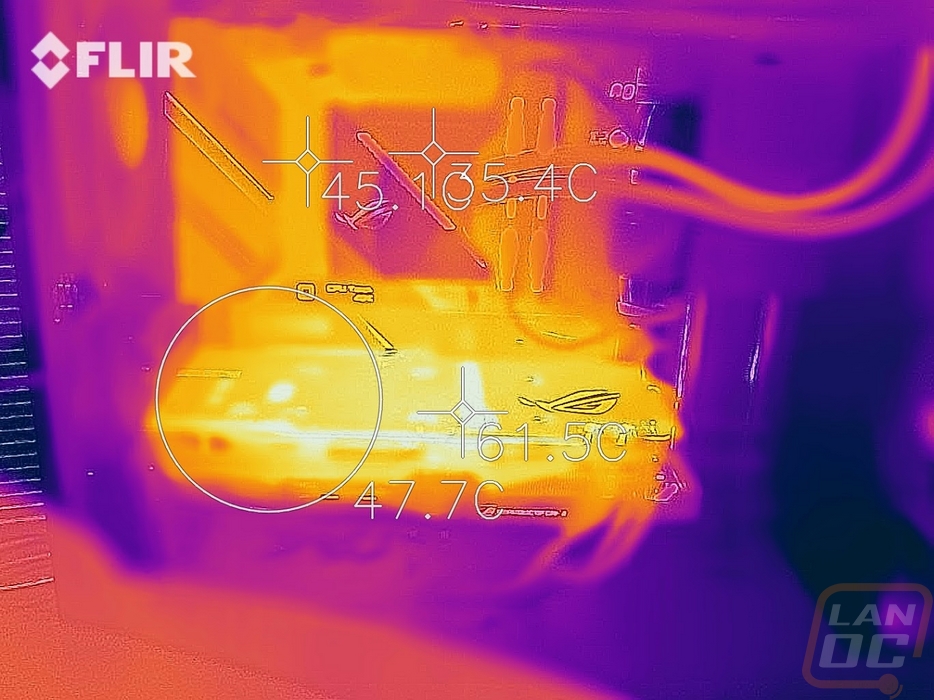
I was also curious about the thermals, for that I ran AIDA64’s Stress Test with the CPU set to FPU and the GPU both running at the same time for an hour and a half. The GPU ended up running at 66c while the CPU package was at 60 and the CPU itself was 49.
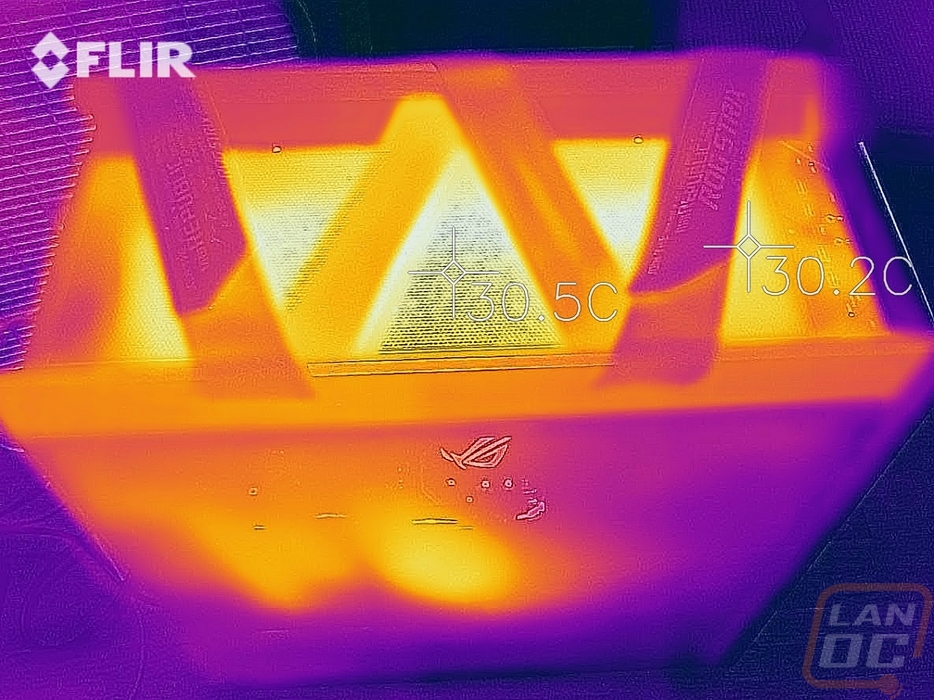
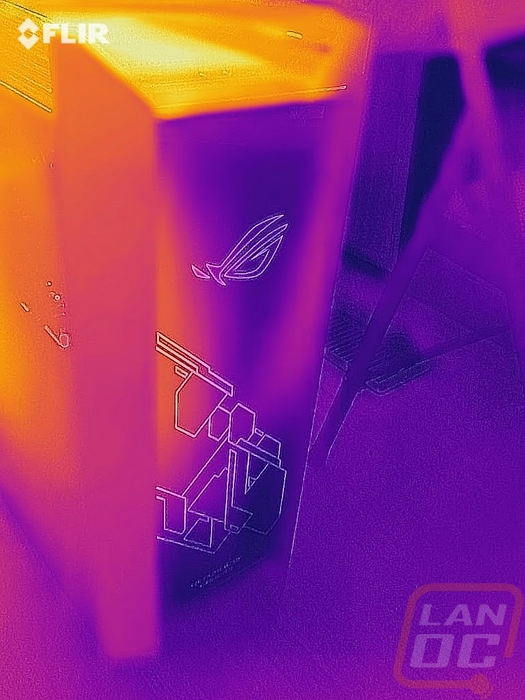
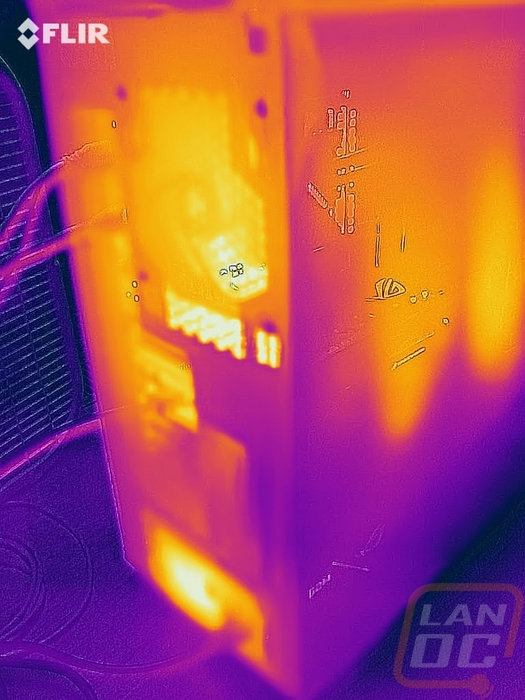
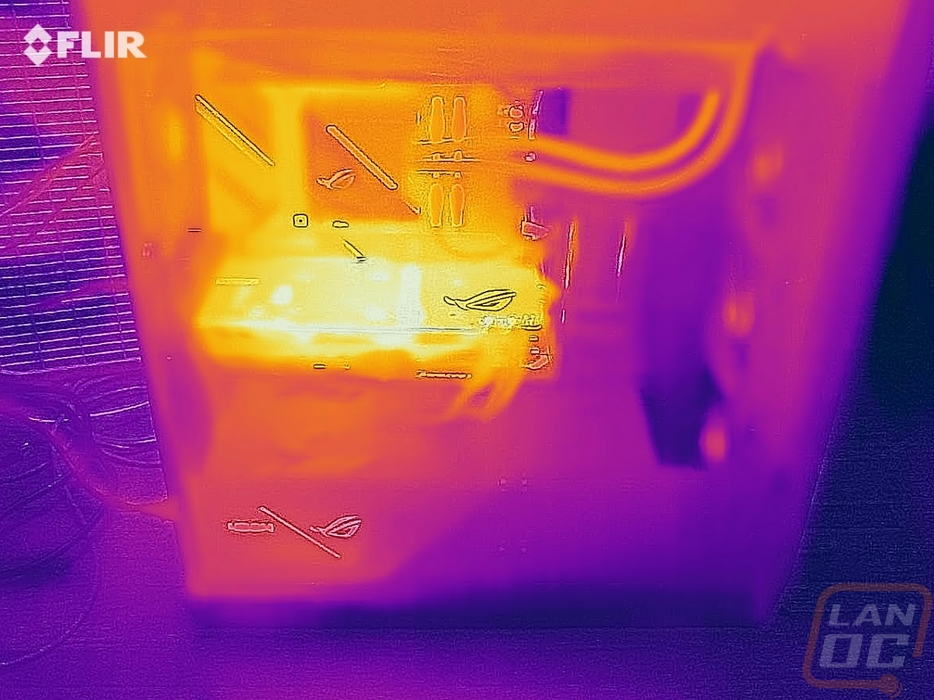
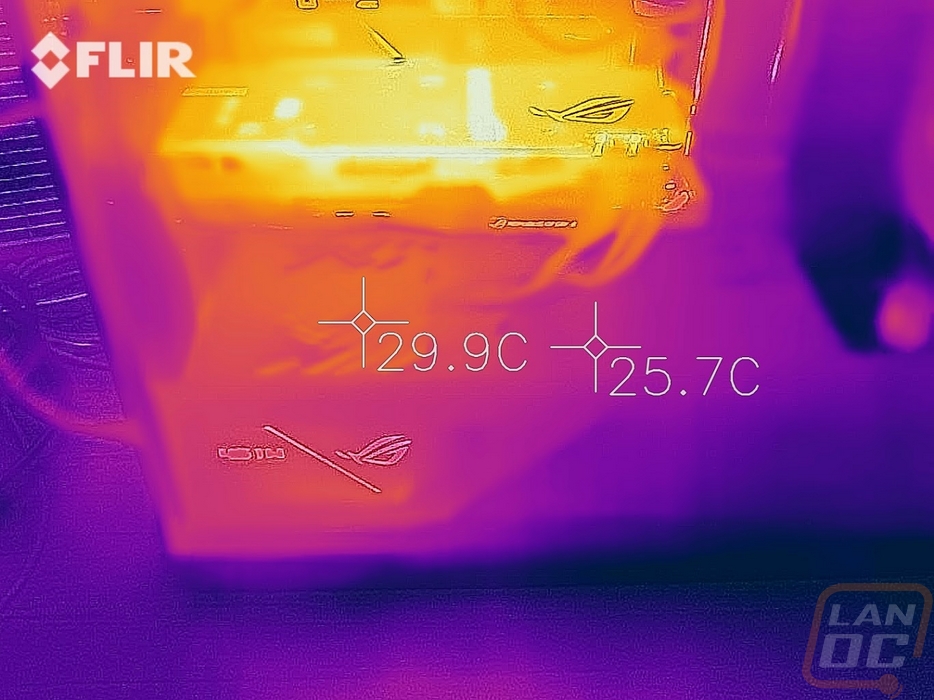
I took thermal images of the setup after the extended testing as well. I was especially curious to see if the carry strap at the top of the case would be a big issue for the AIO cooling mounted at the top and you can see that the straps did get warm over time. Beyond that the GPU cold still use better airflow, even a fan just mounted right in the PSU shroud, but there weren’t any big hot spots. Having to run the PSU flipped upside down to have the power screen visible did mean the PSU shroud does show some heat in it where I think if it was a normal PSU and was flipped that wouldn’t be an issue.
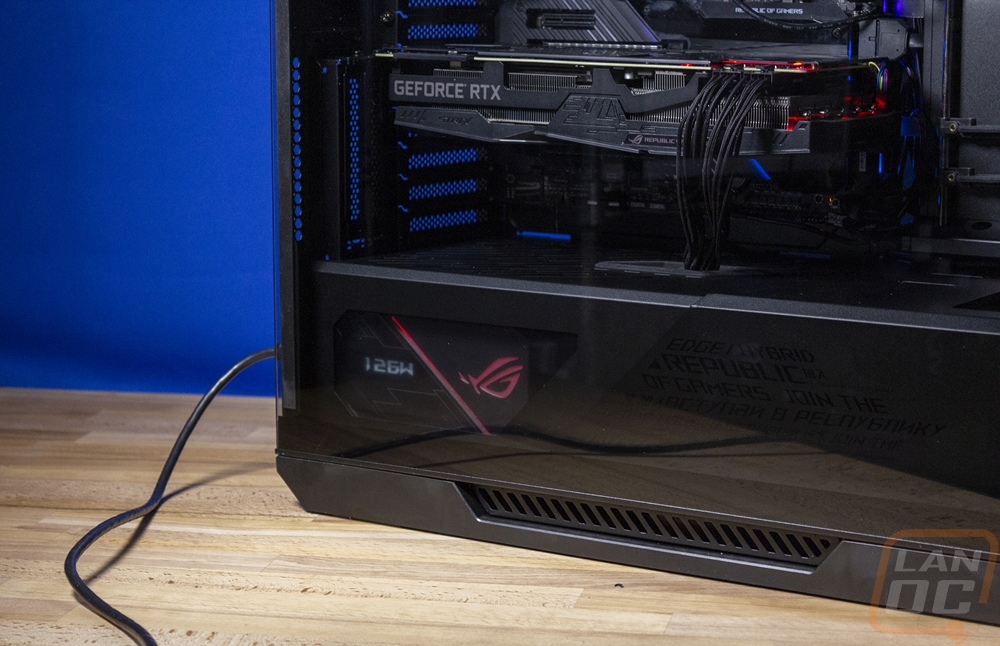
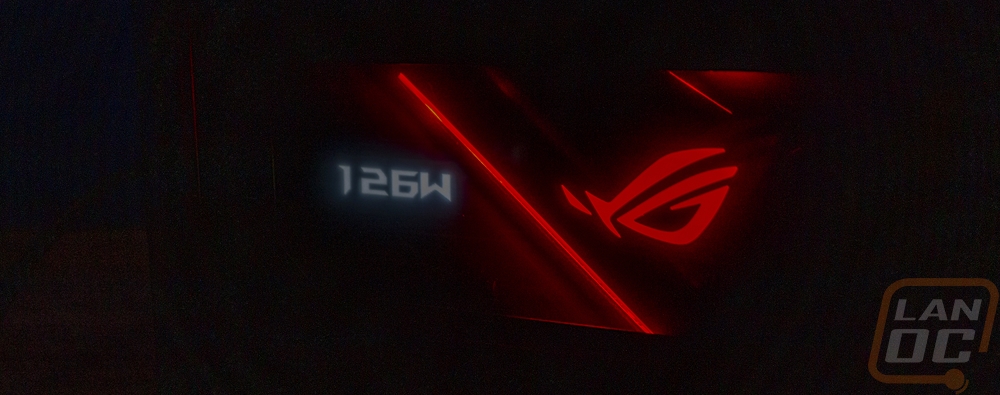
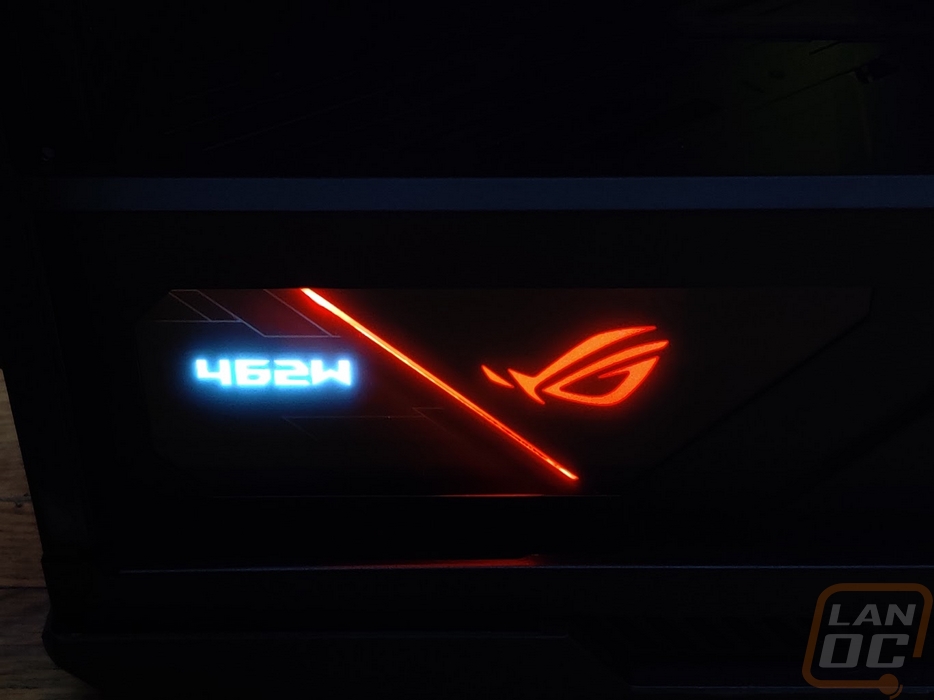
While running the CPU and GPU test I did also keep an eye on the wattage being pulled using the Thor PSU and that leveled out around 462 watts.
Beyond that, for noise testing, I did run a few decibel tests on the entire setup. It came down to the case fans though. When I had them set too high the system tested at 47.6 decibels from 18 inches away. This was while I also had the GPU and CPU tests running. Turning the case fans down to the low setting dropped that down the 41.3 decibels.
The last thing I wanted to check out was the total weight of the system. The Helios case itself was extremely heavy and adding a heavy motherboard, an AIO, and everything else into the mix didn’t help things. The total weight was 54 pounds, which was better than I thought it would be but still a lot more than I would ever want to move around often. This is without a doubt, not a LAN setup. I wouldn’t even want something like this if I rearranged my office often. Thankfully though the carry straps do make moving it easier. I can’t imagine having to move it without them.