You may not have noticed, but not only have PCs been getting smaller but devices like notebooks, phones, and tablets have been taking over. It doesn’t mean that the PC is going away as some people would like you to think, but it does mean that fewer devices have the capability to hold bulk storage. Sure SSDs are getting bigger and computers have some room, but enthusiasts, geeks, and professionals used to load up their main PCs with hard drives and the PC market is moving away from that. You could go with an external drive but they don’t really have the capacity as well. Because of that, the home NAS market has been picking up and more and more people are realizing that a central storage location is helpful for the whole family. In our case, I moved to NAS storage years ago to cut back on electricity from having servers running in the house. We have had one for my attached office and another with video files but recently those have filled up and I’ve been looking at new options. While doing that I thought it would be a great time to take a look at what QNAP has going on so they sent over their TS-451+. My past NAS have been powered by slower CPUs and over time his has caused slowdowns when running RAID so I’m excited to see how the TS-451+ performs with its Intel quad core. So let’s dive in.
Product Name: QNAP TS-451+
Review Sample Provided by: QNAP
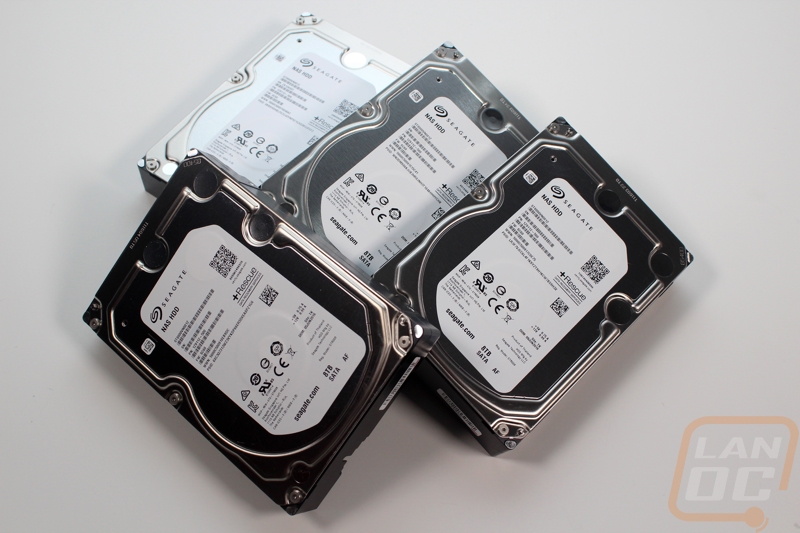
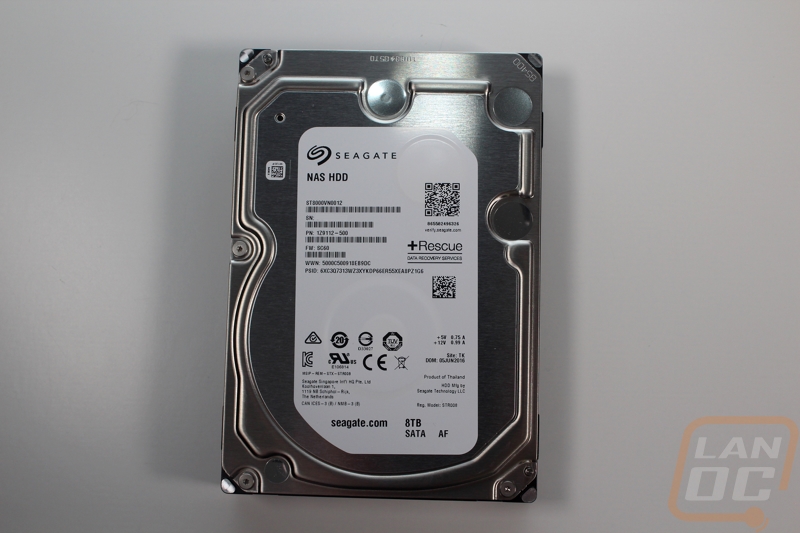
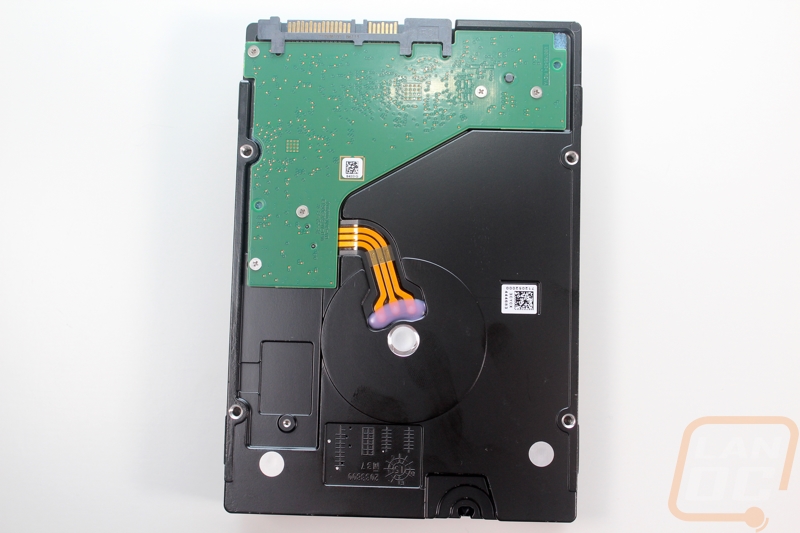
Test Hard Drives: Seagate 8TB NAS HDD ST8000VN0012
Hard Drives Provided by: Seagate
Written by: Wes
Pictures by: Wes
Amazon Link: HERE
| Specifications | |
| CPU | Quad-core Intel® Celeron® 2.0GHz (burst up to 2.42GHz) |
| Floating Point Unit | Yes |
| GPU | Intel® HD Graphics |
| Hardware-Accelerated Transcoding | Yes |
| Memory |
System memory: TS-451+-2G: 2GB DDR3L RAM (1 x 2GB) TS-451+-8G: 8GB DDR3L RAM (2 x 4GB) Total memory slots: 2 SODIMM Expandable up to: 8 GB NOTE: 1. When installing two memory modules, please ensure that they are the same size and ideally use the same type of RAM for both memory slots. 2. For the information of RAM module installation and compatible NAS models, please refer to the QNAP RAM Module Installation Guide |
| Flash Memory | 512MB |
| Drive |
4 x 2.5" or 3.5" SATA 6Gb/s, 3Gb/s HDD or SSD; hot swappable trays NOTE: For the HDD compatibility list, please visit https://www.qnap.com/compatibility |
| Expansion Unit | Max. 1 (UX-800P, UX-500P) |
| Gigabit LAN Ports | 2 |
| USB |
2 x USB 3.0 (Front: 1, Rear: 1) 2 x USB 2.0 (Rear) |
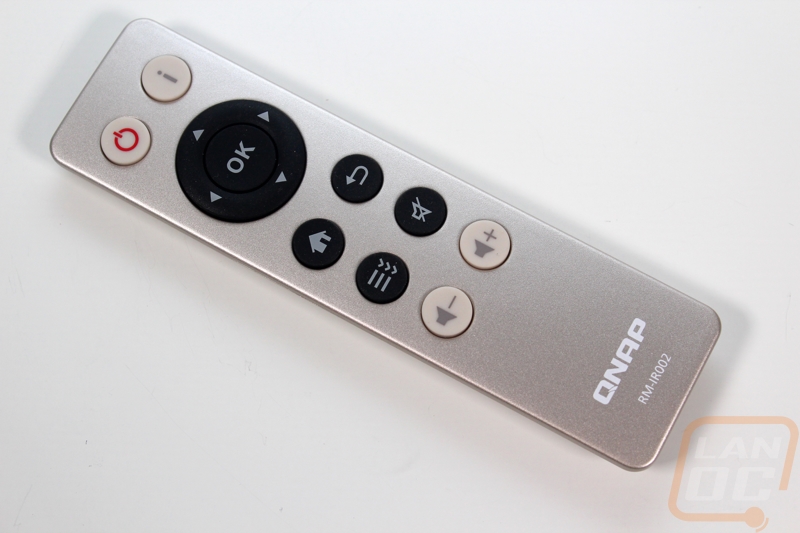
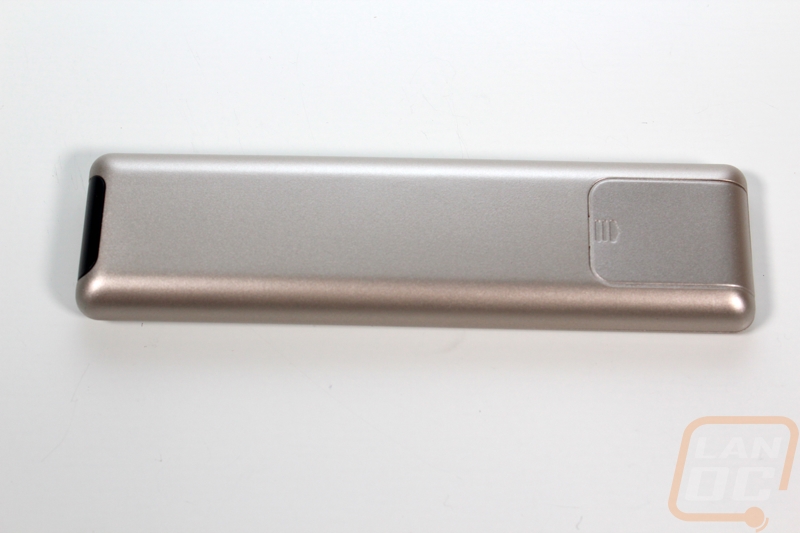
| IR Receiver | Yes (QNAP RM-IR002 remote control) |
| HDMI | 1 |
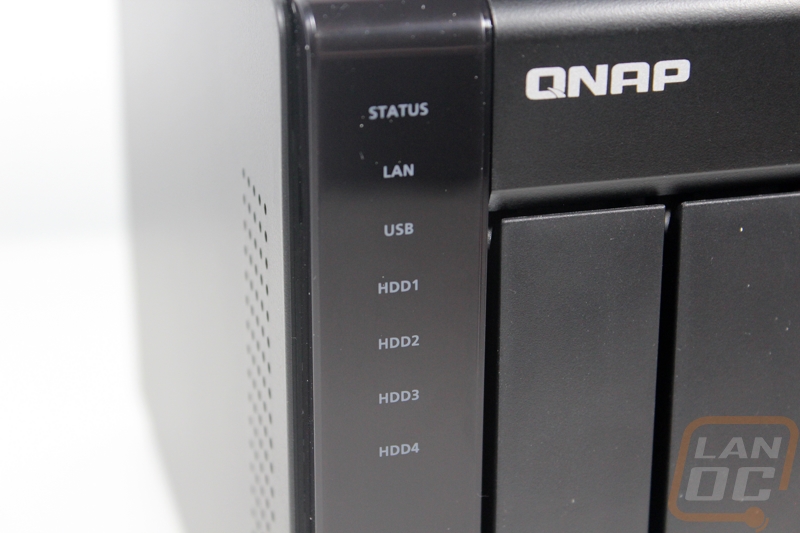
| LED Indicators | Power/Status, LAN, USB, HDD1-4 |
| Buttons | Power, Reset, USB Auto Copy |
| Alarm Buzzer | System warning |
| Form Factor | Tower |
| Dimensions (HxWxD) |
169 x 160 x 219 mm 6.65 x 6.3 x 8.62 inch |
| Weight (Net / Gross) | 3 kg (6.61 lbs) / 4.3 kg (9.48 lbs) |
| System Fan | 1 x 12cm, 12V DC |
| Kensington Security Slot | 1 |
| Power Supply | External Power Adapter, 90W, 100-240V |
| Power Consumption (W) |
S3 sleep: 0.57 HDD standby: 15.78 In operation (typical): 33.88 |
| Sound Level | Sound pressure (LpAm) :16.9 dB(A) |
| Temperature | 0 - 40 °C |
| Humidity | 5~95% RH non-condensing, wet bulb: 27˚C |
Packaging
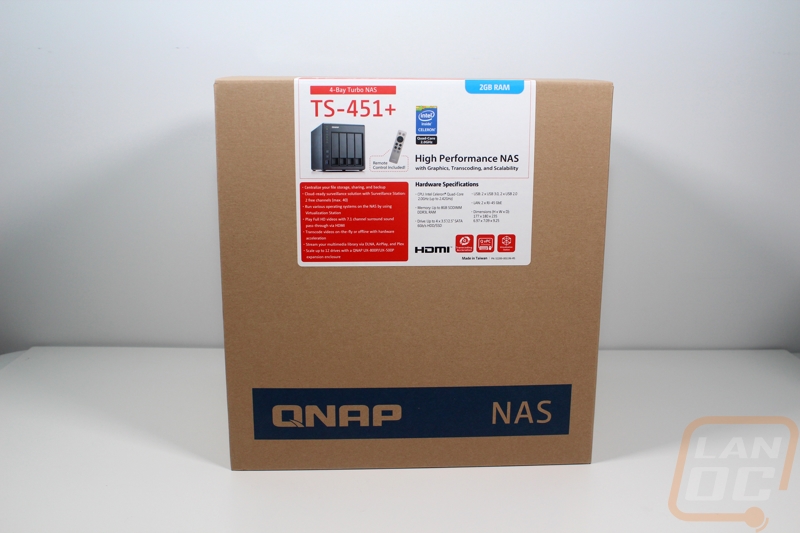
The packaging for the QNAP TS-451+ is a combination of a brown box with blue print on it for generic things like the QNAP branding and a few features that all of their NAS have on the back of the box. Then the other half is a color printed sticker that wraps from the front of the box up onto the top. The sticker has all of our more specific information, in fact, QNAP really went all out here. There is a hardware specification breakdown, a list of features, a color photo of the NAS and the included remote and then, of course, they point out things like the 4 bay capacity and the 2 gigs of ram up on the top edge. The Intel inside logo is also featured up near the top.
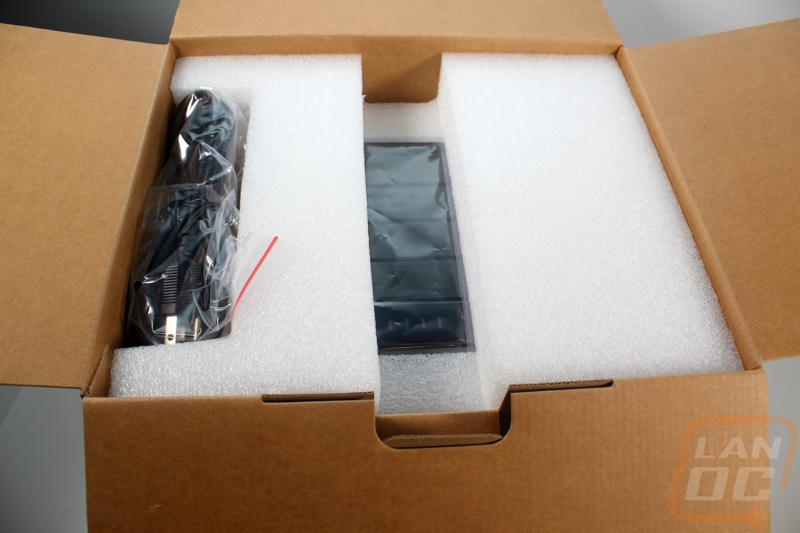
Inside the TS-451+ comes wrapped up in a bag then inside a thick foam shell. Half of the power cord is tucked in up at the top, specifically, the half the is dependent on the country you will be using the NAS in, so it is easy to swap out.
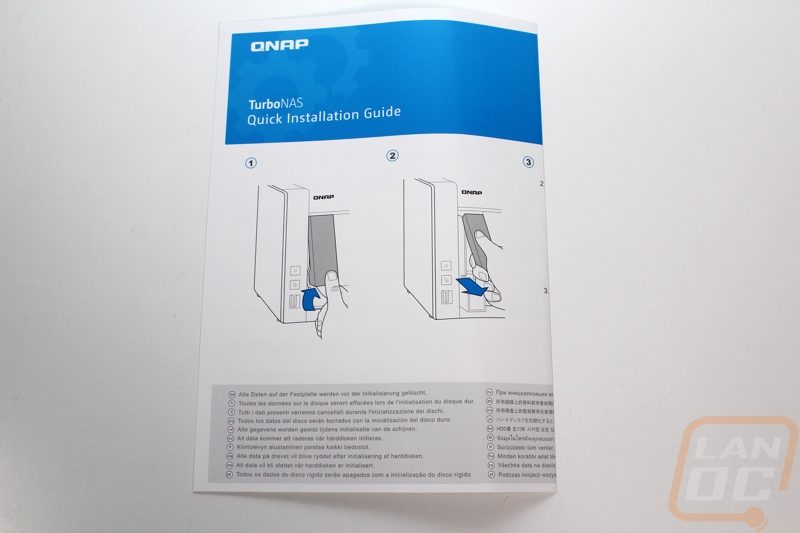
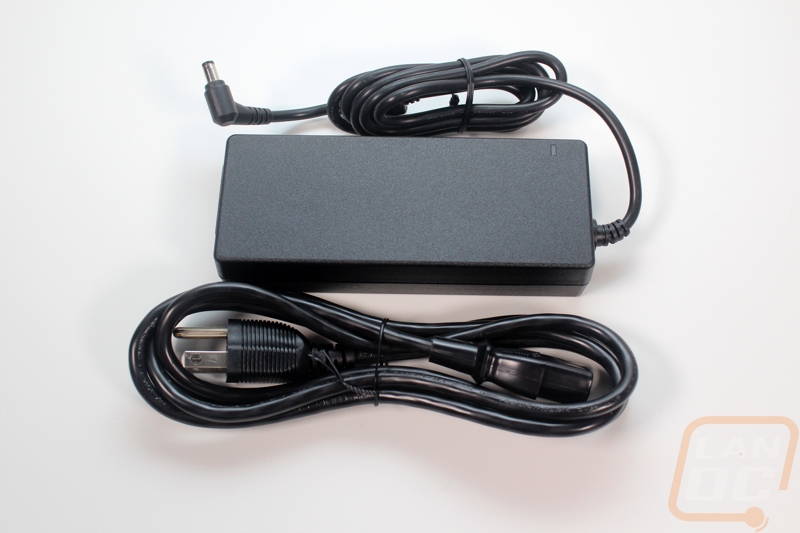
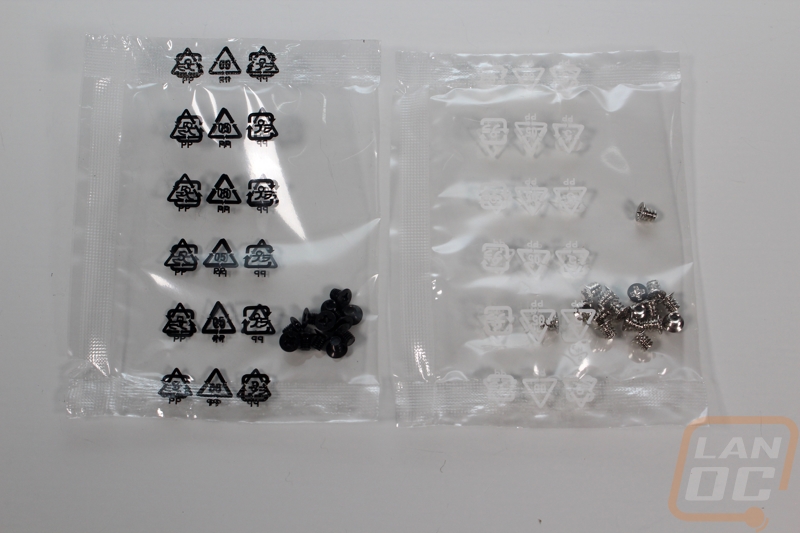
Inside you get a one-page quick installation guide that shows you how to get drives into the NAS. There is then a cardboard box with all of our accessories. You get a 90-watt power brick to use with the cord we found up on top. You get two cat5e network cables for each of the TS-451+’s NICs, then you get a bag with two bags of screws inside. Half the screws are for 3.5-inch drive installations and the others are for 2.5-inch drive mounting depending on what you are planning on using in the NAS.

Photos and Features
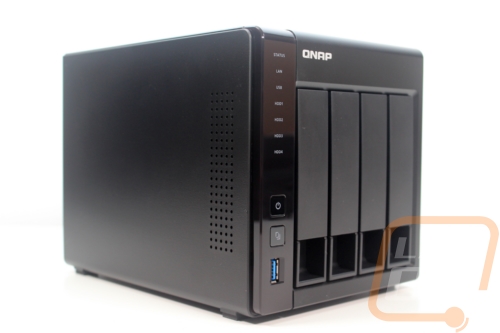
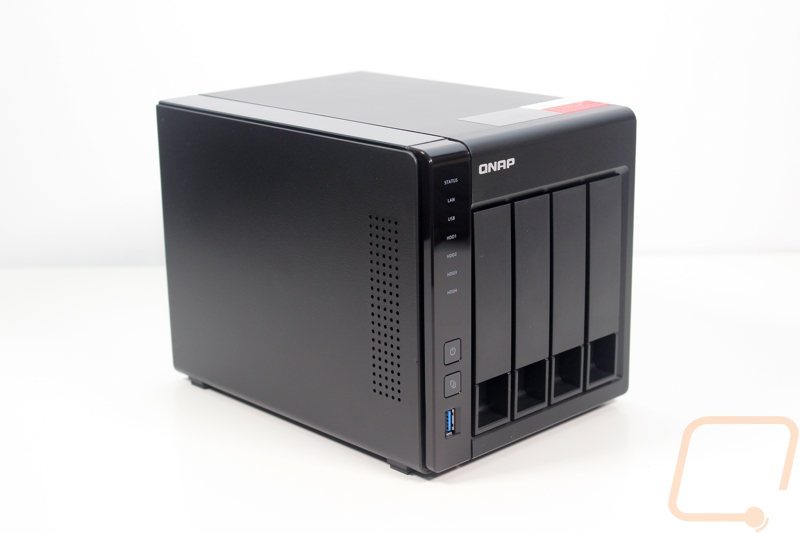
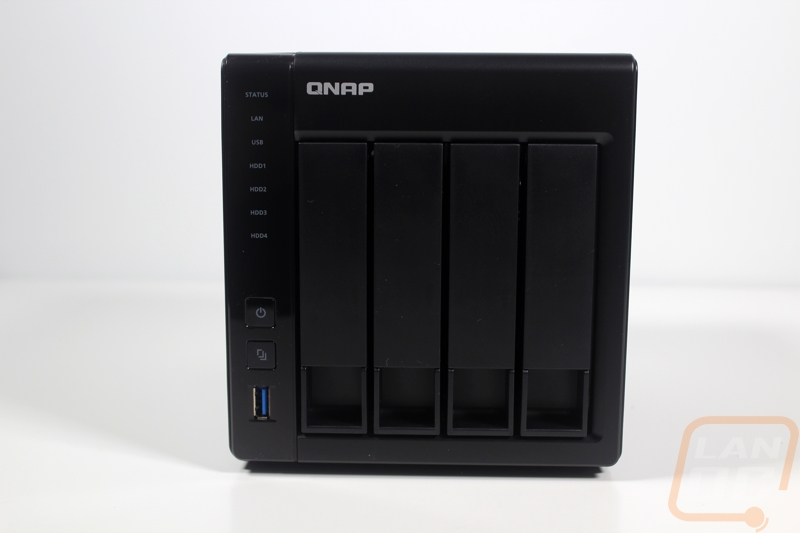
For the most part, from the outside, the TS-451+ doesn’t really look any different than other QNAP network drives. Obviously, the 4 in the name stands for the four drive bays that it comes with. The 51+ is the product series and this is specifically a Home and SOHO meaning small office or home office. While my home office might have the computing power of a much larger office, for the most part, there are only a few people accessing it at any point in time and that would fall into that range. With the exception of the new TS-x51A Series, it is also the quickest home NAS in Qnaps product lineup. You can get a 2 bay model and the 4 bay model I am testing today.
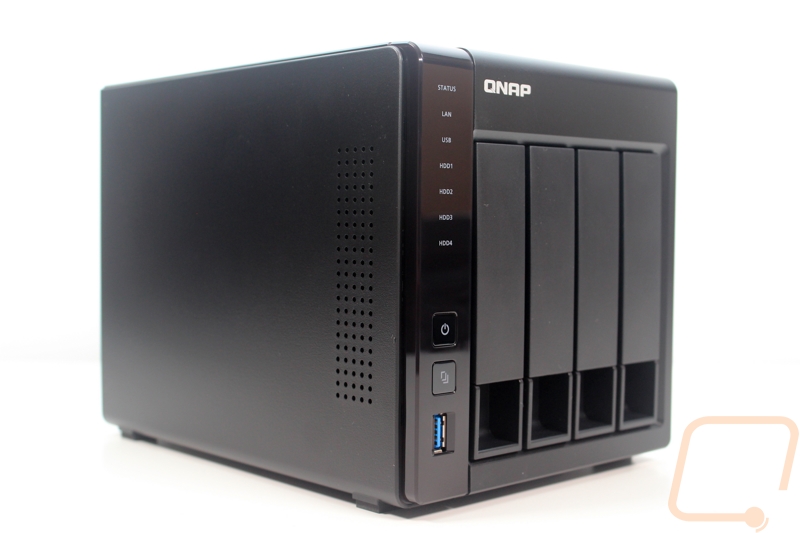
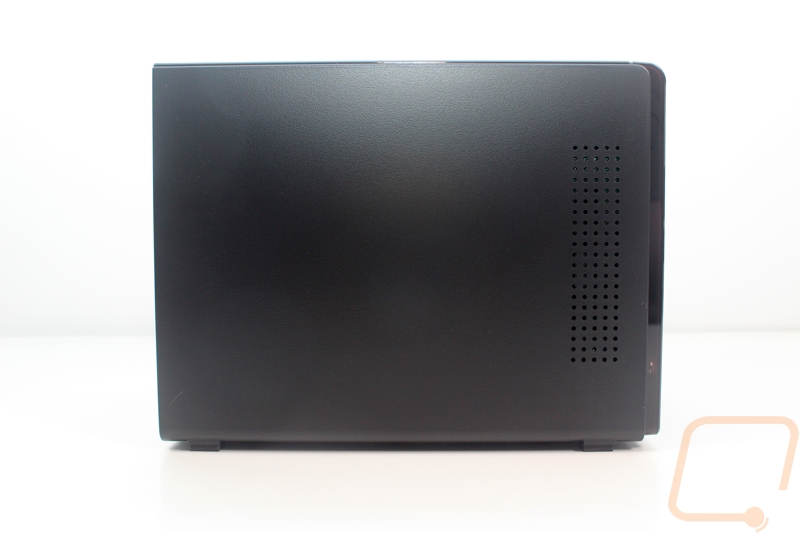
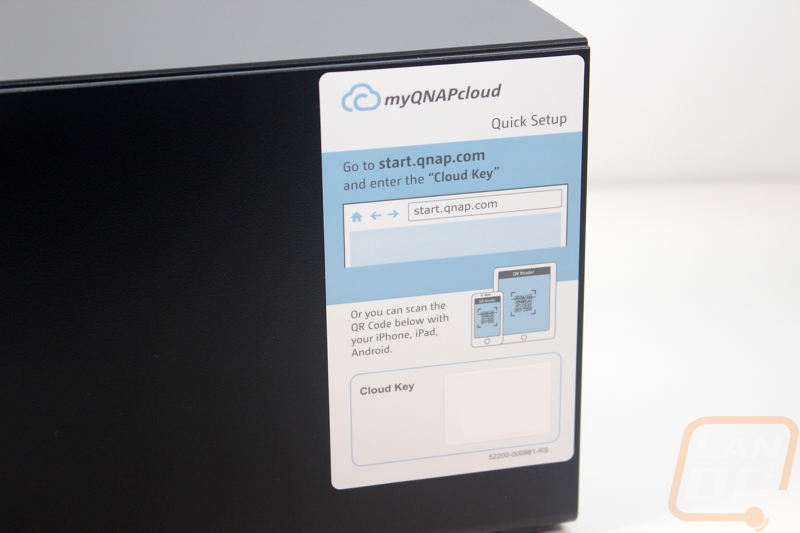
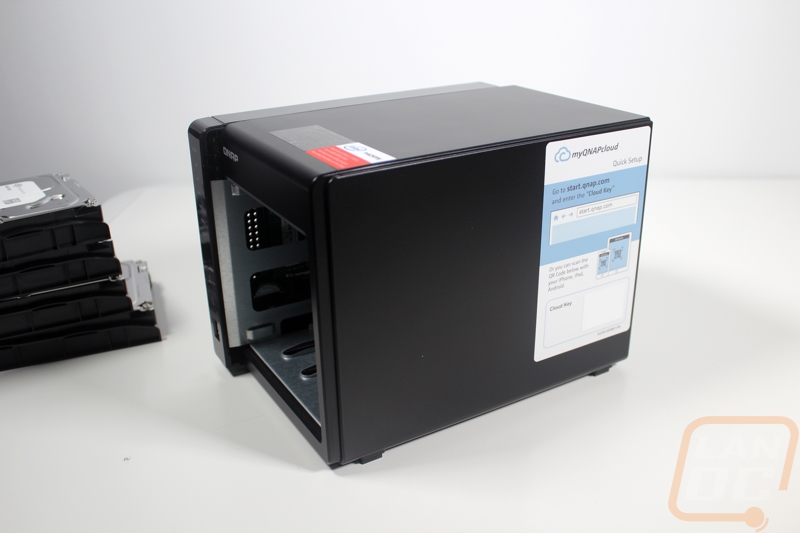
Both sides of the NAS are very simple and just have the small vented area to the front. The right side does, however, come with a sticker on the side that explains myQNAPcloud and gives you a QR code right on the side to get things setup. I removed the code out of the picture for obvious reasons, but you can tell that this is a consumer device when you have big stickers for easy setup if not a lot of people might never know the feature exists.
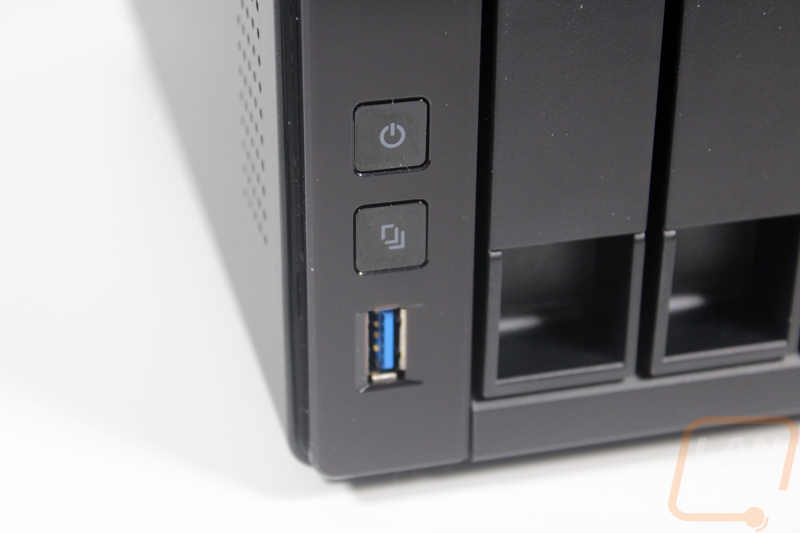
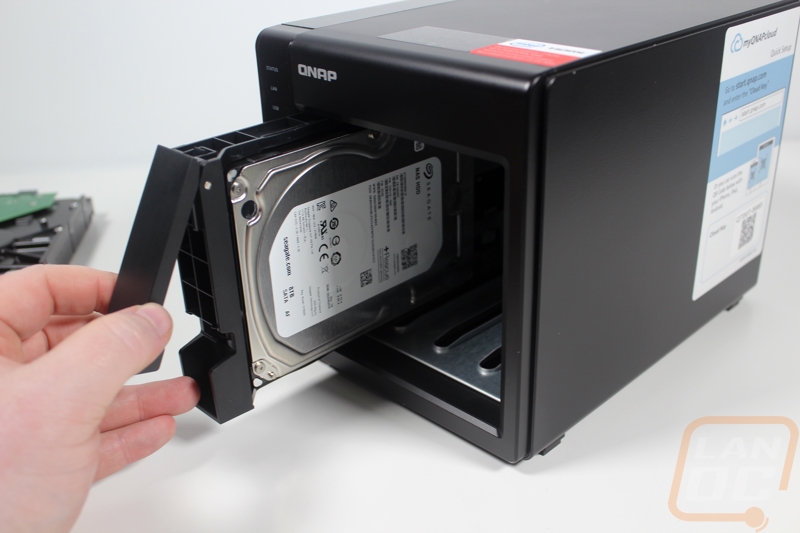
The front of the NAS is where everything is going on. In the past, I have tested a few NAS around this size and they sometimes will have an LCD screen on the front for notifications but QNAP kept things simple with a vertical row of LED status indicators. You get one for each drive bay, one for an overall power indicator, one for LAN traffic, and the one showing when a USB device is active. This is enough to get the job done, especially when most people put a NAS like this up in a closet. Down at the bottom left is the USB 3.0 port and with the button directly above it, you can plug a thumb drive or USB hard drive in and press the button and the NAS will automatically back everything up. Above that button is also a power button. The four drive bays all have access on the bottom, you pull out and the latch will unlock then the tray will slide out.
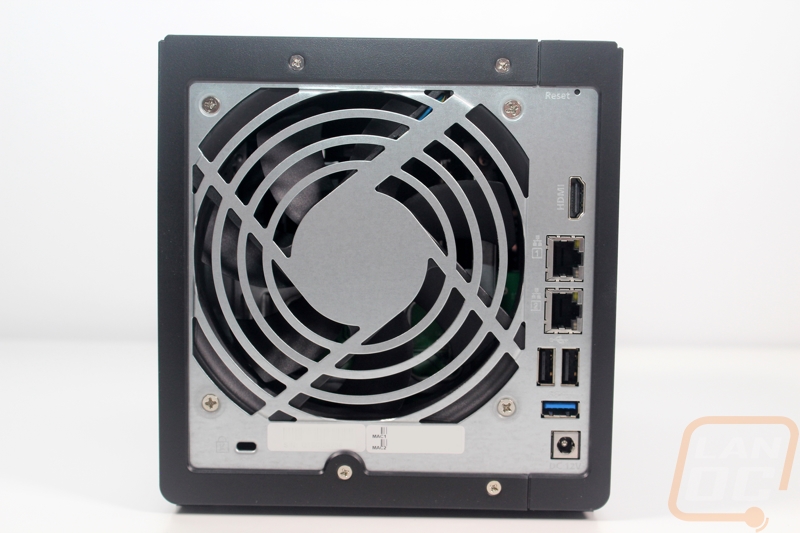
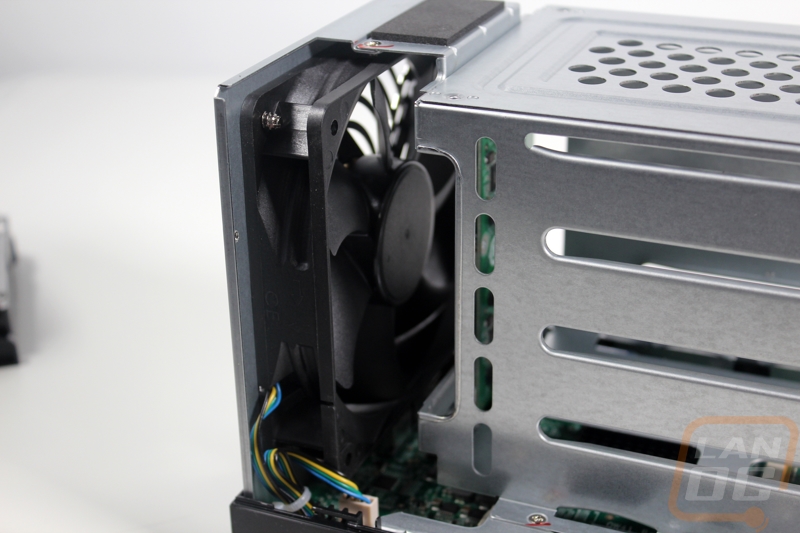
On the back, most of the back is taken up by a large fan that helps keep all four drives cool during heavy use. There are a few plugs, though. The power plugs down at the bottom and the two network interfaces are the normal connections for a NAS. The HDMI and the three USB ports might surprise people, though. QNAP has set the TS-451+ up to run as a media player, taking advantage of the integrated graphics on the Intel CPU.
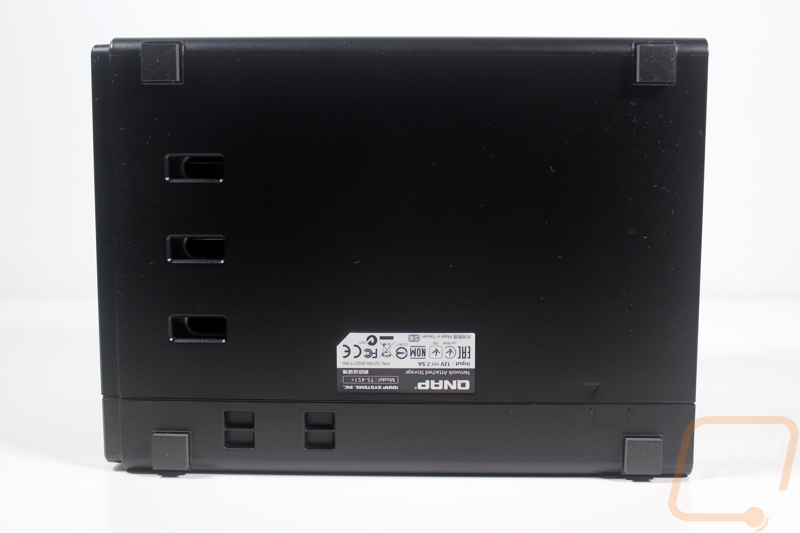
On the bottom is a small sticker with all of the normal regulatory logos and the QNAP model number. The serial number was actually on the back of the NAS to make it easier to get at should you ever need to use it.
With the integrated HDMI port and the media player, you can use a mouse and keyboard but to make things easier they did integrate an IR receiver on the front of the NAS and include a remote. The remote is really simple with its direction pad, volume controls, menu buttons, and a power button but it is all you need to navigate the media player or some of the other downloadable apps.

There is no reason to dig into the TS-451+ to get everything setup, but I wanted to get inside anyhow both to see the layout and to also see how easy RAM upgrades would be. To get the casing off you remove the back screws. Pull all of the drives out then you can slide ¾ of the enclosure back about a half an inch like in the photo below. From there it pops right off. The hard drive trays take up most of the room and at the end of them is a PCB with all of the SATA connections. The side of the NAS with the LEDs has the motherboard running the length of the drive.
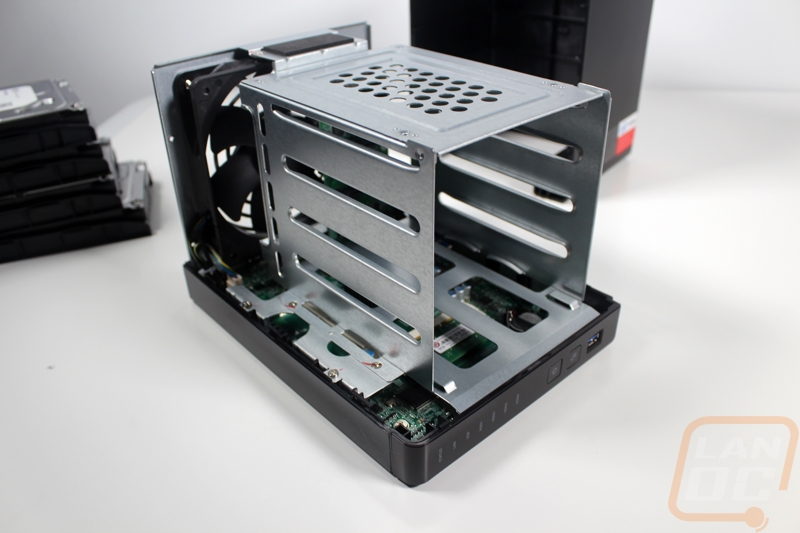
To get access to the RAM you do have to unscrew a few screws and remove the hard drive cage. But from there the two SO-DIMMs are right in front of you. It comes with one 2GB stick so a second in the open slot would double up your RAM should you need it.
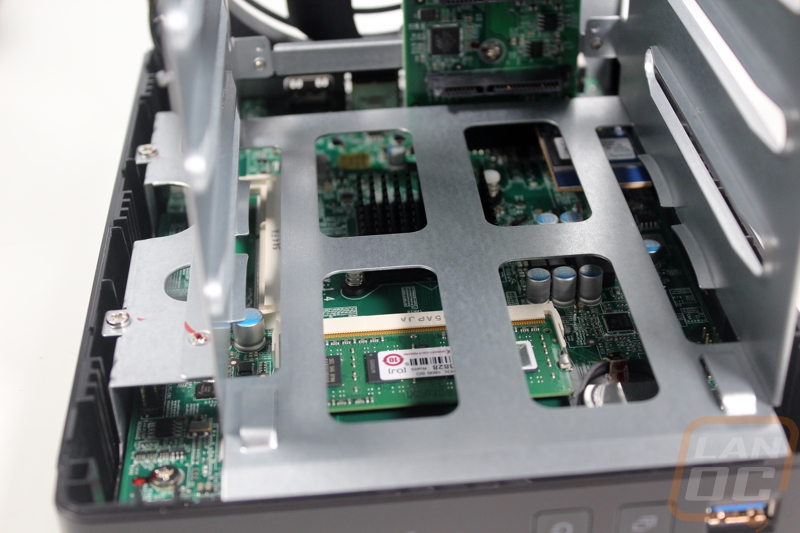
The big fan on the back of the TS-451+ is facing out as an exhaust but it pulls air from across all four hard drives as well as down from the motherboard as well.
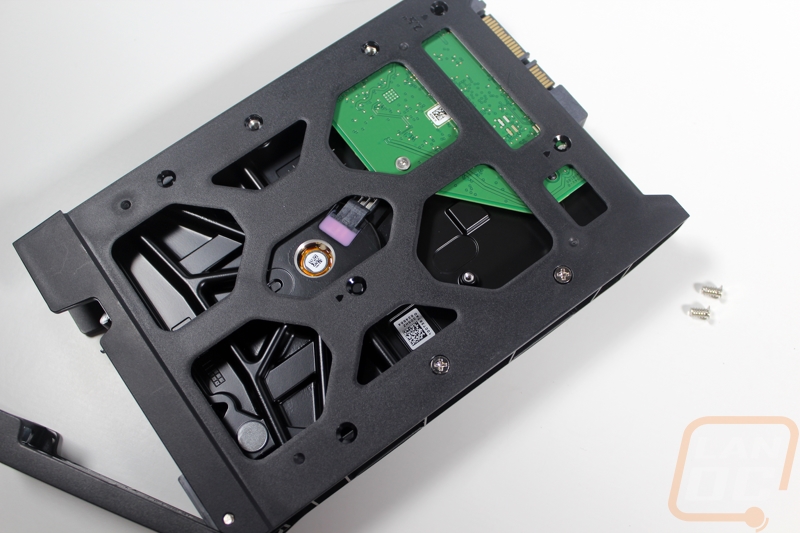
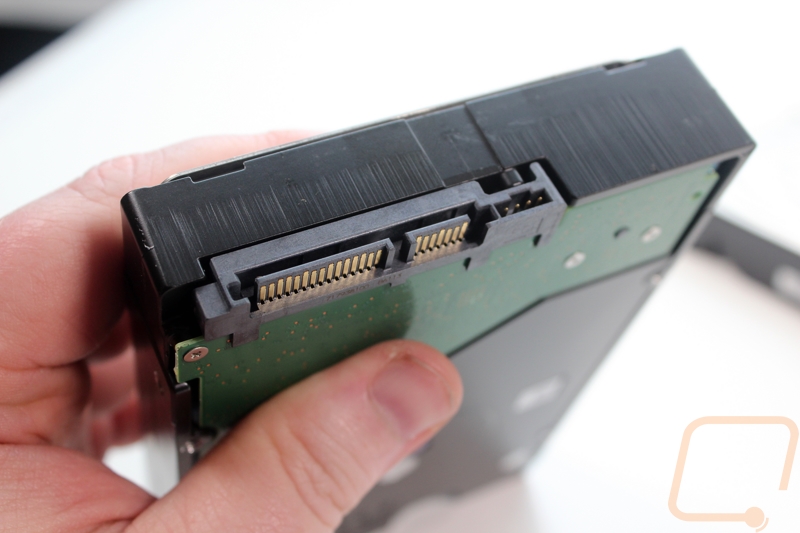
Installing your hard drives is simple. You slide the drive in with the SATA power facing out the back and install the four flush mounted screws into the bottom. From there you slide each tray in and when you pull down on the latch it will help lock the drive in place as well as help slide the drive into the SATA connection at the back of the enclosure. 2.5-inch drives are the same, but you use a different set of holes to make sure they line up the same as a 3.5-inch drive.
Seagate 8TB NAS HDD
So with this being my fifth NAS build I’ve learned a few things in the past. The biggest thing I have learned is that it is best to spend a little extra time when picking our your hard drives to make sure you have the perfect fit. A lot of people will jump online and pick the cheapest option from their preferred manufacturer. This can work but you are much better off starting with the compatibility list. Picking just any old drive can end up in not having anything work at all like some people have had with some of the low power drives or it might just fail earlier than expected if it isn’t designed for NAS use. Well for me I took a look at QNAPs Compatibility page and then spoke with our friends over at Seagate. It just so happened that their 8TB NAS drives model number ST8000VN0012 were at the top of the list for Seagate 8tb drives.
I went with these drives for a few reasons. The first being the fact that they were willing to hook us up, but that is an obvious one. Beyond that, I wanted to go with the highest capacity drive as possible to help future proof everything and I also wanted it to be a NAS-specific drive. In the past, I have used normal drives, NAS drives, and enterprise drives and the NAS drives have been the most reliable to date. They are designed to handle the additional vibration that a NAS drive receives due to being in the same drive cage as multiple other drives. You wouldn’t think so, but all of the different vibrations together can cause additional wear, especially on the bearings. They are also designed to handle the heat of 24-hour use while sitting between two other warm drives. The coolest feature of the Seagate NAS drives though is their NAS error recovery that helps keep the drive from dropping out of the array, this is one of the main reasons that some drives have compatibility issues in some NAS. They drop a few bits and the RAID thinks the drive has failed and kick the drive out.
So a big thanks to Seagate for their support with the drives, check out the performance section, later on, to see how they performed in the drive in our initial testing. I will be looking forward to seeing how they run over time as well.
Software
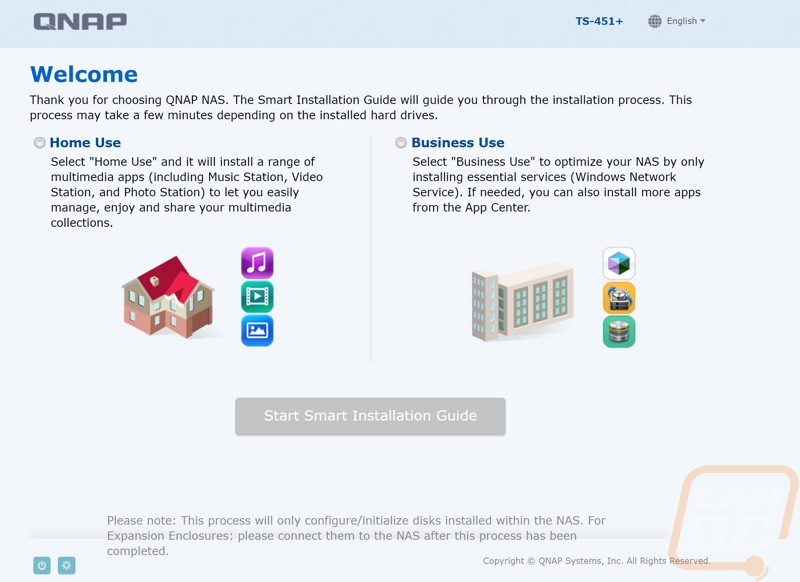
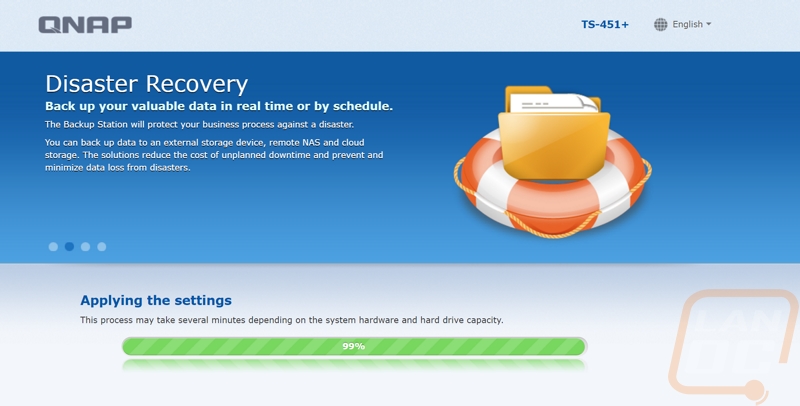
The hardware side of things with network drives is mostly cut and dry. Faster hardware translates to things like faster RAID rebuilding times and faster transfer speeds. So when you are looking for a NAS the biggest thing you need to look at if the software. You see, it can be slow and buggy or fast, filled with features or lacking any features or options, or it can even be too hard to navigate or way too dumbed down. Even just a few years ago a lot of the network drives I tested were still a little on the tough side to navigate through with wizards they were at least easy to setup. QNAP has been a big example of a company who has put software first for a long time and it shows. Getting the TS-451+ up and running consisted of getting it booted up and looking on our router to find its IP but they have even made that simpler with software to search your network for QNAP NAS. Once I was in, the first thing the software asked was what type of use it would be getting. Knowing I could go back later and install anything I needed I went the business route for a cleaner install. From there it asked a few simple questions like what name the NAS should have and then it set everything up.
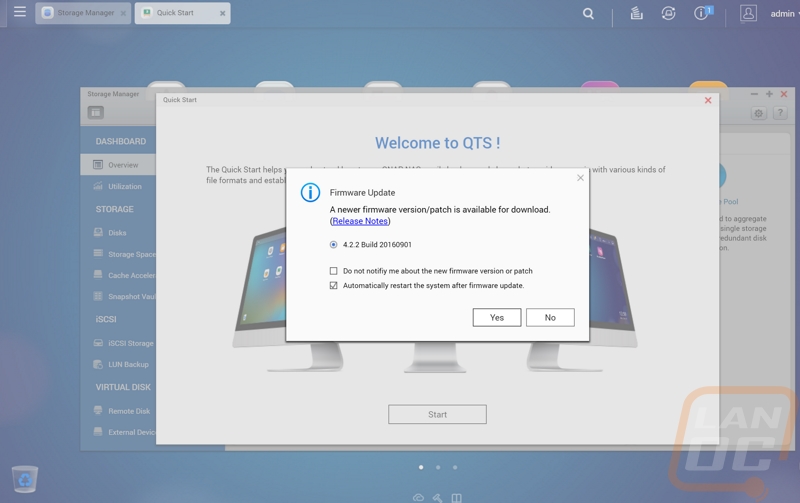
As soon as I got booted up it let me know that the firmware needed to be updated and with a couple clicks it downloaded and installed the new firmware. This did lead me to an issue. After it rebooted I couldn’t get back into the software and I fought with this for about 20 minutes, looking online at people with similar issues. I used Putty and SSHed into the NAS and couldn’t for the life of me figure it out. Then I decided to try to get in using https and I logged right in. Going back into the settings I saw that it defaulted to port 8080 for the non-secure page, flipping that back to port 80 fixed my issue and I was back up and running.
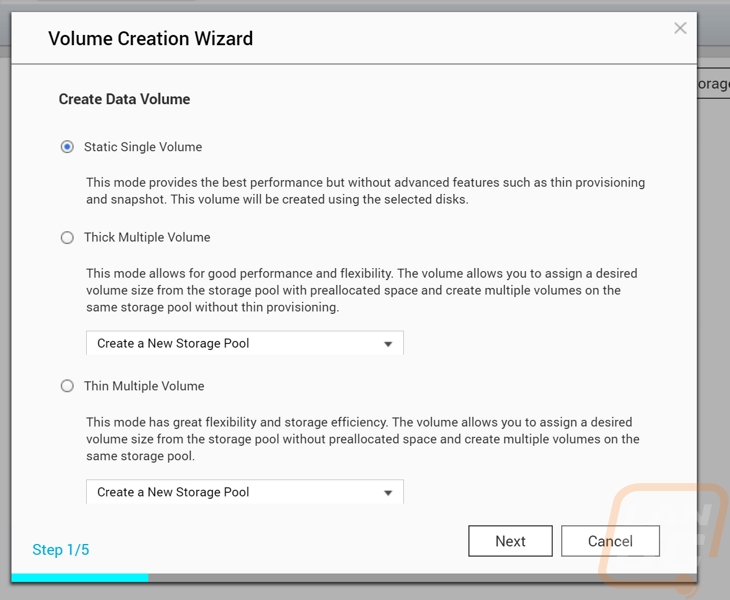
From there I started by setting up a single volume to start off my testing. I do love that QNAP offers a few other options like creating storage pools to allow for more flexibility later on, but for my testing, a single volume did the job.
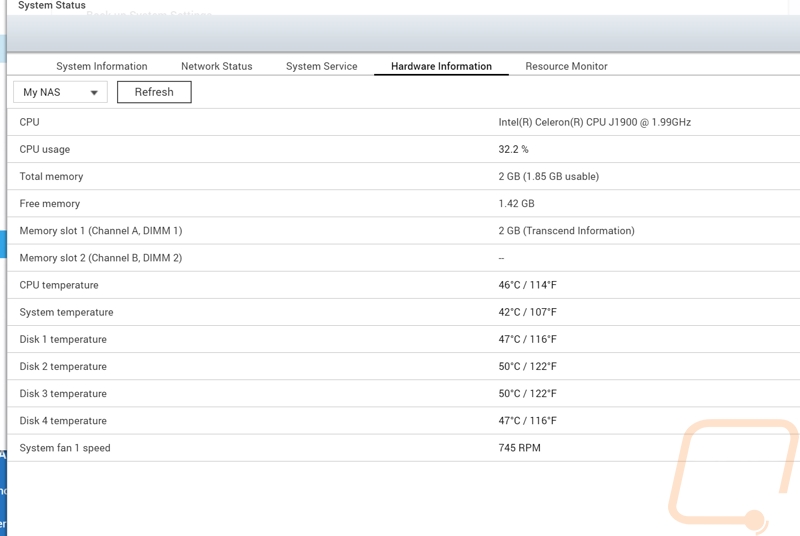
While waiting on the RIAD 0 to setup I started poking around, starting with the hardware. I wanted to see what the TS-451+ comes with and check out the temperatures. I found all of this together in the hardware information page under system status. The TS-451+ comes with an Intel Celeron J1900 BayTrail CPU. It is running at 1.99 GHz and it should burst up to 2.42 GHz if needed, assuming QNAP has allowed that. You get 2 gigs of RAM with 1.85GB of that being usable after the onboard takes its share. The CPU was running at a comfortable 46C while working at 32.2% and the motherboard was running at 42C. The hard drives while all formatting were a little warmer at 50C and the two middle drives ran warmer than the two outer drives by 3 degrees.
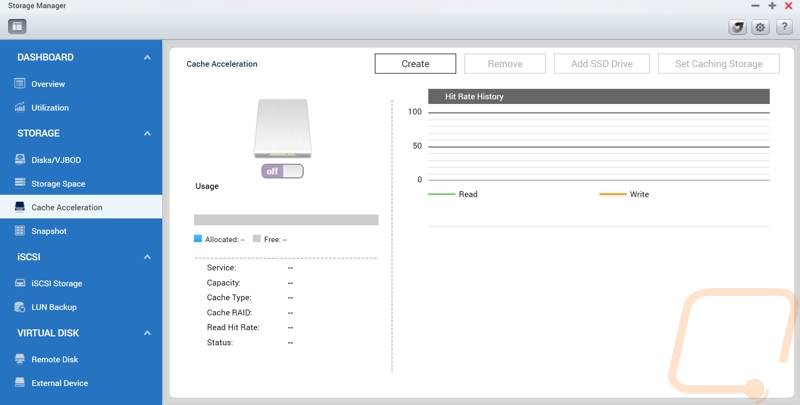
Beyond being able to setup RAIDs, JBOD, and even Virtual JBODs the TS_451+ can also bump up performance by swapping out a drive for an SSD to use as a Cache. You have the option to set it as a read only or a read and write cache. They also give you the option to pick between a least recently used algorithm or first in first out. On top of that, you can also setup a RAID 0 for the cache drives to bump the speed up even more. In my case, overall capacity and redundancy are most important, but the idea of running one or two storage drives and then running a RAID 0 cache is interesting if you need faster transfer speeds and access times. QNAP has a few higher end NAS that use this same tech but have support for M.2 drives for even better speeds. Considering our office NAS’s speeds, a NAS with an M.2 drive for cache sounds really appealing.
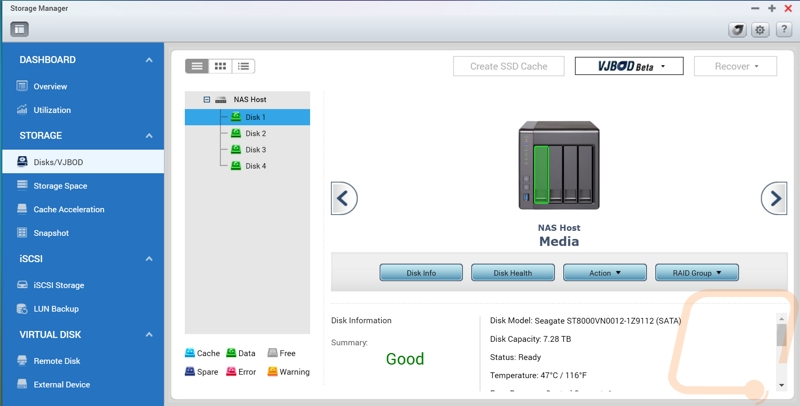
When doing your maintenance you can also go in one by one and take a look at each drives health and information. Each is labeled on a photo of the TS-451+ to help you find a drive if there is an issue.
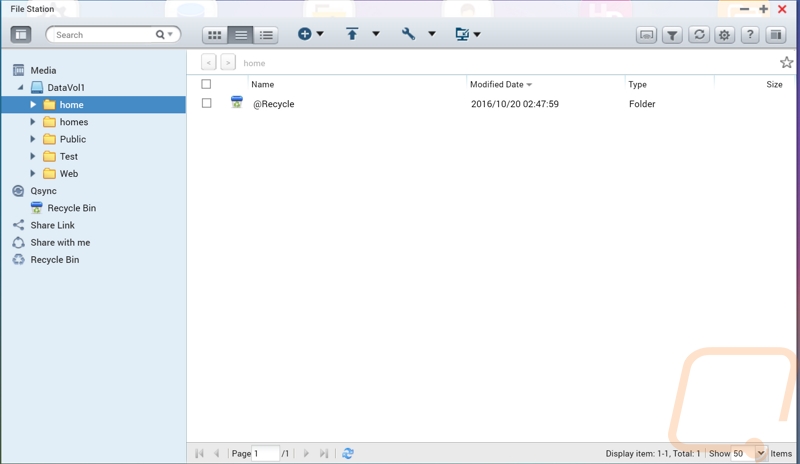
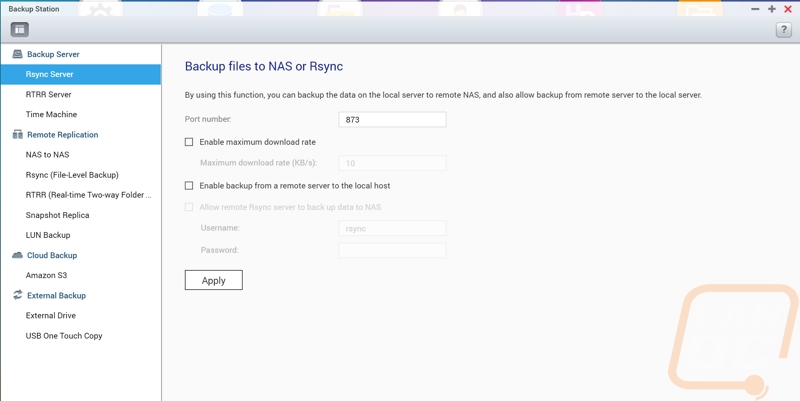
By default, even when setting the TS-451+ up with the business configuration that doesn’t install everything. You do still get a few interesting apps on the NAS. It sounds like a given, but I love that you get a file explorer right out of the hole. I’ve had a few NAS in the past that had horrible file browsers that basically didn’t work. There are also a huge amount of backup options build into QNAPs OS. These options are in the Backup Station app and cover both backing up PCs to your NAS as well as remote backup options for the NAS itself with things like Amazon S3, NAS to NAS, and even external backup options. At their core, NAS are heavily used for backing up home and office PCs so it's not a shocker that QNAP put a lot of focus on this, but even so I am impressed with all of the options available and there are even more available as apps as well.
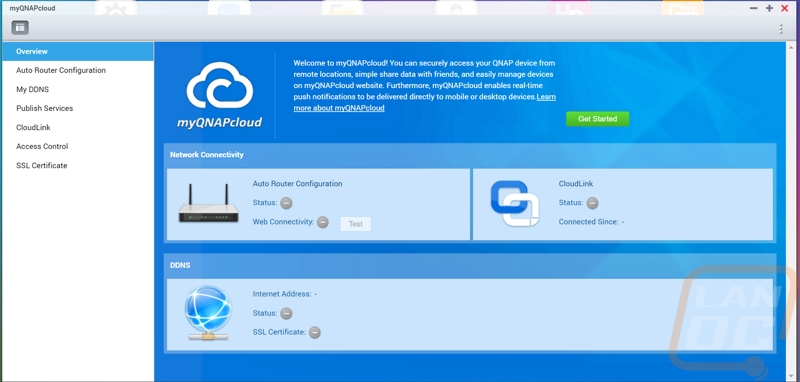
There is also the myQNAPcloud option that I touched on a little when we saw the sticker on the side of the NAS. Once you have everything on your TS-451+, you want to be able to access it even if you are away from home. To make this simple QNAP has iOS and Android apps that simplify syncing directly to your NAS. There are also a few different VPN options in the settings to get you directly into your network when traveling. As someone who works from a home office and travels from time to time, without a way to access the files on my network I would be SOL, in fact, that happened to me on my recent vacation when a scheduled power outage took down my internet and most of my network.
On top of the included apps and trust me I wasn’t able to touch on them all. QNAP also has their AppCenter. This is basically an app store a lot like the google play store or Apples App Store. They have broken all of the apps up into different categories and made it as simple as one click to install. Like the included apps, there is just no way I could cover everything but just know that basically anything you can think of is available.
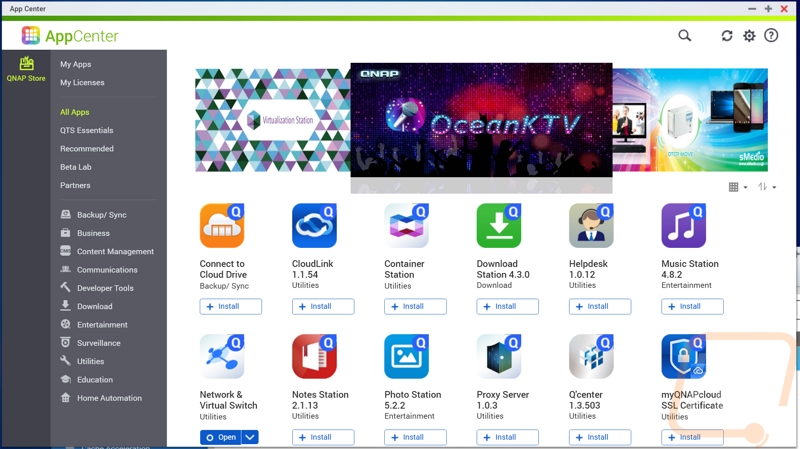
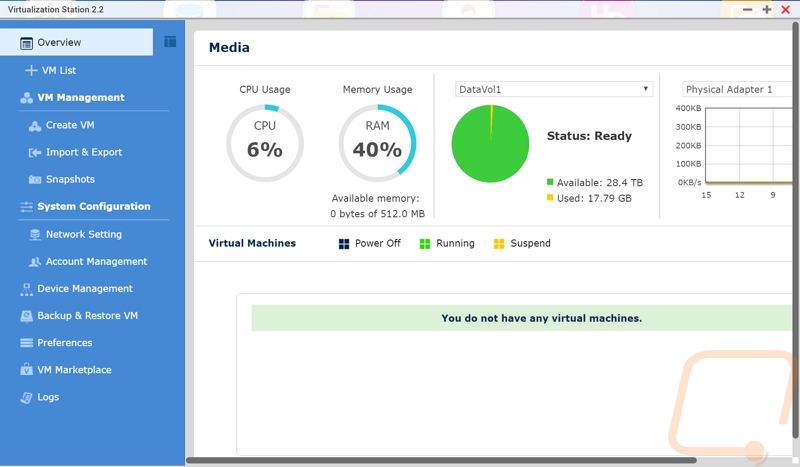
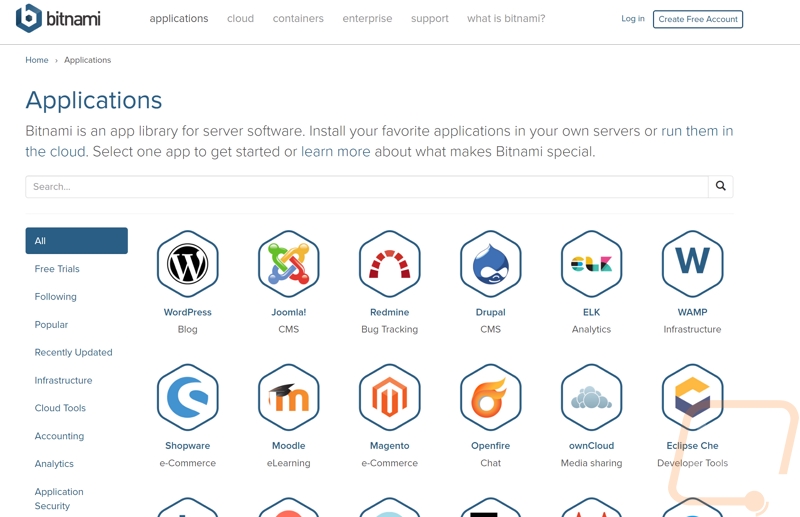
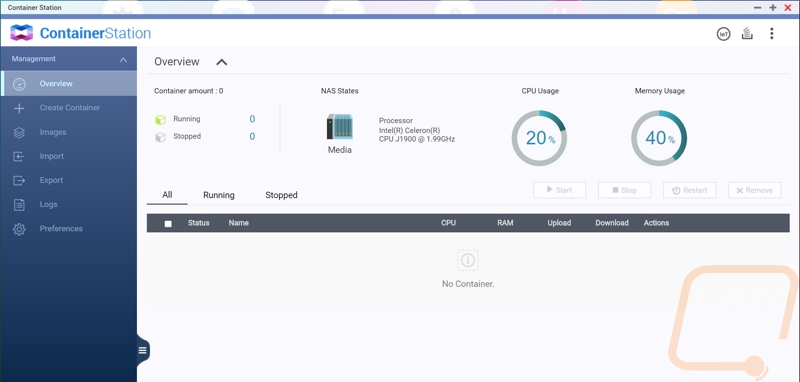
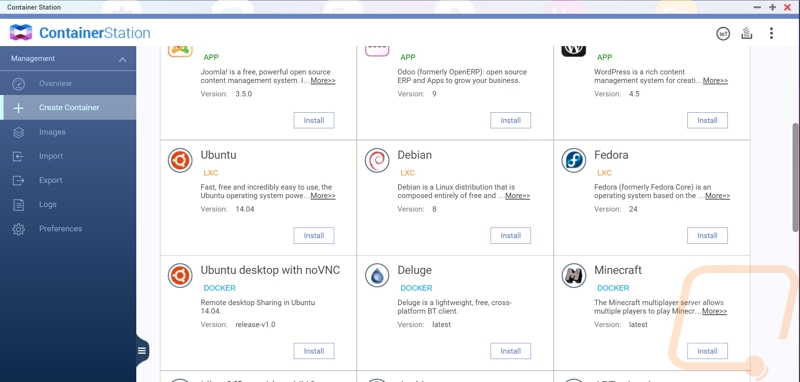
Two of the apps really caught my eye, not just because they are cool, but because they completely expand what I thought a NAS was even capable of. They have Virtualization Station and Container Station. The first one helps you actually run full VMs directly on the TS-451+. You have the option to set your own VMs up or you can use Bitnami and you have access to a whole selection of ready to go VMs with almost unlimited options available like different content management setups or infrastructure VMs. Container Station is similar but uses a docker style configuration with one click installation options for things as crazy as a Minecraft server. The Bitnami software, on the other hand, lets you search and find anything even other game servers like TF2 servers. Really the only limitation is the power of the NAS itself.
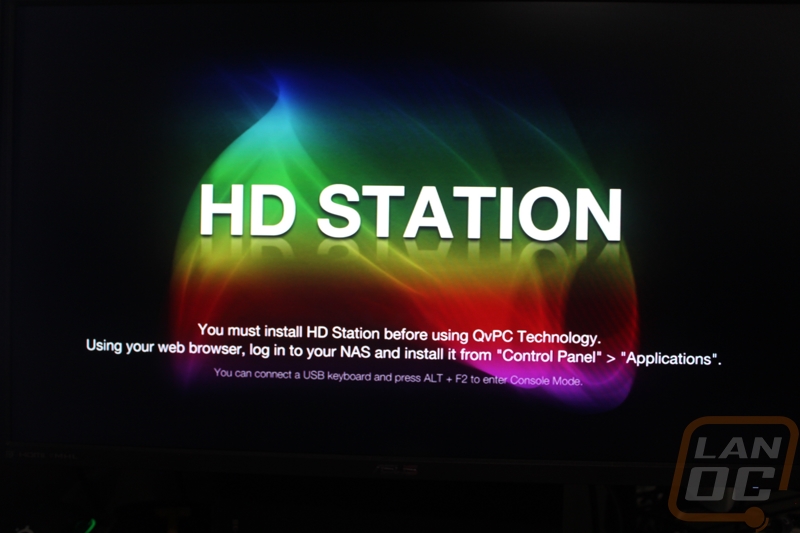
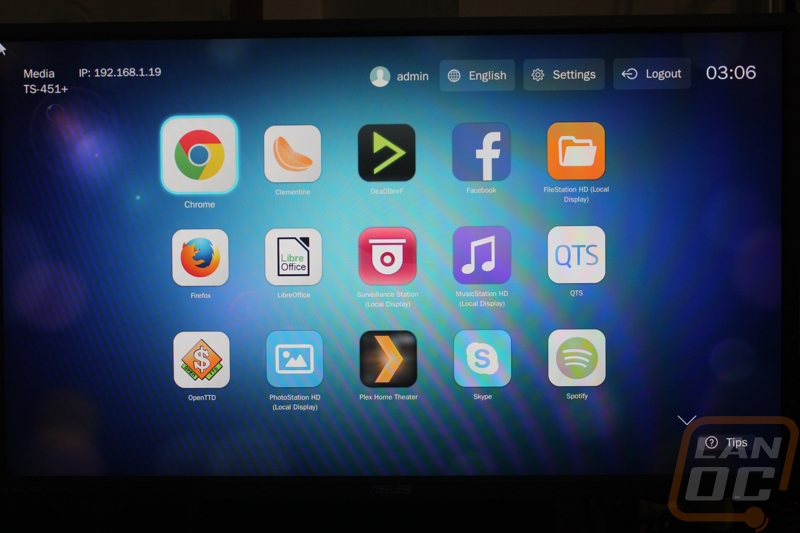
Of course, I couldn’t spend all of that time with the TS-451+ and not try out the whole TV-based interface. I hooked the NAS up via HDMI and after installing HD Station I was ready to go. You get access to a lot of the features you would find on a smart TV or an Android-based TV box as well as other features. Navigating the menu using the included remote was simple and it worked well with things like Plex. Getting into the browsers, LibraOffice, Facebook, etc on the other hand really requires a mouse and keyboard to do anything. I couldn’t do anything at all in them other than back out and even that took a lot of button mashing. If they had a controller with a small keyboard and a touchpad to act as a mouse this whole thing would be amazing. Even with the issues, it is a great way to get a TV on the network without adding another device and it also could give you direct access to all of the files stored on the NAS without having to stream them over the network.
Performance
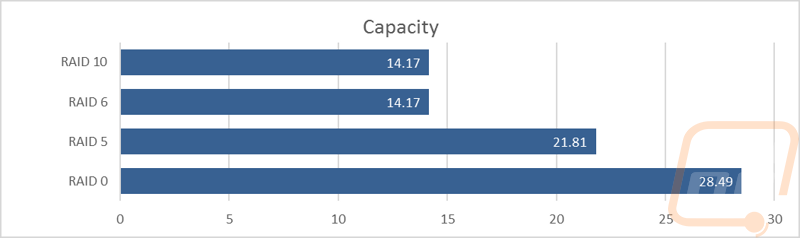
Beyond playing around in the interface like I did in the previous section. I did spend a lot of time testing the TS-451+ over the network. I built the RAID up in four different configurations and tested transfer speeds both with a 1.2 gig file and with CrystalDiskMark. Before I did that though I took a look at the overall capacities I had left with each RAID configuration. I’m not going to dive in deep into what each raid does but the quick version is like this. Here is a little more information.
RAID 0 - Striped across all four drives, No redundancy
RAID 5 - block-level striping with portions of each disk spread out to each drive, can lose one drive without data loss
RAID 6 - Very similar to RAID 5 but with two parity blocks not one, can lose two drives
RAID 10 - This is basically two drives in RAID 0 then backed up with two drives aka RAID 1+0. Can lose two drives as long as one of each pair is still available.
So let’s start with the capacities. The RAID 10 and RAID 6 configurations are the safest but also leave us with only half of the overall capacity. Raid 5 gets us three out of the four drives but offers a little safety. Then RAID 0 gives us the full 28.49 TB capacity of these monster drives.
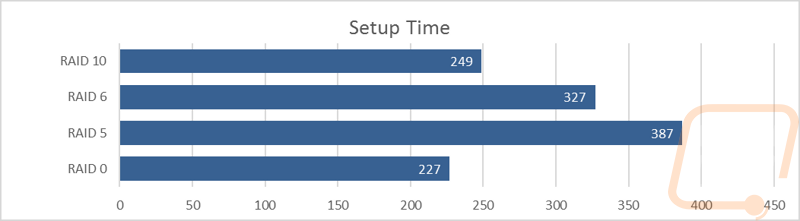
Next, I tested the overall setup time it took to configure the four disk array. There are a few things to keep in mind here, though. For starters my first configuration took a LOT longer than the rest, I had to retest it a second time to get a result in line with the other RAID configurations. I think this was because the TS-451+ didn’t have to completely format all four drives after the first time. The second thing to keep in mind with the RAID 5,6, and 10 configurations is that this is only how long it took for the array to be “ready”, each of the redundant solutions requires almost a full day for them to finish setting up the backups. Even as I type, the RAID 5 configuration that I plan on using after the review is still only at 33% and I started that 7 hours ago. With all that said, the RAID 10 and RAID 0 configurations both look good for a time due to their stripped configurations. It also means that you should be able to get your array setup quickly on the TS-451+ with any drive (especially one that is smaller than the 8TB drives I tested with.
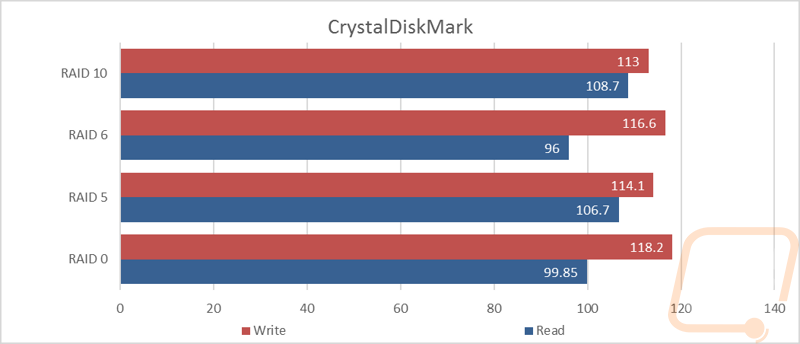
Next, I wanted to see if there were any noticeable performance differences between the different RAID configurations on a clean install. I mention that because I know from past experience that the RAID 5, 6 and 10 configurations all slow down later on when filled up. The RAID 0 with its striped drives had a better read speed and the 10 was similar as well. The RAID 6 had trouble with its read speeds, this was a surprise given all information suggested writes would be slower. RAID 5 did well as well in both categories. I did notice though that none of them were drastically different. It should also be noted that this is noticeably faster on the read speeds than the last NAS we tested (about 30MB/s) and over twice as fast on the write speeds!
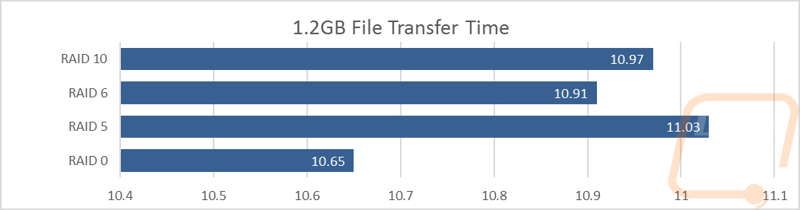
My last test was simple, I made a zip file that consisted of five copies of a CD in FLAC format for a total size of 1.2 GB. I copied the file over to a clean install and timed it using a stopwatch (app). The excel graph makes the difference look a little deceiving, but all four configurations were within 1 second with the RAID 0 being the fastest as expected.
Overall and Final Verdict
Given my past experiences with network drives, I put off getting the TS-451+ setup for a while. But once I did get to it I was disappointed I didn’t do it sooner. Setup was a lot easier than I expected. QNAP did a great job packing in all of the not so user-friendly features that power users like while still making setting up the basic features that everyday user wants. They even made it simple to setup cloud-based access to all of your files from your mobile devices. Even with all of that, my focus was almost immediately on all of the awesome apps that are included with the NAS and that doesn’t even count all of the other apps available on the app store. App of the apps combined with the two VM/Docker apps takes the TS-451+ from being your everyday NAS to something closer to an easy to use server for your home office. Really the only limitation is the power of the NAS itself, while that Intel CPU is quick, it doesn’t have the power to run multiple VMs on top of the apps and basic functionally.
Adding the HDMI connection and all of the apps specifically for the TV-based interface just add even more to the functionality. You can centralize all of your home or office storage and also use it to turn your TV into a smart TV, who would have thought.
Really the only big issue I found with the TS-451+ was with the basic controller that they give you for the TV functionality. It works for a few of the important apps, but a lot of people are going to be drawn to things like the Facebook app and the browser and with all of those you really need a mouse and keyboard. Moving to a remote like some of the smartTVs use these days (touchpad and keyboards built in) would help a lot.
All of the extra functionality is great and the TS-451+ does a great job of the basics as well but you do need to keep in mind that picking up one is a big purchase. You are looking at $444 for the NAS plus you will need hard drives, you don’t even want to know what it would cost with four of the 8TB Seagate NAS drives I tested with. But I do think it is a good investment, moving your data storage off all of your PCs and hopefully using a redundant RAID configuration is a good decision. There is nothing like losing all of your data to motivate you to make sure it never happens again. If you have been lucky enough to not have a hard drive or SSD die on you, go pick up a lottery ticket on your way to picking up the TS-451+ and a few drives because it is bound to happen at some point, especially to power users with multiple drives. The TS-451+ is a lot like the Thecus NAS that I have reviewed in the past. It does cost a little more, but that cost is getting you easier to work with software and a LOT more in APP variety and quality.


Live Pricing: HERE


