When it comes to Mini-ITX motherboards people are going to have a wide range of feature requirements. For some, as long as it supports their CPU and it has a x16 PCIe slot they are good to go. Others want to have a lot of the features they would find in their full sized builds including wireless AC, different storage connection options, and even upgraded audio. Personally I have been on both sides. When I’m building a budget Mini-ITX build I can skip out on the features but when I’m building a crazy LAN rig like the build we put in the In Win D-Frame Mini only the best will do. Asus continues to impress me with their drive to pack anything and everything into their Impact boards. Well today I’m going to take a look at the latest one, the Maximus VII Impact. This is officially the second Impact board, based on the Z97 chipset. Is this the perfect LAN rig motherboard? Let’s find out.
Product Name: Asus Maximus VII Impact
Review Sample Provided by: Asus
Written by: Wes
Pictures by: Wes
|
Specifications |
|
|
CPU |
Intel® Socket 1150 for the 5th/New 4th/4th Generation Core™ i7/Core™ i5/Core™ i3/Pentium®/Celeron® Processors Supports Intel® 22 nm CPU Supports Intel® Turbo Boost Technology 2.0 |
|
Chipset |
Intel® Z97 |
|
Memory |
2 x DIMM, Max. 16GB, DDR3 3300-1333 MHz Non-ECC, Un-buffered Memory Dual Channel Memory Architecture Supports Intel® Extreme Memory Profile (XMP) |
|
Graphic |
Integrated Graphics Processor- Intel® HD Graphics support Multi-VGA output support : HDMI/DisplayPort ports - Supports HDMI with max. resolution 4096 x 2160 @ 24 Hz / 2560 x 1600 @ 60 Hz - Supports DisplayPort with max. resolution 4096 x 2160 @ 24 Hz / 3840 x 2160 @ 60 Hz Maximum shared memory of 512 MB Supports Intel® InTru™ 3D, Quick Sync Video, Clear Video HD Technology, Insider™ DP 1.2 Multi-Stream Transport compliant, supports DP 1.2 monitor daisy chain up to 3 displays |
|
Expansion Slots |
1 x PCIe 3.0/2.0 x16 *1 1 x mini-PCIe 2.0 x1 *2 |
|
Storage |
Intel® Z97 chipset : |
|
LAN |
Intel® I218V, 1 x Gigabit LAN Controller(s), featuring GAMEFIRST III Intel® LAN- Dual interconnect between the Integrated LAN controller and Physical Layer (PHY) Anti-surge LANGuard |
|
Wireless Data Network |
Wi-Fi 802.11a/b/g/n/ac*5 Supports dual band frequency 2.4/5 GHz Support ASUS Wi-Fi Go! Utility |
|
Bluetooth |
Bluetooth V4.0 |
|
Audio |
ROG SupremeFX Impact II 8-Channel High Definition Audio CODEC *6 |
|
USB Ports |
Intel® Z97 chipset : *7 |
|
ROG Exclusive Features |
SupremeFX Impact II |
|
Special Features |
5-Way Optimization by Dual Intelligent Processors 5 |
|
Operating System Support |
Windows® 8.1 86x64 Windows® 8 86x64 Windows® 7 86x64 |
|
Back I/O Ports |
1 x PS/2 keyboard/mouse combo port(s) 1 x DisplayPort 1 x HDMI 1 x LAN (RJ45) port(s) 4 x USB 3.0 (blue) 4 x USB 2.0 (one port can be switched to ROG Connect) 1 x Optical S/PDIF out 3 x Audio jack(s) 1 x Clear CMOS button(s) 1 x ROG Connect On/ Off switch(es) 1 x Q-Code LED 1 x Sonic SoundStage button 1 x KeyBot button |
|
Internal I/O Ports |
1 x USB 3.0 connector(s) support(s) additional 2 USB 3.0 port(s) 1 x USB 2.0 connector(s) support(s) additional 2 USB 2.0 port(s) 1 x TPM connector(s) 4 x SATA 6Gb/s connector(s) 1 x CPU Fan connector(s) 3 x Chassis Fan connector(s) *9 1 x 8-pin EATX 12 V Power connector 1 x 24-pin EATX Power connector(s) 1 x Front panel audio connector(s) (AAFP)*10 1 x System panel(s) 10 x ProbeIt Measurement Points 1 x LN2 Mode header(s)*9 1 x Power-on button(s) 1 x Reset button(s) 1 x mPCIe Combo IV connector(s) 1 x LN2 Mode jumper(s) 1 x ROG extension (ROG_EXT) header(s) 1 x Impact CoolHub connector(s) 1 x SupremeFX Impact II connector(s) |
|
Accessories |
User's manual 1 x ASUS Q-Cable 1 x SupremeFX Impact II audio card(s) 1 x Optional 4-in-1 washers for CPU cooler backplate I/O Shield 4 x SATA 6Gb/s cable(s) 1 x ASUS 2T2R dual band Wi-Fi moving antennas (Wi-Fi 802.11a/b/g/n/ac compliant) 1 x 12 in 1 ROG Cable Label(s) 1 x mPCIe Combo IV card(s) with dual-band WiFi 802.11 a/b/g/n/ac + Bluetooth v4.0 module 1 x Impact CoolHub card(s) |
|
BIOS |
64Mb UEFI AMI BIOS, PnP, DMI2.7, WfM2.0, SM BIOS 2.8, ACPI5.0 Multi-Language BIOS |
|
Manageability |
WfM 2.0, DMI 2.7, WOL by PME, PXE |
|
Support Disc |
Drivers ROG GameFirst III ROG RAMDisk ROG CPU-Z ROG Mem TweakIt Kaspersky® Anti-Virus DAEMON Tools Pro Standard ASUS WebStorage Home Cloud ASUS Utilities |
|
Form Factor |
Mini ITX Form Factor 6.7 inch x 6.7 inch ( 17 cm x 17 cm ) |
Packaging and Accessories
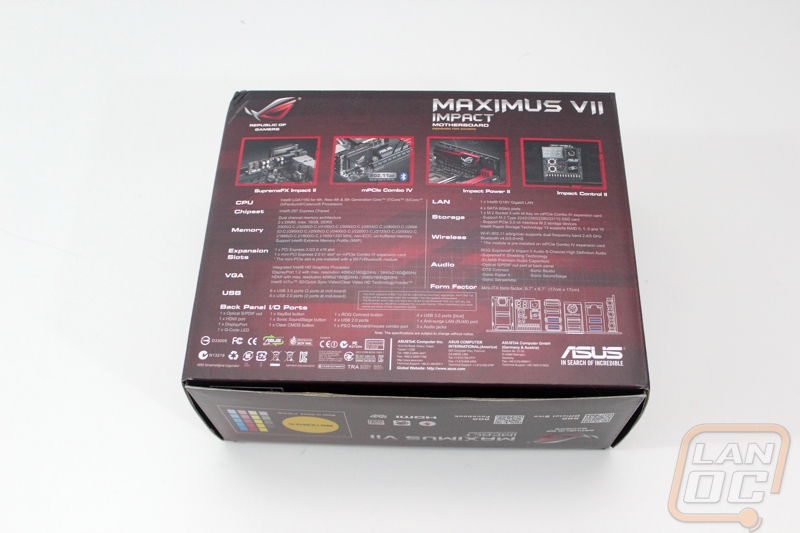
The Impacts box reflects its Mini-ITX size but Asus still stuck with their typically ROG red and black styling. The cover has the board name in large letters with just a few of the required badges from Intel on the cover. The cover does open up though and inside Asus was careful to cover a few of the Impacts biggest features like the upgraded sound card, power circuitry, and the mPCIe Combo card. With a board like this, they can’t cover every feature, but I think they did a good job hitting a few key features that the competition doesn’t have. The back of the box has a few more images of other Impact features. Asus also included a line drawing of the rear I/O panel to show all of the connection options and a full specification listing as well to help with your decision.

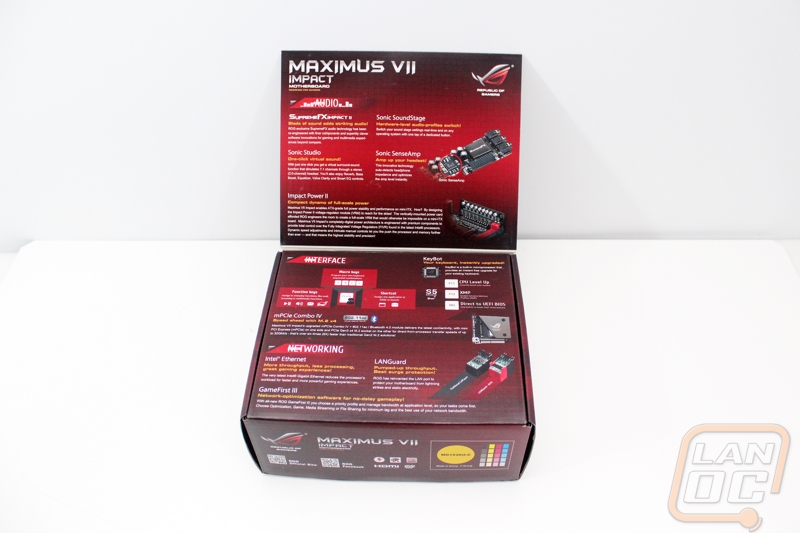
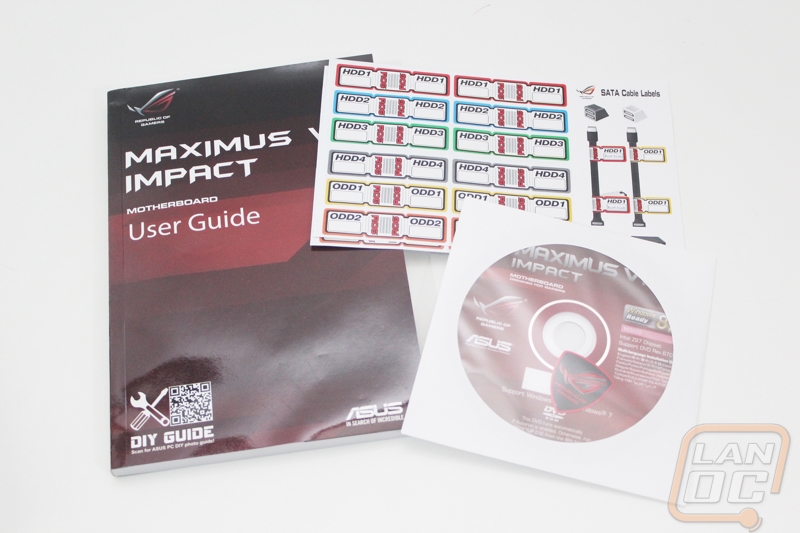
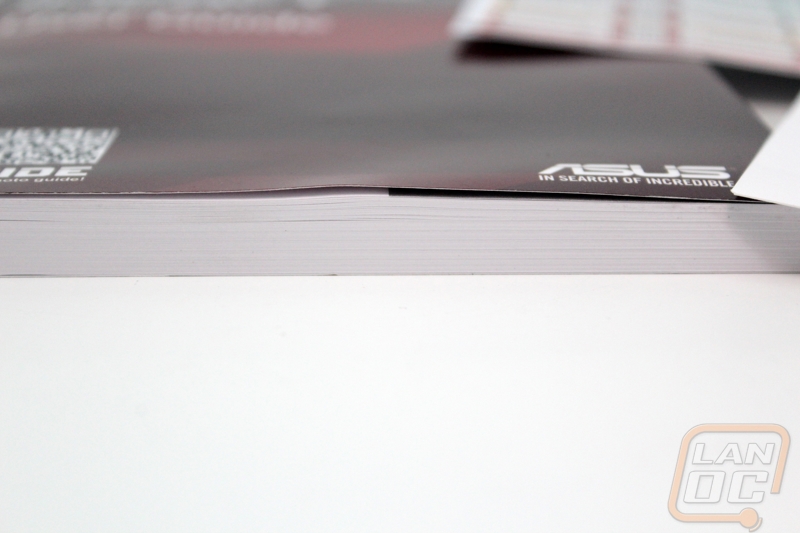
For documentation Asus bundled a user guide, a driver/software disc, and a sheet of SATA label stickers. The user guide is especially impressive, this is literally a full sized book of information on the Impact.
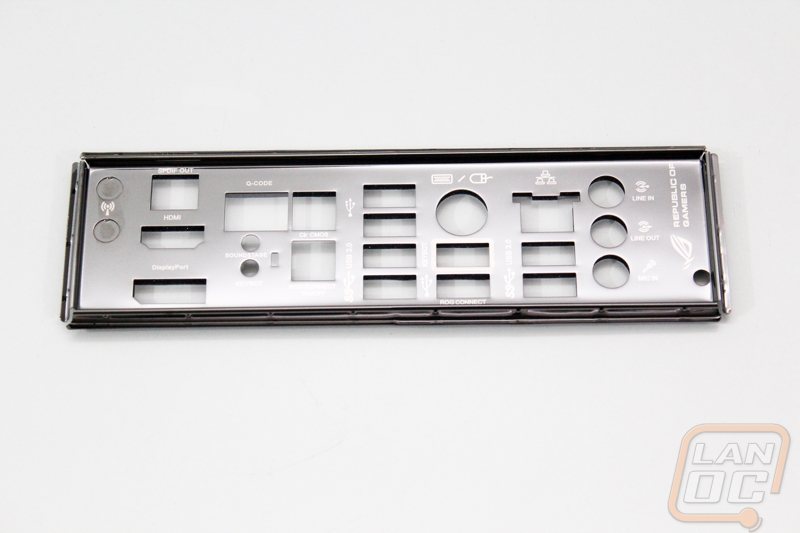
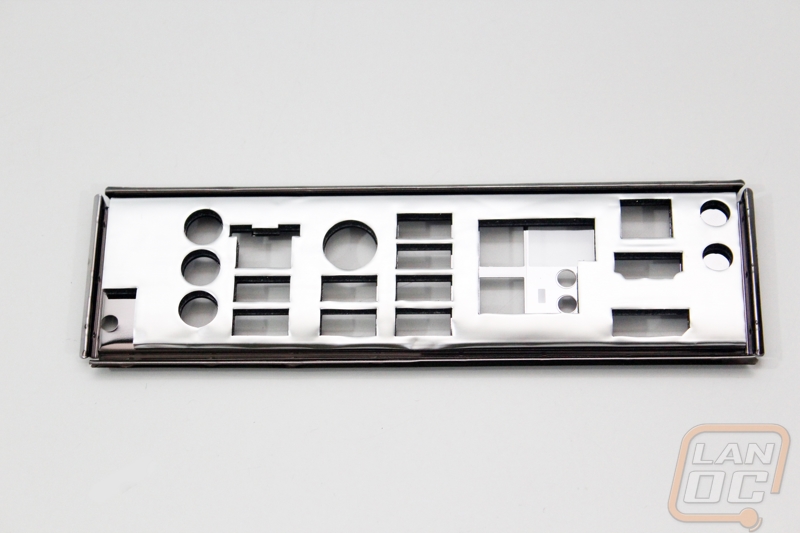
The rear I/O cover for the Impact is a slightly tinted silver with white legends. I personally would prefer this to have a black background to match with the black cases that most people are using. I do like that Asus used foam rather than those annoying metal springs on the back of the I/O panel.
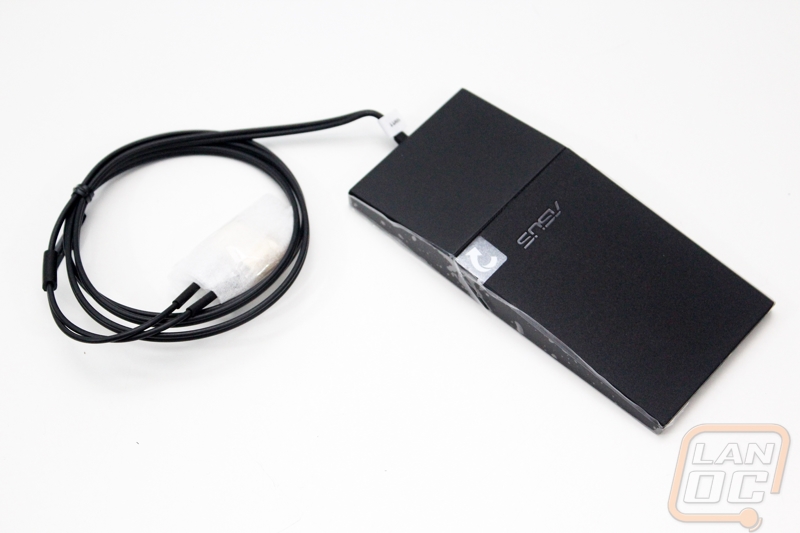
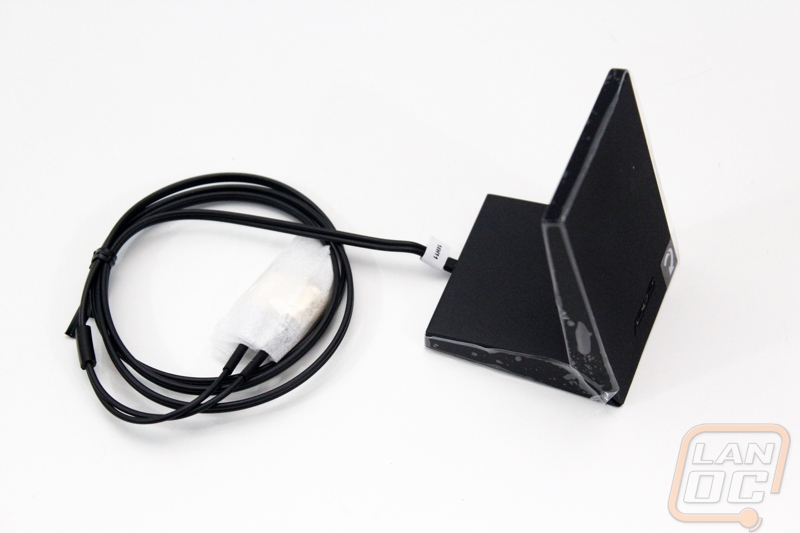
To go with the included wireless card (that I will talk about in the next section) Asus did include a wireless antenna with the Impact. They went with the same design that I saw with their Z87 models. The antenna has a magnet built into the back to help stick it to the side or top of your case. It can be laid flat or if you twist it at the midpoint it can be right angled. This is great for sitting it on your desk or on top of your case.
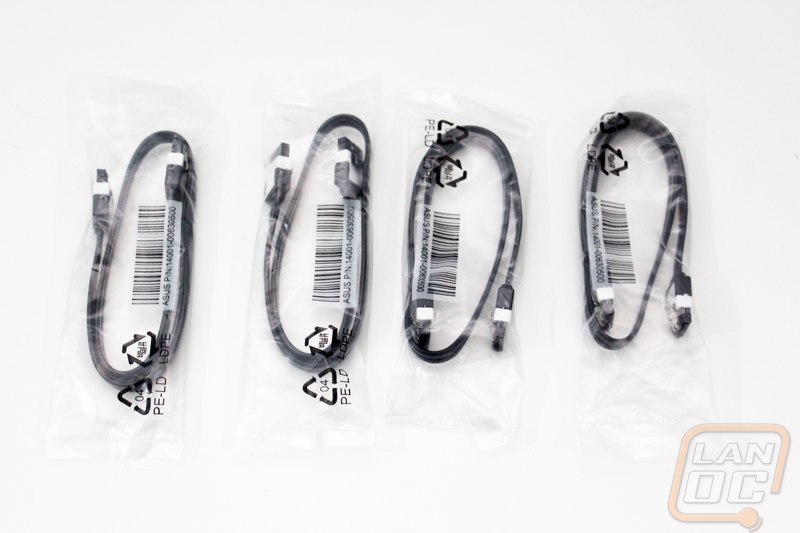
For SATA cables Asus includes four, all with straight plugs on both ends, right angle cables wouldn’t work with the Impacts design.
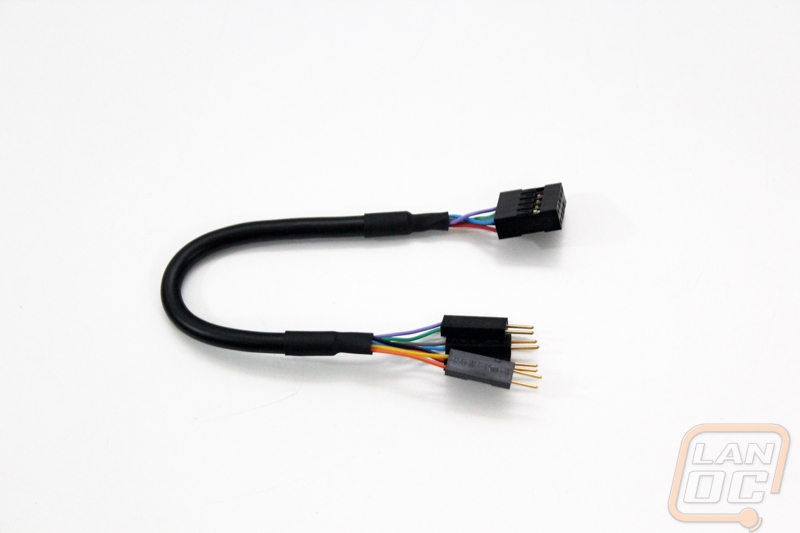
To make plugging your front panel connection in a little easier Asus also includes a small adapter cable. You can plug all of the individual plugs in out of the case were you have more room then plug just the single cable in. This is nice in any build, but when working in small Mini-ITX cases it is even more helpful.
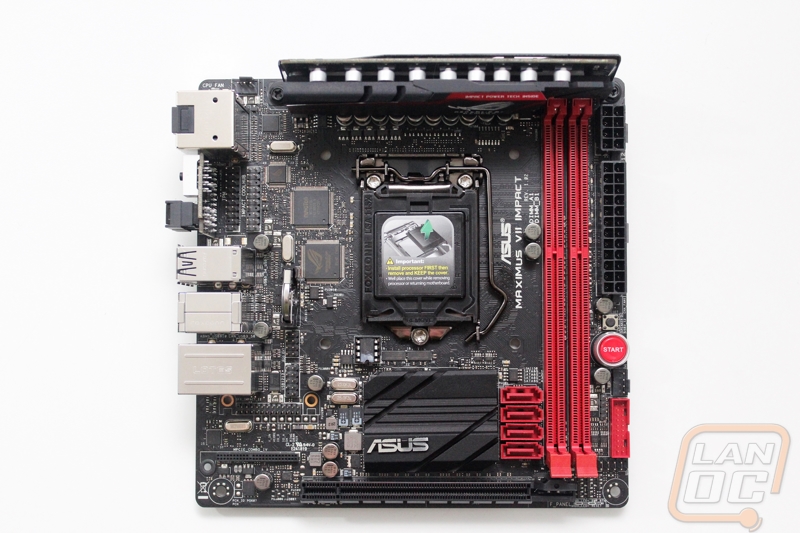
Board Layout and Pictures
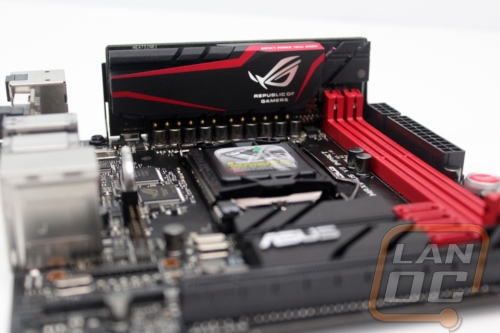
The Impact has to be the busiest motherboard I have ever seen. Asus took an already cramped motherboard and just completely packed it full of features. It’s almost like a scene out of a James Bond movie, someone dropped off a Mini-ITX motherboard and then a whole stack of features as requirements then before they left they said oh by the way we want this audio card, this wireless card, and the power circuitry from our ATX board. They did stick with the red and black theme that all ROG boards have giving the board a little style.
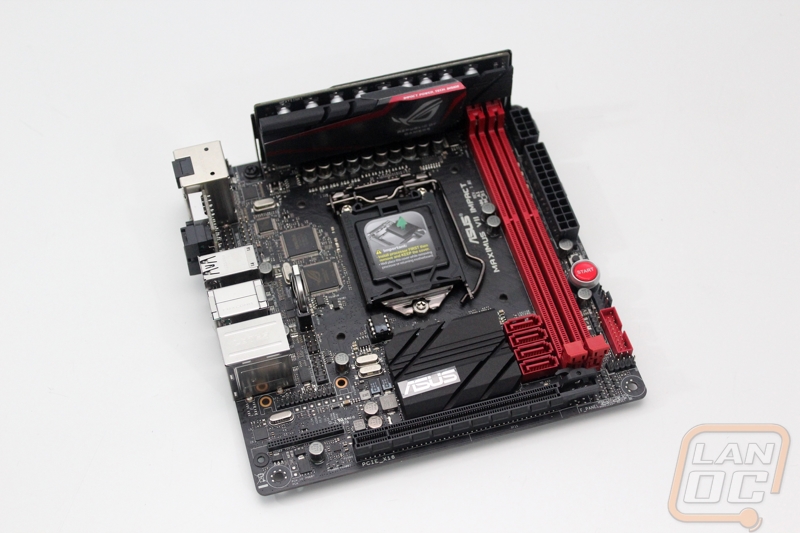
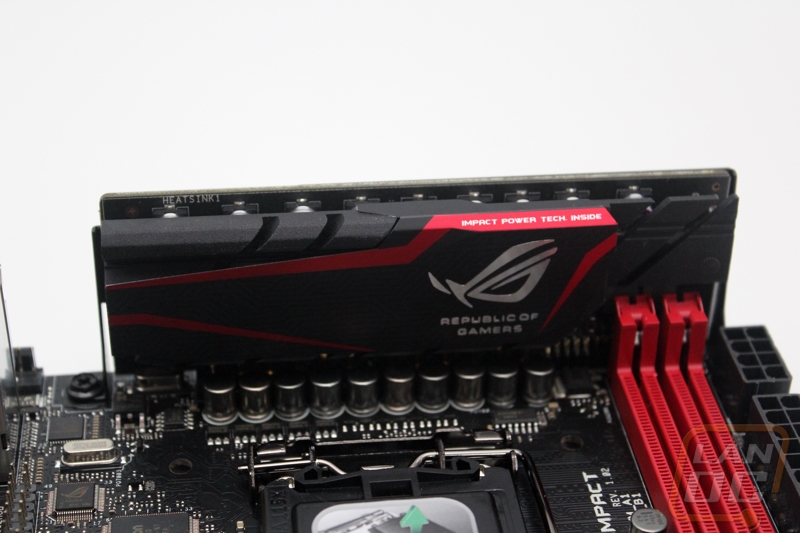
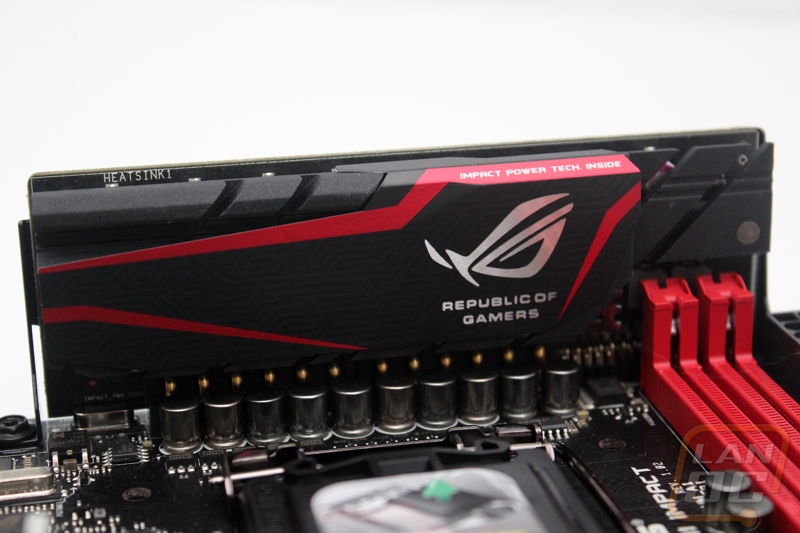
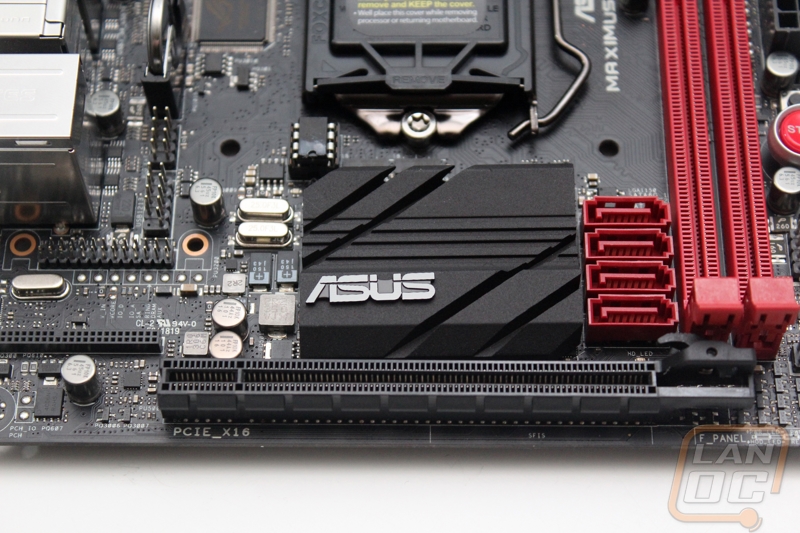
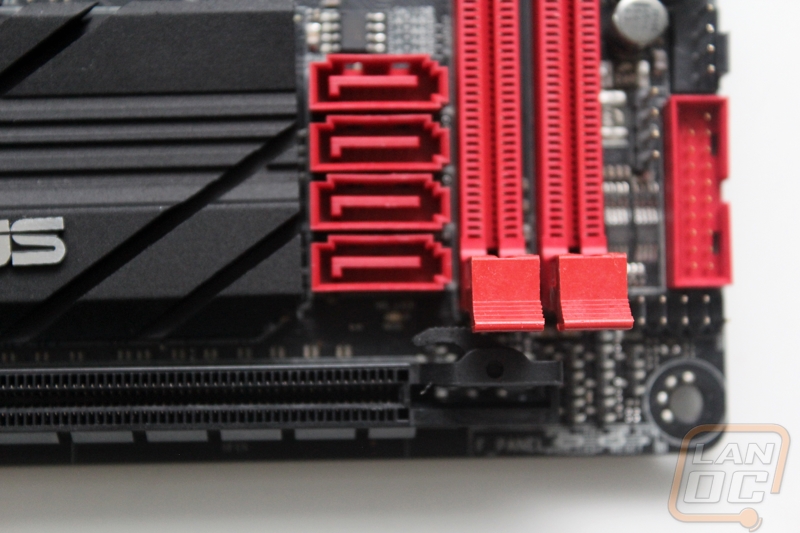
The cooling on Mini-ITX boards is typically very minimum. You can see that as well on the Impact, the chipset heatsink above the PCI slot is tiny, just an inch tall. Where the Impact is different from the competition is in its power circuitry though. Most ITX boards will just cut back on power due to the limited space. Asus uses a riser board at the top of the board to avoid having to cut back. The Impact Power II features NexFET MOSFETs and BlackWing Chokes. They also use Japanese made 10k Black Metallic Capacitors. You end up with an 8+2 power design. This isn’t even in the same world as the competition. This means that the Impact will have the stability and overclockability that ROG boards are known for. To keep things cool Asus uses a black powder coated heatsink on the riser card. To give it a little styling they also put a plate overtop with red trim and the ROG logo machined in silver.
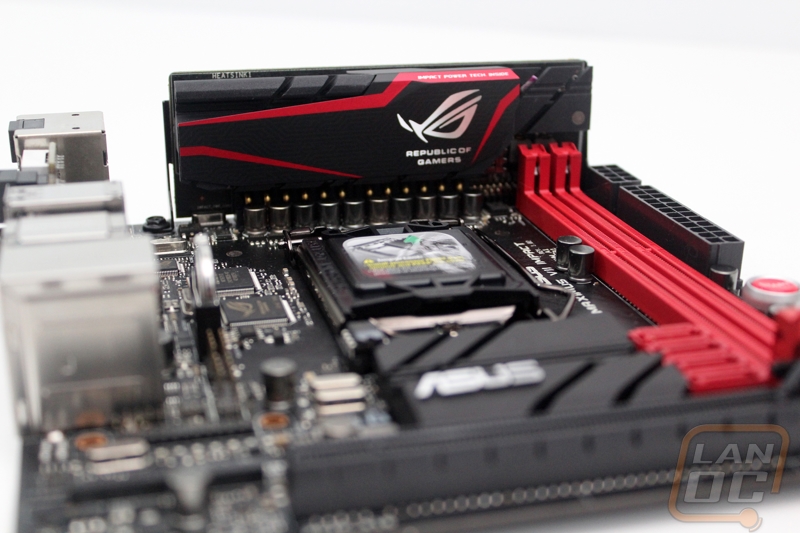
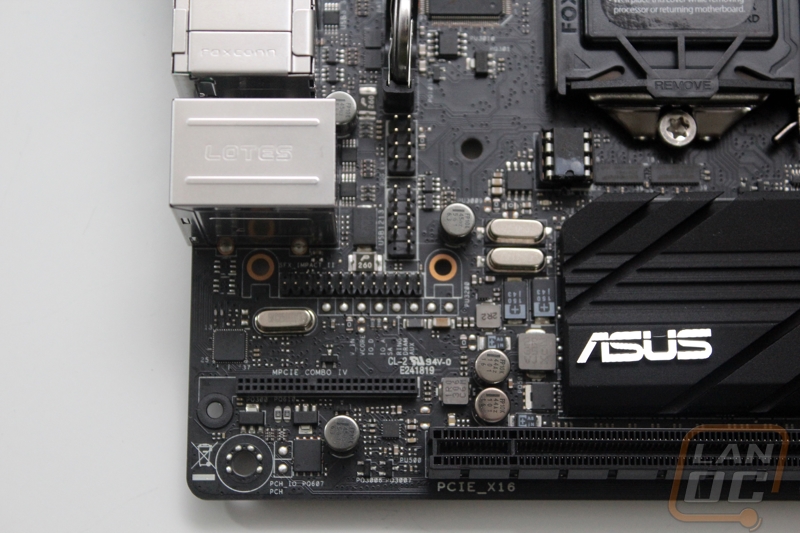
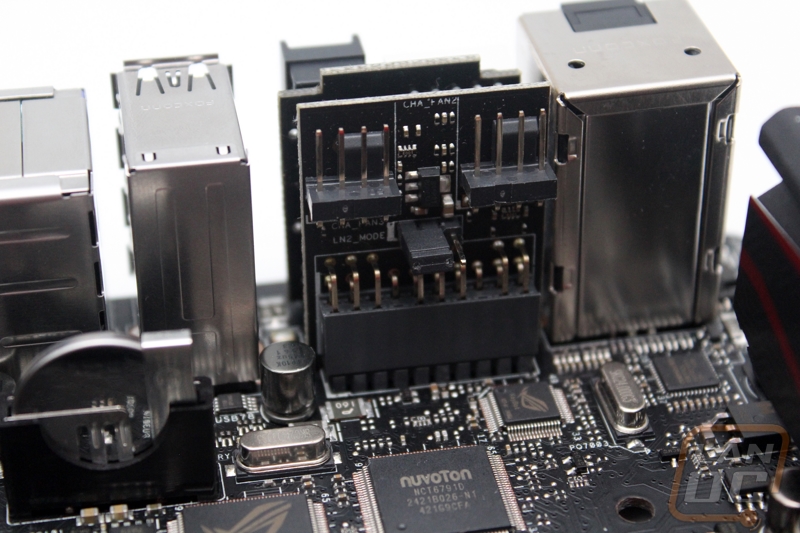
Okay let’s take a close look at things starting at the top left corner of the board. Asus didn’t let any space go to waste on the Impact, a great example of this is right behind the rear I/O panel. They slipped in the TPM header as well as the header for the Impact CoolHub that I will cover father down the page. Also in the top left corner is our first four pin PWM fan header, this one is labeled for the CPU fan. The rest of the top left corner is taken up by the large power riser and the CPU socket itself.
The top right is also largely dominated by the CPU socket and the power riser. We do however get our two DDR3 DIMMs in a nice ROG red. I really like that Asus put the 8-pin CPU power here right next to the 24-pin motherboard power. This is a much cleaner look and easier to plug the CPU power in, I would love to see this become popular on larger boards as well.
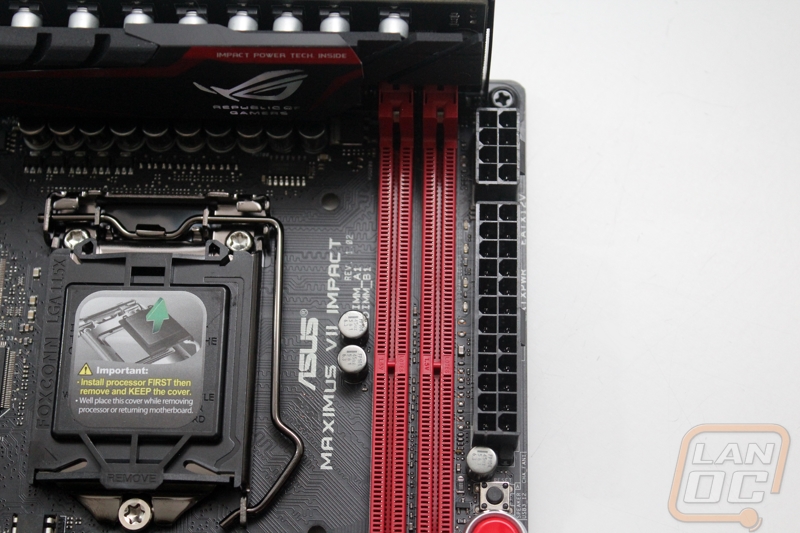
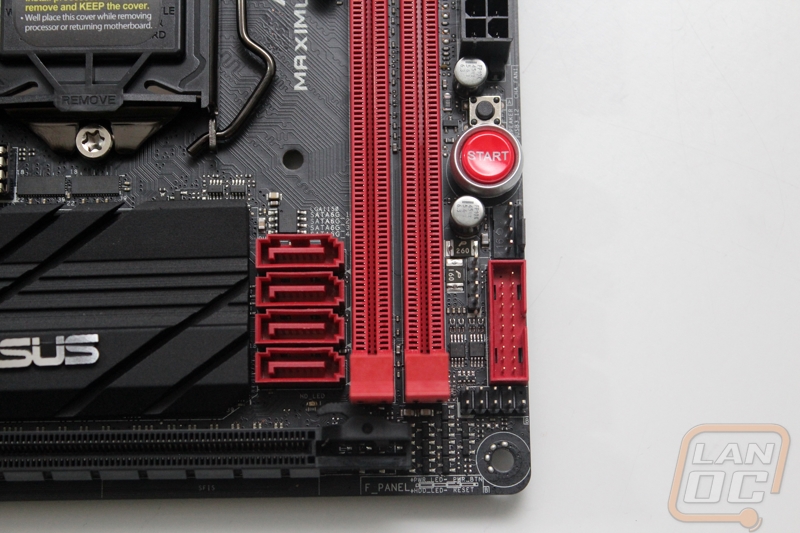
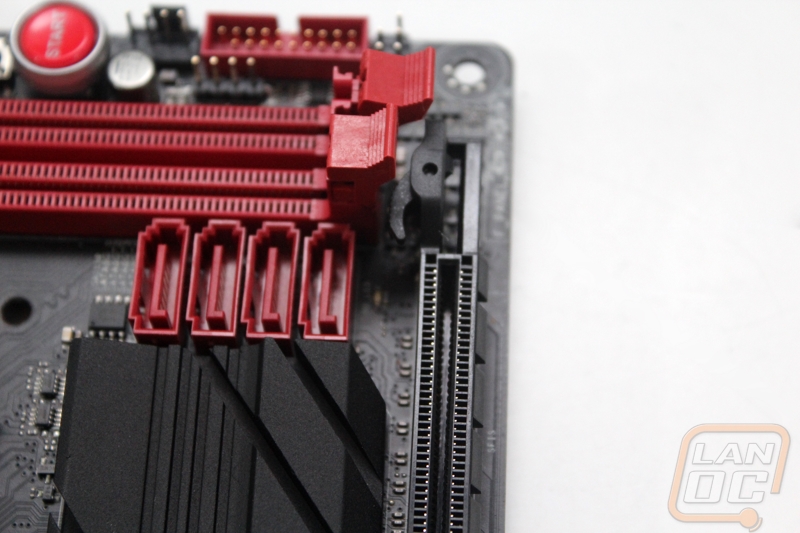
Down in the bottom right corner we have a little more going on. To the left of the RAM DIMMS we have four SATA 3 ports. Over along the right edge Asus included a nice red power button as well as a small reset button. Below that is our second four pin PWM fan header and then a red USB 3.0 header. Last but not least is the front panel connection. Look at just how close Asus packed everything together here, the gaps between the different headers are almost non-existent.
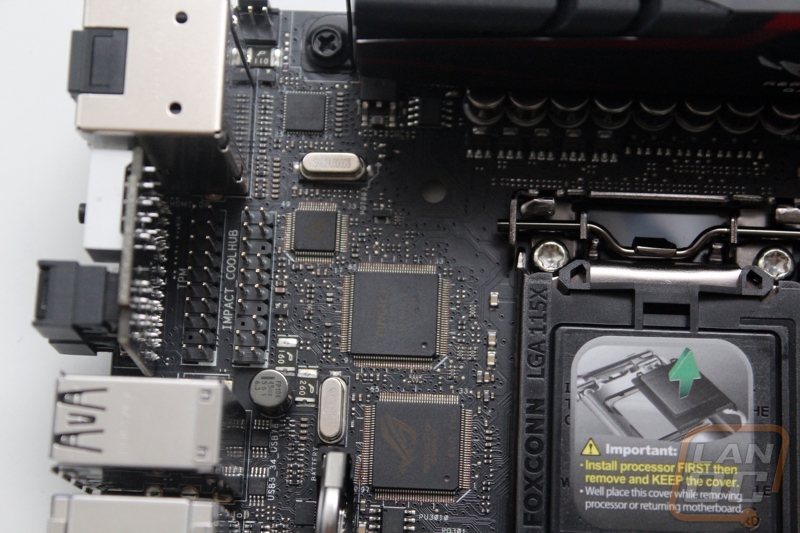
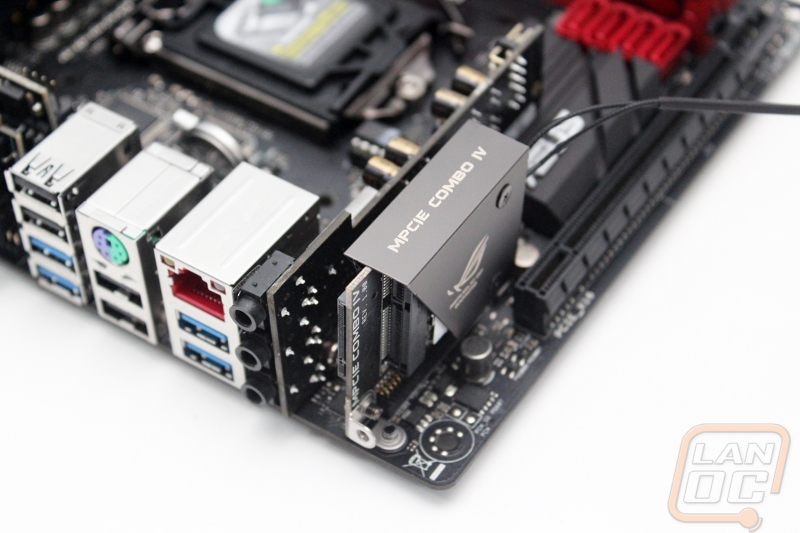
Down in the bottom left corner under the rear I/O panel we can see the headers for the mPCIe Combo IV and the audio card. Asus also slipped in a small row of ProbeIt Measurement Points for overclockers just under the audio card. This is something we just never see on a Mini-ITX card, they normally never overclock well. There is also a USB 2.0 internal header back behind the rear I/O panel that is shared with the ROG Extension connection.
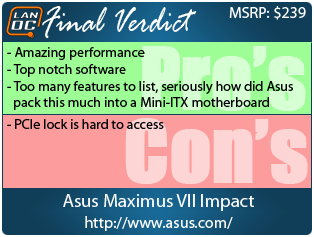
Down along the bottom edge we get a full PCIe x16 slot. It’s not something you think of when just looking over the Impact but I did run into a slight issue with the placement of the two RAM slots along with the PCIe slot. As you can see the ram locks are tight up against the PCIe lock. This means that with a video card installed you might not be able to replace the RAM and more importantly it is going to be very hard to unlock the video card with or without ram installed. Typically the non-latch locks would do the job here but in order to be able to fit the power riser card they were already used on the top of the DIMMs. I’m not sure there is a better option here so I can’t fault Asus too much, but it is something to keep it mind.
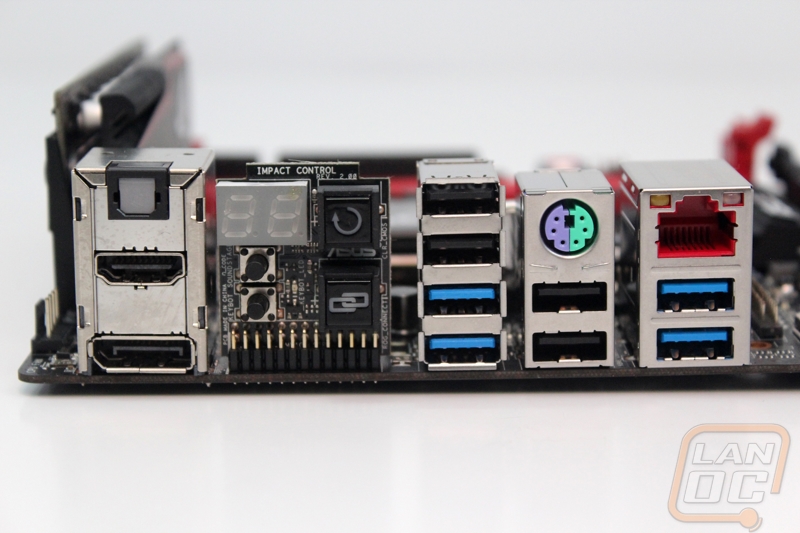
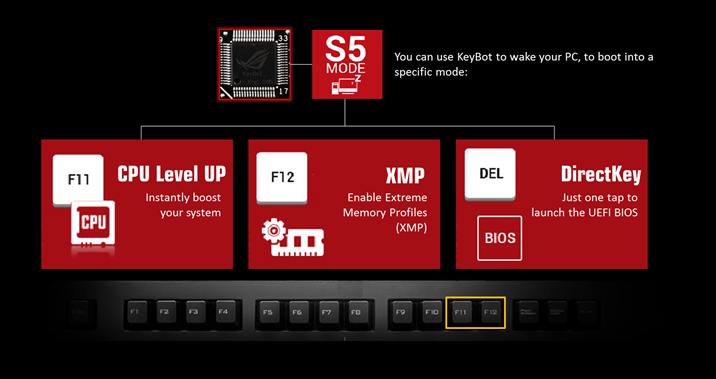
The rear I/O panel on the Impact is an interesting one. Typically most boards have a few USB 2.0 or PS2 ports on the left for keyboard a mouse connections but Asus moved things around slightly and on the left we have a full sized DisplayPort and HDMI along with a SPDIF Out for hooking up to your home audio system or an on desk audio solution. Next to that is yet another riser card, this one is called the Impact Control. Here you have your Q-Code readout for figuring out errors. Having this here is much easier than having to open up your case to see what the problem is. To the right you have a clear CMOS button and below it a ROG Connect button. The two other buttons are Impact specific though. The button directly below the LED panel is the Sonic Soundstage button and below it is the button that turns on Keybot. For Keybot I have included an image below, Asus has integrated a microprocessor that will let you assign macros to your F1-F10 keys, even if your keyboard doesn’t support macros. In addition, you can also use key combos to instantly overclock your CPU, turn on XMP, and even boot directly into the BIOS.
Moving to the right of the Impact Control PCB, we have a total of eight USB connections. That breaks down to four USB 3.0 ports and four USB 2.0 ports. It might seem silly but I like that Asus staggered the connections so you don’t have more than two of each type together, there is a good chance they did this intentionally. What this means is if you have any thick USB devices they won’t block everything. Therefore, you could plug in more than one USB 3.0 flash drive for example while still having your mouse and keyboard hooked up. You also get a single legacy PS2 port. Its surprising to see this included but I welcome it, Model M keyboard fans will be very happy. Lastly, we have the Intel I218-V NIC with Languard. What is Languard? Well Asus build in ESG guards into the NIC to help protect your motherboard from lightning strikes that come in through your Ethernet cable.

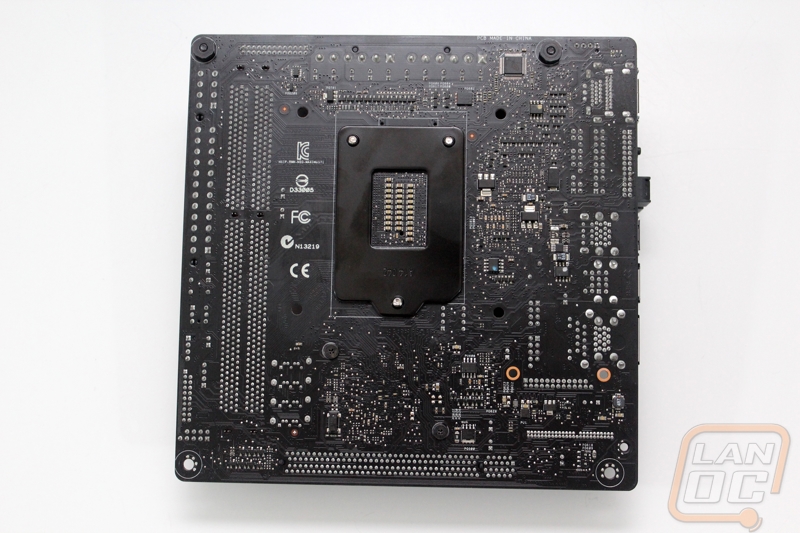
With the Impact flipped over we can really see just how much Asus packed into the board. There isn’t an open area on the PCB that doesn’t have something going on. We can also get a better look at the flat black PCB that they went with as well.
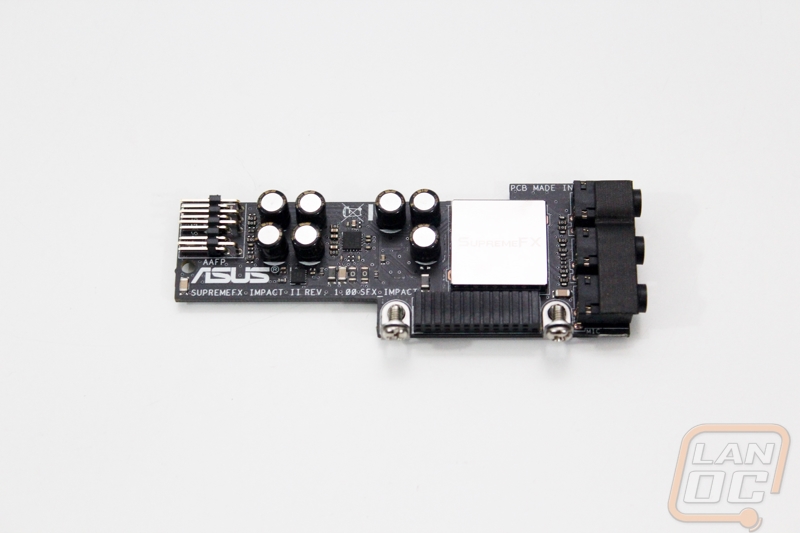
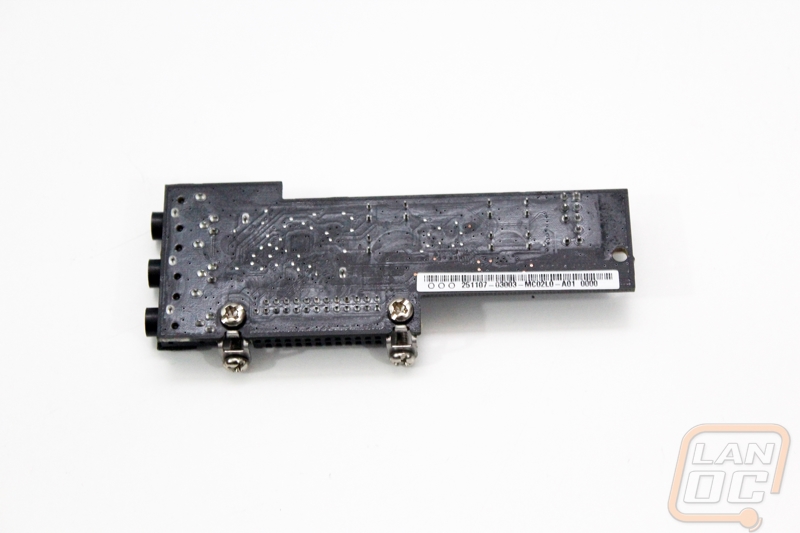
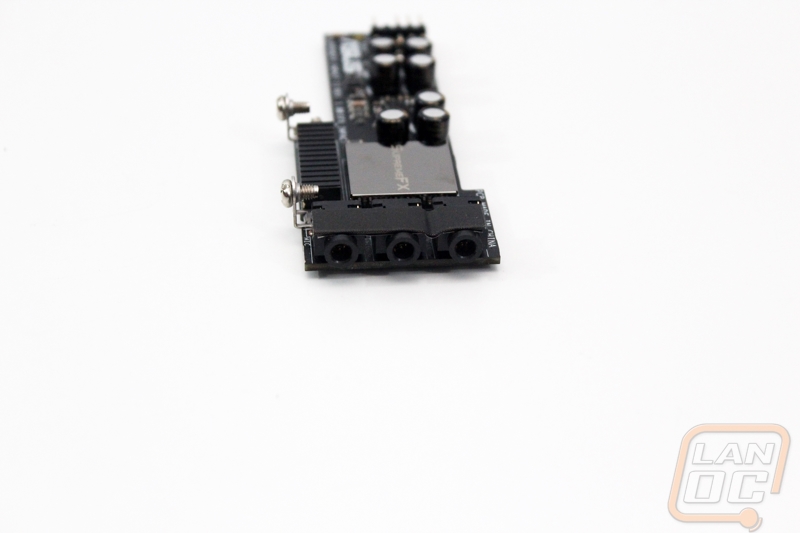
The first of the Impacts three removable add in cards is the SupremeFX Impact II audio card. Asus has been known for great audio cards for years now and over the past few years they have been innovating onboard audio options. For the Impact, there just isn’t enough room to include a good audio option on the board at Asus standards. To fix this they have the add in board, this keeps your audio separate from the motherboard for the best audio quality. The board plugs into a header and then attaches with two screws to keep it secure. So what do you get with SupremeFX Impact II? Well for one they have a feature called Sonic Sense Amp that detects your headphone impedance and automatically adjusts the gain of the built-in amp to best suite your headset.
For hardware, you get the same ALC1150 audio card that the original Impact had. Asus still has ELNA premium audio capacitors as well. This time around though you get a hardware EQ. They did add additional features in the software, specifically Sonic Studio. They also built in what they are calling Sonic Soundstage, a hardware based sound surround technology for front panel headphones. You can turn this on using the button on the control panel on the rear I/O panel. Speaking of that, I didn’t have the audio card installed when I took the rear I/O panel picture but you get three rear audio connections. The top one is a line-in, the middle a line-out, and the bottom is a microphone in. On the PCB itself there is also a front panel header as well.
Just next to the PCIe slot Asus included a header to plug their new mPCIe Combo IV into. The combo card has both a Mini PCIe slot and an M.2 slot. They fit both on the card by putting one on each side of the PCB. The mPCIe slot comes filled with wireless card that supports up to wireless AC speeds. Where things get interesting is the M.2 slot, the M.2 slot supports type 2242/2260/2280/22110 storage devices with up to a x4 speed. The original Impact just supported a 2242 type with a x1 speed. If you are looking for the cutting edge in storage speed you can get it on this board.
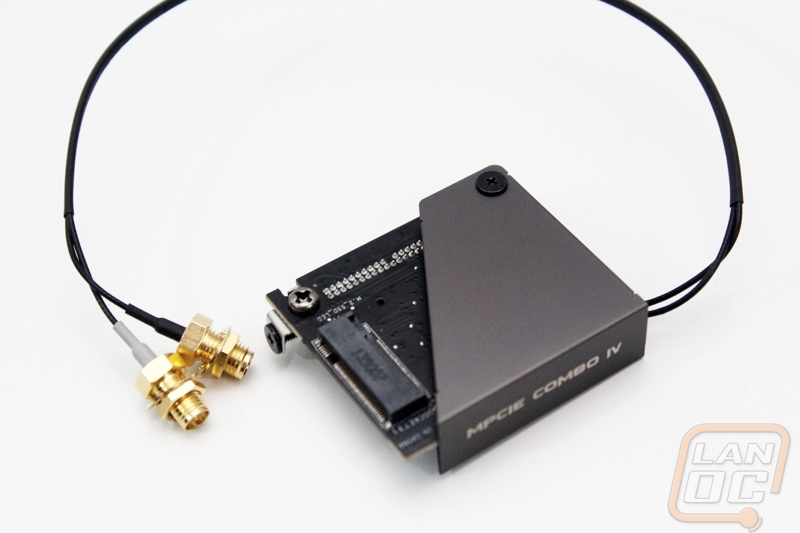
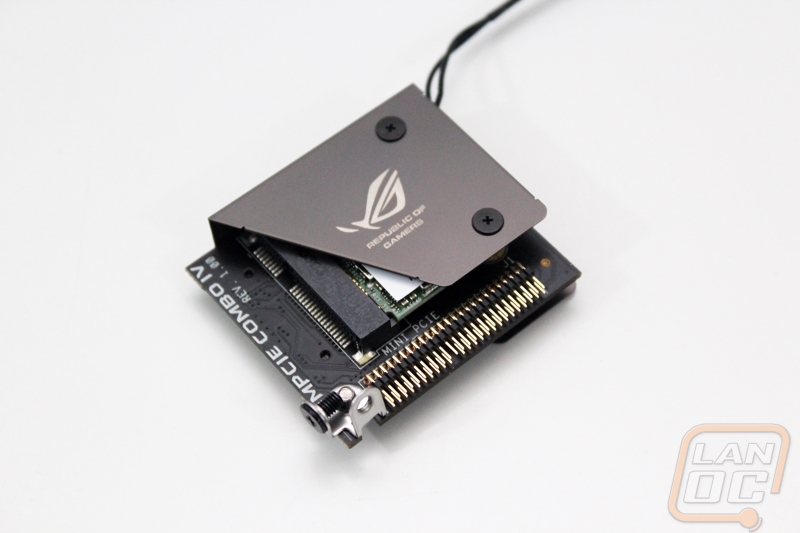
With both devices plugged in we can see just how tight things are against the PCI slot. It is also interesting to note that the mPCIe Combo IV has two mounting options, you can attach it to your rear I/O panel or to the motherboard. You only get one screw, so you have to pick between the two. I would prefer if they let you do both to keep it more secure. For my situation I wouldn’t have a rear I/O panel for our case so I went with the bottom screw mount but it was obvious right away that the board still flexes around a lot. Using both mount locations would help this or even better having a second screw mount on the left side to keep it stable would be great.
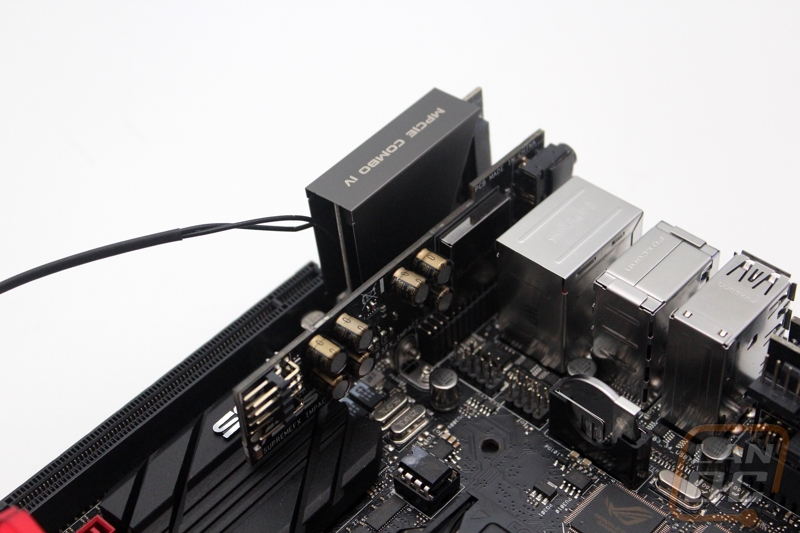
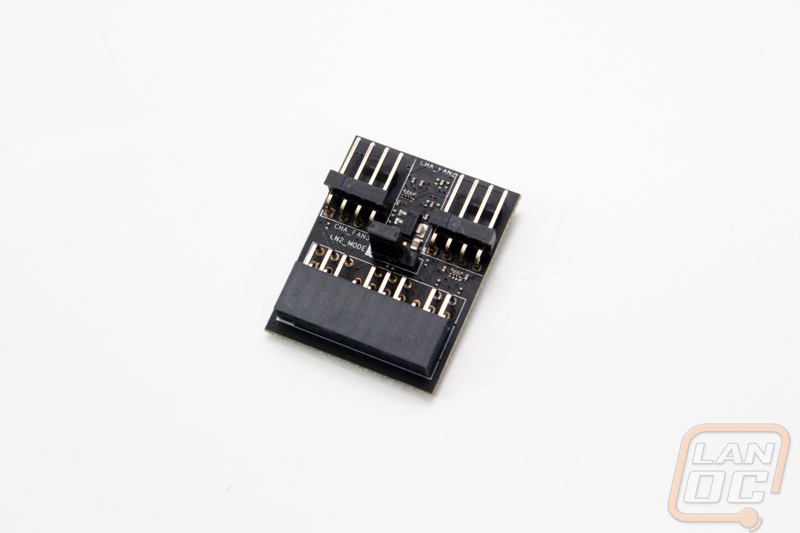
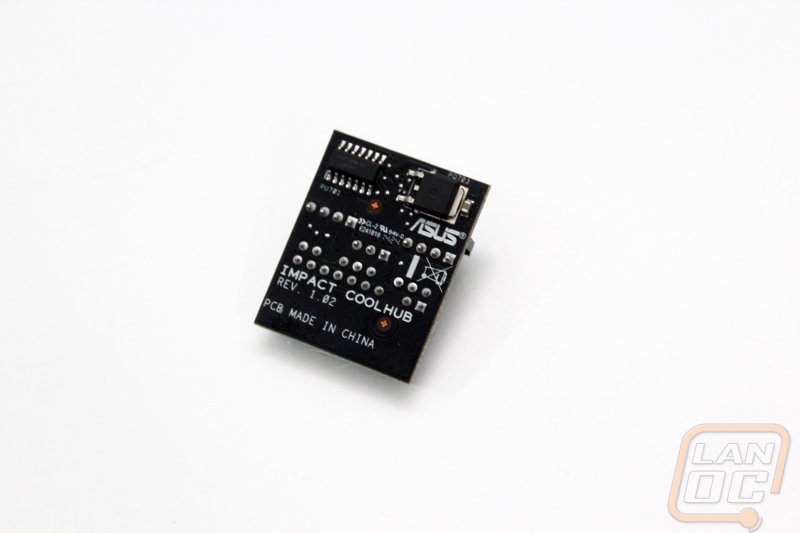
While the other two add on cards are really cool, the original Impact did have variations of both, with left features of course. The one add in board that Asus added this time is the CoolHub. What the CoolHub does at its core is add two additional 4-pin PWM fan headers to the Impact. That gives you a total of 4 when you include the two already on the board. Additionally CoolHub gives you an option to put the board into LN2 mode, turning this on will help the board post at sub-zero temperatures.
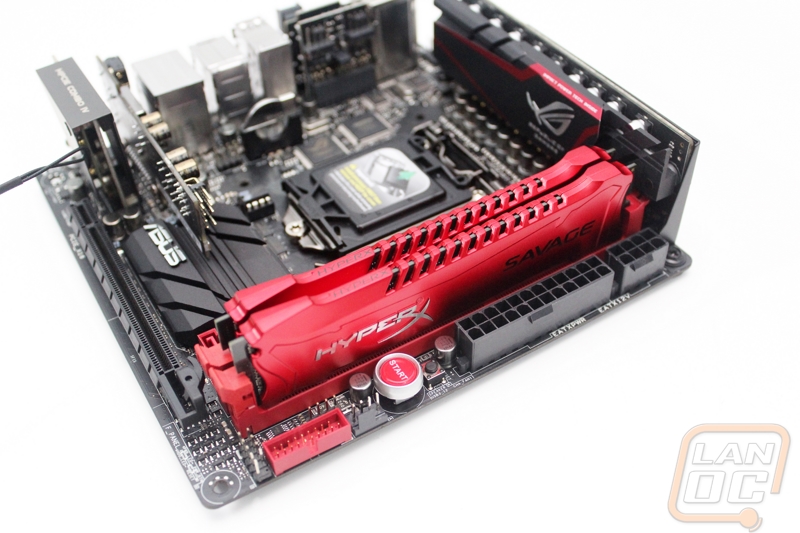
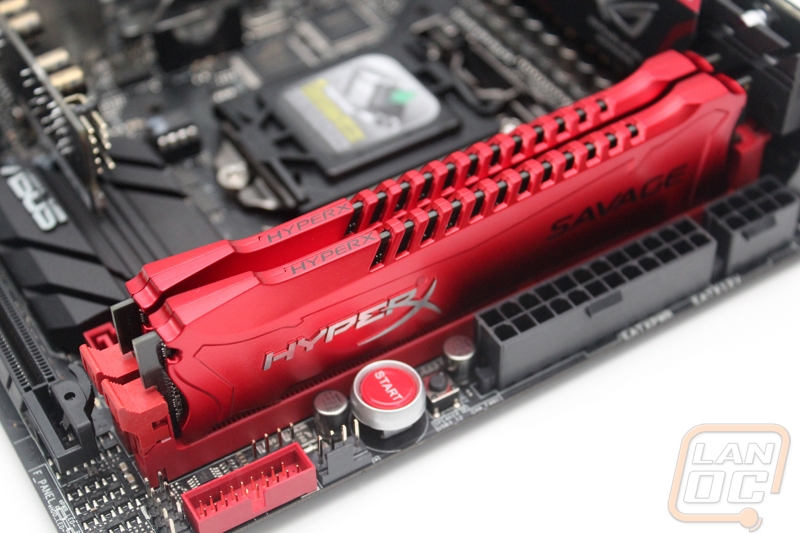
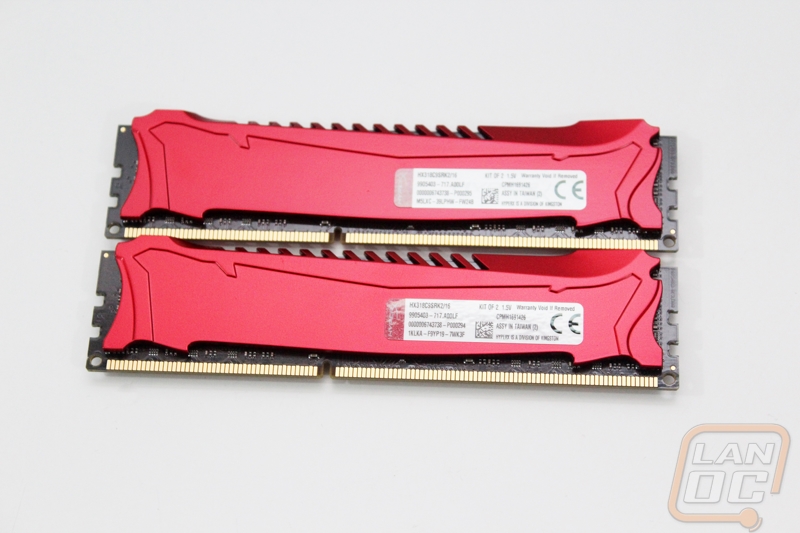
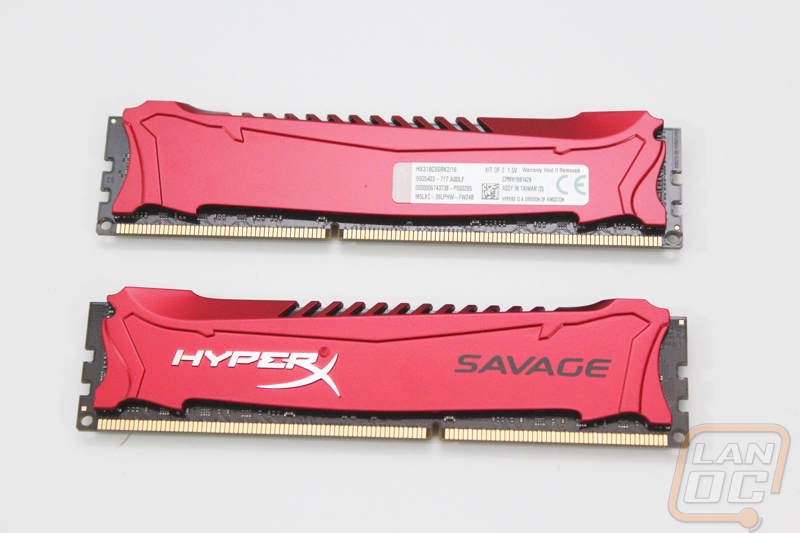
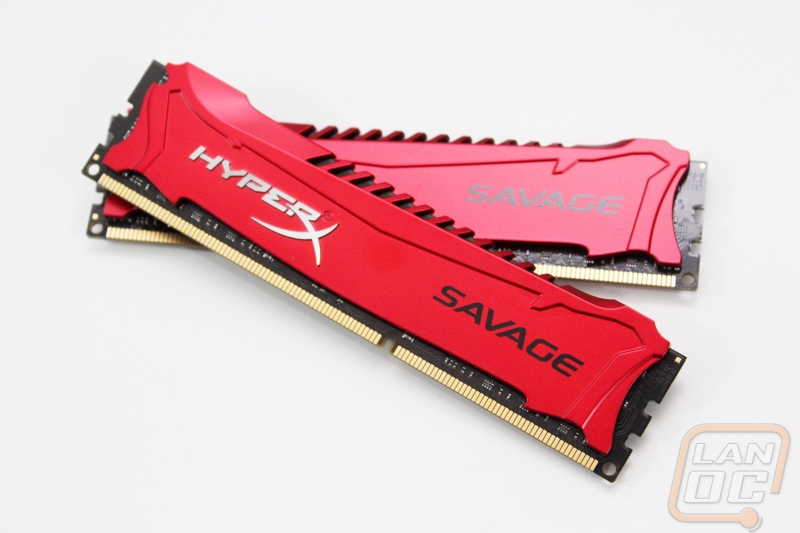
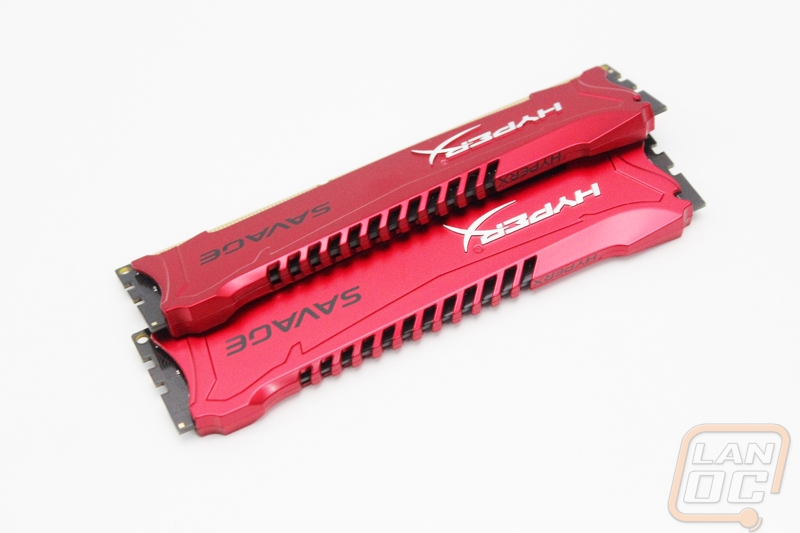
When gathering components for our new LAN rig that would be featuring the Impact I decided to stick with the black and red theme of the Impact and also of the In Win D-Frame. When I went looking for RAM I took a peak at what Kingston had to offer and came across a new set that I fell in love with. Their new Savage RAM is available in red with a black PCB. When they came in I just had to feature them along with the Impact because frankly I don’t think you can get a better combination. Just look at how great the kit looks in the board below!

UEFI and Software
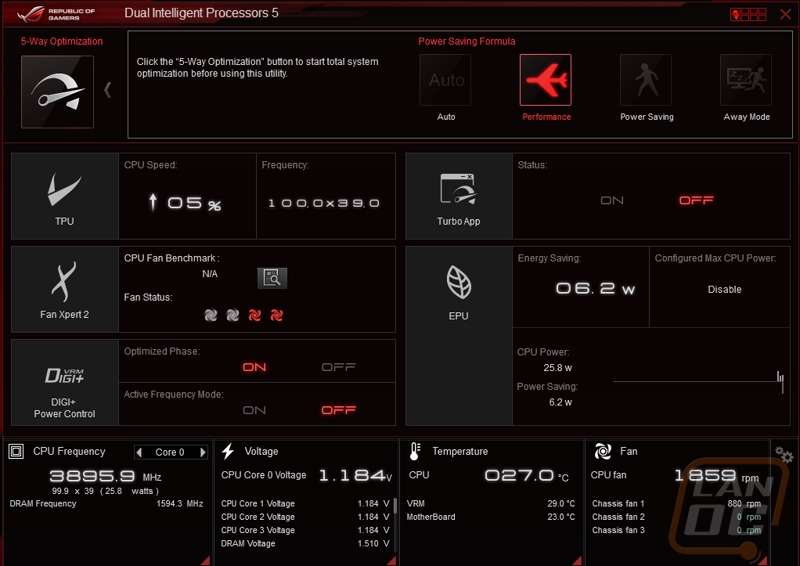
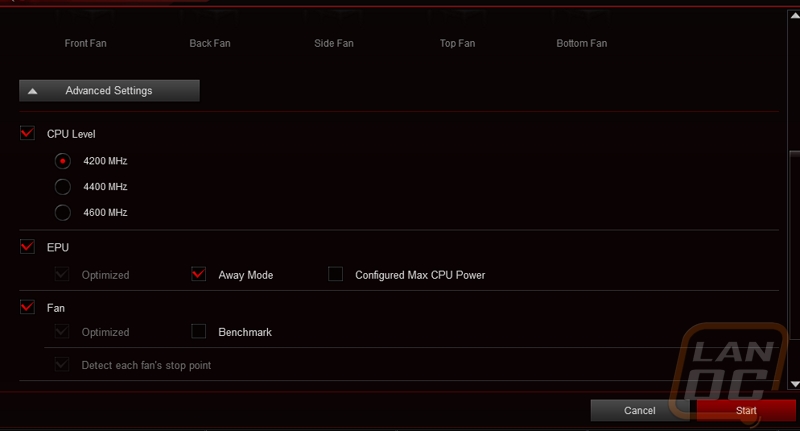
It might seem like a small thing but software can play an important role in your overall experience with a motherboard. When software is bad you will find yourself not wanting to install it at all. This isn’t been an issue with Asus boards for me for a very long time. Their AI Suite software has impressed me over and over every single time I get the chance to use it. The Impact has the same AI Suite III software once again, in fact short of a few small differences there isn’t much different between this time around compared to any other time. With this being an ROG board the software does have the red and black theme with the ROG logo up in the top left corner.
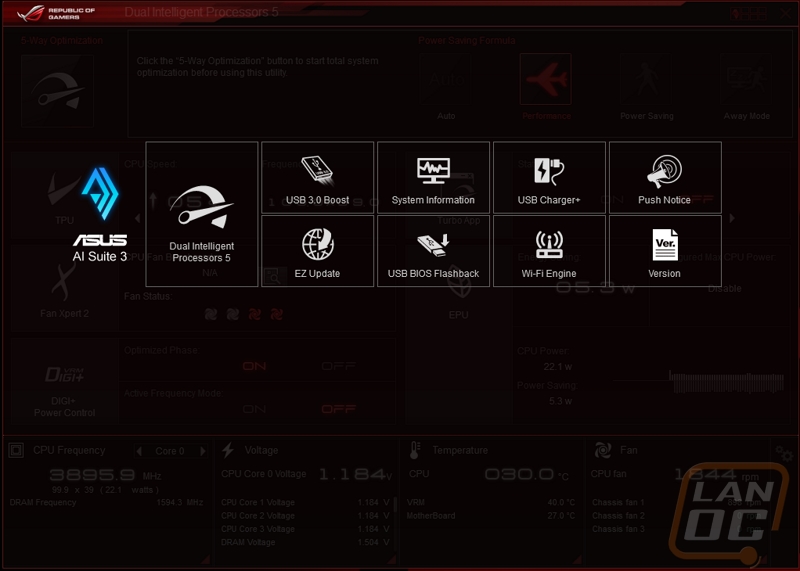
When you open the software up the home page has a lot going on right from the start. Asus has put a small part of each section of the software on the homepage. That means you can see the current overclock percentage, see how much energy you are saving, peak at fan and DIGI+ Power settings. On top of all of that along the bottom we can see all of our voltages, temperatures, and fan speeds.
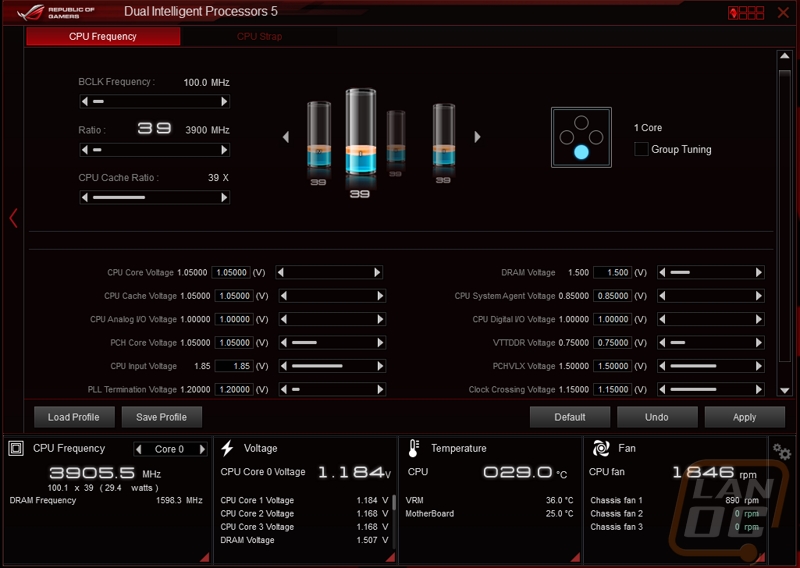
When we start clicking on sections we can finally get a better look at just how much we can do and change in the software. For manual overclocking we can change every voltage setting and overclock all of your cores together or do them individually.
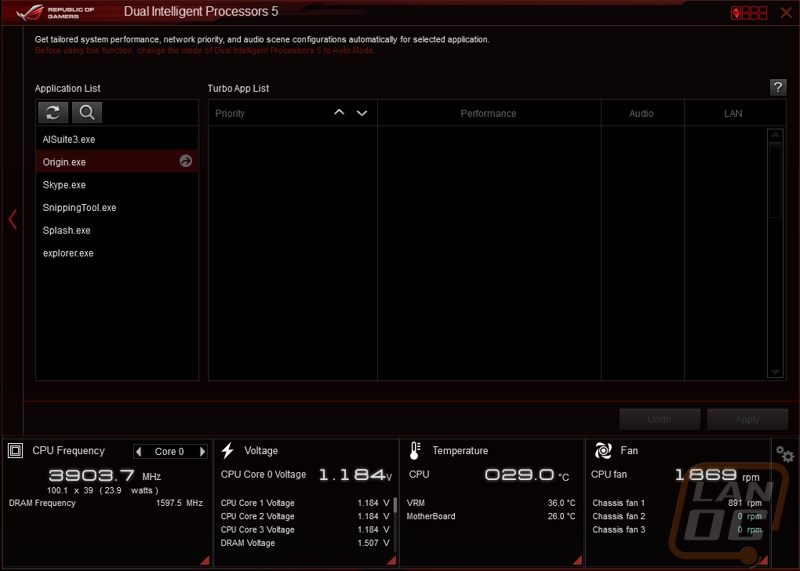
The turbo page is really interesting as well. In the past we have seen the option to give network priority to specific programs but here Asus is allowing us to go beyond that and even set performance priority. All you have to do it select the programs you want to give priority and then from there you can put them in order from highest to lowest priority.
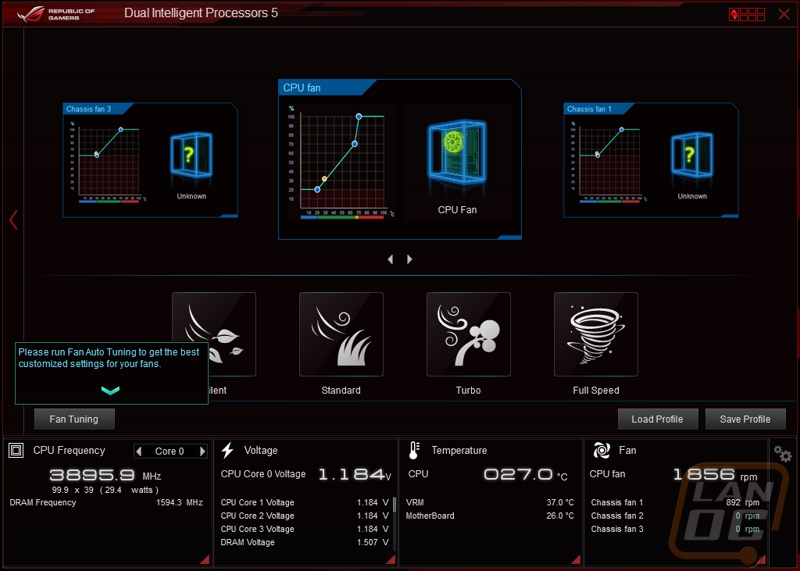
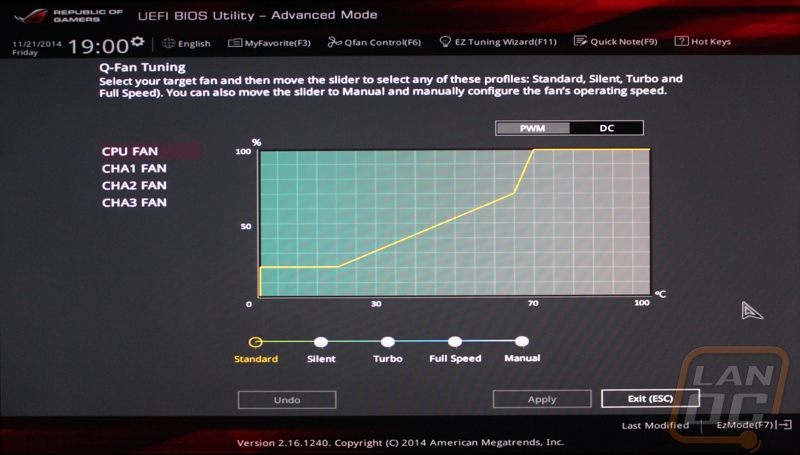
On top of easy to use fan setting options that anyone can use Asus also gives us the option to select any one fan and map out how it will spool up compared to temperatures.
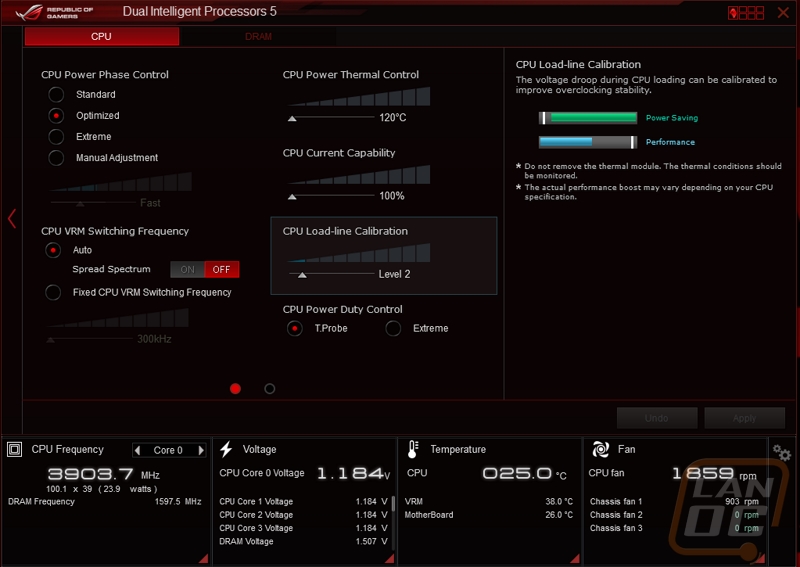
DIGI+ means we have full control of how the Impact handles its power delivery. There are easy to use settings as well as more detailed options over on the right. As you make changes there is a small graph that shows how the changes affect energy and performance.
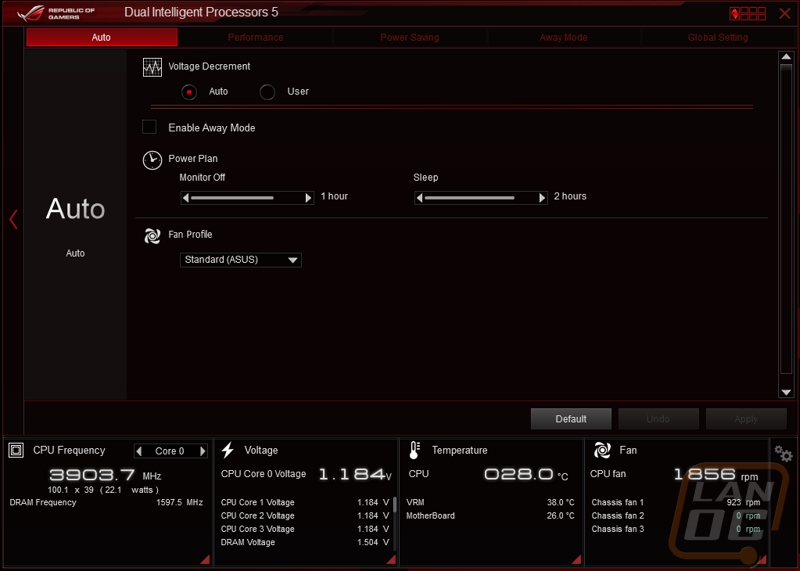
We can also get into power saving features. Here we can set when the monitor will turn off, how AI Suite will handle power savings with voltage changes, and even fan profiles while the PC is idle.
In addition to the main pages in AI Suite, up in the top right corner you can click and open up a page full of additional options. Here we can get into things like USB 3.0 Boost that I love so much.
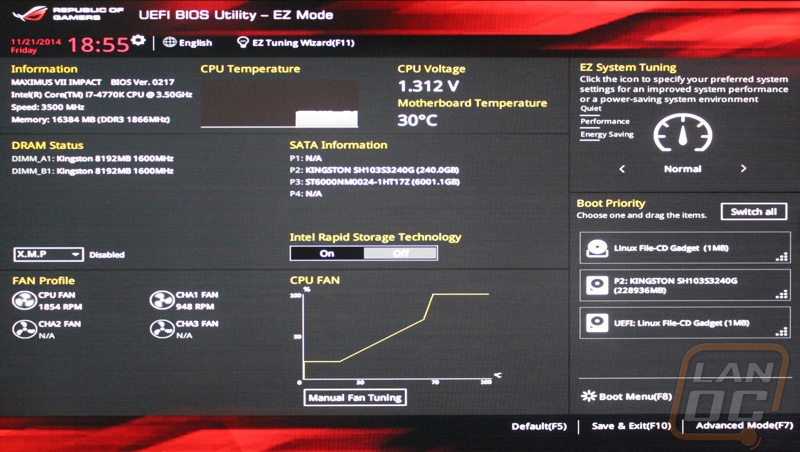
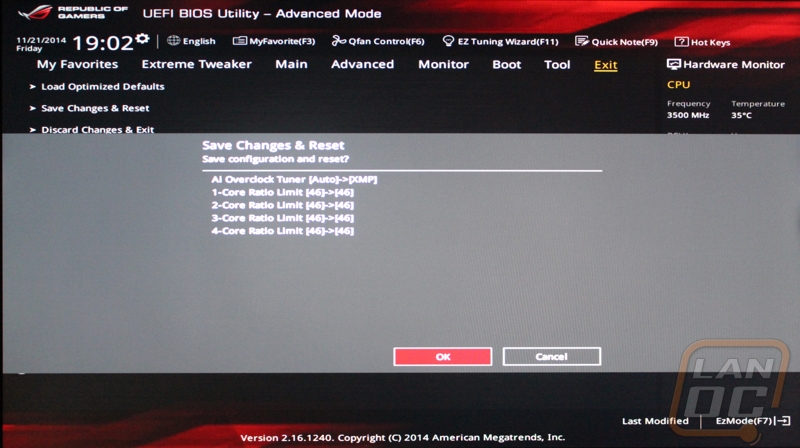
While to be completely honest you can get almost everything done in AI Suite, that doesn’t mean that Asus left their UEFI alone. Asus’s UEFI’s have been leading the market for years now. When you first boot into the UEFI I was surprised to find that on the Impact It took me right into the advanced options page, normally you would be taken into the EZ Mode to prevent someone who is inexperienced getting into options that could cause damage. The EZ Mode has all of the basic features including a nice drag and drop hard drive boot priority section.
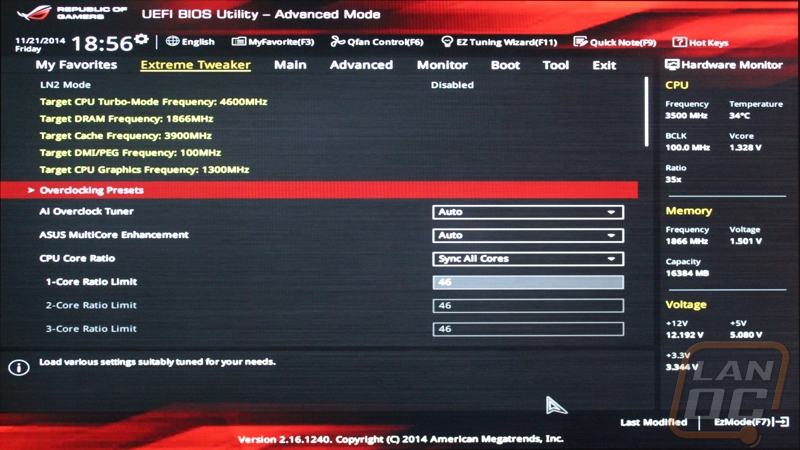
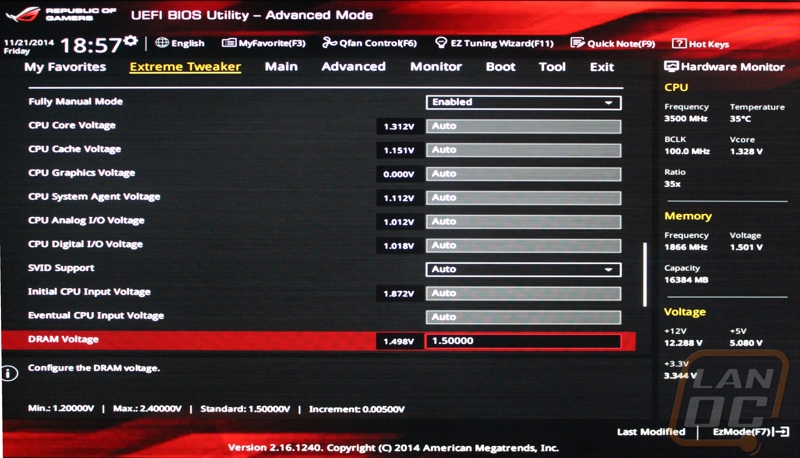
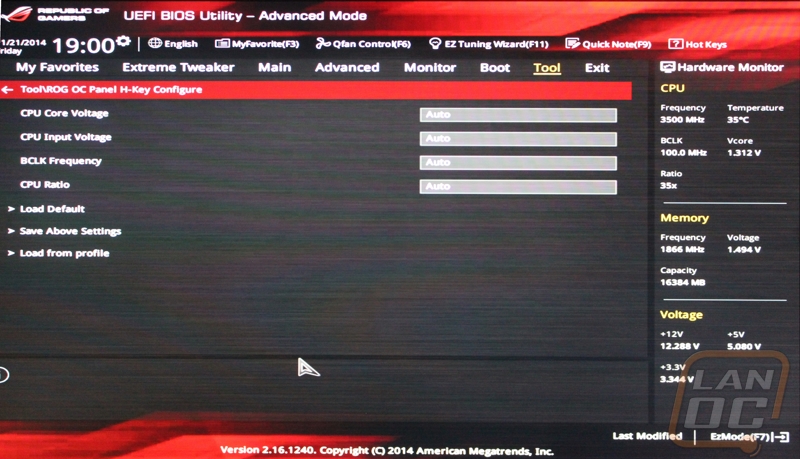
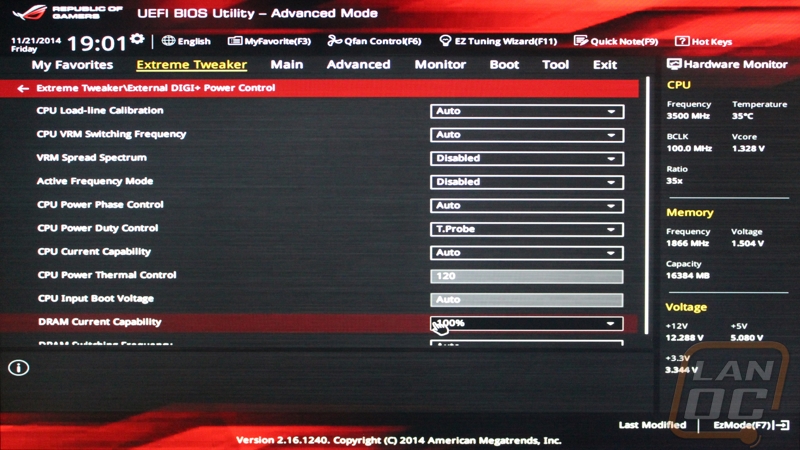
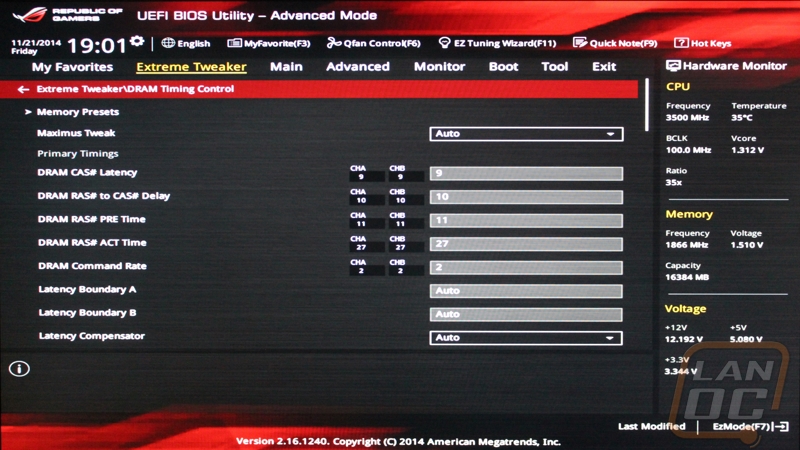
When you get back into the advanced mode you are placed right into all of your overclocking options. Asus calls this the Extreme Tweaker section, here we can get into anything overclocking related. That include voltage controls, CPU and RAM overclocking, you name it.
The next tab is a lot less exciting, this is the “Main” tab but basically here you will find information on the UEFI build, basic information on the memory and CPU, and options to select the UEFI language.

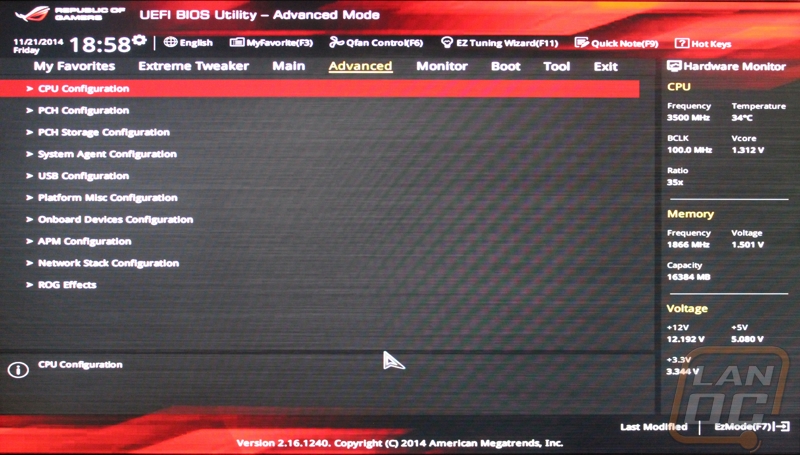
The Advanced tab is where the meat of the options are, here Asus has broken things down by subsystem. You can get in and configure or turn off features all over the motherboard. This includes chipset options, USB, CPU, and even ROG options to turn motherboard lighting on and off.
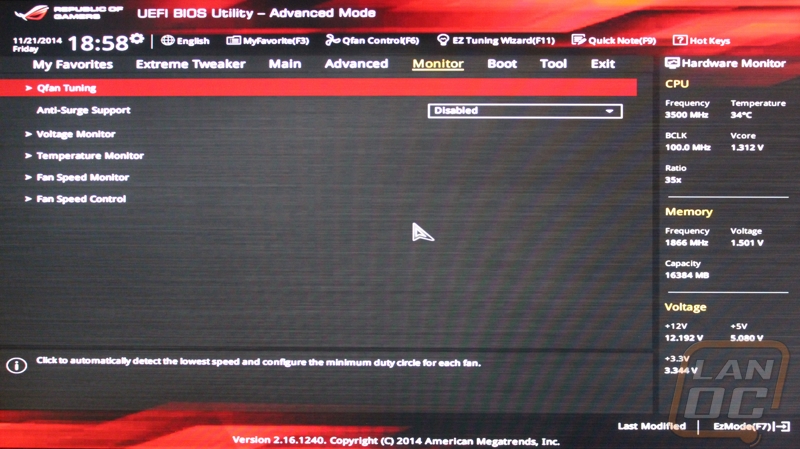
The Monitor tab is split up into four different pages for voltage monitoring, temperature monitoring, fan speed monitoring, and a page to configure the fans.
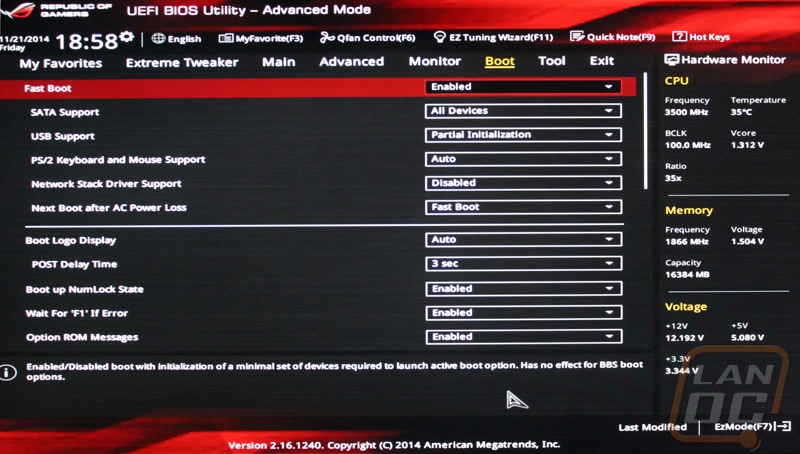
The Boot tab has more than just your boot order, here you can also get into details on the Impacts boot process including turning fast boots on and off and also turning on or off the boot logo.
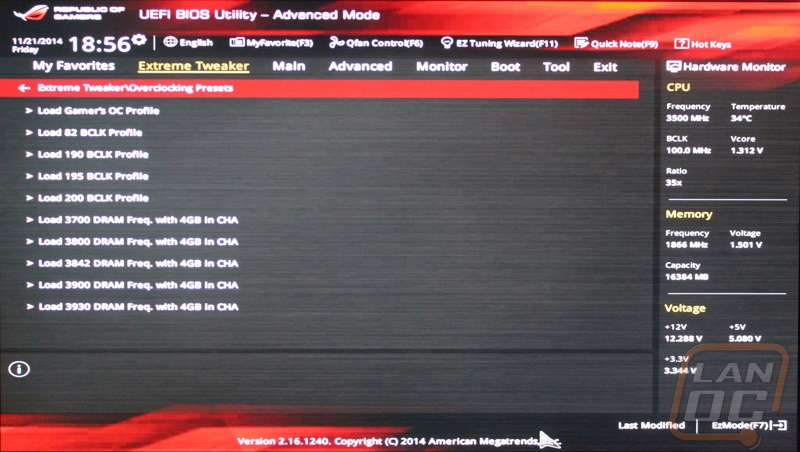
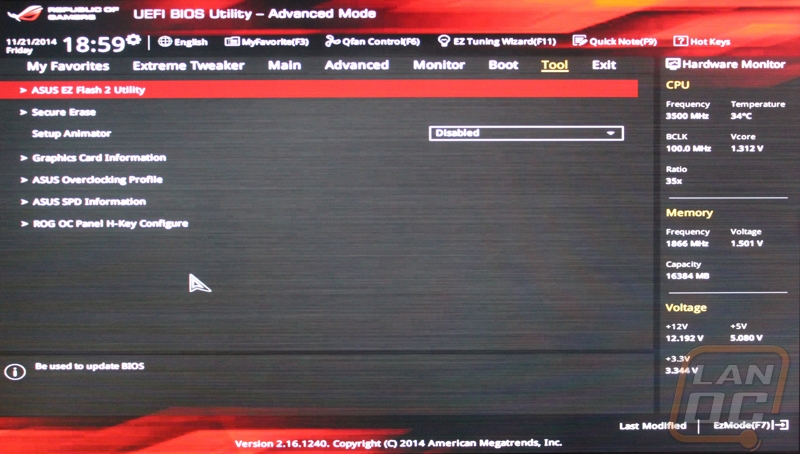
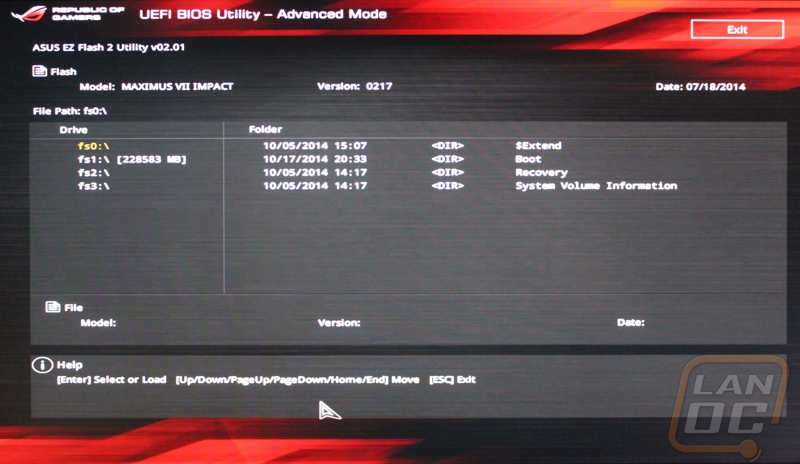
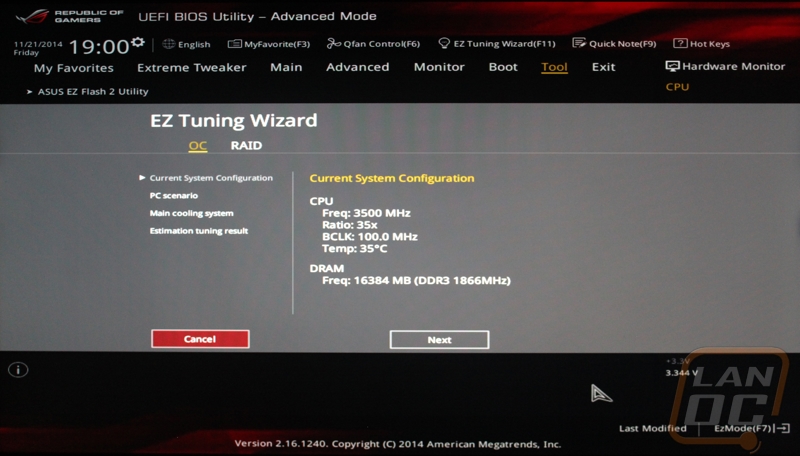
I really like the took page that Asus put together. Here we can get into things like the Asus overclocking profiles where you can save and load multiple overclock profiles. This is always great when you have a stable build and are working on pushing the limits. They also slipped in a secure erase option as well as their EZ Flash 2 Utility that makes updating the bios easy. You can even get to the fan profile tuning and also an automatic overclocking utility here.
Test Rig and Procedures
|
Intel LGA1150 Test System |
||
|
CPU |
Intel i7-4770K CPU |
|
|
Cooling |
Noctua NH-U12S for cooling Noctua NT-H1 Thermal Paste |
|
|
Memory |
Kingston DDR3 HyperX Genesis Blue 1600Mhz Ram |
|
|
Storage |
Kingston HyperX 3K 240Gb SSD (OS) |
|
|
Video Card |
Nvidia GTX 780 |
|
|
Power Supply |
Cooler Master V1000 |
|
|
Case |
Microcool Banchetto 101 Test bench |
|
|
OS |
Windows 7 Pro 64-bit |
|
|
Motherboard Testing |
|
|
Passmark Performance Test 8.0 |
Passmark overall score |
|
PCMark 8 |
We use the Home Accelerated benchmark and track the overall score |
|
3DMark |
We run the 2013 Fire Strike test on the performance setting |
|
In Game Tests |
|
|
Bioshock Infinite |
Using the Adrenaline Action Benchmark Tool, we run Bioshock Infinite on the “Xtreme” quality setting. |
|
Tomb Raider |
Using the Adrenaline Action Benchmark Tool, we run Tomb Raider on the “Xtreme” quality setting. |
|
Hitman: Absolution |
Using the Adrenaline Action Benchmark Tool, we run Hitman: Absolution on the “Xtreme” quality setting. |
|
Sleeping Dogs |
Using the Adrenaline Action Benchmark Tool, we run Sleeping Dogs on the “Xtreme” quality setting. |
|
Subsystem Testing |
|
|
Crystal Disk Mark |
We use this benchmark for USB 3.0 and SATA speed tests. Testing is done with Crystal Disc Mark with a Corsair Force GT 60 Gb. USB 3.0 testing is hooked up through a Thermaltake BlackX with USB 3.0 support |
|
Passmark |
Passmark Advanced network test |
Performance
For the most part overall performance benchmarks on a motherboard are more a formality than anything else. What we are looking for are numbers that don’t perform up to the average, in other words we are keeping an eye for any weird bugs that you might run into while using the board day to day. It’s hard to compare the numbers to any other boards because they are really based on the memory, CPU, and video card more than anything else (a little on the SSD as well in some tests). In the case of the Impact, there weren’t any of the benchmarks that stood out. Typically a Mini-ITX board will perform a little slower than the full ATX boards but as you can see this wasn’t the case with the Impact. Not only that it bested the MSI ITX board in almost every test as well. Not only that but the results below show that pairing the Impact with a GTX 780 and an i7-4770 is all it takes to put down kick ass numbers. For our LAN rig though that wasn’t enough for me. I will be running the Impact with an overclocked GTX 980 and an i7-4790K for a CPU to edge out even more performance.
|
3DMark |
|
|
MSI Z97 Gaming 5 |
Overall Score 8714 Graphics Score 9784 Physics Score 11082 |
|
Asus Z97-A |
Overall Score 8715 Graphics Score 9777 Physics Score 11119 |
|
MSI Z97I Gaming AC |
Overall Score 8578 Graphics Score 9744 Physics Score 10533 |
|
MSI B85M Gaming |
Overall Score 8572 Graphics Score 9726 Physics Score 10556 |
|
MSI Z97M Gaming |
Overall Score 8660 Graphics Score 9795 Physics Score 11089 |
|
MSI Z97 Gaming 9 AC |
Overall Score 8698 Graphics Score 9836 Physics Score 11128 |
|
Asus Maximus VII Impact |
Overall Score 8690 Graphics Score 9773 Physics Score 11010 |
|
PCMark 8 |
|
|
MSI Z97 Gaming 5 |
5133 |
|
Asus Z97-A |
5287 |
|
MSI Z97I Gaming AC |
4469 |
|
MSI B85M Gaming |
4585 |
|
MSI Z97M Gaming |
4712 |
|
MSI Z97 Gaming 9 AC |
4721 |
|
Asus Maximus VII Impact |
4951 |
|
Passmark |
|
|
MSI Z97 Gaming 5 |
5186.1 |
|
Asus Z97-A |
5200.0 |
|
MSI Z97I Gaming AC |
5057.8 |
|
MSI B85M Gaming |
5117.8 |
|
MSI Z97M Gaming |
5064.4 |
|
MSI Z97 Gaming 9 AC |
5373.8 |
|
Asus Maximus VII Impact |
5160.0 |
|
Bioshock Infinite |
|
|
MSI Z97 Gaming 5 |
106.54 |
|
Asus Z97-A |
110.74 |
|
MSI Z97I Gaming AC |
110.28 |
|
MSI B85M Gaming |
111.36 |
|
MSI Z97M Gaming |
108.35 |
|
MSI Z97 Gaming 9 AC |
110.28 |
|
Asus Maximus VII Impact |
111.02 |
|
Tomb Raider |
|
|
MSI Z97 Gaming 5 |
57.1 |
|
Asus Z97-A |
57.2 |
|
MSI Z97I Gaming AC |
58.9 |
|
MSI B85M Gaming |
57.3 |
|
MSI Z97M Gaming |
56.8 |
|
MSI Z97 Gaming 9 AC |
57.1 |
|
Asus Maximus VII Impact |
57.1 |
|
Hitman: Absolution |
|
|
MSI Z97 Gaming 5 |
45.8 |
|
Asus Z97-A |
46.7 |
|
MSI Z97I Gaming AC |
47.2 |
|
MSI B85M Gaming |
45.6 |
|
MSI Z97M Gaming |
47.3 |
|
MSI Z97 Gaming 9 AC |
47.1 |
|
Asus Maximus VII Impact |
47.2 |
|
Sleeping Dogs |
|
|
MSI Z97 Gaming 5 |
62.4 |
|
Asus Z97-A |
62 |
|
MSI Z97I Gaming AC |
63.2 |
|
MSI B85M Gaming |
62.4 |
|
MSI Z97M Gaming |
62.3 |
|
MSI Z97 Gaming 9 AC |
61.3 |
|
Asus Maximus VII Impact |
62.2 |
USB 3.0 and SATA 3
With Intel bundling more and more USB 3.0 and SATA 3 connections on the Z97 chipset benchmarking them is a little less important than previous chipsets because rarely do any of the manufactures need to use add on controllers for them. That said with the Impact we do get another chance to see just how cool Asus’s USB3.0 Boost is. Basically when you are using Asus’s software, assuming your device supports it, you can turn boost on. When running USB 3.0 boost I saw read speeds nearly as fast as the SATA read speeds. When running normal USB 3.0 you still see good numbers but they look a lot less impressive when sitting next to the USB 3.0 Boost numbers. As for SATA 3 performance, the Impact performed perfectly, well above a few of the full sized ATX boards even.
|
SATA3 |
Read Speed |
|
MSI Z97 Gaming 5 |
459.2 |
|
Asus Z97-A |
460.6 |
|
MSI Z97I Gaming AC |
466.7 |
|
MSI B85M Gaming |
466.5 |
|
MSI Z97M Gaming |
433.5 |
|
MSI Z97 Gaming 9 AC |
442.1 |
|
Asus Maximus VII Impact |
461.3 |
|
USB 3 |
Read Speed |
|
MSI Z97 Gaming 5 |
279.0 |
|
Asus Z97-A |
277.4 |
|
Asus Z97-A w/USB3 Boost |
427.6 |
|
MSI Z97I Gaming AC |
273.6 |
|
MSI B85M Gaming |
273.9 |
|
MSI Z97M Gaming |
275.4 |
|
MSI Z97 Gaming 9 AC |
276.2 |
|
Asus Maximus VII Impact |
276.1 |
|
Asus Impact w/USB3 Boost |
428.3 |
Network
Going into my network testing on the Impact I was a little concerned. When I tested the Z87-A I did run into some slowdowns. Between then and now I had the chance to look into the issue more and what I found was that this issue was specific to the Trendnet switch that we use in the office, other Trendnet models as well as other manufactures didn’t have the problem. That said, when doing the Impact testing I did the testing using the same model switch as with all of our other boards. This time around though the Intel NIC on the Impact performed flawlessly. In fact if you look it came out near the top of all of the Z97 boards tested. Add to that Asus also gives you the option to prioritize gaming traffic on your NIC you shouldn’t have to worry about slowdowns in game or even with file transfers over the network, both things that are important at LANs.
|
Motherboard |
Average Network Speed |
|
MSI Z97 Gaming 5 |
820.0 |
|
Asus Z97-A |
678.1 |
|
MSI Z97I Gaming AC |
886.1 |
|
MSI B85M Gaming |
935.2 |
|
MSI Z97M Gaming |
902.6 |
|
MSI Z97 Gaming 9 AC |
860.5 |
|
Asus Maximus VII Impact |
927.8 |
Overclock
Overclocking on the Impact was a little different than on some other Asus boards. Typically, AI Suite will slowly overclock and benchmark over and over again to reach the highest possible overclock. With the Impact the software just gives you three optional clock speed goals and it will overclock to that and benchmark to make sure it can handle the overclock. I would personally prefer the other way because It gives a better overclock, but I have a feeling this was something they had to give up due to space on the PCB being limited. That said I was able to get the Impact to run at the 4400 MHz option, 4600 MHz was a little higher than it could handle. Looking back at our last Asus Z97 review I was able to get 4590 MHz, so the Impact not hitting 4600 MHz safely isn’t a big surprise. Even at 4.4 GHz that is a nice improvement. Not to mention it will be a little more stable with the headroom left over. It is possible that some people will be able to see 4.6 GHz though depending on their CPU.
Overall and Final Verdict
When the first Impact board came out I didn’t have the chance to check it out. We used the Z87I-Deluxe for our LunchBox build. This time around using the new Z97 Impact in our black and red In Win D-Frame Mini was just too good to pass up. I came into the review with high expectations, previous Asus Mini-ITX board have been great and the Impact promised to be even better than that. So how did it turn out? Well in nearly every test the Impact out performed my expectations. Asus packed the Impact with more features than a lot of full sized motherboards, they managed to do this by really packing every single thing in together as tight as possible. They also took advantage of riser cards for additional space. In the end you get a Mini-ITX board that doesn’t compromise. In addition we still get Asus’s kick ass software. In fact the only complaint I had with the Impact was with the clearance between the ram and the lock on the PCIe lock. It is nearly impossible to get at.
When it comes to Mini-ITX boards, this is going to be the most expensive board on the market. But I’m not including that as a con because I feel that Asus did a great job justifying the cost with a long list of features. If you are looking for high end audio in a Mini-ITX format you don’t have any other options unless you are willing to give up the only PCIe x16 slot and I know I’m not willing to give up my video card in my LAN rig.
So is the Maximus VII Impact for you? I think most people could get away with one of the lesser models for their LAN rig but if you are looking for the best there isn’t anything else even close to the Impact when it comes to features.