Most people store all of their data on their PC or maybe on an external drive and for a long time that was all I did as well. Eventually, because we have multiple devices on our network and because I would reinstall windows often I moved my important files onto the network with a basic server and later I moved to a NAS. But as a data hoarder, I eventually couldn’t fit everything together and split my movies and TV show backups on to their own NAS and everything else on what we call the collective. This has worked well, but our server rack has become a mess with three tower NAS taking up too much space as well as other makeshift servers. I’ve been needing to clean things up for a long time and to start that off I am finally building a rack-mounted NAS. It won’t combine all three of the current NAS, but it will get 2/3 and allow me to also get to know TrueNAS CORE which I’ve heard a lot about. This is a project build, so you can expect to see a few articles going over what is going into the build as well as the build and performance. But today I’m getting started by taking a look at the case itself, which is the Silverstone RM21-308. Let’s get started!
Title: Project Data Hoarder – TrueNAS CORE Build Part 1
Written by: Wes Compton
Build Sponsors/Supporters: Silverstone
Amazon Affiliate link: HERE
Links to the rest of the project: Part 1 - Part 2 - Part 3 - Part 4
|
Specifications |
|
|
Model No. |
SST-RM21-308 |
|
Chassis form factor |
2U |
|
Motherboard |
Micro ATX (9.6" x 9.6"), Mini-ITX (6.7” x 6.7”) |
|
Drive Bay |
External 3.5" or 2.5" HDD/SSD hot-swap x 8
Internal 2.5" x 2 (up to 15mm), slim optical x 1 (up to 12.7mm) |
|
Cooling System |
80 x 15mm ball bearing fan x 3, 4000±10%RPM |
|
Power Supply |
2U single or 2U redundant / PS2 (ATX) up to 160mm deep and 86.3mm height (not included) |
|
Limitation of CPU cooler |
68mm |
|
Power connector on HDD backplane |
4-Pin peripheral x 2 |
|
Expansion Slot |
Low profile PCI / PCIe x 4 |
|
Front I/O Port |
USB 2.0 x 1, USB 3.1 Gen 1 Type-A x 1** |
|
Front buttons |
Power On / Off, system reset |
|
Indicators |
Chassis : Power LED x 1: Blue HDD Access x 1: Green LAN LED x 2: Green HDD Tray : HDD Power LED x 8: Yellow HDD Access x 8: Blinking green |
|
HDD backplane |
8 ports SAS / SATA to Mini-SAS SFF-8087 x 2 |
|
HDD Interface |
SAS-1 / SAS-2 / SAS-3 SATA-1 / SATA-2 / SATA-3 |
|
Main metal thickness |
1mm |
|
Net Weight |
7.3 kg |
|
Dimension |
430mm (W) x 88.5mm (H) x 480mm (D) 18.3 Liters 16.93" (W) x 3.48" (H) x 18.9" (D) 18.3 Liters |
Silverstone RM21-308 Photos and Features
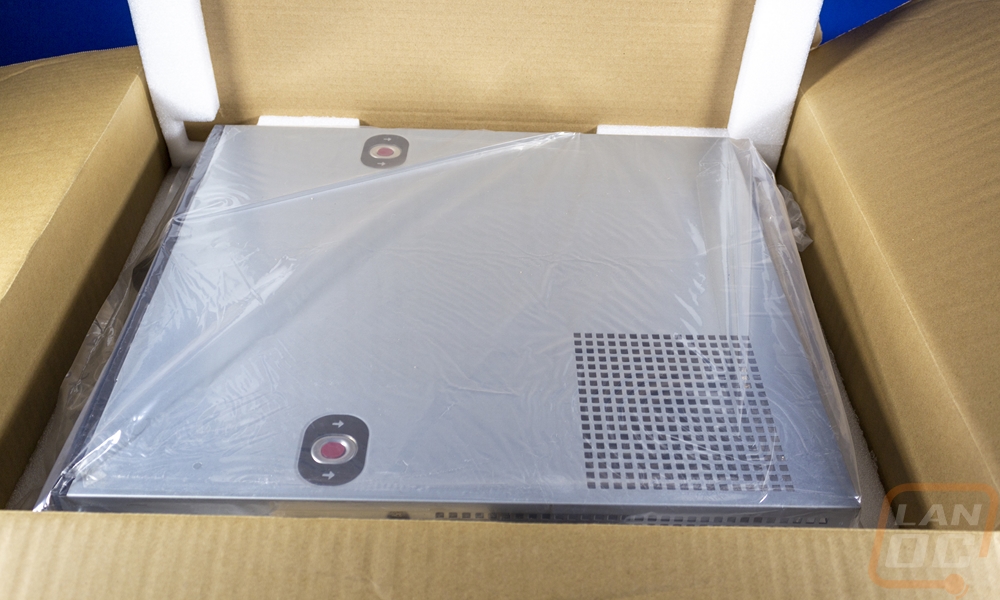
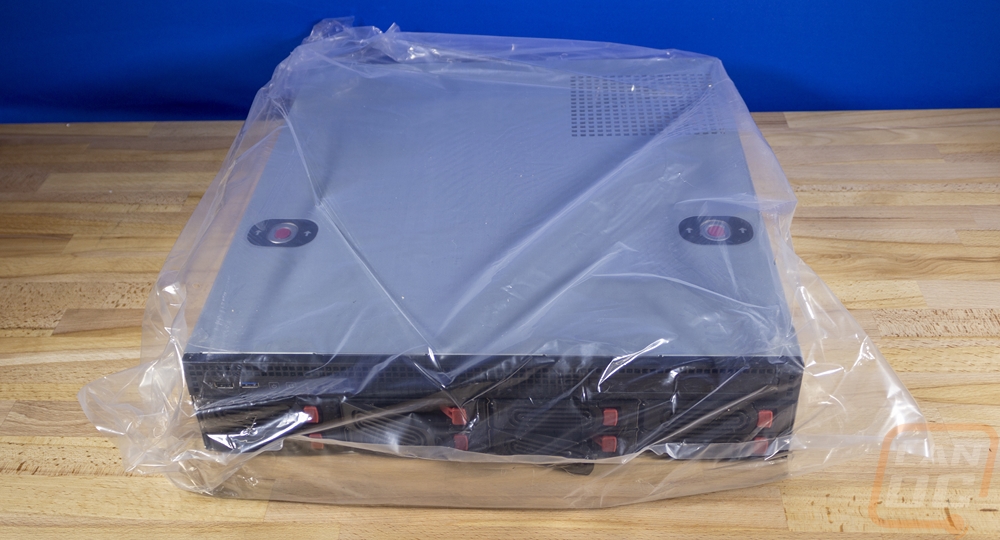
Being a server case, the RM21-308 coming in a brown box wasn’t a surprise at all. It also doesn’t have case-specific branding on the box, but it does still have the Silverstone logo and then under it a black stripe with “Rackmount Chassis Series” on it. This isn’t something that will be sitting in retail so if anything this is more than I expected. When you open the box up, they have the chassis wrapped up in plastic and then to keep it in place and keep it protected. The accessories came in a bag tucked away inside of the case as well but I will touch on those in a minute.

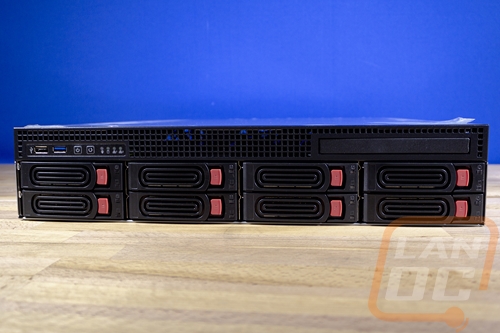
The front of the RM21-308 tells you almost everything you need to know about the case really. If it wasn’t obvious, this is a rack-mounted 2U case. Each U is 1.75 inches tall, which most of you have probably seen a rack-mountable switch before, especially if you have gone to LAN events. Those are 1U. When I was looking at case options I could have found a few 1U solutions, but it didn’t fit the build. For starters, this is for a NAS so having a good amount of hot-swappable hard drive bays was important the the RM21-308 has 8 of them on the front. Frankly, Silverstone has a 3U that would double that number and it could have worked but I wanted to build something a little smaller without going so small that cooling and components were going to be an issue. Part of this build is just using some hardware that I have around the office, putting it to use. I also think this is more in line with what a lot of you might be doing as well. Using components from a recently upgraded PC to build a NAS or a file server. I’ll touch on it more here in a minute, but the RM21-308 has another important feature that helps with that.
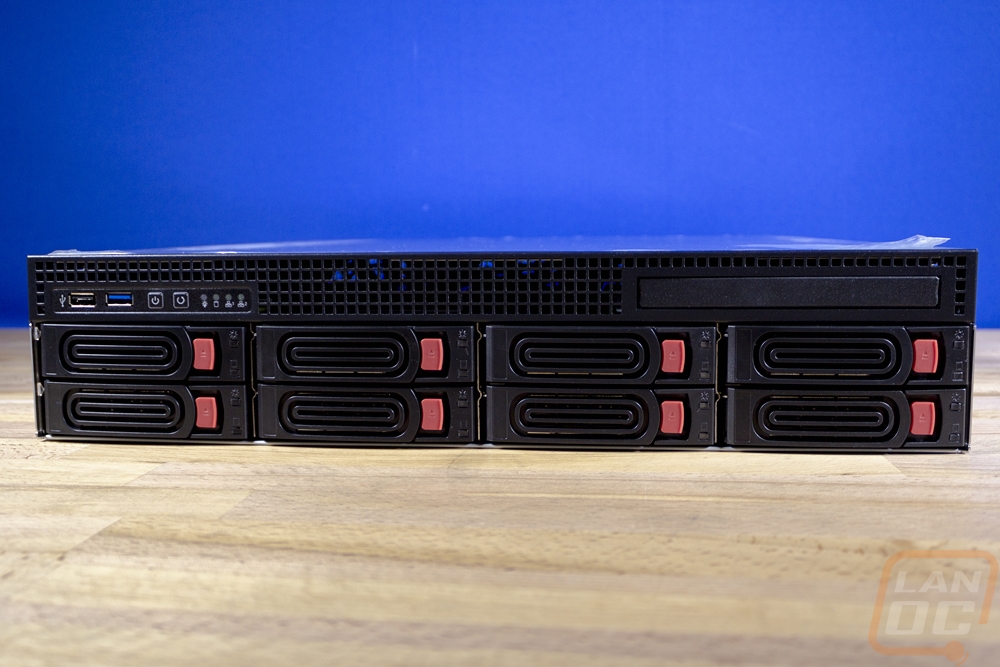
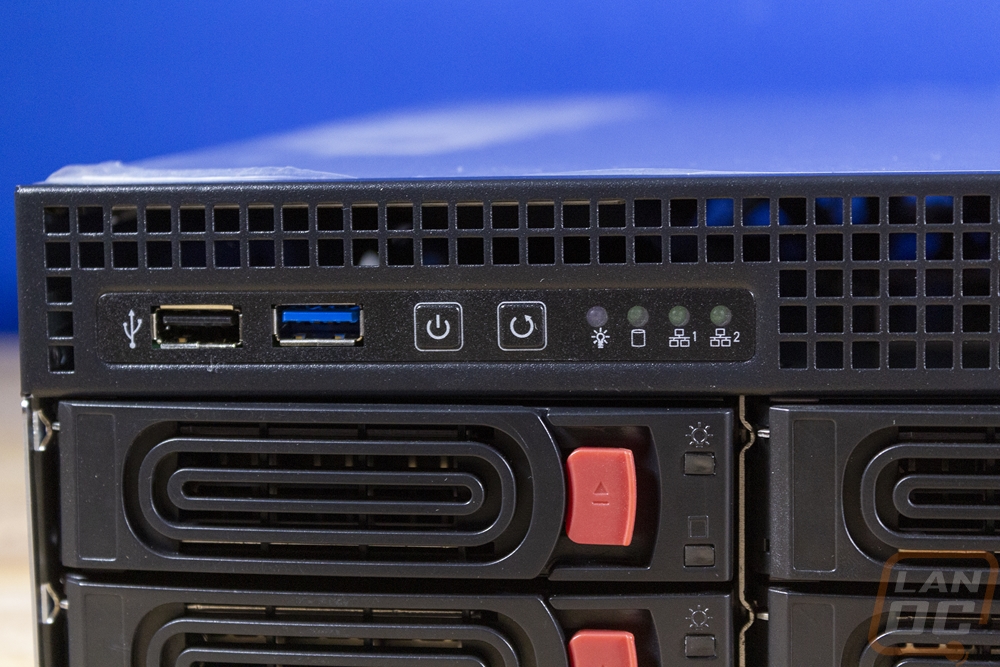
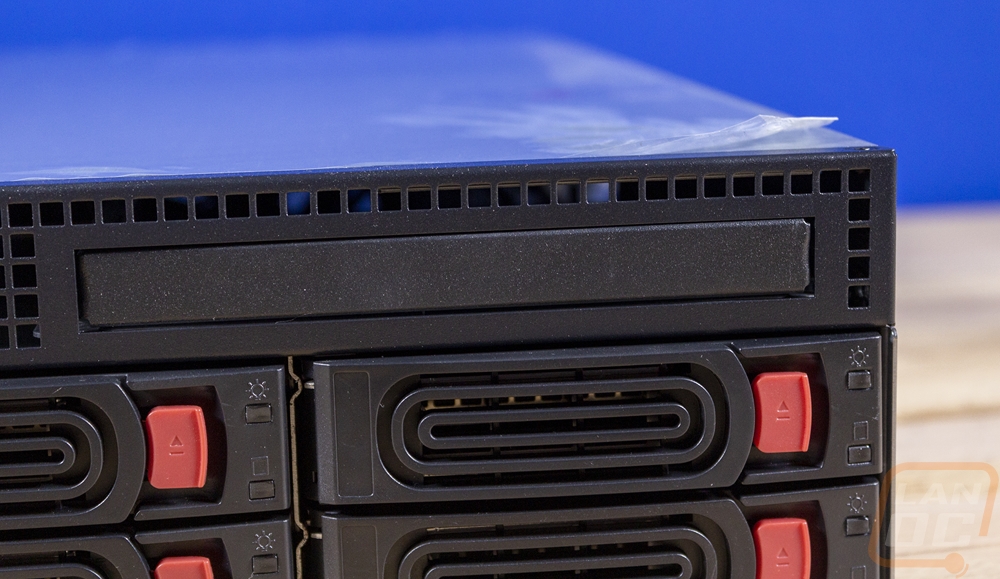
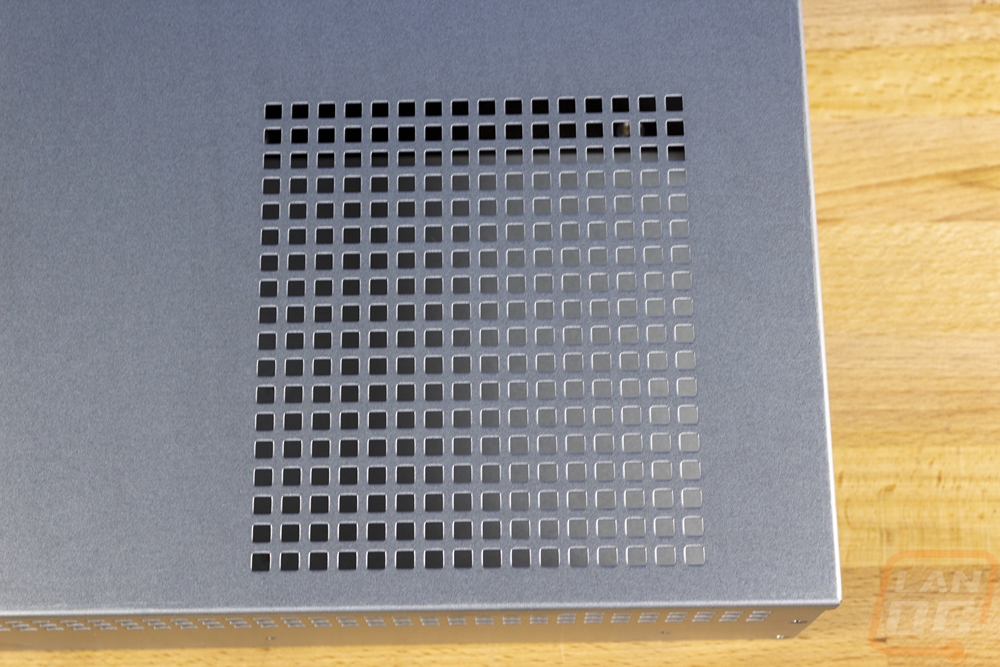
So we have eight removable hard drive bays across the front, each having its own red latch that you push to unlock the lock. Each also has a drive status light indicator in the top right corner as well. Then along the top edge, Silverstone has some cooling ventilation as well as a slim DVD drive slot and the front I/O on the far left. The front I/O has one USB 2.0 port and one USB 3.0. There are two buttons, one for power and the other for reset. Then status indicators. One is for system power, the next is hard drive, and the other two are for two network adapters so you can see everything without going to the back of the case, assuming you have a NIC with a remote light jumper that you can plug them into.
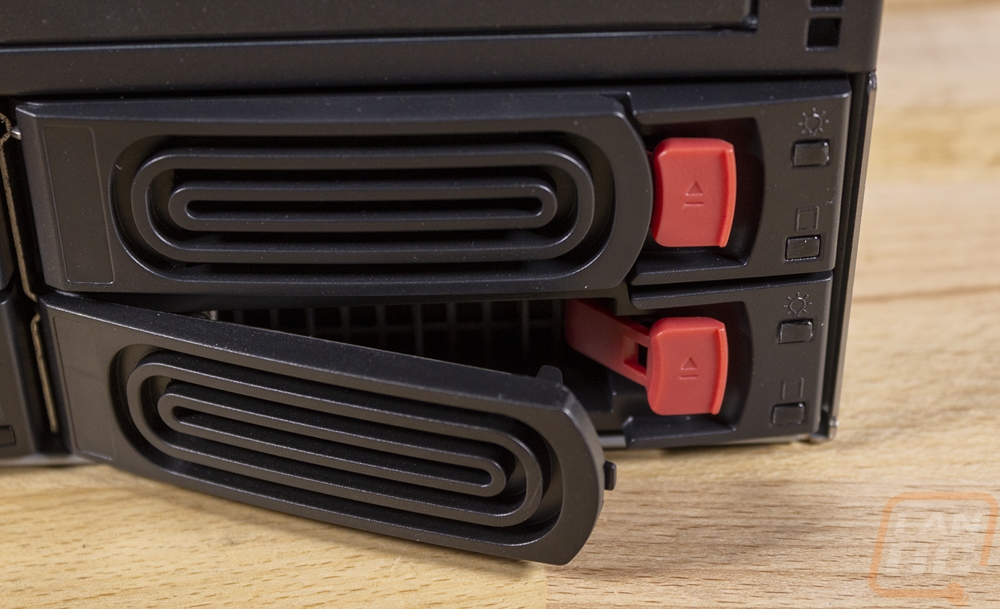
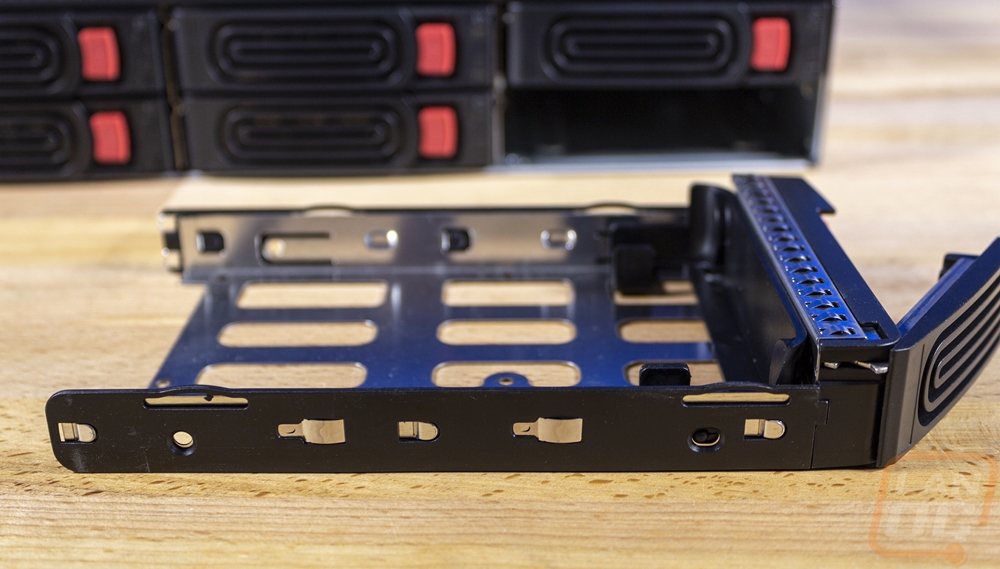
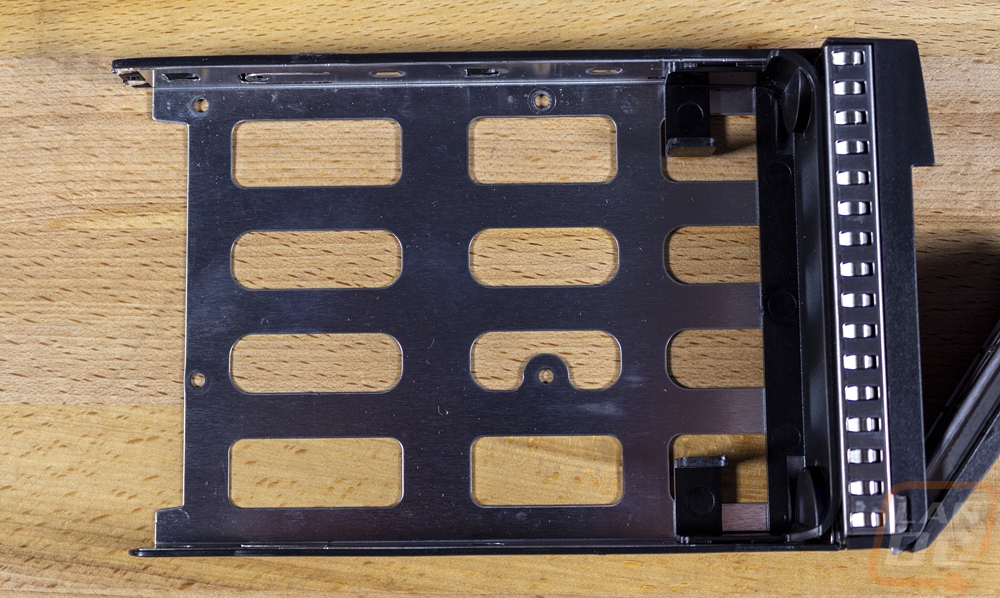
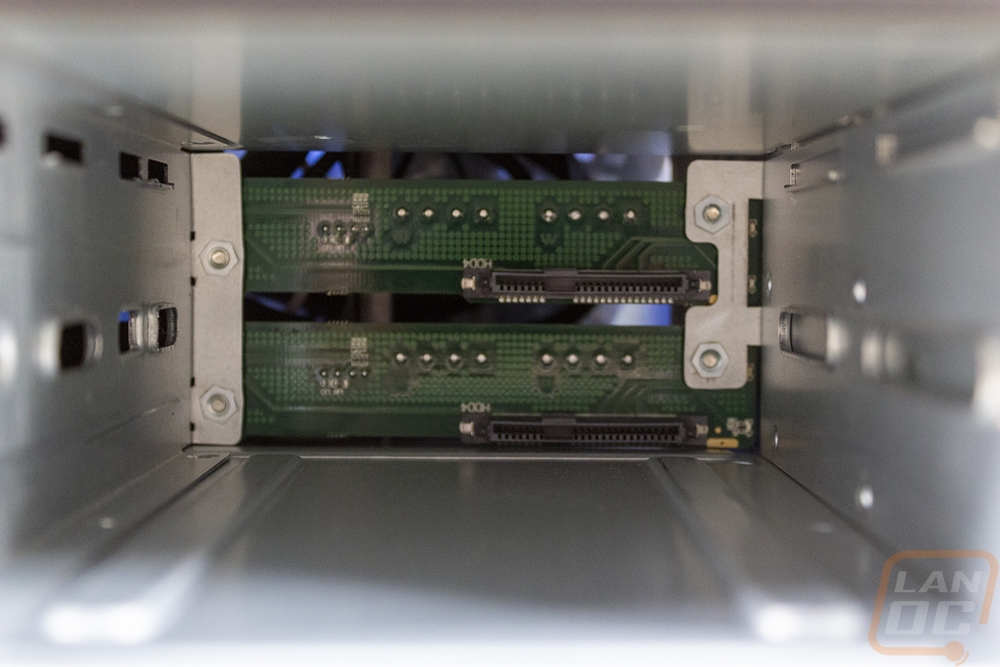
The trays are all metal and support mounting 2.5 or 3.5-inch drives or SSDs. With the trays pulled out, you can see how the backplane works as well which is a full PCB backplane with SAS connections. SAS has the same layout as SATA, only the gap between data and power is connected. So SATA is also supported and if you are building a build anything like mine that is more likely to be used.
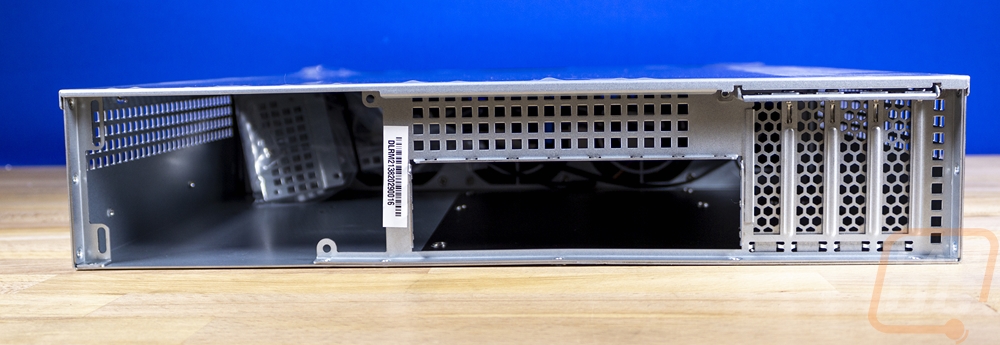
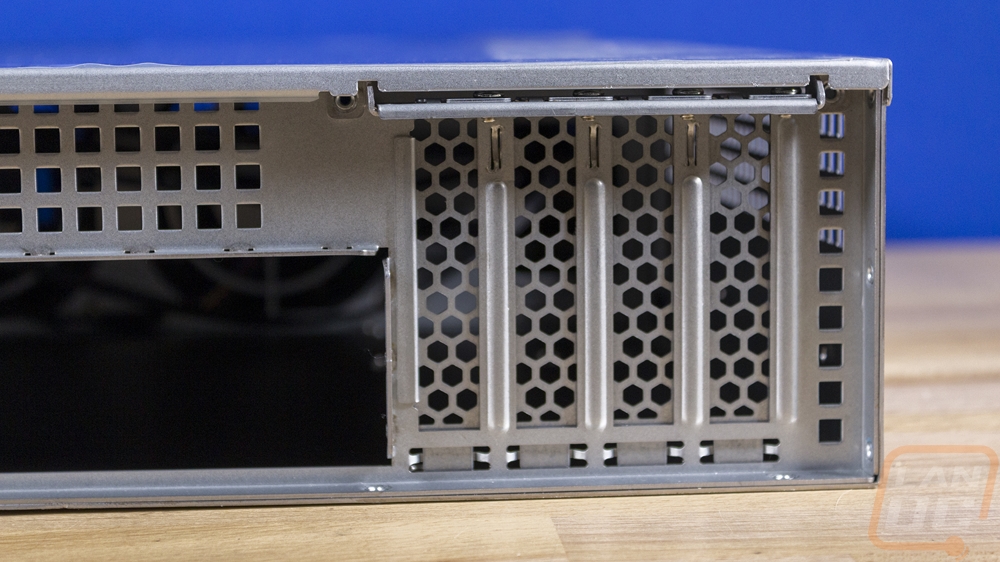
So around at the back, there are more of the square ventilation holes up above the rear I/O. But this is where we can talk about two other big features for the RM21-308. Silverstone has an RM22 lineup as well and the difference is the overall length of the case and the size of the motherboard supported. The RM21-308 supports Mini-ITX and mATX motherboards. Even though I have a full-sized four post rack, I like the more compact case here. Ironically if I went with the larger model I have more motherboard options available to use. To go with that, on the right side of the rear I/O the RM21-308 has four half-height PCI brackets. Then on the far left is the power supply location. Most server cases would use a 2U power supply or a redundant 2U and that is supported here. But it is also wider and supports a normal ATX power supply as well. I’m sure some of you might hate the idea of, but for a situation where you are building something from your recently upgraded hardware is great. I had planned on going with a 2U redundant power supply here, but PSU shortages meant that Silverstone didn’t have one for us. But that also meant I could give the ATX support a try so that will be coming soon!
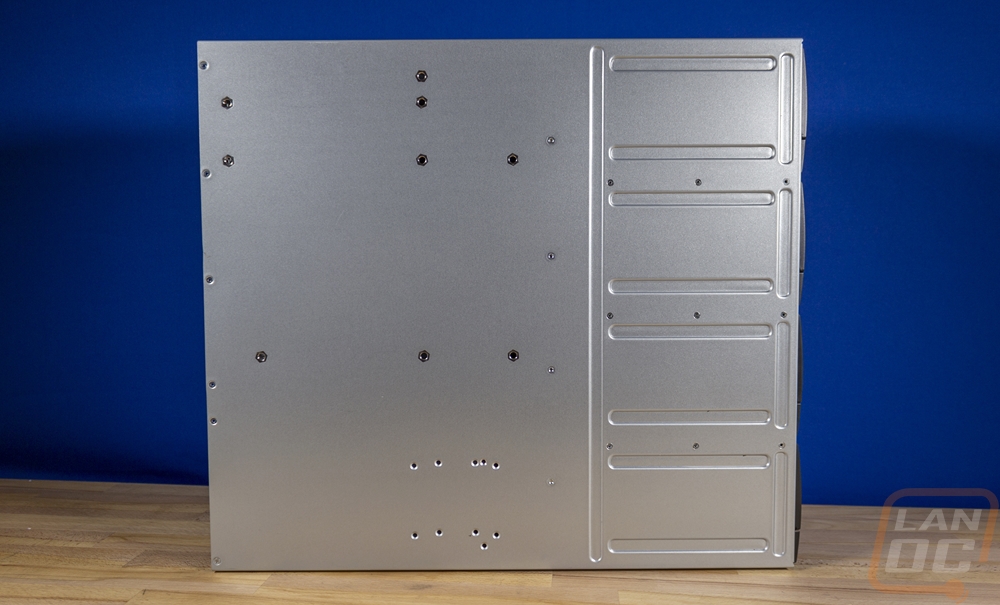
The RM21-308 comes in at 16.93 inches wide, 3.48 inches tall, and 18.9 inches deep which Silverstone has listed as an 18.3-liter case. Not bad considering the number of hard drives supported. The RM22-308 which is the same case only with the full E-ATX and SSI-EEB support comes in at 25.98 inches long. The bottom just shows the mounting for everything inside but the side does have the three mounting pegs for the included rack ears. There are also two slide on pegs on the side and two mounting screw locations for rack rails as well.
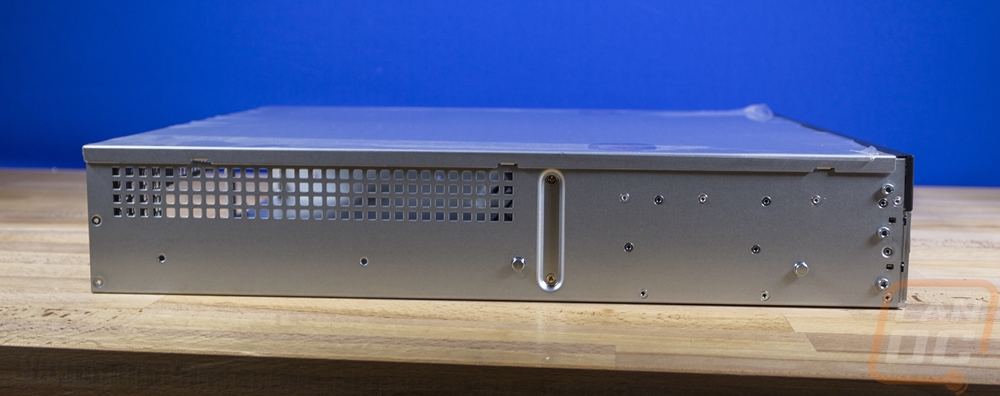
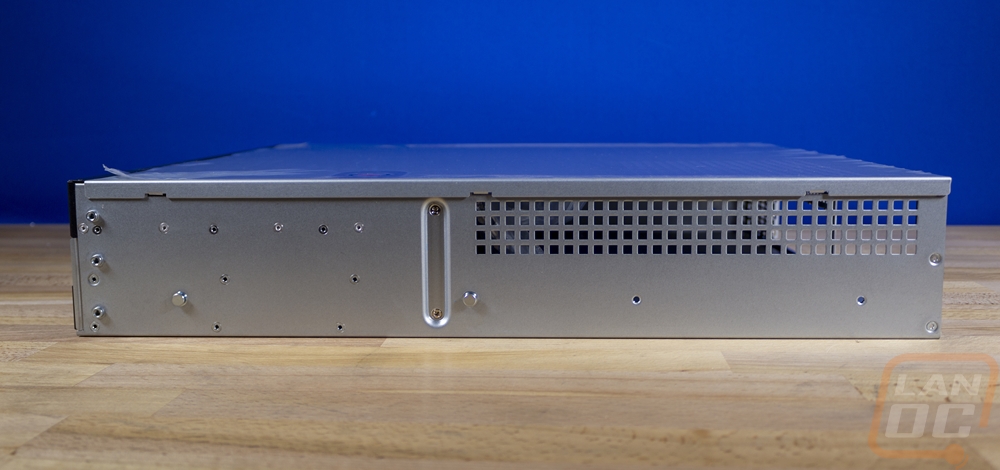
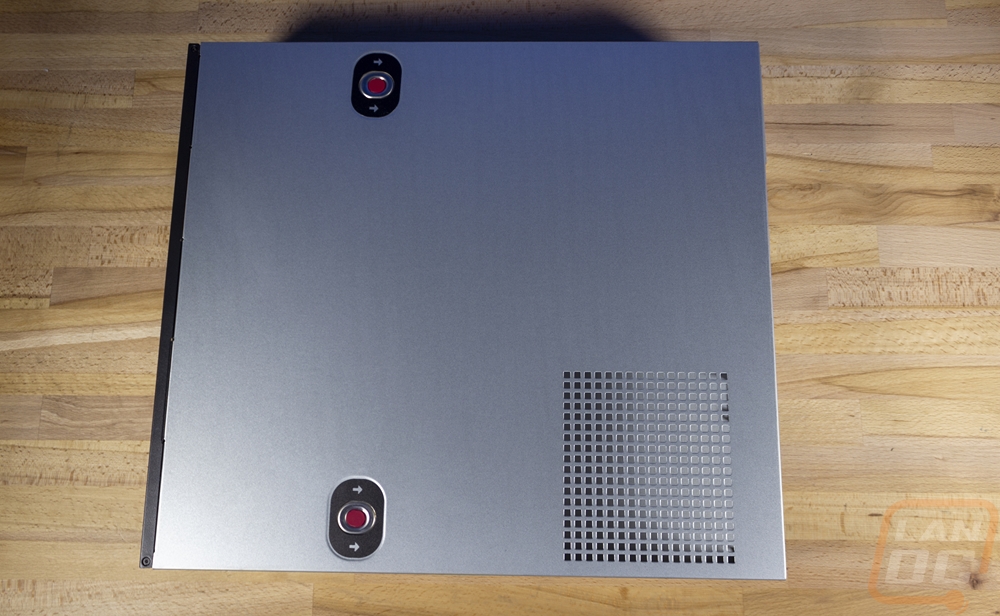
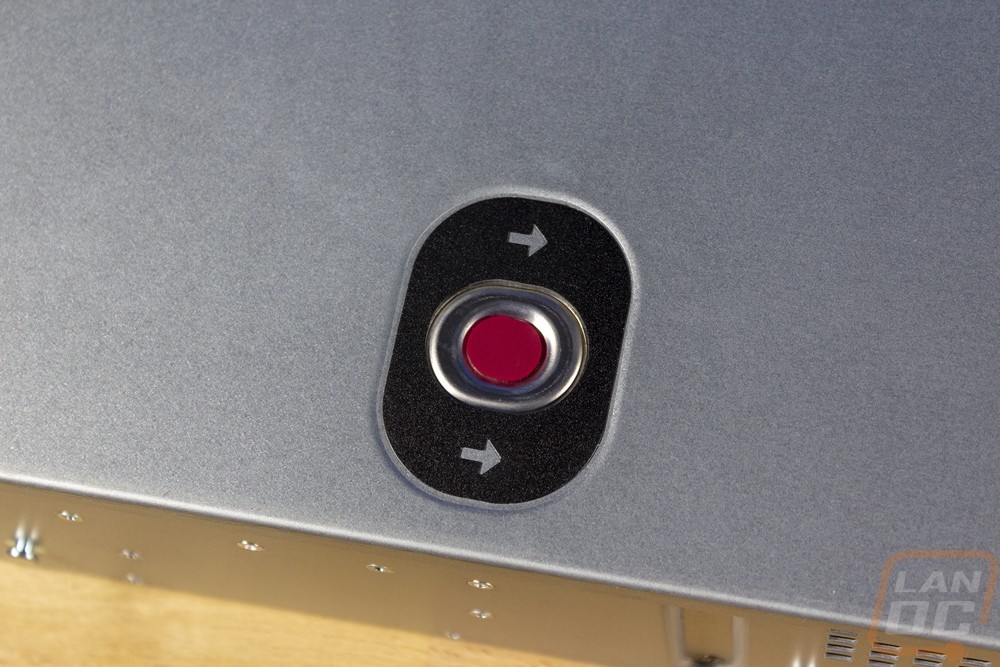
Now the top of the case does have two things going on that are important. For starters, the entire top is a removable panel like any other server case. Silverstone went with two red push buttons to unlock the top, then you slide it to unlock as indicated by the arrows around the buttons. The other things going on here is the ventilation on the top. That isn’t something you would normally see in a server rack, but for the ATX support, it is needed. Keep this in mind when mounting in your rack if you do go with the ATX power supply, you will need to leave room above it for the PSU to pull in air.
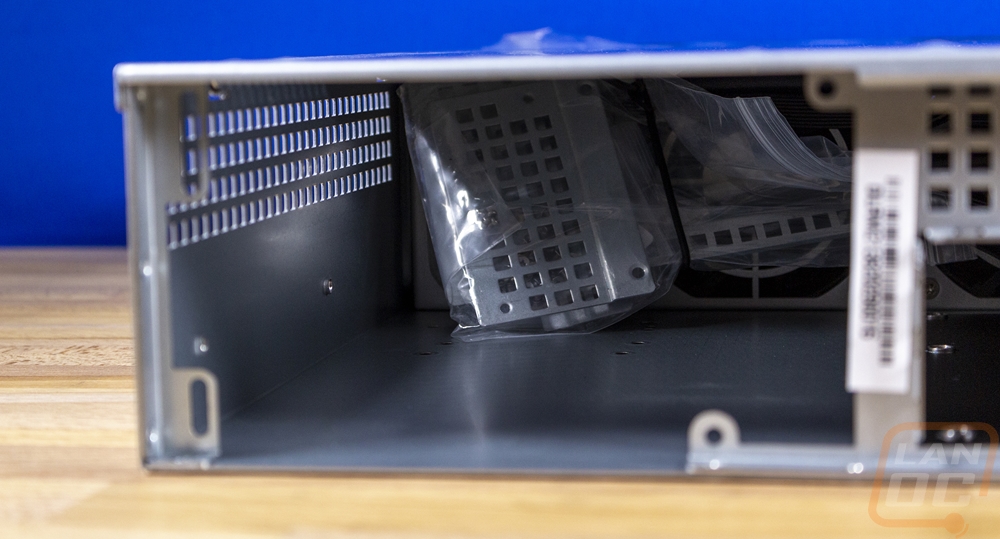
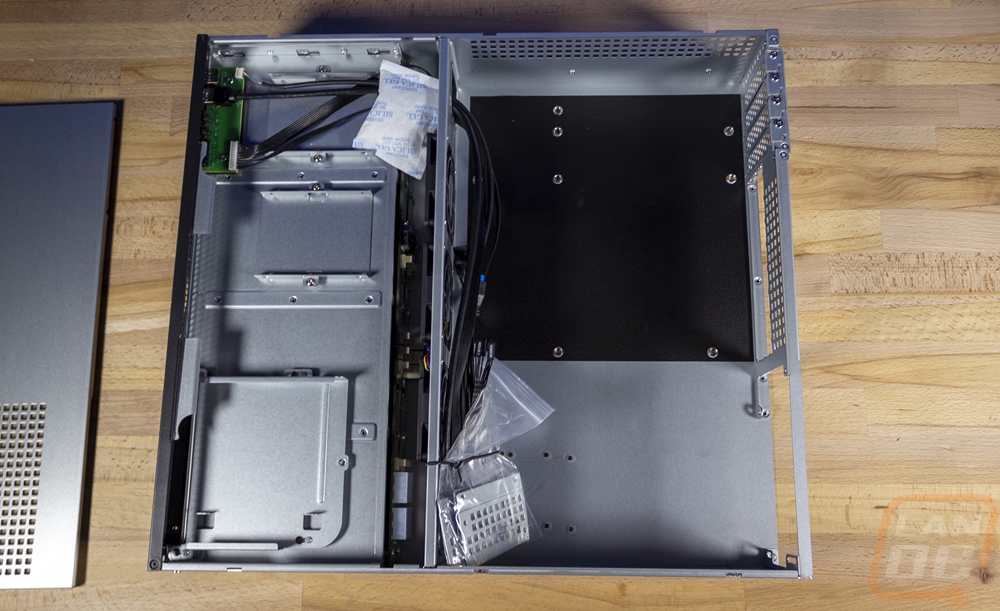
So here is the internal layout of the RM21-308. Up front, as expected are the eight hard drive bays. But on top of them, there is a lot going on. You have a mounting bracket on the left for the slim optical drive. Then over on the right, you have two 2.5 inch drive bays for small hard drives or more likely SSDs. This is perfect because you can use the eight bays for storage and have OS drives inside, even including redundancy. The front panel is also up in the same area as the right drive which will be a little tight with everything. There is a dividing wall just behind the hard drive backplane which has the cooling. Then the black area is where you mount the motherboard. The black is a protective cover to avoid grounding the back of the motherboard out. You use standoffs of course, but I’m guessing because the standoffs don’t come preinstalled they have had a few people ruin their boards that way, or they are at least trying to avoid that from coming up. Then next to the motherboard is the PSU area.
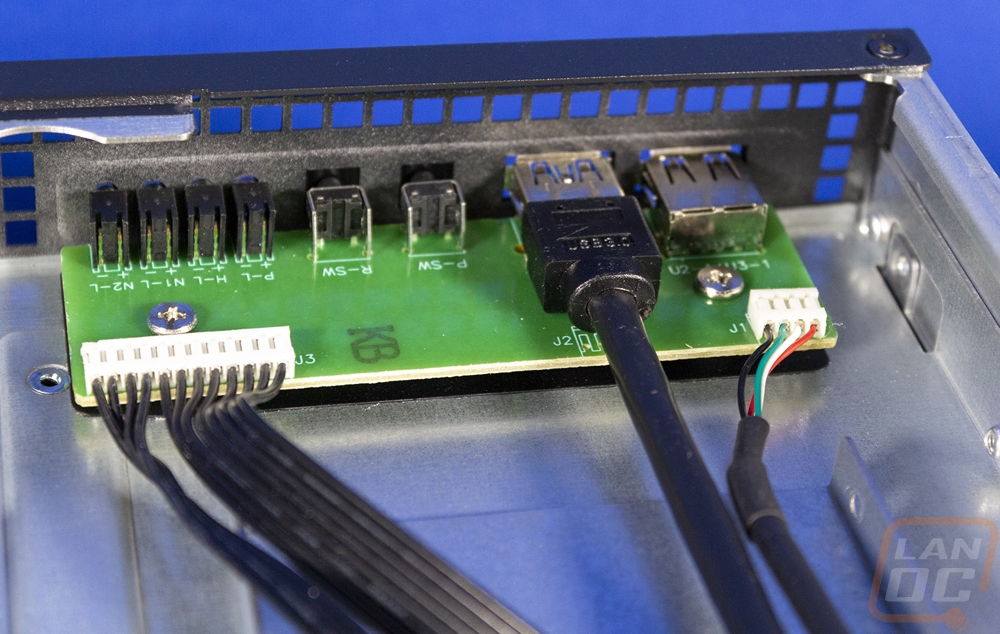
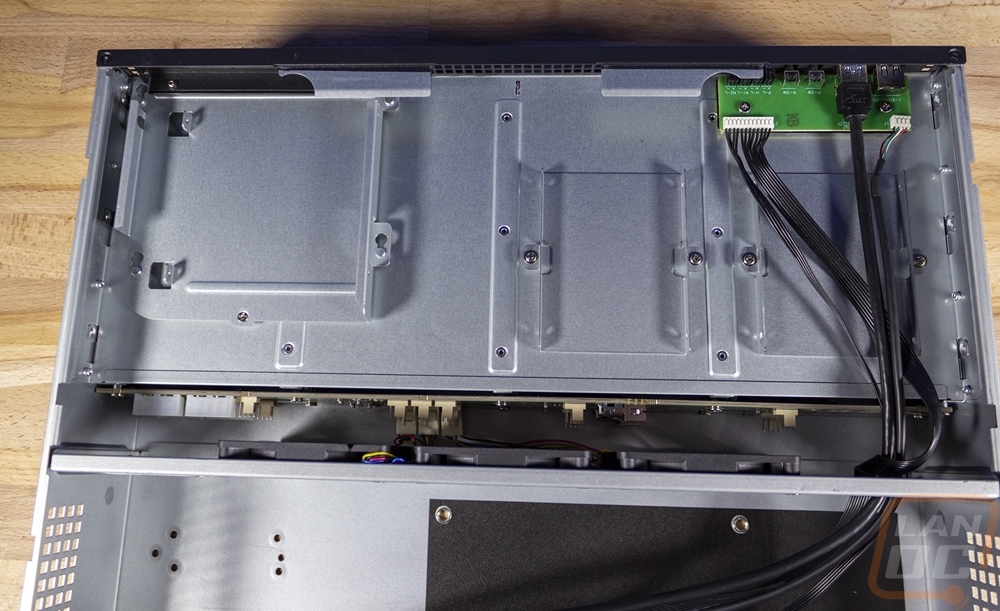
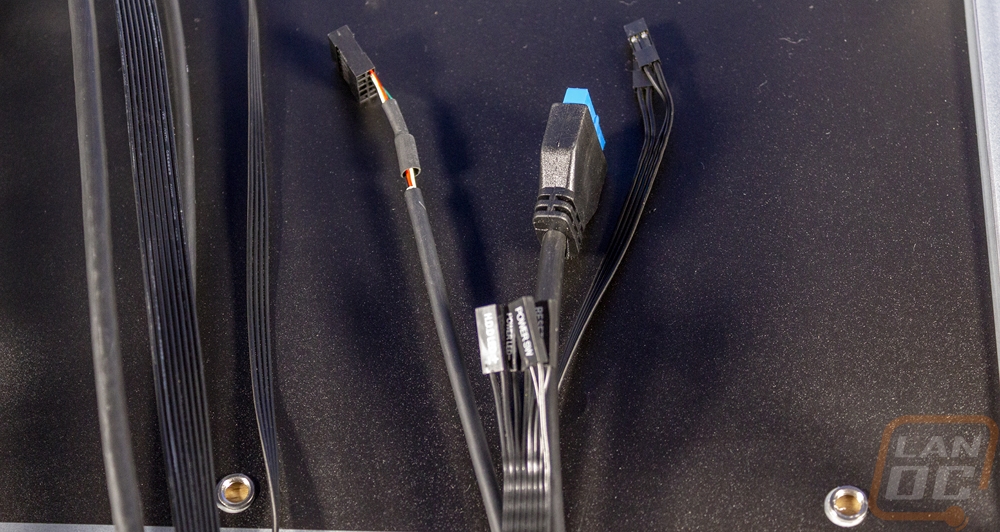
For the front I/O connections, even though no one will ever see them the cables are all black. There is a USB 3.0 plug for the single front panel USB plug and a USB cable for the single USB 2.0 plus. Then the two small two-pin cables are for the two network status indicators. This means you can run them over to your NIC if needed. Then the flat cable is all of the normal front panel connections including power, reset, power, and hard drive indicator LEDs.
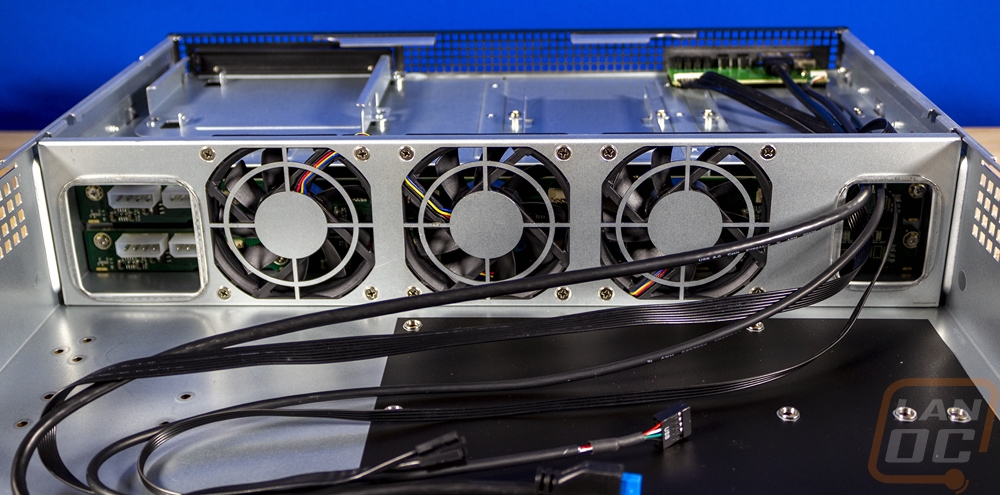
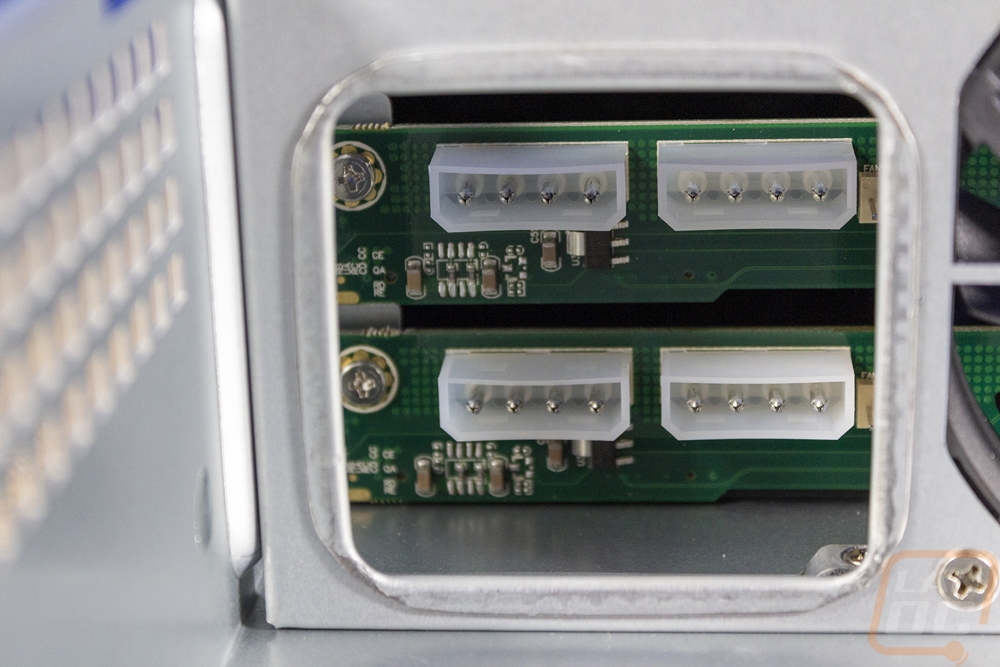
The divider wall behind the backplane has three 80mm fans which are 15mm thick which is 10mm thinner than your “standard” 80mm fan. They are ball bearing and run at 4000 RPM, so while they are larger than fans used in a 1U case at that speed I wouldn’t get your hopes up on them being quiet. They pull the air through the hard drive area to give the hard drives airflow as well as from on top where there was a strip of ventilation on the front. Then those push the air through the back across the motherboard. There is a hole for the four Molex connections needed to power the hard drives. The backplane also has two Mini-SAS SFF-8087 plugs on the right side which are what handle data to the drives. Silverstone has a few cable options for this as accessories you can buy, I will talk more about them when I put everything together as for my motherboard I did have to use two different types. There are also a few SGPIO headers which look like fan headers for hooking up to your RAID card.
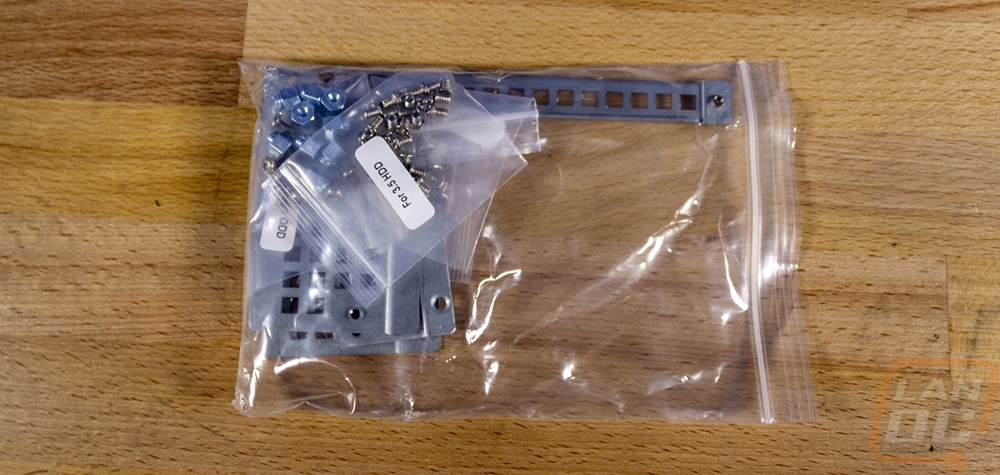
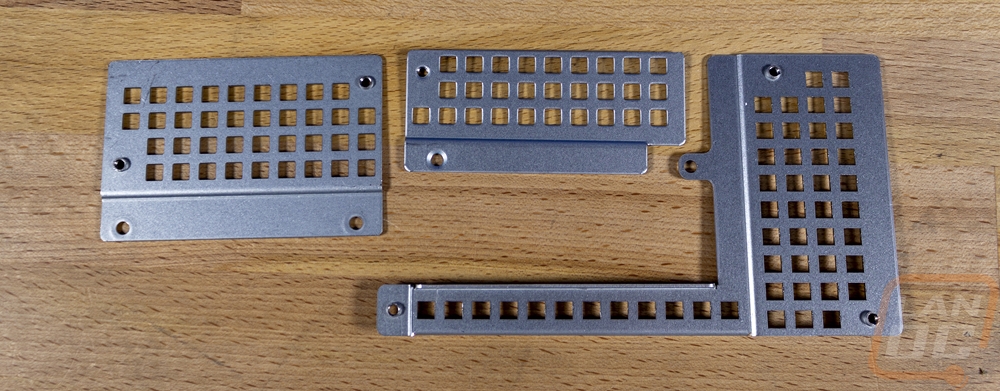
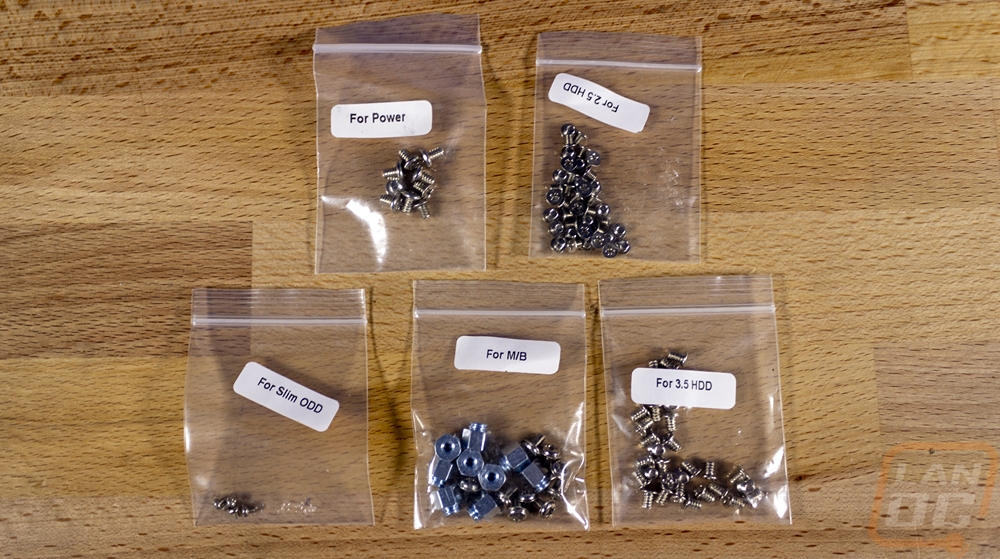
As for the accessories with the RM21-308, you get a bag full of them. The things that stand out the most of course are the filler panels. All three are for the power supply installation. As mentioned before, this case supports an ATX power supply or dual or single 2U server power supplies so you will need these to reconfigure things around. Without brackets, ATX is supported. From what I can tell the large panel and the smaller are for use with the 2U and the medium is for when you are using a double 2U for redundancy but the manual doesn’t say so without a 2U on hand I’m not 100% sure. Beyond that, you get small baggies of screws which are all labeled to make it easy to find. They also include standoffs for the motherboard and even include the small screws needed for the slim ODD or optical disk drive. Then you get a small fold-out instruction manual and two nice black ears. These have latches built in to latch the server into your rack assuming you also have Silverstone rails which we do. Sadly though our rack is an older round hole style that won’t latch with these.