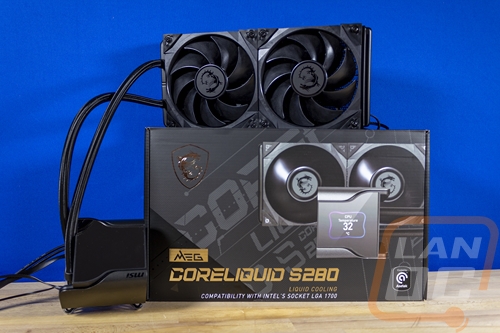
My first introduction to MSI being in the water cooling market was the MAG CoreLiquid C280 which had its pump mounted in the middle of the radiator which at first seemed weird but does end up being a great solution for those bottom mounting their radiator and trying to avoid having the pump as the highest point. So I’m excited to see what MSI has going on with the MEG CoreLiquid S280 that they sent over. Today I’m going to check out what it’s all about then put it through our test suite to see how it performs so let’s dive in!
Product Name: MSI MEG CoreLiquid S280
Review Sample Provided by: MSI
Written by: Wes Compton
Amazon Affiliate Link: HERE
|
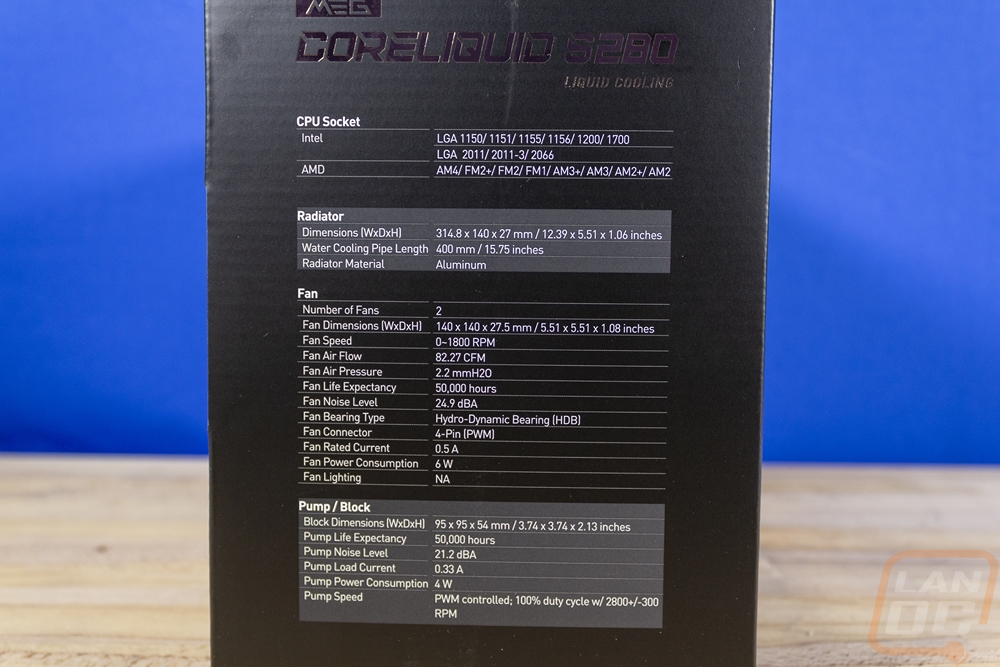
Specifications |
|
|
Number of Fans |
2 |
|
Fan Dimensions |
140 x 140 x 25mm / 5.51 x 5.51 x 0.98 inches |
|
Fan Speed |
0 ~ 1800 RPM |
|
Fan Power Consumption |
6 W |
|
Fan Rated Current |
0.5 A |
|
Fan Life Expectancy |
50,000 Hours |
|
Fan Bearing |
Hydro-Dynamic Bearing |
|
Fan Air Pressure |
2.2 mmH2O |
|
Fan Noise Level |
24.9 dBA |
|
Fan Air Flow |
82.27 CFM |
|
PWM Mode |
Yes |
|
Fan Cable Length (5v argb / pwm cable) |
350mm; 13.78 inches |
|
Radiator Material |
Aluminum |
|
Radiator Dimensions |
314.8 x 140 x 27mm / 12.39 x 5.51 x 1.06 inches |
|
Radiator Water Cooling Pipe Length |
400mm / 15.75 inches |
|
Block Dimensions |
95 x 95 x 83.53 mm |
|
Pump Life Expectancy |
50,000 Hours |
|
Pump Noise Level |
21.2 dBA |
|
Pump Load Current |
0.33 A |
|
Pump Speed |
PWM controlled; 100% duty cycle w/ 2800 +/-300 RPM |
|
Pump Power Consumption |
4W |
|
Intel Socket |
LGA 1150/1151/1155/1156/1200/1700 LGA 2011/2011-3/2066 |
|
AMD Socket |
AM4/FM2+/FM2/FM1/AM3+/AM3/AM2+/AM2 |
Photos and Features
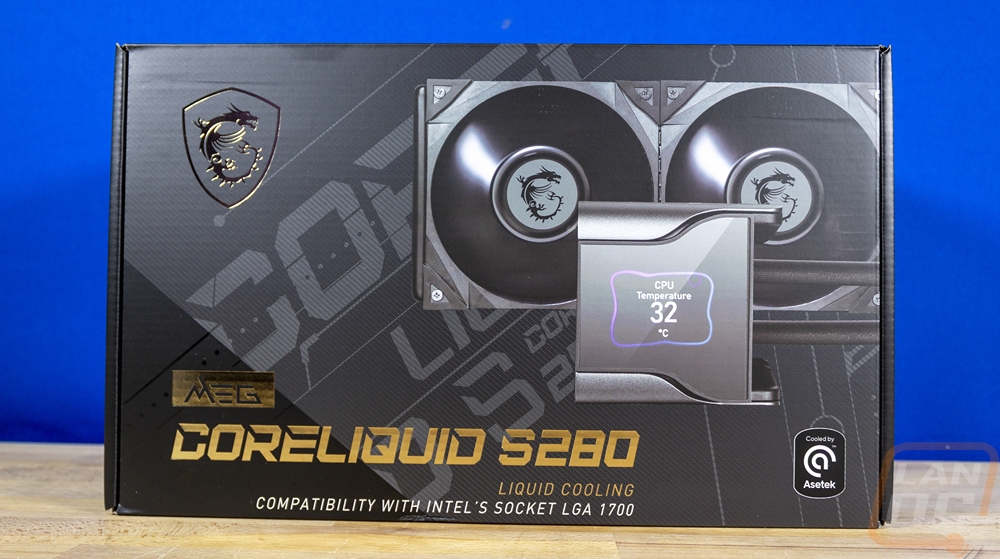
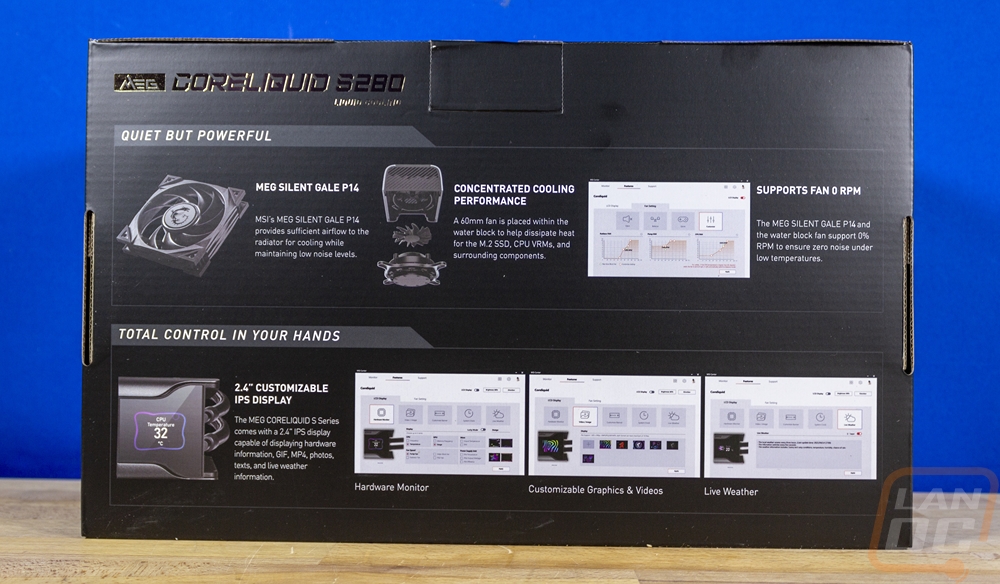
The packaging for the CoreLiquid S280 is blacked out with a flat black/dark grey background for most of the box and a darker black area in the bottom left corner which is where the branding starts. They have the MEG CoreLiquid S280 branding in a large font with a gold reflective finish and below that they make sure to point out that the new LGA 1700 socket is supported. The box front has the MSI gaming logo also with that same gold finish and then a large photo of the cooler including the built-in screen that takes up most of the front. The side of the box has a specification listing on it which is awesome and can be helpful if you are trying to figure out if the cooler will fit in your case in a retail store. Then around on the back, they highlight a few of the main features. They touch on the MEG Silent Gale P14 fans, the fan built into the pump housing, the display, the software, and the ability for the fans to run at 0 RPM. Each has pictures to go along with a description to help educate on each feature.
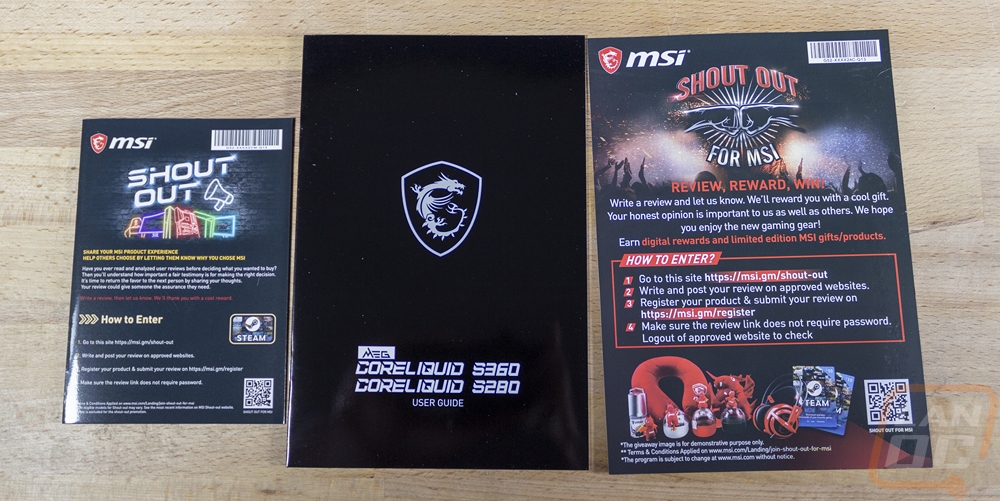
Once you get the box opened up, inside there is a formed cardboard tray that is formed around each of the components and with a pouch for all of the hardware. The documentation is tucked in with the radiator and each part of the cooler comes in its own plastic bag with the radiator getting extra protection for its fins with a slide-on cardboard protector. For the documentation, the CoreLiquid S280 comes with a user guide and then two different cards with information on a contest that MSI is running to give away swag and steam gift cards for reviews of your experience with their products.
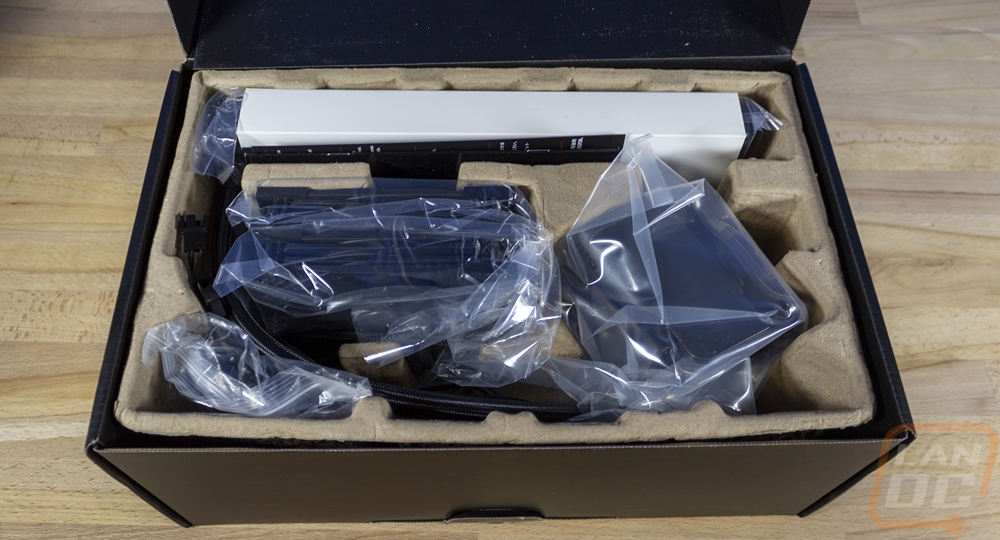
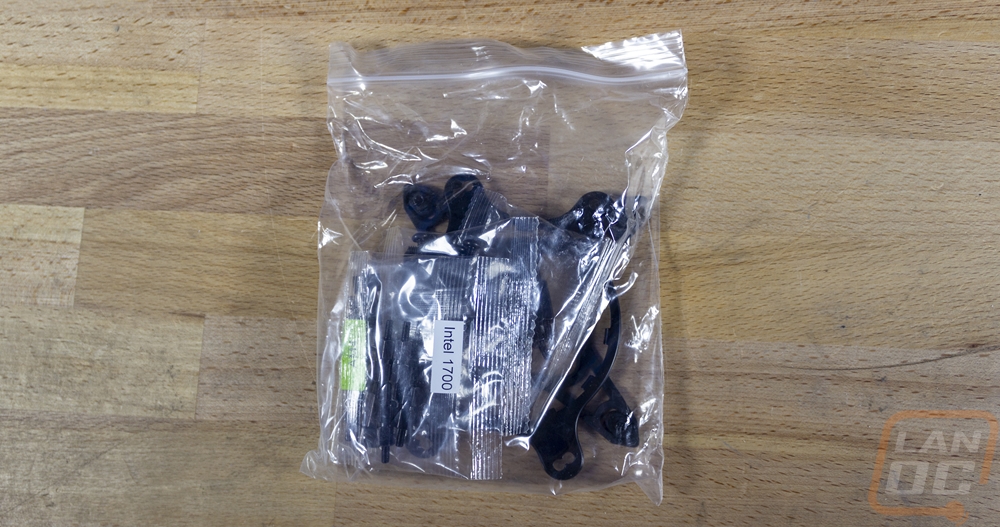
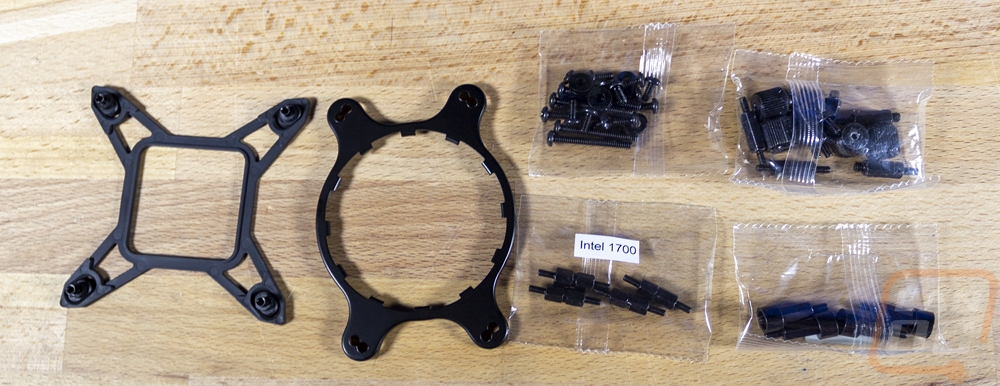
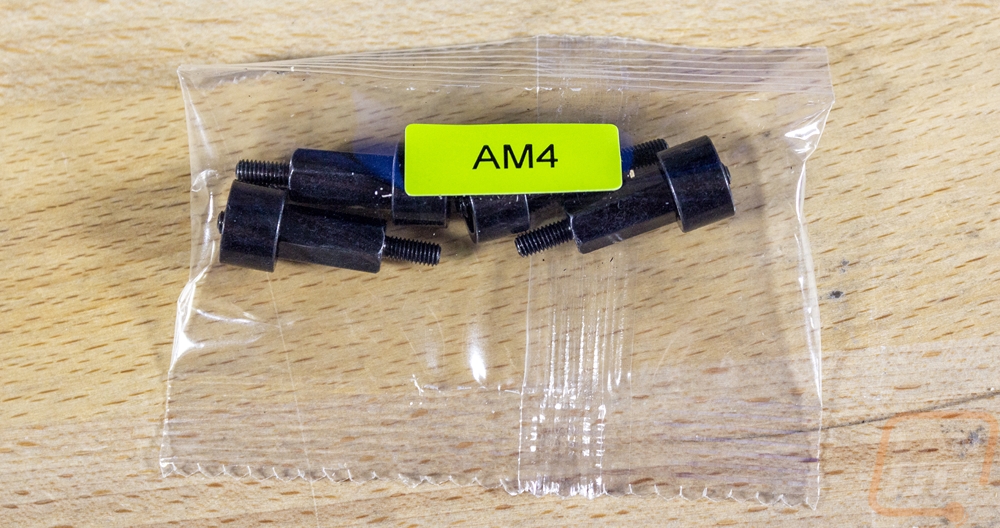
The rest of the hardware all comes in one large reclosable bag. Inside you have an AMD bracket for the pump housing and a backplate for Intel. There are four small baggies which are all one use only that have all of the mounting hardware. All of it is blacked out which is cool and for the Intel 1700 and AM4 hardware, they have those labeled specifically. One has the screws for mounting the radiator and the fans then the biggest bag has the normal mounting hardware including the thumbnuts that you will need if you end up using the AM4 or LGA 1700 mounts. That bag also has the hardware for the older sockets like Intel’s 2011 or the LGA 115* as well as the older AM3 and below mounts as well. I like that the two newest mounts are labeled but I almost would prefer if they had five bags that split up the older hardware as well and at least one being a reusable bag would be nice to store the unused hardware you will end up having from the fan and the general bag. For now, you have to toss all of those in the big bag that everything came from.
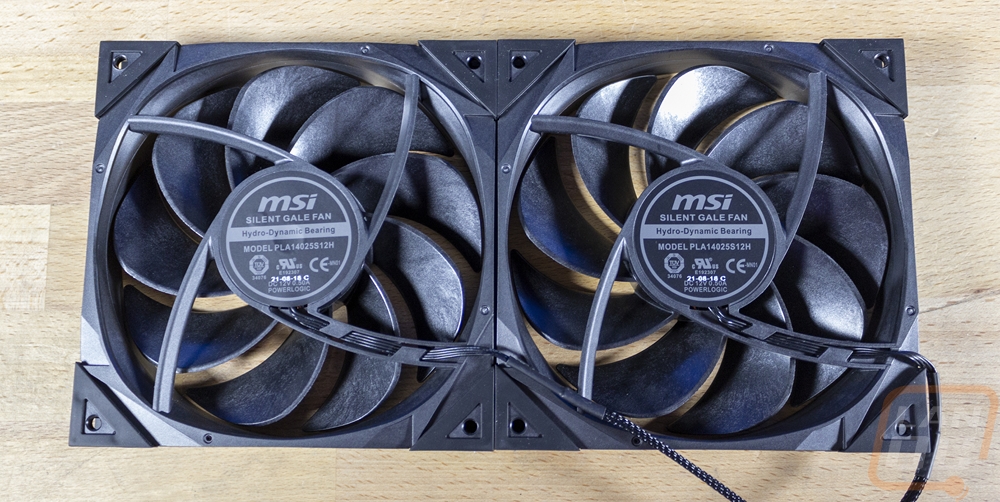
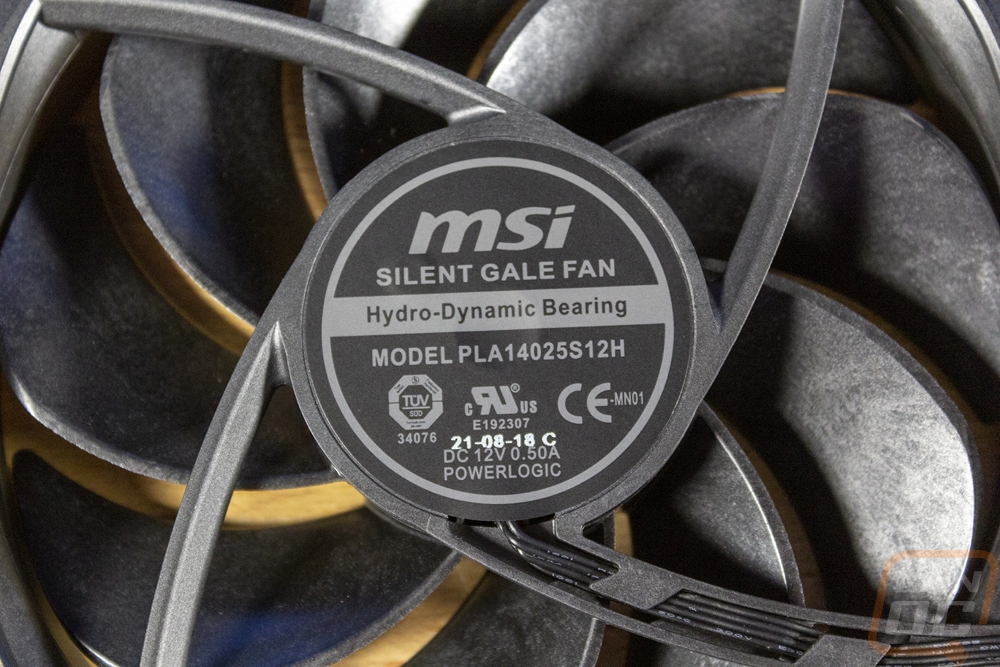
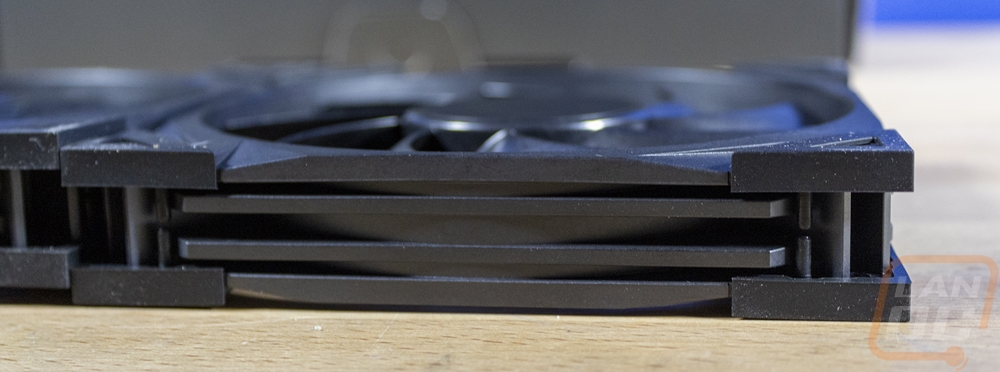
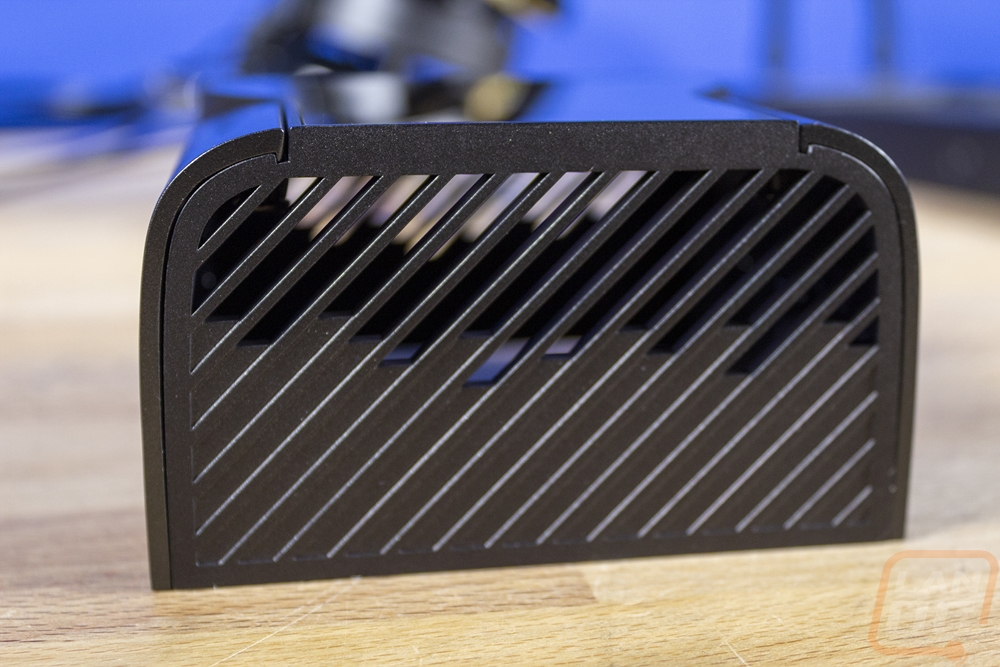
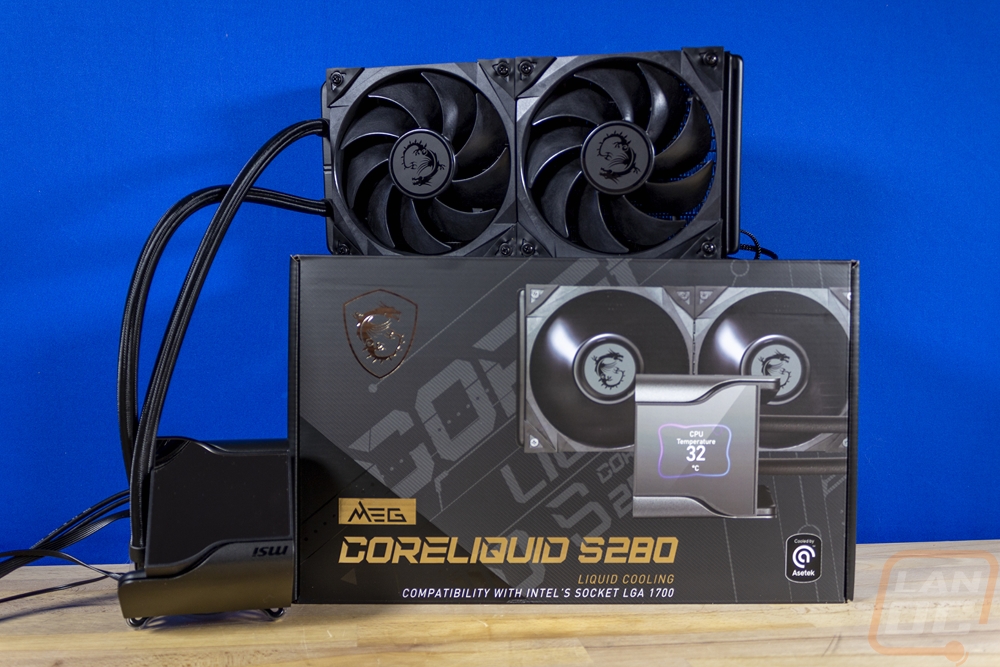
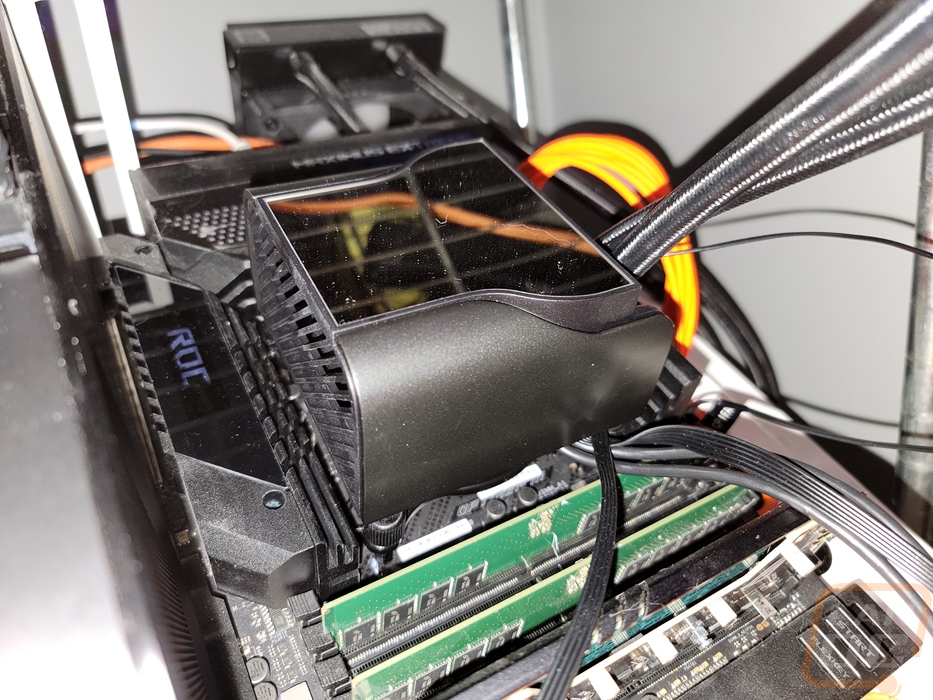
The CoreLiquid S280 as the numbers in the name might indicate is a dual 140mm radiator setup and with that, it comes with dual 140mm fans. I’ve never previously seen the fans included here but they are noticeably much better quality than the previous MSI AIO that I tested. They are MSI Silent Gale fans with the model number PLA14025S12H. They have a hydro-dynamic bearing and unlike just about every other higher-end AIO cooler these aren’t RGB or LED at all. They are all blacked out and the plastic is a liquid crystal polymer which is the same material Noctua uses on their newer A12x25. It’s clear that MSI is aiming for a similar caliber fan here. The blades have 9 blades with a twist to their shape and in the center, on the front, they have the MSI Gaming Dragon logo which when upside down still looks like a sad face and I just can’t unsee it. The housings have thick rubber anti-vibration mounts on the corners and the housing itself has a little bit of an angular shape cut into it in a few places. The vibration mounts have the sharpest edges that I’ve ever seen on a fan, normally these are rounded off so the sharp edges look distinct. Then from the side view, the housing has extra reinforcements that run along them. Everything including the 4 pin PWM fan wire is black. The fans are rated by MSI at 2.2 H2O which isn’t bad for static pressure, they have an airflow of 82.27 CFM, and according to them, they should run at 24.9 dBA. The hydro-dynamic bearing gives the fan a life expectancy of 50,000 hours.
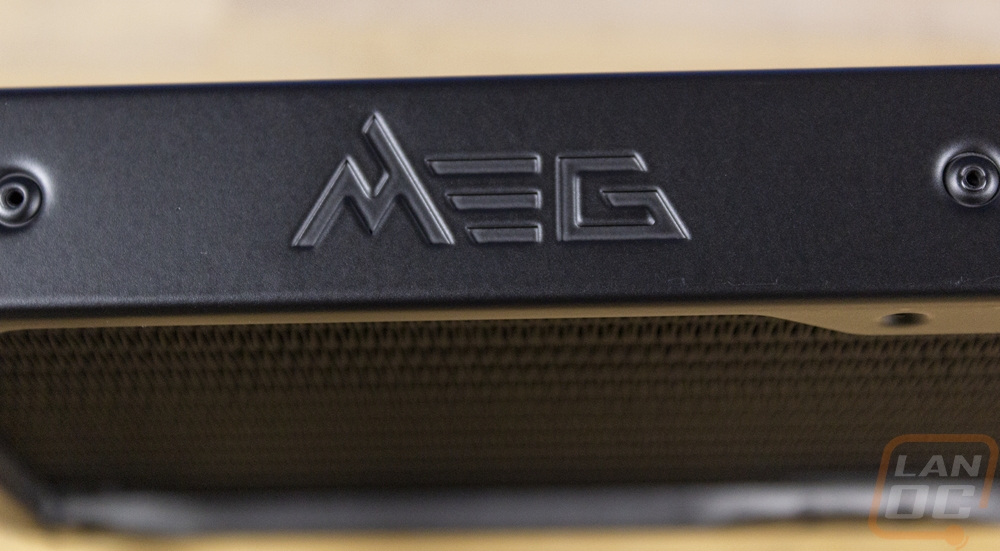
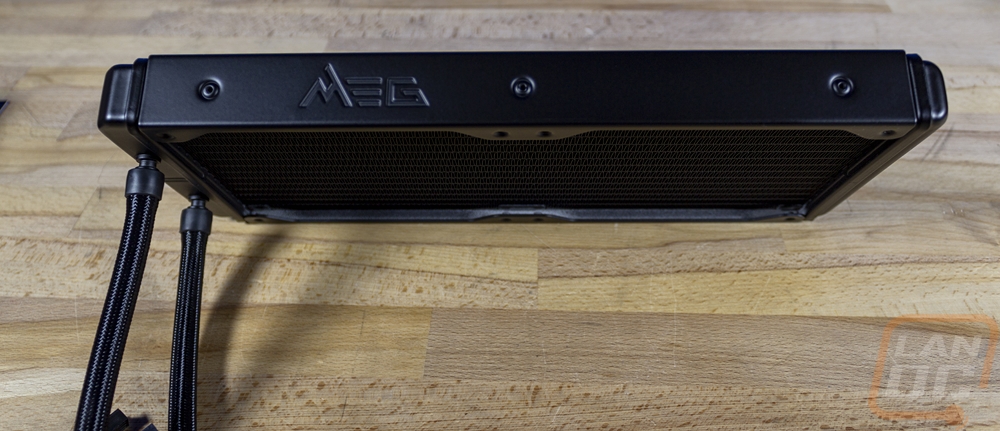
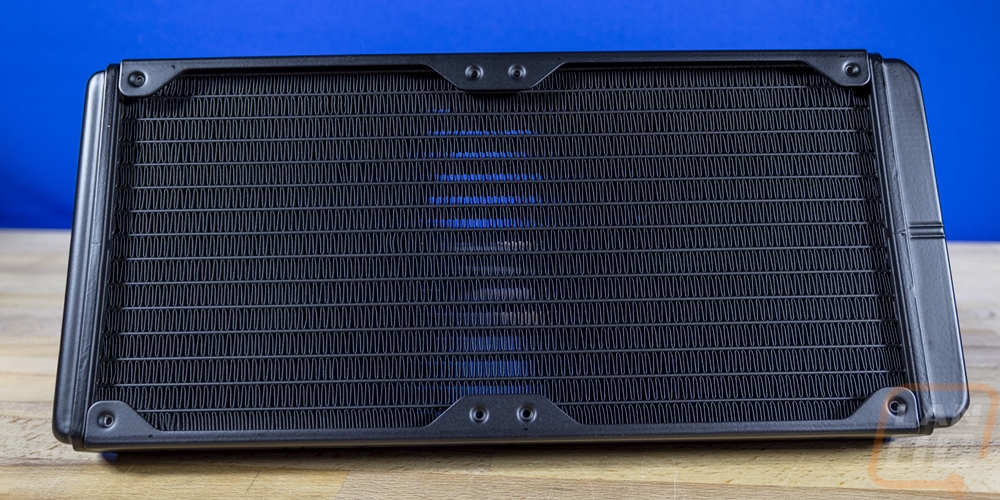
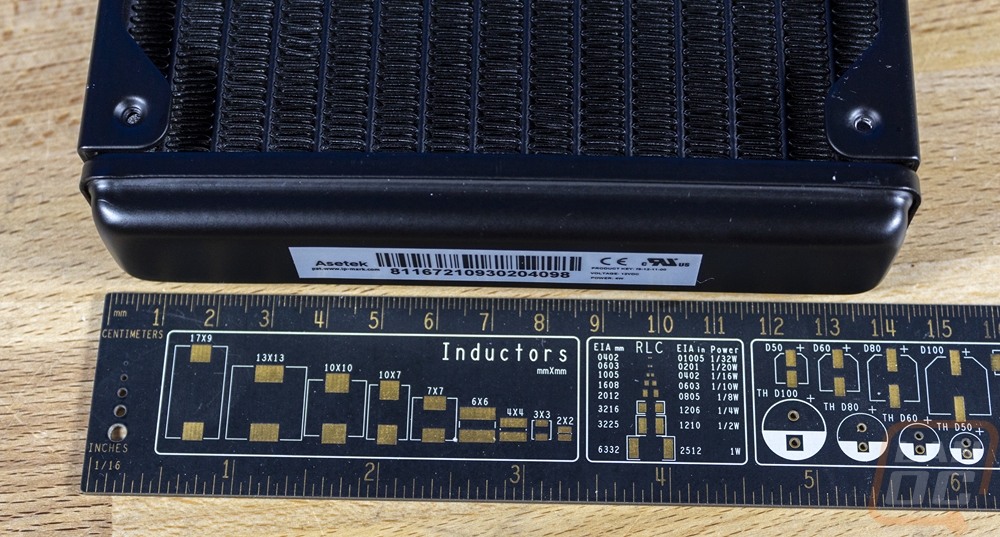
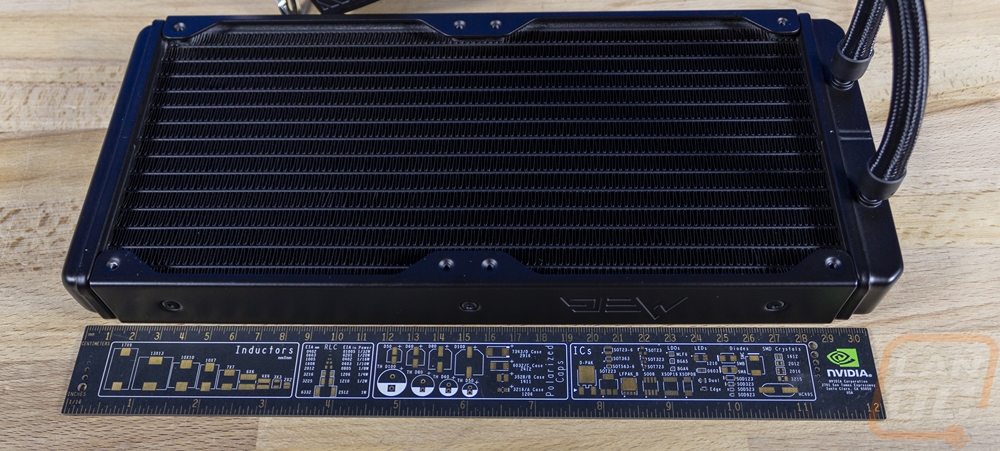
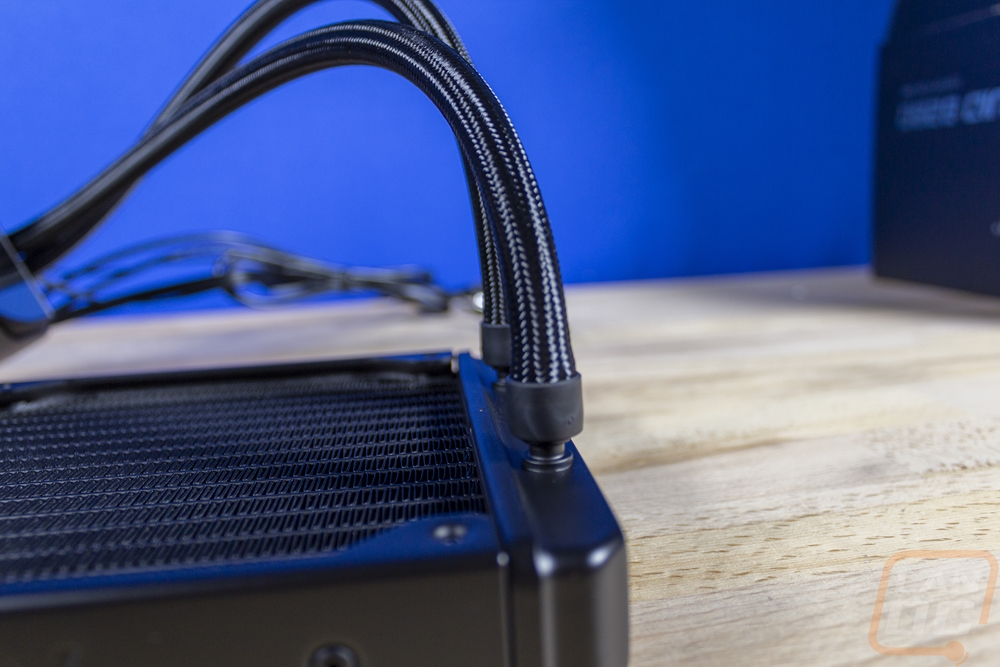
The radiator for the CoreLiquid S280 in most ways looks to be a standard AIO radiator. It is a hair over 27mm which is the standard thickness. Being a dual 140mm setup the radiator is 140mm wide and 314.8mm long. It also has the older style rounded ends when a lot of kits have been moving to the squared-off boxy style that looks a little cleaner. MSI did however have the MEG branding stamped into the sides which gives it a little style. Down on the end, there is a white sticker that has your kit’s serial number and the Asetek branding which tells us that Asetek is the OEM for the CoreLiquid S280, not that the mounting style didn’t already give that away. For the tubing, the CoreLiquid S280 has a standard-sized hose with a black sleeving over top.

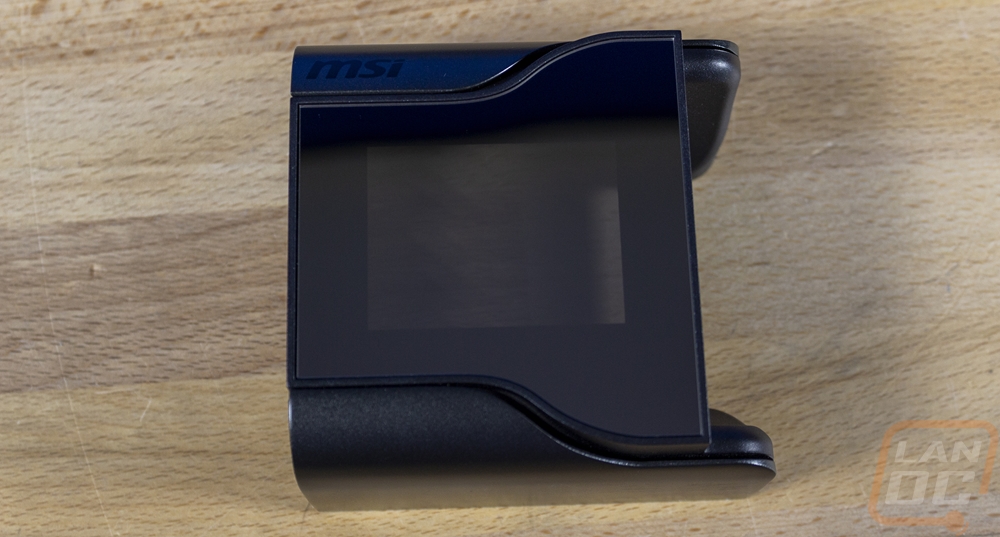
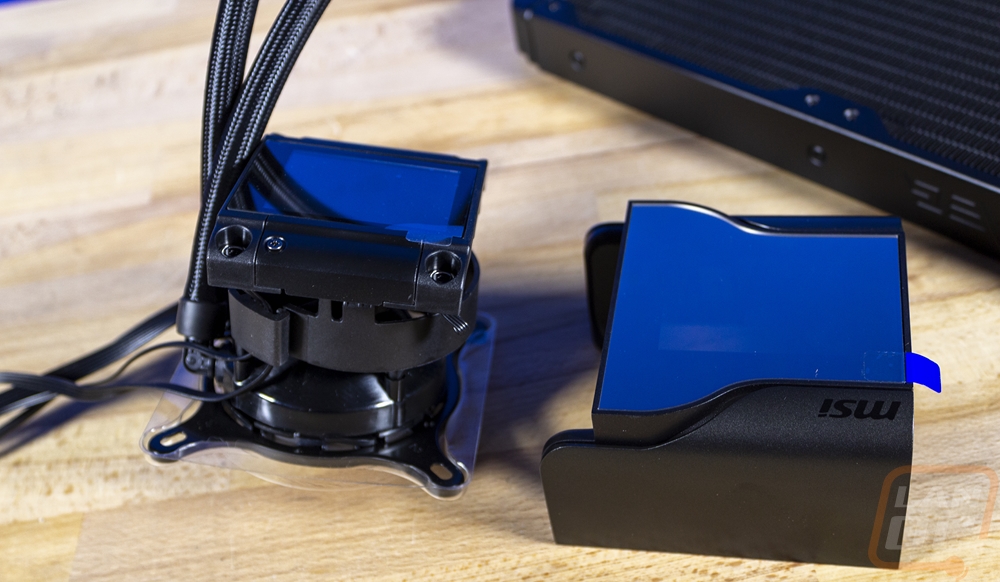
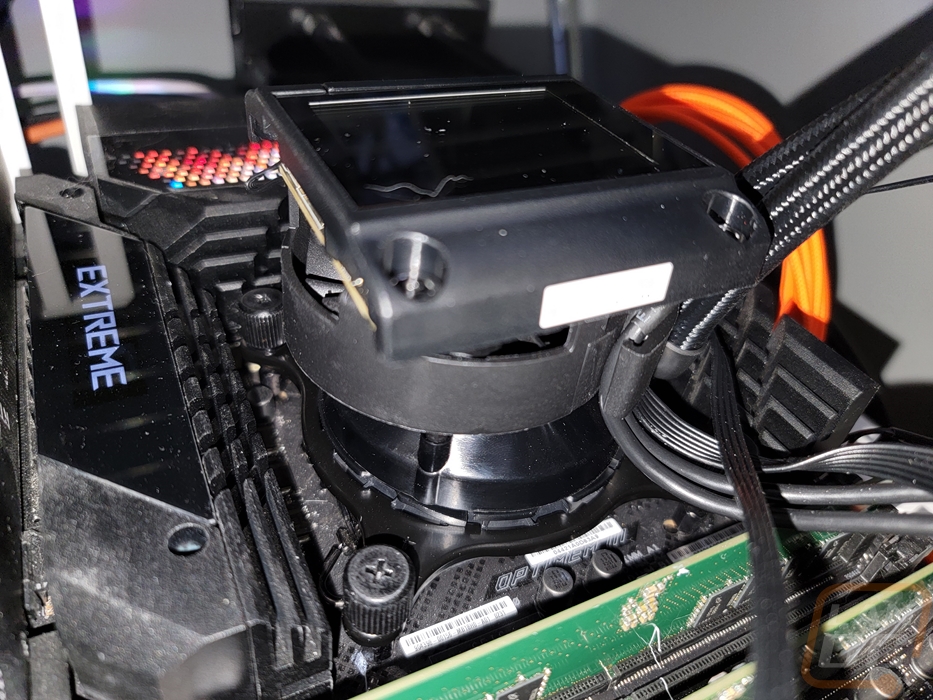
The pump/block assembly for the CoreLiquid S280 is a lot more complicated than your standard AIO setup. We already know that this is an Asetek OEM design can that can be seen with the twist-lock design that attaches the mounting bracket to the pump. But on top of the standard design, the CoreLiquid S280 has two more things. It has a fan integrated into it and then the screen on top. All of that is then covered up by a big cover. The cover is attached with magnets so it can be pulled on and off at any time. This is helpful because it does cover up all of the mounting.
The CoreLiquid S280 is 83.53mm tall and with the housing is 95m95mm square. This is taller than the Corsair iCue Elite models due to the CoreLiquid S280 also having the integrated fan and it is a little wider as well.
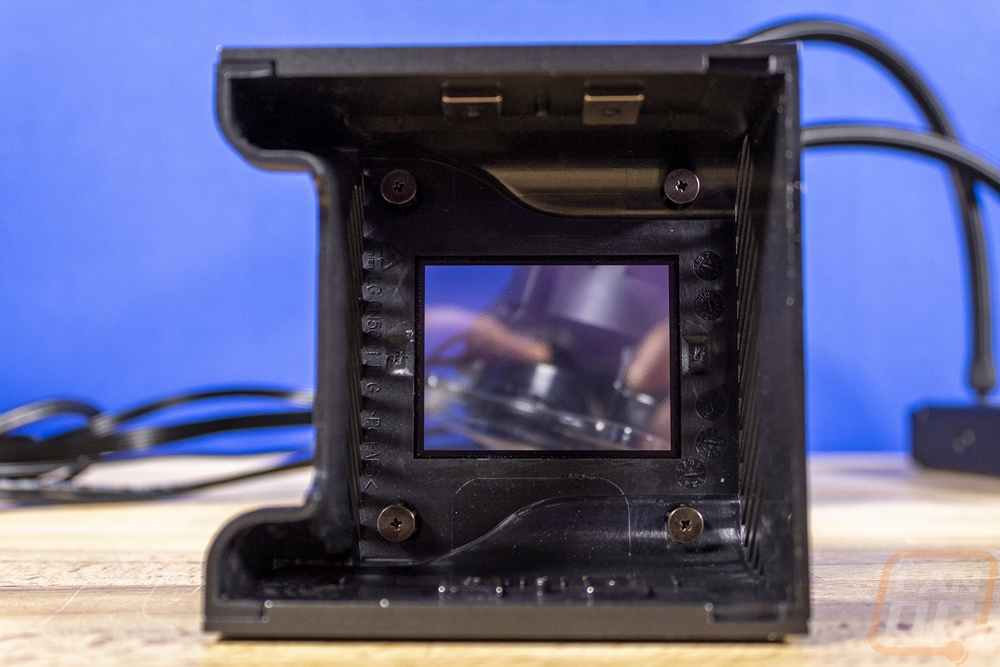
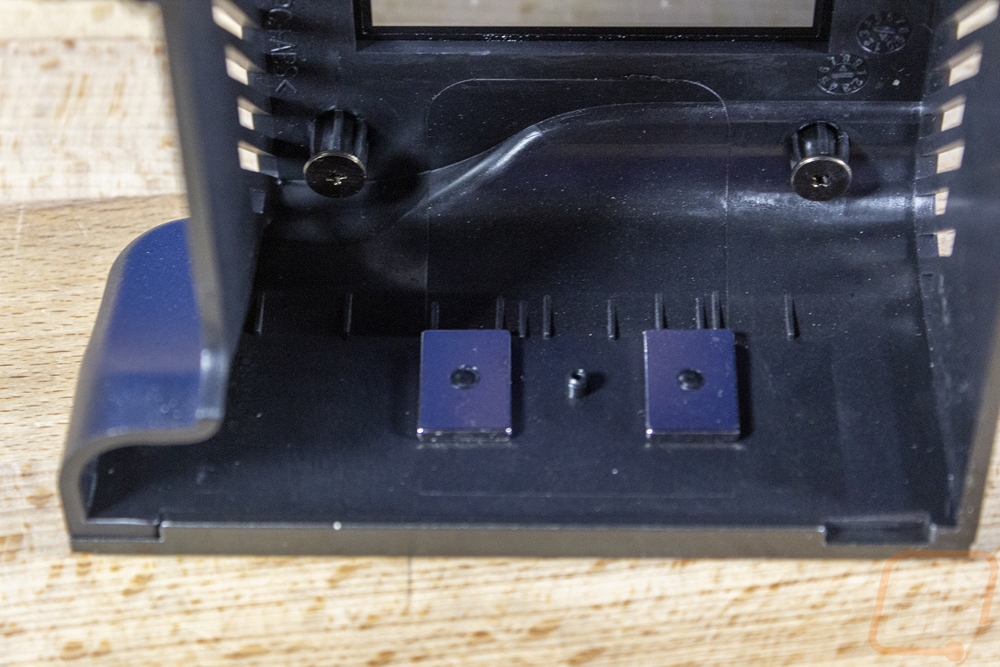
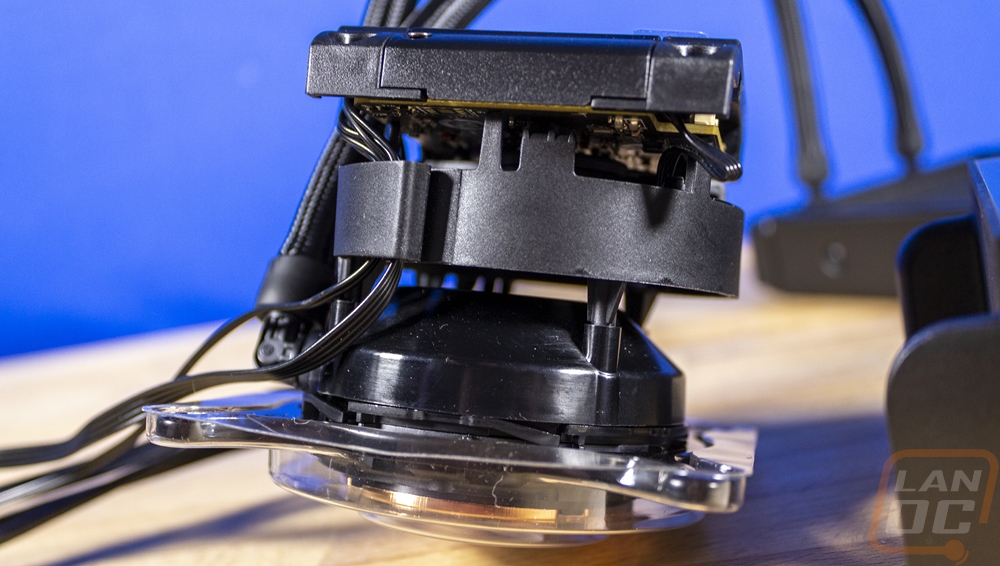
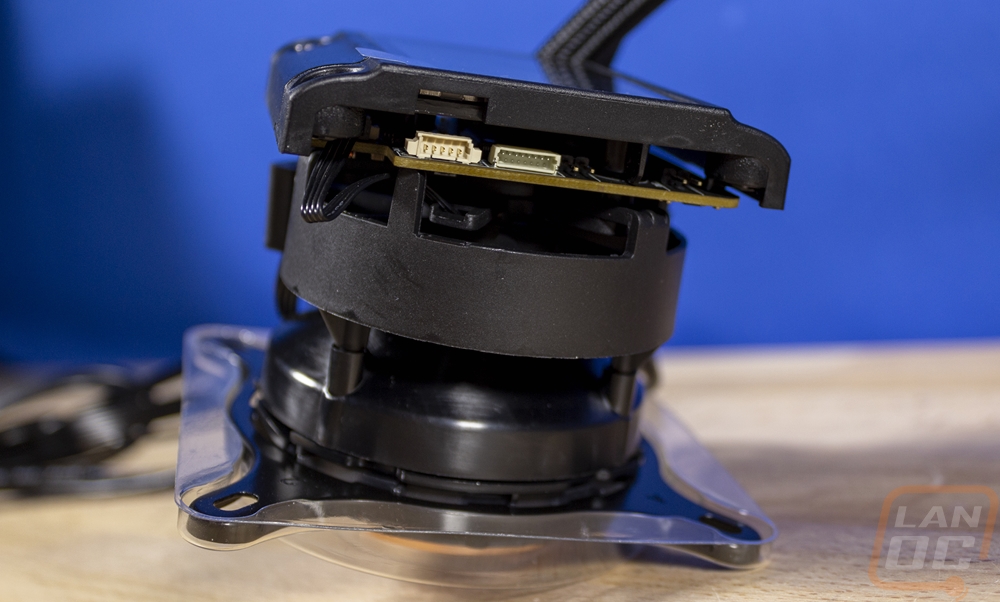
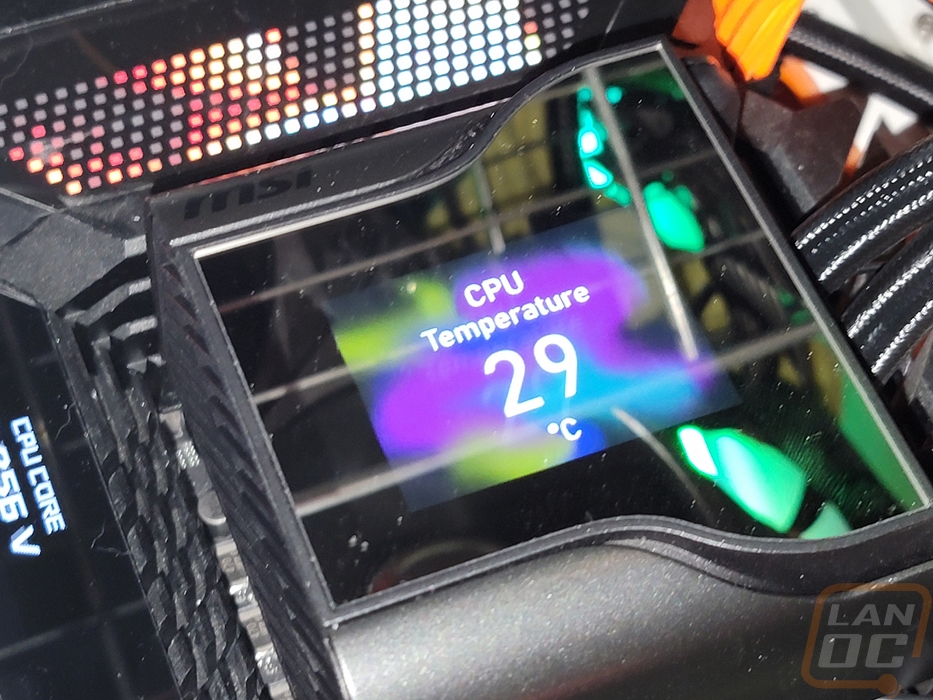
Both the cover and the screen below it have plastic installed on them that you will need to remove before using but I would highly recommend waiting until you have everything installed before doing that because they get dust and fingerprints very easily. The side view of the pump assembly really helps put the overall package in perspective. You can see the water block and pump down at the bottom which is compact. They are using the Asetek 7th gen pump design and if you haven’t seen the twist-lock mount design you can see it here where you can twitch to attach or remove the metal mounting bracket depending on what CPU socket you are installing on. Above that is the fan which has openings below and above the fan to pull air in and blow it out. The idea with this is to push air into the VRM around your CPU as well as your ram. With water cooling in general the airflow in those areas can get bad. Then up on top is the 2.4-inch screen. The one side of the screen down has additional plugs on it which is interesting but they aren’t used in this setup. I don’t know if maybe that PCB is designed to be used in other ways as well.
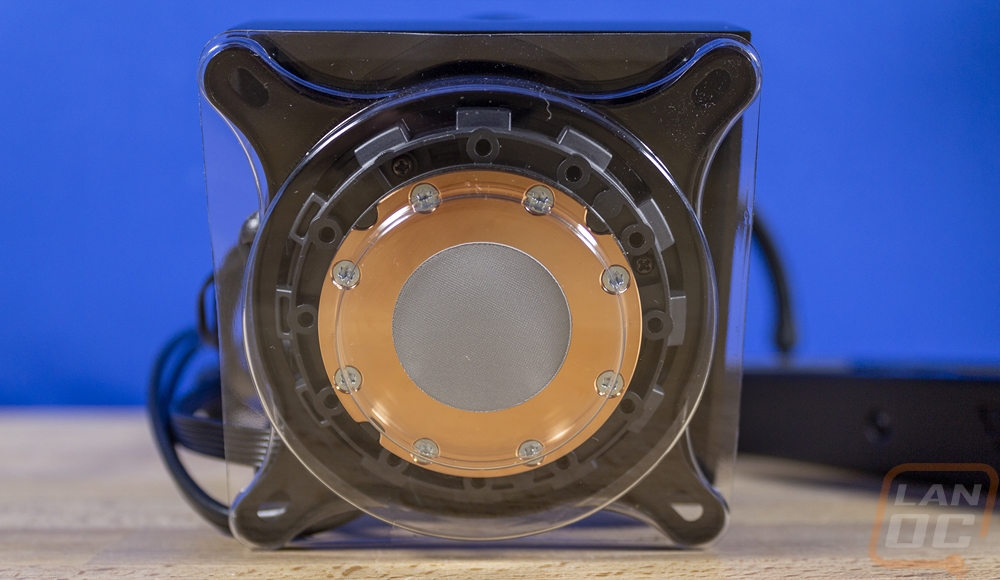
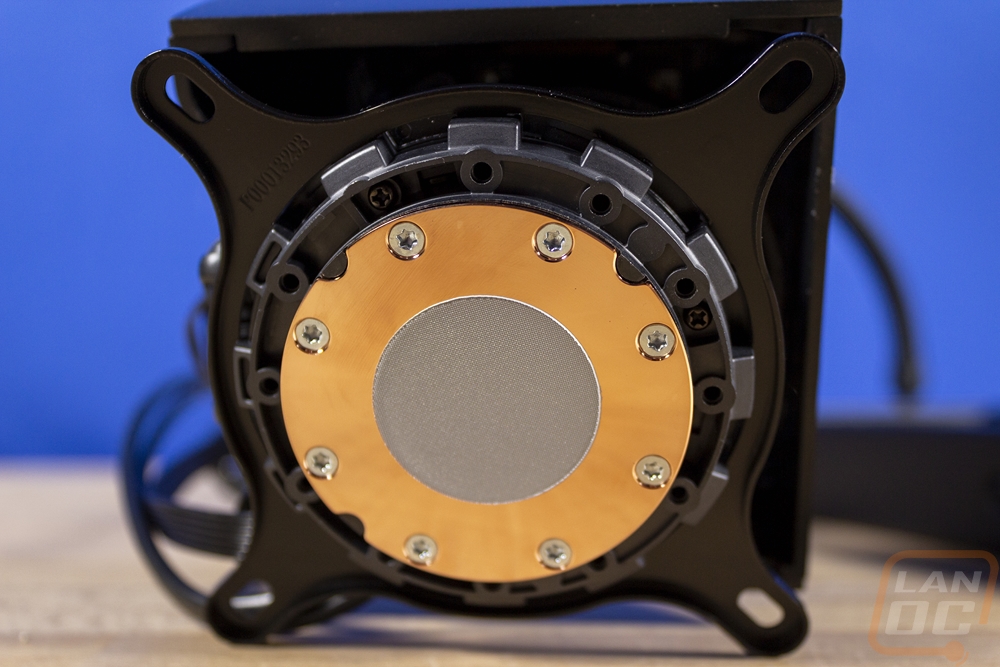
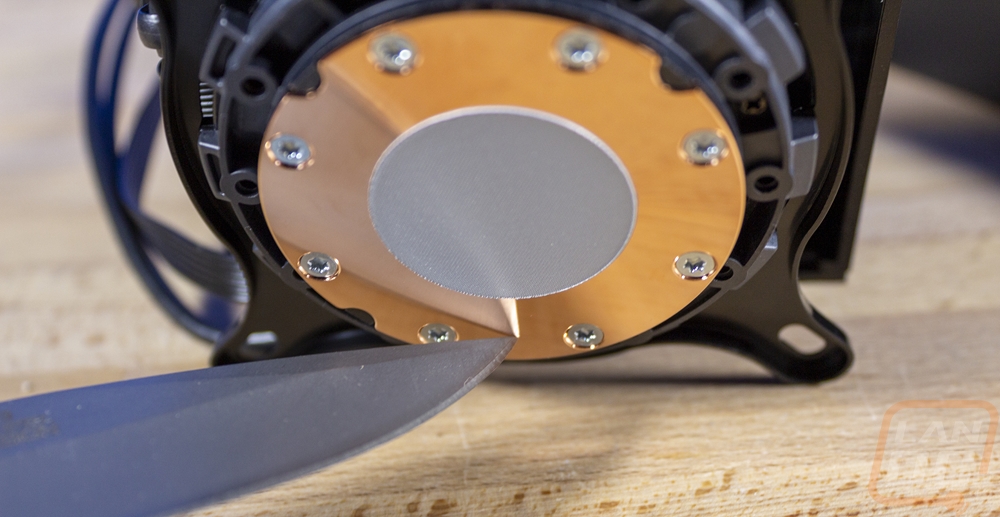
The bottom of the CoreLiquid S280 water block has the typical round Asetek contact surface. This gives a better look at the twist-lock mounting system. You can also see that it does come preinstalled with thermal paste which is why the CoreLiquid S280 doesn’t come with any extra paste. The overall finish of the contact surface isn’t too bad, it is smooth enough that we have a good reflection up close but it does get fuzzy farther away.
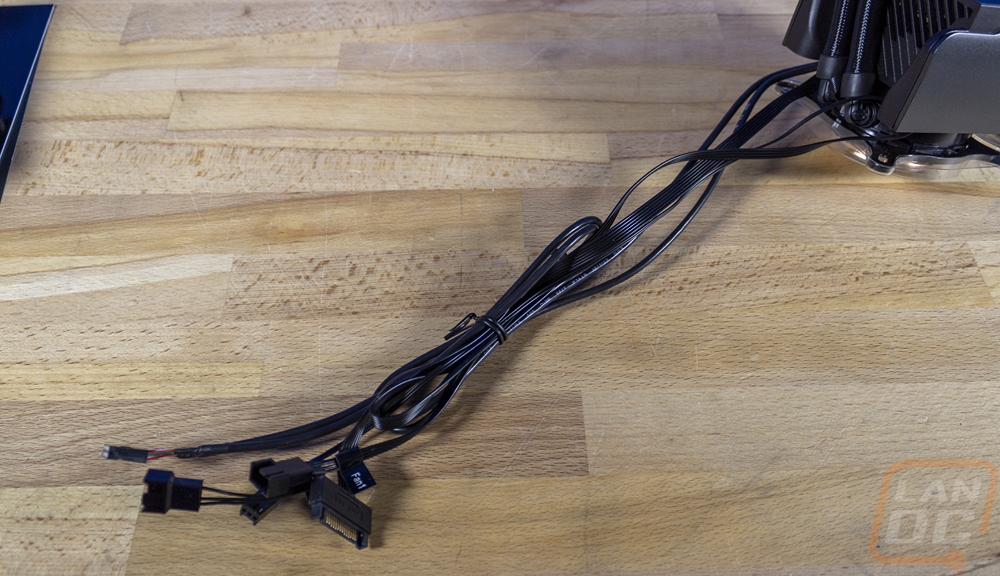
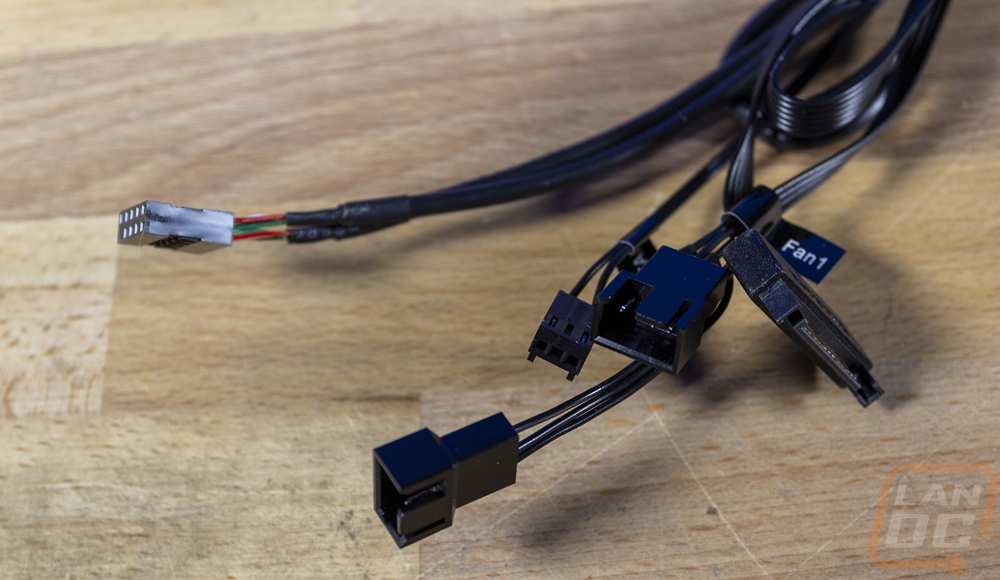
With so much integrated all into the pump housing, it does end up with a mess of cables. I do wish some of these designs would use one cable and let you split all of this up behind the motherboard tray for a cleaner look. They are all black but just keeping all of these out of the way right in the middle of your case is hard to do. There are two 4-pin PWM fan connections to hook the radiator fans up. There is a 3 pin fan connection to hook to your motherboard so that it doesn’t think your CPU isn’t being cooled. Then you have a USB cable for the data connection and a SATA power cable to power all of this.
The Silent Gale 140mm fans look good installed on the radiator, especially with all of the blacked-out mounting hardware.

Test Bench
|
Testing Hardware |
Live Pricing |
|
|
Case |
Primochill Wetbench |
|
|
Motherboard |
Asus ROG Maximus Z690 Extreme |
|
|
CPU |
Intel i9-12900K w/ PL2 set to 250W |
|
|
Ram |
Crucial 2x32GB 64GB Kit |
|
|
Power Supply |
Corsair AX1200w |
|
|
Thermal Paste |
Noctua NT-H2 |
|
|
SSD |
Sabrent Rocket Q4 2TB |
|
|
OS |
Windows 11 Pro |
|
Noise Testing, Fitment, and Screen/Software
Before being able to test out the CoreLiquid S280 we do need to install it first which brings me to fitment. With air coolers, the height and width of a cooler play a big role in if it will fit in your case if your motherboard will work with it, and if the memory will fit. With AIO coolers most of that is a little easier to know. Your case should tell you what sized radiator it supports assuming it supports any at all. Beyond that, the height of the pump is normally short enough to be a none issue but we do need to double-check. Especially with the CoreLiquid S280 which has the screen and fan both built on top of the pump and water block. You can see that in this comparison of water block heights where the CoreLiquid S280 comes in at 83.53mm, 30mm taller than the other AIOs including the Corsair which also has a screen. Adding in that fan into the mix affects the height so you do want to make sure that the CoreLiquid S280 is going to fit in your case, it should fit most but there will be some SFF cases that it might not. LGA 1700 is supported and that is what I am testing on and being an AIO memory compatibility won’t be an issue.
|
AIO Cooler |
Fan Configuration |
Radiator Thickness |
Water block height |
LGA1700 Support |
|
Corsair iCUE H100i ELITE LCD Liquid CPU Cooler |
2x 120mm |
27mm |
57mm |
Yes |
|
MSI MAG CoreLiquid C280 |
2x 140mm |
27mm |
52mm |
Yes |
|
Sapphire Nitro+ S240-A |
2x 120mm |
27.5mm |
59.17mm |
Yes |
|
Cooler Master MasterLiquid PL240 Flux |
2x 120mm |
27.2mm |
40 mm |
Yes |
|
MSI MAG CoreLiquid S280 |
2x 140mm |
27mm |
83.53mm |
Yes |
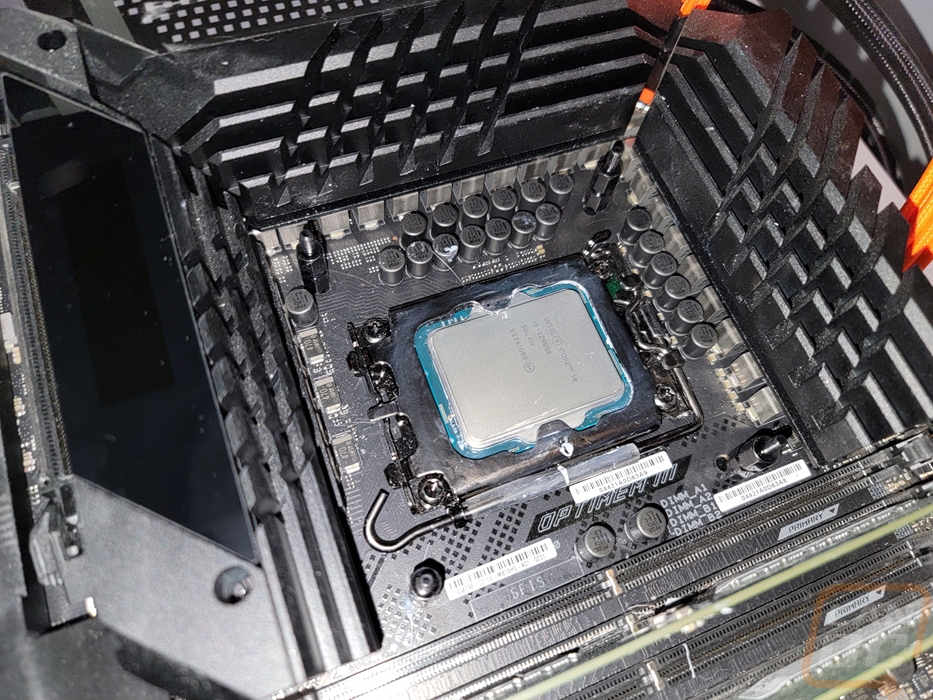
I did get a few pictures of the overall installation of the CoreLiquid S280. Its mounting bracket installation is a lot like the Corsair on LGA 1700. You have the backplate which supports 1700 and older Intel sockets with adjustable sliding mounts. You hold it from the back and have to screw in the included standoffs. Even with those tight it feels loose and getting the standoffs installed with fat fingers is kind of a pain with a motherboard like our ROG Z690 Extreme with huge VRM heatsinks.
Once the bracket is installed you drop the pump on to your CPU and you have four large thumbnuts to tighten down. These are thicker and easier to use than the Corsair but the large screen, the wiring, and the two water lines make getting at them tight. Once installed you can tuck your wiring off to the side and run it. Then the cover can be dropped on. It uses its magnets to snap into place but can take a little wiggle if the wiring or hoses are keeping it from going in place.
First up for our testing is noise testing. For this, I test in three different situations. I test with the fans and pump all set to 50% fan speed, again at 100% fan speed, then the third under load test is done while running our AIDA64 CPU Stress Test once temperatures have leveled off I test the noise level of everything. Each test is run with an A-weighting which is normal, then C weighted which takes in more in the lower frequencies. The CoreLiquid S280 has a noise focus with the very Noctua like Silent Gale fans for the radiator, but at the same time a small fan-like what is installed in the pump can add a lot of noise so I was curious to see where the CoreLiquid S280 would end up. At the 50% fan speed, it was similar in performance to the MAG CoreLiquid C280 that I previously tested. Turning the fans up more it was quieter than some of the other AIOs but still a little louder than the C280. After messing with things, the radiator fans weren’t the issue, the fan in the pump was so a little bit of tuning could keep things quiet. Speaking of quiet, once under load, the CoreLiquid S280 did well, running right with the Noctua NH-U12S which has just one fan.
|
Noise Testing |
50% Fan Speed A Weighted |
50% Fan Speed C Weighted |
100% Fan Speed A Weighted |
100% Fan Speed C Weighted |
Under Load A Weighted |
Under Load C Weighted |
|
Corsair iCUE H100i ELITE LCD Liquid CPU Cooler |
36.5 |
56.1 |
48.3 |
58.4 |
44.2 |
58.7 |
|
MSI MAG CoreLiquid C280 |
36.2 |
51.7 |
46.9 |
57.4 |
43.9 |
56.7 |
|
Sapphire Nitro+ S240-A |
35.7 |
54 |
50.8 |
58.1 |
37.8 |
56.5 |
|
Cooler Master MasterLiquid PL240 Flux |
35.2 |
53.8 |
45.2 |
58.6 |
34.4 |
54.5 |
|
Noctua NH-U12A chromax.black |
33.8 |
51.1 |
43.9 |
58.2 |
35.6 |
55.4 |
|
Noctua NH-U12S |
33.3 |
51.1 |
37.9 |
58.6 |
34.5 |
55.3 |
|
MSI MAG CoreLiquid S280 |
36.3 |
53.3 |
49.3 |
57.7 |
34.6 |
55.2 |
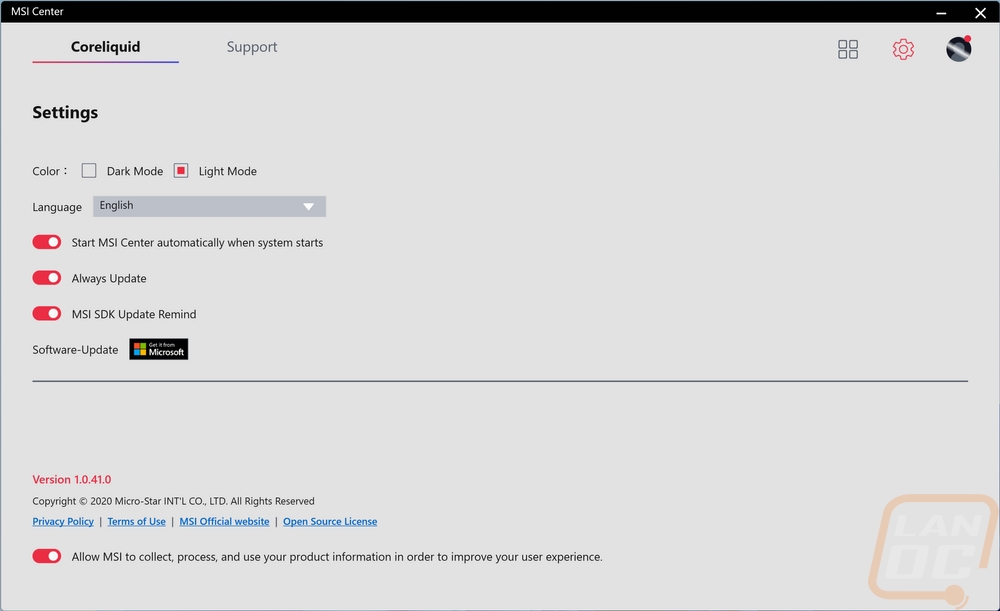
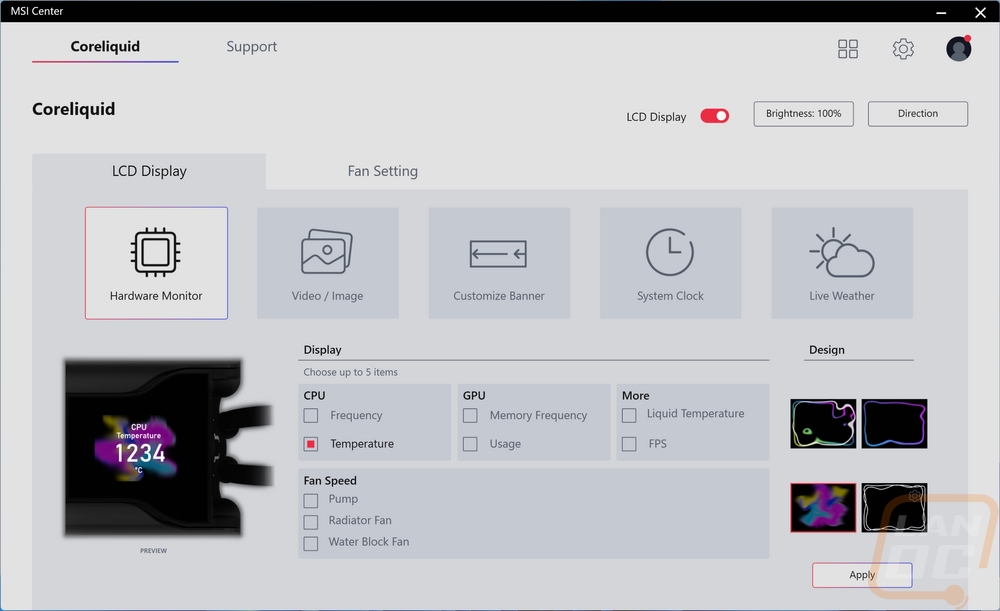
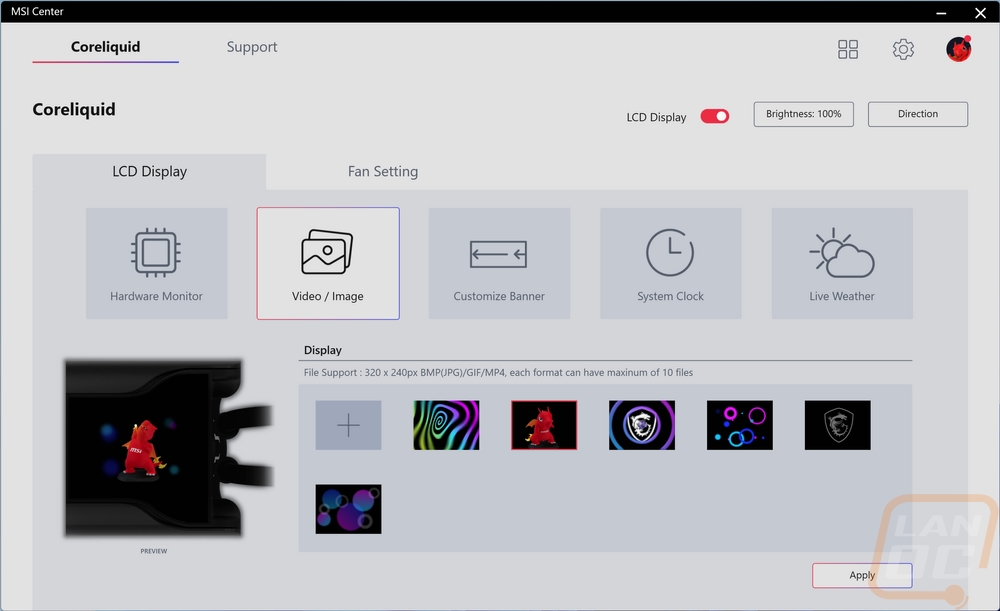
So with a lot of AIO coolers, you just need to hook things up to your fan header on your motherboard to control everything. But because of the integrated screen, the CoreLiquid S280 does have software. Without the software, you will just get a default animation on the screen. It uses a program called MSI Center which works with a variety of MSI products. With the CoreLiquid S280 installed once you install MSI Center, you have a tab up top specifically for the cooler. That has things broken down into two sections. You have the LCD Display settings and your fan settings. You also have a gear in the corner that gets you to the settings. This will let you switch the software between light and dark mode and you can set the language. Beyond that, you can tell MSI Center if you want it to start when your boot up and if you want it to check for updates automatically.
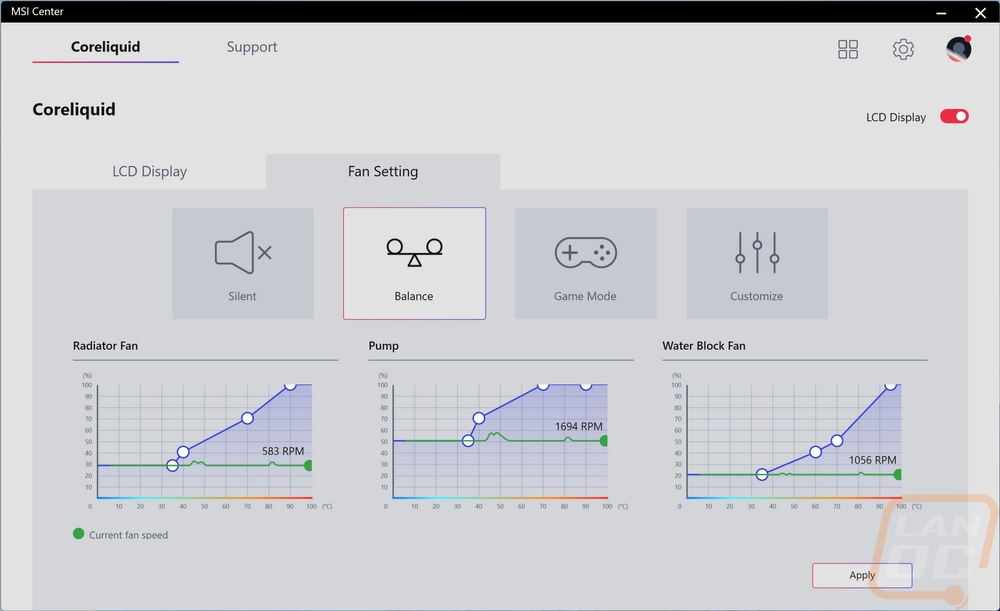
The fan setting page is relatively simple. It has four default settings, you can run silent, balanced, game mode, or custom. For all of our testing, I ran balance because that is the default setting. Silent will turn the fans off when temperatures are low and game mode gets more aggressive on the fan profiles. For all of those, you can see the fan profile for the radiator fans, the pump, and the water block fan in the bottom half of the screen. For the custom profile, you can adjust those white dots yourself. I do wish they had more than one custom profile and maybe one for full speed but most people will want to run one of the three default modes.
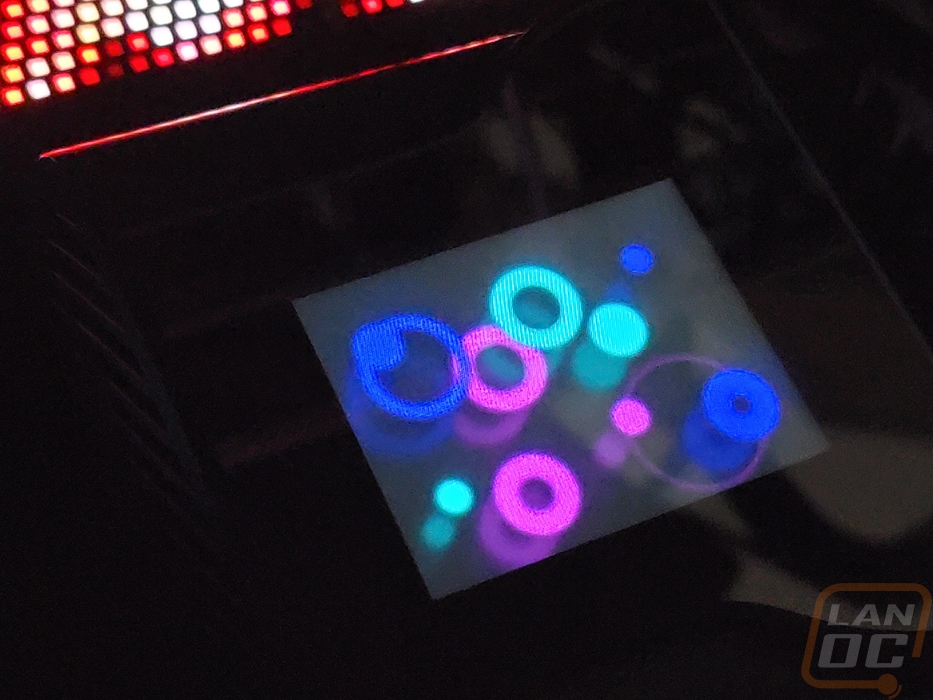
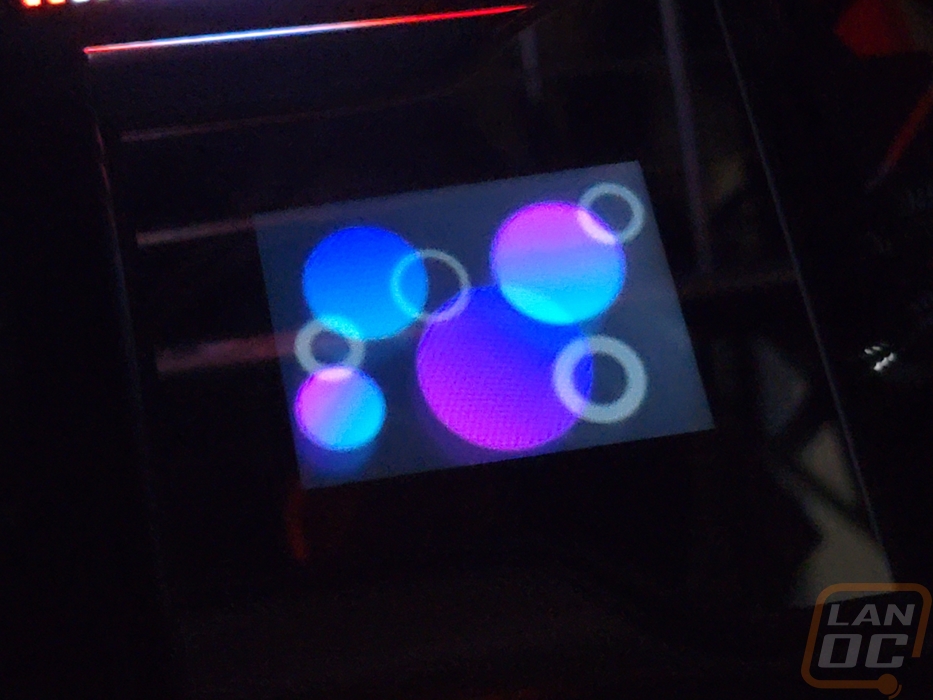
The LCD Display page looks similar to the fan setting page but there is a lot more control. The five mode squares are the main options. Then once you have one of those clicked below that you can adjust the settings for that mode. So for the hardware monitor, you can pick up to 5 options to display and pick one of the four animated effects to show in the background. I do wish you could show this information but put your own image or effect into the background.
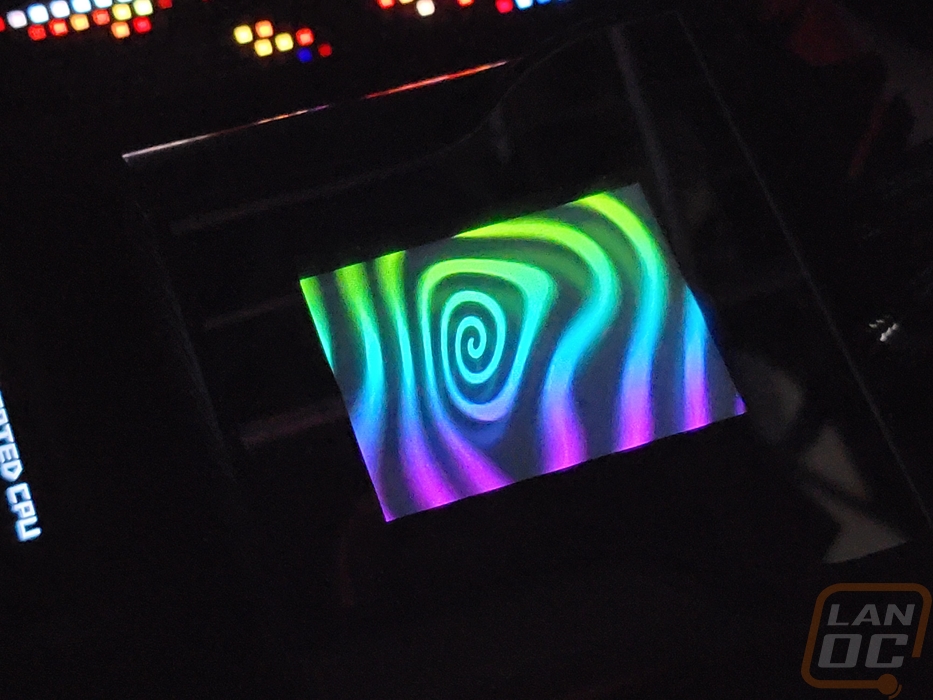
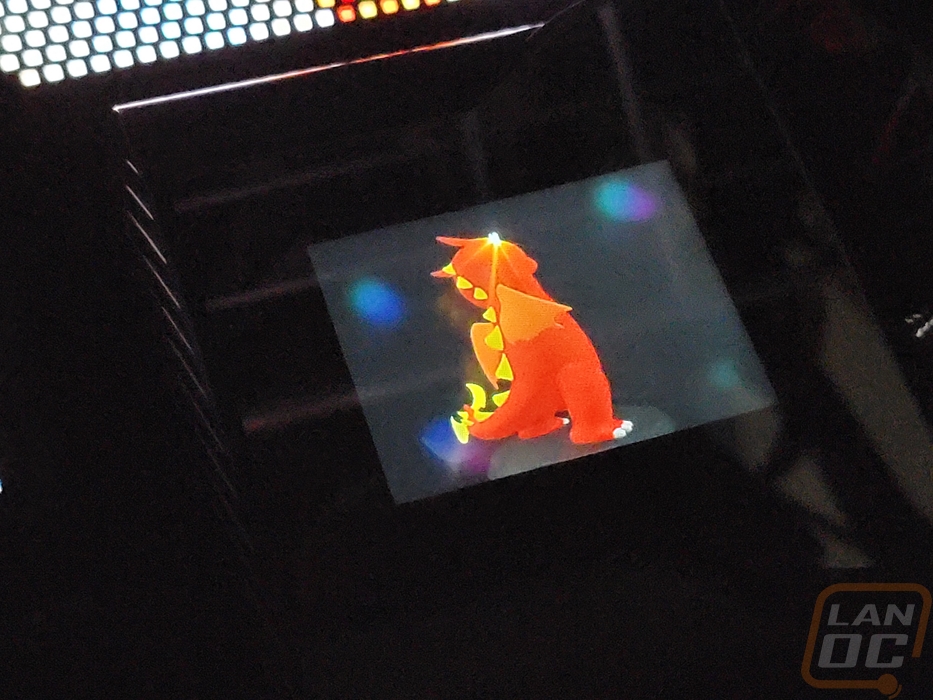
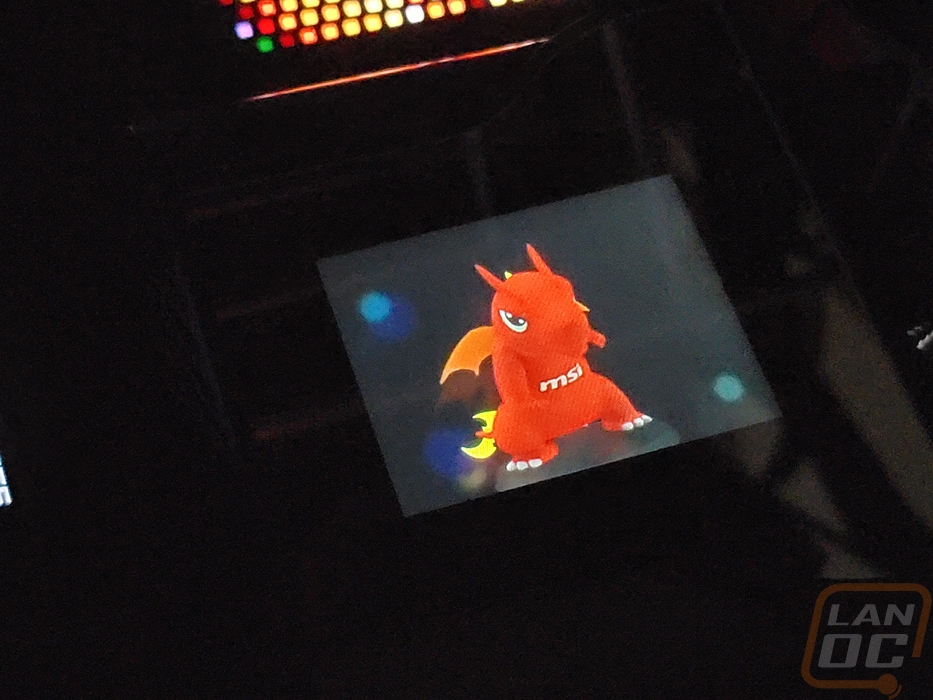
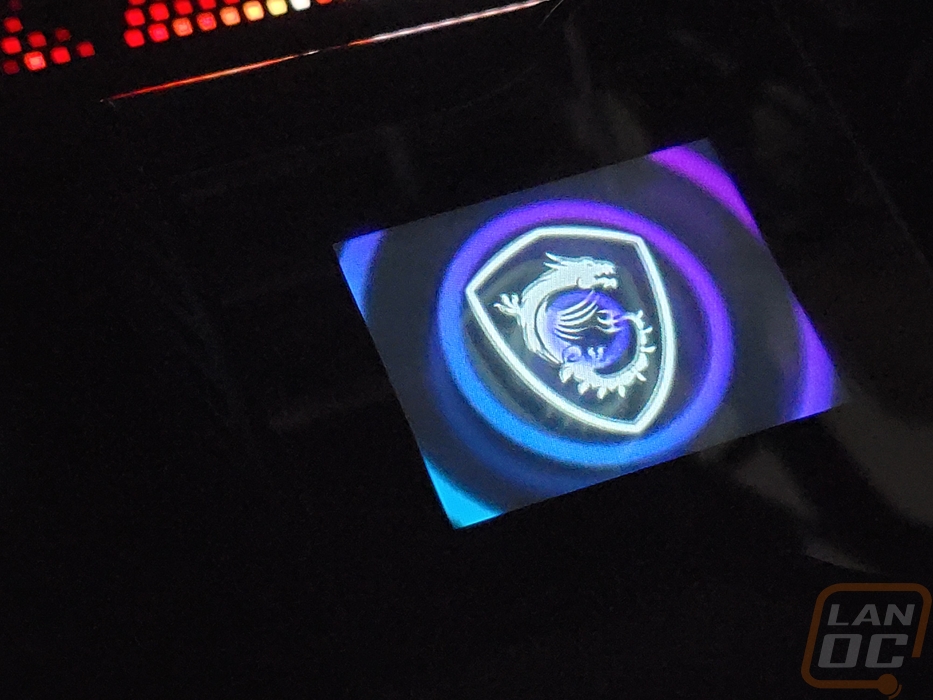
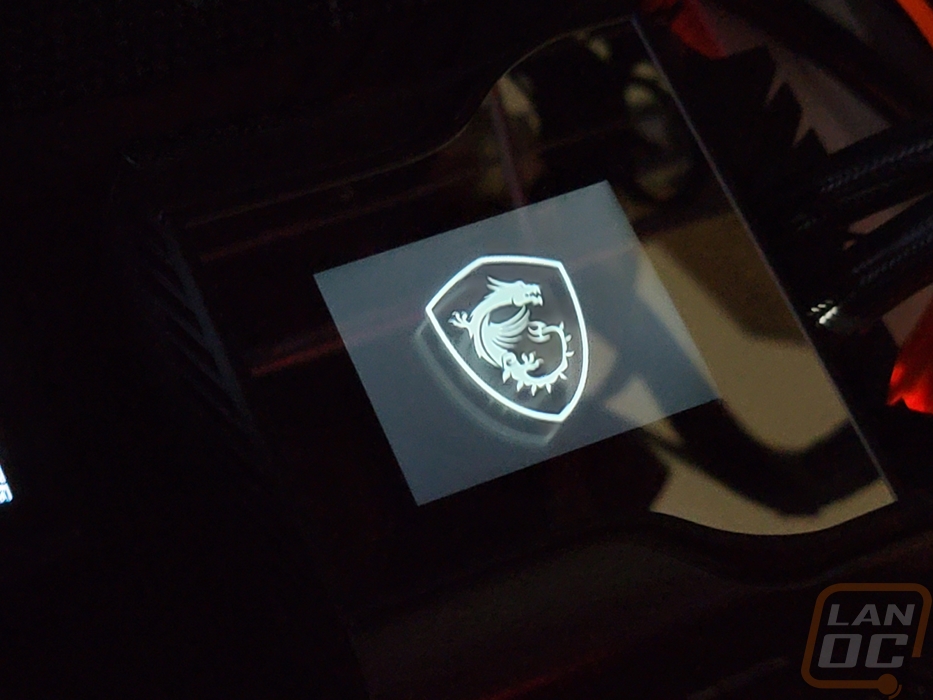
Next up you can upload your own image or video which can be a BMP, JPG, GIF, or MP4. You can also pick from the already uploaded options which are animated and a few have an MSI theme including the MSI dragon.
The banner page gives you a few additional backgrounds along with some from the hardware monitor page. Then on the right, you can type in text. You can have the text scroll, you can pick the font and color, and you can change the scroll speed.
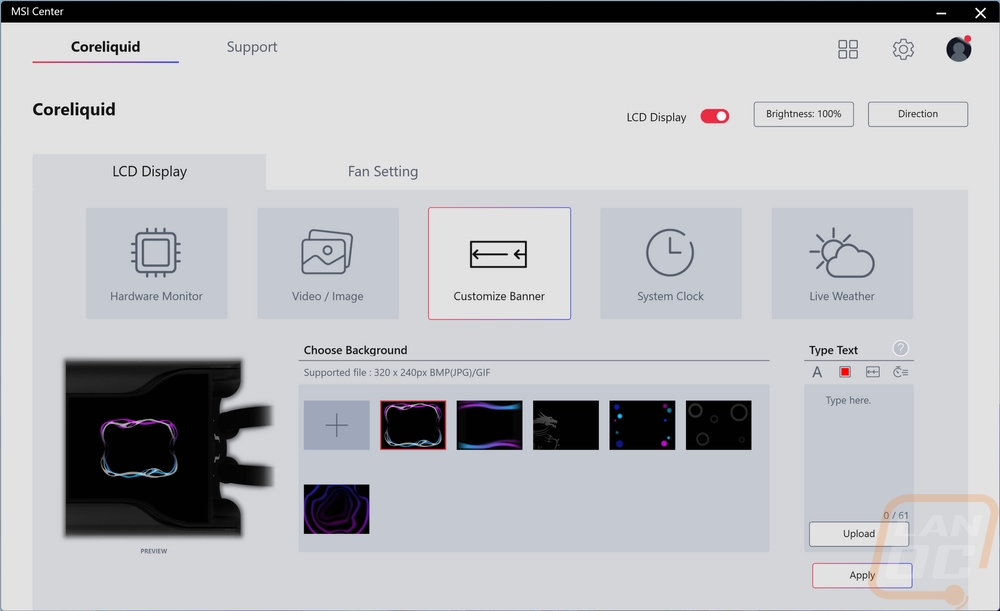
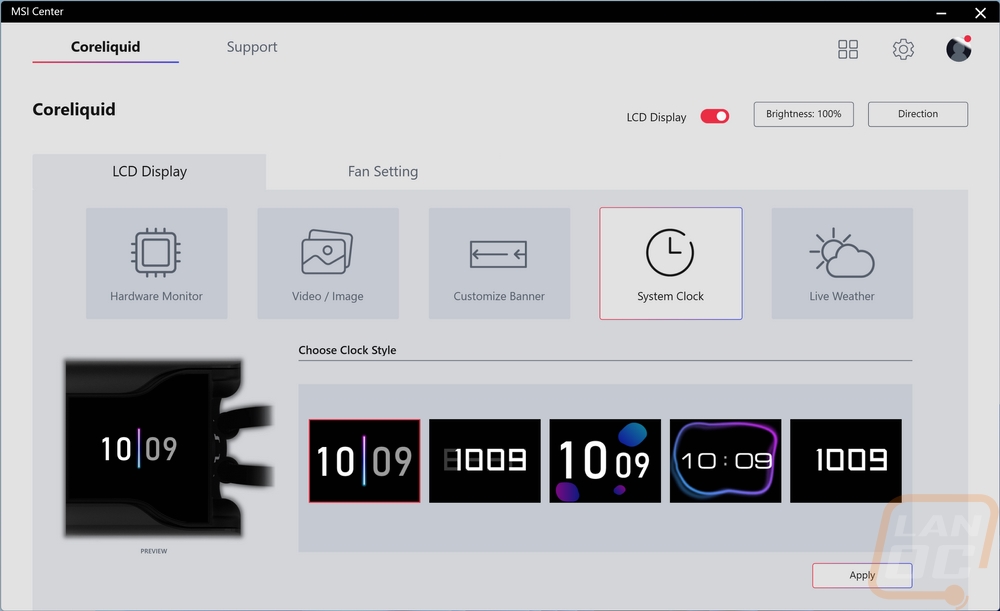
Next up is the system clock where you can pick from five different designs. These have different backgrounds and different font and font sizes for the time itself that will show on the screen. Again like the hardware monitor, I wish there was a little more control here. Being able to put your own background and if you could use your own font and font colors here could be a nice addition.
Last up is the weather. This will use your location and give you current weather updates including the temperature, humidity, rain conditions, and chance of rain. I don’t see many people needing this, but even as I say that my thermostat is just a few feet away and shows the current weather and the outside temperature and I use it ALL of the time. I do wish that you could have the option to put in your own zip code, I assume this is going off of your IP and some people’s IP will show in a different area.
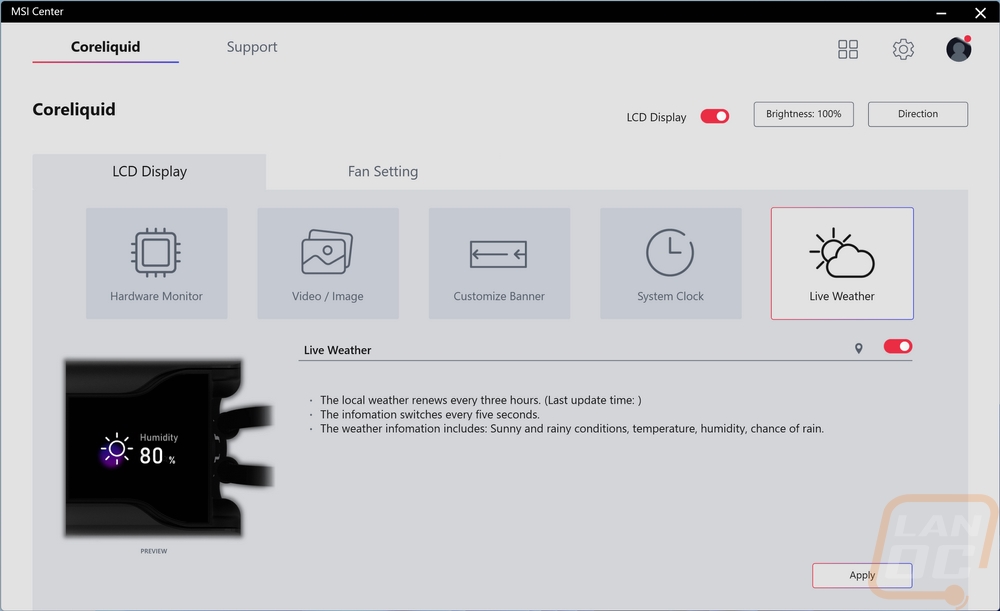
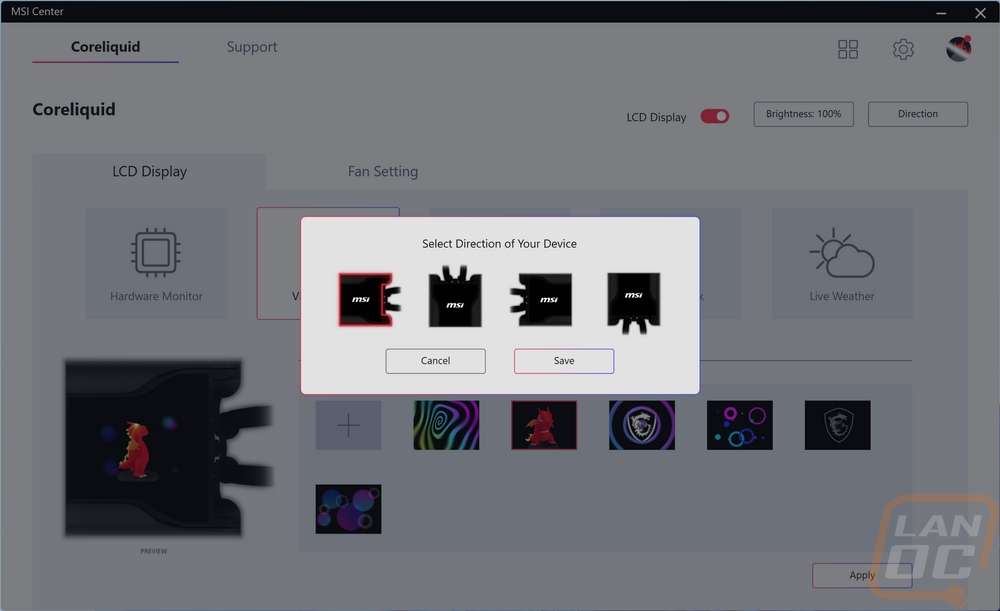
There is a little control available. For starters, you can select the direction that which the display is laid out. When I tested the Corsair this wasn’t an option and what is the point of a display that isn’t orientated in the direction you need so being able to pick any of the four directions is nice. You can also adjust the screen brightness or turn the LCD completely off if needed.
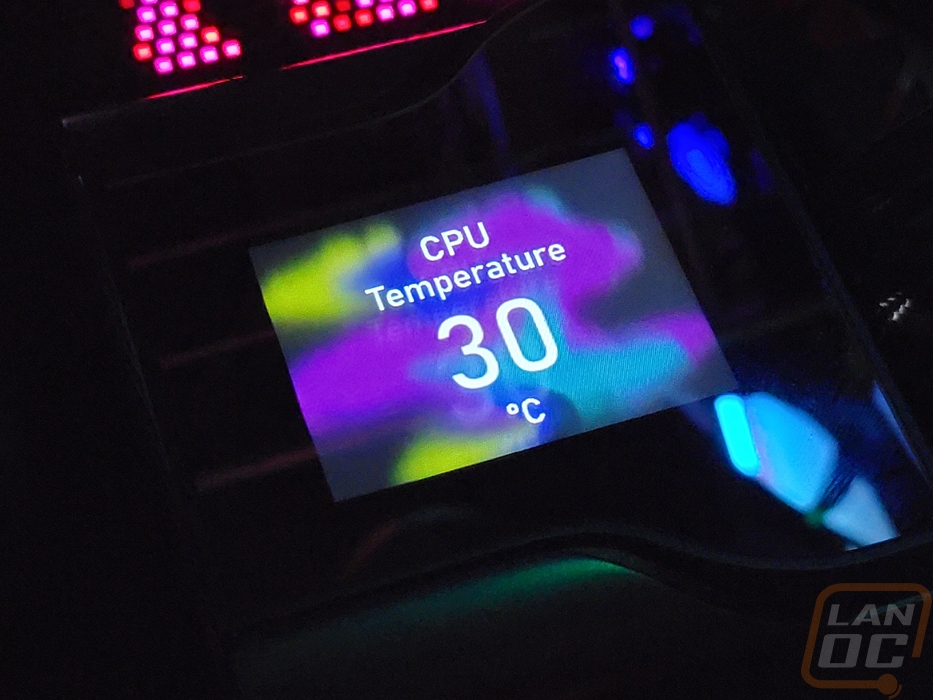
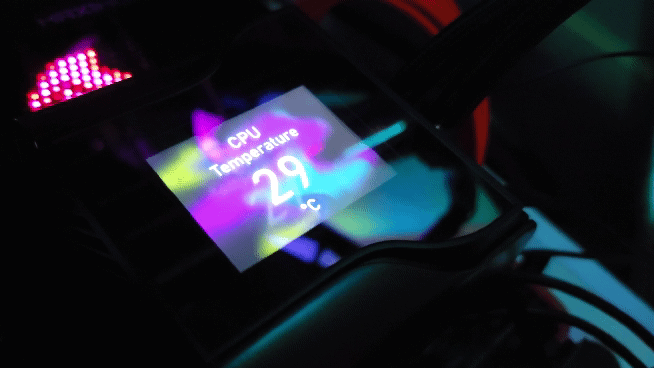
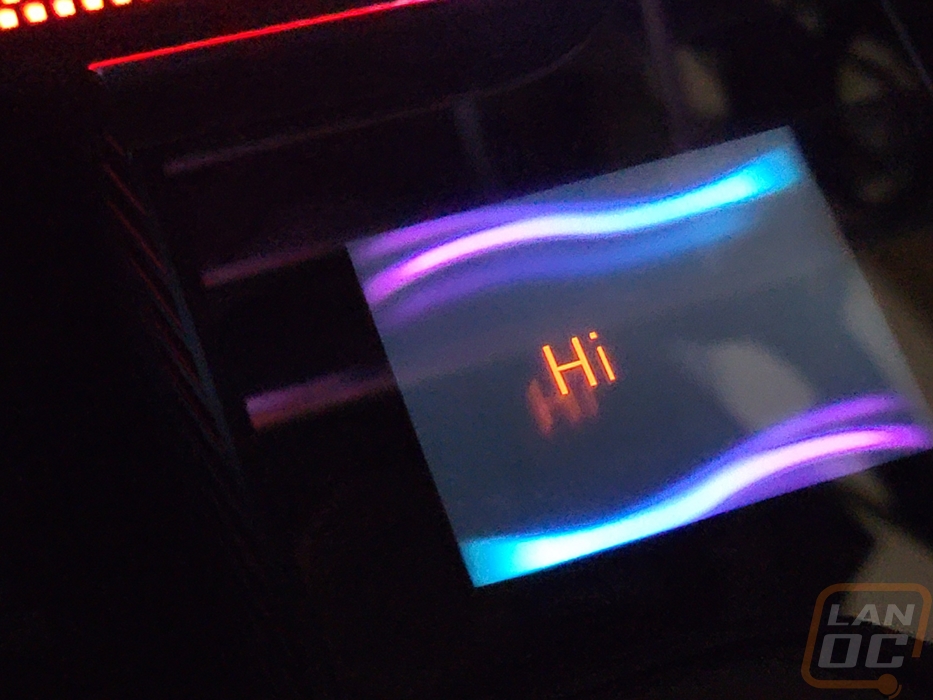
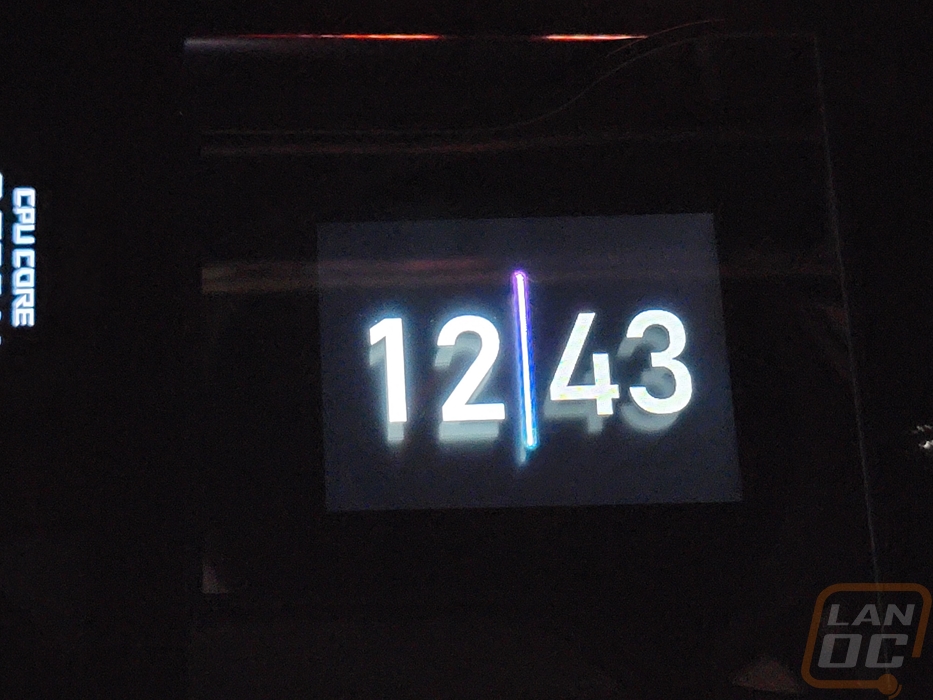
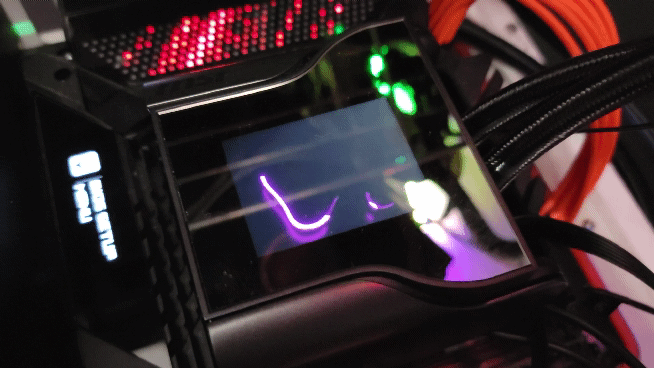
Overall MSI does give you a lot of control over the screen and the software is easy to use. The screen looks great at night but because they use a mirrored cover getting photos of the screen was a little difficult. It picks up a lot of reflections. The screen and then cover also can create another effect as well. If you aren’t looking right at the screen the gap between the cover and the screen itself can give a ghosting effect. You can see it in our photos because our test bench sits at an angle and also because taking direct on pictures was giving me fits with the reflections. In person, this effect isn’t nearly as noticeable but I do think in the future MSI could avoid issues by not having the cover or putting the cover up tight against the screen.
Cooling Performance
With everything set up, I could then jump into the rest of the performance testing with cooling performance. For this, we are running the Intel i9-12900K and except for the one test, the PL2 is set to the default 250 watts. To heat things up I used AIDA64’s Stress Test which has two different CPU workloads, one they call CPU and the other FPU. FPU focused on AVX instructions and is a significantly heavier workload, it is very similar to how a render would affect your PC where the CPU workload is more like how normal daily use or gaming would work the CPU when at 100% load. My first test was with the FPU stress test and I tested the CoreLiquid S280 with the stock fan profile which was the balanced in the software and again with the fans and pump turned to 100%. The CoreLiquid S280 did well with the stock profile, being the first out of the coolers tested under 90c with its 80c. Turning the fans up didn’t change things at all though it ran up to 89c there as well.
|
AIDA64 FPU Stress Test |
Stock Fan Profile |
100% Fan Speed |
|
Corsair iCUE H100i ELITE LCD Liquid CPU Cooler |
93c |
90c |
|
MSI MAG CoreLiquid C280 |
91c |
90c |
|
Sapphire Nitro+ S240-A |
91c |
89c |
|
Cooler Master MasterLiquid PL240 Flux |
90c |
89c |
|
Noctua NH-U12A chromax.black |
97c |
97c |
|
Noctua NH-U12S |
100c |
100c |
|
MSI MAG CoreLiquid S280 |
89c |
89c |
My next test was the same test, but this time around I uncapped the wattage that the CPU would pull, and using hwmonitor I documented the peak wattage that it reached. Here the better the cooling the higher the wattage will go. This also helps us see coolers that are underclocking due to thermals. The CoreLiquid S280 let our 12900K reach 273 watts which was one watt higher than the CoreLiquid C280 which has the same radiator/fan size.
|
AIDA64 FPU Stress Test With PL2 uncapped and 100% Fan Speed |
CPU Wattage |
|
Corsair iCUE H100i ELITE LCD Liquid CPU Cooler |
262 |
|
MSI MAG CoreLiquid C280 |
272 |
|
Sapphire Nitro+ S240-A |
258 |
|
Cooler Master MasterLiquid PL240 Flux |
261 |
|
Noctua NH-U12A chromax.black |
250 |
|
Noctua NH-U12S |
233 |
|
MSI MAG CoreLiquid S280 |
273 |
Last up I switched over to AIDA64’s CPU workload on the Stress Test. Unless you are rendering, this is what you can expect to see in day-to-day use so this is the most important to me. The CoreLiquid S280 with the stock fan profile which as a reminder was the quietest tested was also the coolest of the coolers tested. Turning the fans and pump all the way up did help cool things down here going from 62c to 57c which matched the performance of a few of the other coolers.
|
AIDA64 CPU Stress Test |
Stock Fan Profile |
100% Fan Speed |
|
Corsair iCUE H100i ELITE LCD Liquid CPU Cooler |
68c |
62c |
|
MSI MAG CoreLiquid C280 |
63c |
62c |
|
Sapphire Nitro+ S240-A |
65c |
57c |
|
Cooler Master MasterLiquid PL240 Flux |
63c |
57c |
|
Noctua NH-U12A chromax.black |
70c |
63c |
|
Noctua NH-U12S |
75c |
70c |
|
MSI MAG CoreLiquid S280 |
62c |
57c |
Overall and Final Verdict
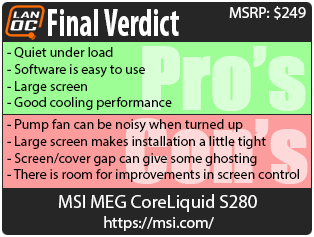
Not only can you now basically build an all MSI system with the exception of the memory and the CPU. With MSI bringing out more and more cooling options you aren’t forced into one specific path. They have cooling options from budget coolers or on the other end of the spectrum coolers like the MSI MEG CoreLiquid S280 with a large LCD screen on it and options in between. The CoreLiquid S280 takes a relatively standard OEM dual 140mm cooler design and adds on a 2.4-inch screen on top, a VRM cooling fan on top of the pump, and higher-end non-RGB fans. It’s kind of an interesting combination really, most companies who have been adding screens on their coolers have been going with fancy RGB fans but MSI with the CoreLiquid S280 is clearly targeting the same crowd as the ROG Ryujin which has a similar but larger top screen, the integrated pump fan, and Noctua fans. It is a good balance as well in my opinion, cooling is important and so is noise, at least for me. In my personal builds, I don’t need RGB fans, but I do like having some customization that the integrated screen can offer.
The CoreLiquid S280 performed well in our test suite with its 280mm cooling setup keeping the 12900K cooler than the other coolers tested. For noise, the Silent Gale fans did well but the integrated pump fan was a little noisy so our 50% and 100% fan speed tests were a little noisy but when the software was left to control things it was the quietest cooler tested as well. You do get a nice large screen, at least compared with the Ryuo and the Corsair options that I have previously tested but the latest ROG Ryujin II does have a larger screen which is an area a future model could improve on. The software was easy to use as well but I did find a few areas where MSI could add more customization for the CoreLiquid S280 screen in the future as well.
Beyond that my only other complaint would be with the reflective screen cover that the CoreLiquid S280 has. It made seeing the screen harder with other RGB lights around and the gap between the actual screen and the cover did sometimes create a ghosting effect if you aren’t looking at the screen head on. So there is room for improvement in the future, much like how the Ryujin changed from its first to second versions. But MSI is on the right track. As for pricing, the CoreLiquid S280 has an MSRP of $249.99 which is $10 less than the Ryujin II 240 but the Ryujin II gets you the Noctua branded fans and a larger screen. The CoreLiquid S280 however is selling for $232 at Newegg right now which better fits what you are getting and the Ryujin II is priced higher than MSRP at those retailers evening things out. Not to mention the CoreLiquid S280 is a larger cooler.
Live Pricing: HERE


