Rumors about Intel’s next generation of CPUs have been going around for a while but we recently saw that BIOS support for the future CPUs have been hitting some motherboards including Asus’s Z690 boards. This means that for those who are looking to build a high-end PC right now you can go with one of those Z690 boards with at least some confidence that an upgrade later will be possible. As far as Z690 boards go there is a HUGE range in features and pricing but there are a few cool options up on the high end. A good example of this is the ROG Maximus Z690 Extreme that we have been using on our test bench going back to the Z690 launch and it is high time that I take a close look at it so let’s check out what it has going on.
Product Name: Asus ROG Maximus Z690 Extreme
Review Sample Provided by: Asus
Written by: Wes Compton
Amazon Affiliate Link: HERE
|
Specifications |
|
|
CPU |
Intel® Socket LGA1700 for 12th Gen Intel® Core™, Pentium® Gold and Celeron® Processors Intel® Socket LGA1700 for 12th Gen Intel® Core™, Pentium® Gold and Celeron® Processors* Supports Intel® Turbo Boost Technology 2.0 and Intel® Turbo Boost Max Technology 3.0** * Refer to www.asus.com for CPU support list ** Intel® Turbo Boost Max Technology 3.0 support depends on the CPU types. |
|
Chipset |
Intel® Z690 Chipset |
|
Memory |
4 x DIMM, Max. 128GB, DDR5 6400+(OC)/ 6200(OC)/ 6000(OC)/ 5800(OC)/ 5600(OC)/ 5400(OC)/ 5200(OC)/5000(OC)/4800 Non-ECC, Un-buffered Memory* Dual Channel Memory Architecture Supports Intel® Extreme Memory Profile (XMP) OptiMem III *Supported memory types, data rate(Speed), and number of DRAM module vary depending on the CPU and memory configuration, for more information refer to www.asus.com for memory support list. |
|
Graphics |
2 x Intel® Thunderbolt™ 4 ports (USB Type-C®) support DisplayPort 1.4 and Thunderbolt™ video outputs * Graphics specifications may vary between CPU types. Please refer to www.intel.com for any updates. ***Support 4K@60Hz as specified in HDMI® 2.1. |
|
Expansion Slots |
Intel® 12th Gen Processors* 2 x PCIe 5.0 x16 slots (supports x16 or x8/x8 modes)** Intel® Z690 Chipset*** 1 x PCIe 3.0 x1 slot * Please check PCIe bifurcation table in support site. ** M.2_1 shares bandwidth with PCIEX16(G5)_2. When M.2_1 is enabled, PCIEX16(G5)_2 will be disabled. *** Support Intel® Optane Memory H Series on PCH-attached PCIe slot. |
|
Storage |
Supports 5 x M.2 slots and 6 x SATA 6Gb/s ports Total supports 5 x M.2 slots and 6 x SATA 6Gb/s ports* Intel® 12th Gen Processors M.2_1 slot (Key M), type 2242/2260/2280/22110*** - Intel® 12th Gen processors support PCIe 5.0 x4 mode. M.2_2 slot (Key M), type 2280 - Intel® 12th Gen processors support PCIe 4.0 x4 mode. Intel® Z690 Chipset** M.2_3 slot (Key M), type 2280 (supports PCIe 4.0 x4 & SATA modes) DIMM.2_1 slot (Key M) via ROG DIMM.2, type 2242/2260/2280/22110 (supports PCIe 4.0 x4 mode) DIMM.2_2 slot (Key M) via ROG DIMM.2, type 2242/2260/2280/22110 (supports PCIe 4.0 x4 mode) 6 x SATA 6Gb/s ports**** * Intel® Rapid Storage Technology supports NVMe RAID 0/1/5, SATA RAID 0/1/5/10. ** Intel® Rapid Storage Technology supports Intel® Optane Memory H Series on PCH attached M.2 slots. ***M.2_1 shares bandwidth with PCIEX16(G5)_2. When M.2_1 is enabled, PCIEX16(G5)_2 will be disabled. ****RAID configuration and boot drives are not supported on the SATA6G_E1-2 ports. |
|
Ethernet |
1 x Intel® 2.5Gb Ethernet 1 x Marvell® 10Gb Ethernet TUF LANGuard |
|
Wireless & Bluetooth |
Intel® Wi-Fi 6E |
|
USB |
Rear USB:Total 10 ports 1 x Thunderbolt™ 4 port (1 x USB Type-C®) 1 x USB 3.2 Gen 2x2 port (1 x USB Type-C®) 8 x USB 3.2 Gen 2 ports (7 x Type-A + 1 x USB Type-C®) Front USB:Total 10 ports 1 x Thunderbolt™ 4 connector (1 x USB Type-C®) 1 x USB 3.2 Gen 2x2 connector (supports USB Type-C®) 2 x USB 3.2 Gen 1 headers support additional 4 USB 3.2 Gen 1 ports 2 x USB 2.0 headers support additional 4 USB 2.0 ports |
|
Audio |
ROG SupremeFX 7.1 Surround Sound High Definition Audio CODEC ALC4082 - Impedance sense for front and rear headphone outputs - Supports: Jack-detection, Multi-streaming, Front Panel Jack-retasking - High quality 120 dB SNR stereo playback output and 113 dB SNR recording input - Supports up to 32-Bit/384 kHz playback Audio Features - SupremeFX Shielding Technology - ESS® SABRE9018Q2C DAC/AMP - LED-illuminated audio jacks - Rear optical S/PDIF out port - Premium audio capacitors - Audio cover |
|
Back Panel I/O Ports |
1 x Thunderbolt™ 4 USB Type-C® port 1 x USB 3.2 Gen 2x2 port (1 x USB Type-C®) 8 x USB 3.2 Gen 2 ports (7 x Type-A + 1 x USB Type-C®) 1 x HDMI® port 1 x ASUS Wi-Fi Module 1 x Intel® 2.5Gb Ethernet port 1 x Marvell® AQtion 10Gb Ethernet port 5 x LED-illuminated audio jacks 1 x Optical S/PDIF out port 1 x BIOS FlashBack™ button 1 x Clear CMOS button |
|
Intrernal I/O Connectors |
Fan and Cooling related 1 x 4-pin CPU Fan header 1 x 4-pin CPU OPT Fan header 2 x 4-pin Chassis Fan headers 2 x 4-pin Radiator Fan headers 2 x W_PUMP+ headers 1 x WB_SENSOR header 1 x 2-pin Water In header 1 x 2-pin Water Out header 1 x 3-pin Water Flow header Power related 1 x 24-pin Main Power connector 2 x 8-pin +12V Power connector 1 x 6-pin PCIe Graphics Card connector Storage related 3 x M.2 slots (Key M) 1 x DIMM.2 slot supports 2 x M.2 slots (Key M) 6 x SATA 6Gb/s ports USB 1 x Intel® Thunderbolt™ 4 port (USB Type-C®) 1 x USB 3.2 Gen 2x2 connector (supports USB Type-C®) 2 x USB 3.2 Gen 1 headers support additional 4 USB 3.2 Gen 1 ports 2 x USB 2.0 headers support additional 4 USB 2.0 ports Miscellaneous 1 x 6-pin ARGB Gen 2 header to support 2 x ARGB Gen 2 headers 1 x Addressable Gen 2 header 1 x AURA RGB header 1 x BIOS Switch button 2 x BCLK button 1 x FlexKey button 1 x Front Panel Audio header (AAFP) 1 x LN2 Mode jumper 1 x Osc sence header 12 x ProbeIt Measurement Points 1 x ReTry button 1 x RSVD switch 1 x RSVD header 1 x Safe Boot button 1 x Slow Mode switch 1 x Start button 1 x V_Latch switch 1 x 10⁻¹ pin System Panel header 1 x Thermal Sensor header |
|
Special Features |
Extreme OC Kit - FlexKey button - LN2 Mode - Probelt - ReTry button - Safe boot button - Start button - Slow Mode Extreme Engine Digi+ - 10K Black Metallic Capacitors - MicroFine Alloy Choke ASUS Q-Design - M.2 Q-Latch - PCIe Slot Q-Release - Q-Code - Q-Connector - Q-DIMM - Q-LED (CPU [red], DRAM [yellow], VGA [white], Boot Device [yellow green]) - Q-Slot ASUS Thermal Solution - M.2 heatsink backplate - M.2 heatsink - Steel backplate - VRM heatsink design ASUS EZ DIY - BIOS FlashBack™ button - Clear CMOS button - CPU Socket lever protector - ProCool II - Pre-mounted I/O shield - SafeSlot - SafeDIMM AURA Sync - ROG AURA sync backplate - AURA RGB header(s) - Addressable Gen 2 header(s) Dual BIOS OLED 2" Front Panel USB 3.2 Gen 2x2 with Quick Charge 4+ Support - Support: up to 60W charging* - Output: 5/9/15/20V max. 3A, PPS:3.3–21V max. 3A - Compatible with QC 4.0/3.0/2.0, PD3.0 and PPS * To support 60W, please install the power cable to 6-pin PCIe Graphics Card connector or can only support 27W ASUS HYDRANODE - 2 x Chassis fan support* (CHA_FAN1P,CHA_FAN2P) * Visit ASUS Website for the latest compatibility list. |
|
Software Features |
ROG Exclusive Software - GameFirst VI - ROG CPU-Z - ROG True Voltician - Sonic Studio III + Sonic Studio Virtual Mixer + Sonic Suite Companion - Sonic Radar III - DTS® Sound Unbound - BullGuard Internet Security (1-year full version) ASUS Exclusive Software Armoury Crate - AIDA64 Extreme (1-year full version) - AURA Creator - AURA Sync - Fan Xpert 4 - Two-Way AI Noise Cancelation - OLED Display - AniMe MatrixTM LED Display AI Suite 3 - Easy Optimization with AI Overclocking TPU EPU DIGI+ Power Control Turbo app MyAsus WinRAR UEFI BIOS AI Overclocking Guide ASUS EZ DIY - ASUS CrashFree BIOS 3 - ASUS EZ Flash 3 - ASUS UEFI BIOS EZ Mode MemTest86 |
|
BIOS |
2 x 256 Mb Flash ROM, UEFI AMI BIOS |
|
Manageability |
WOL by PME, PXE |
|
Accessories |
Cables 1 x 1-to-3 ARGB splitter cable 1 x 1-to-2 ARGB splitter cable 2 x 1-to-4 fan splitter cables 1 x RGB extension cable 3 x ROG weave SATA 6G cables 4 x SATA 6Gb/s cables 1 x 3-in-1 Thermistor cables pack ROG Fan Controller 1 x ROG Fan Controller 1 x Fan EXT PWR cable 1 x ARGB input cable 1 x USB input cable 1 x ROG Fan Controller 3M Mounting tape 1 x Fan Controller manual ROG DIMM.2 with Heatsink 1 x ROG DIMM.2 with heatsink 1 x M.2 pad for ROG DIMM.2 2 x M.2 screw package for ROG DIMM.2 ROG True Voltician 1 x ROG True Voltician 4 x cables for ROG True Voltician Miscellaneous 1 x ASUS Wi-Fi moving antennas 1 x M.2 SSD screw package 1 x Q-connector 1 x ROG CLAVIS DAC 1 x ROG graphics card holder 1 x ROG key chain 1 x ROG logo plate stickers 1 x ROG screwdriver 1 x ROG stickers 1 x ROG thank you card 1 x Thermal pad package for M.2 heatsink Installation Media 1 x USB drive with utilities and drivers Documentation 1 x User guide |
|
Form Factor |
EATX 30.5cm x 27.7cm |
Packaging and Accessories
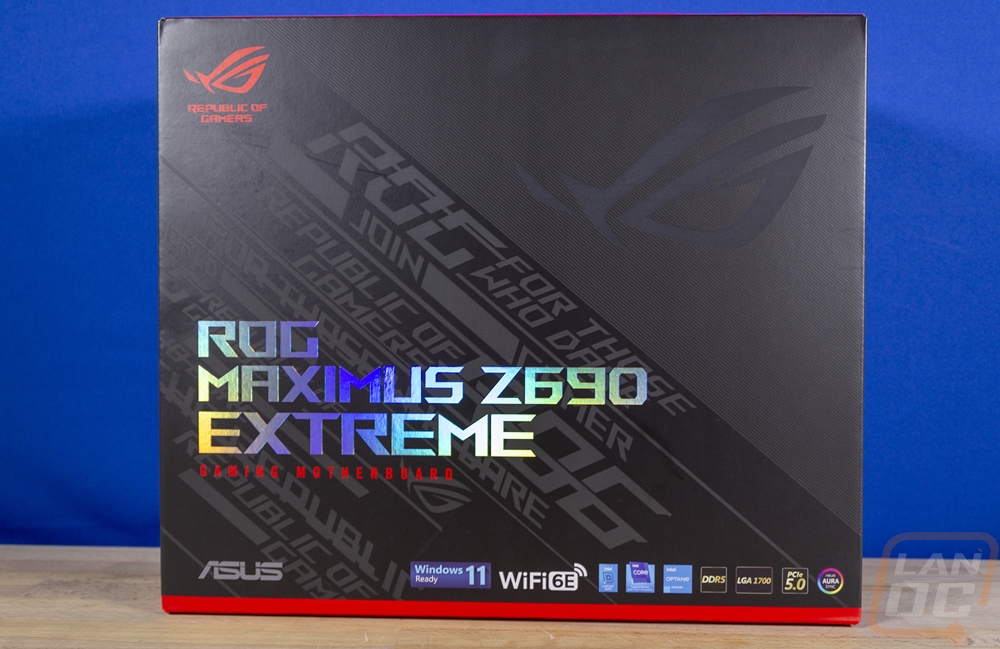
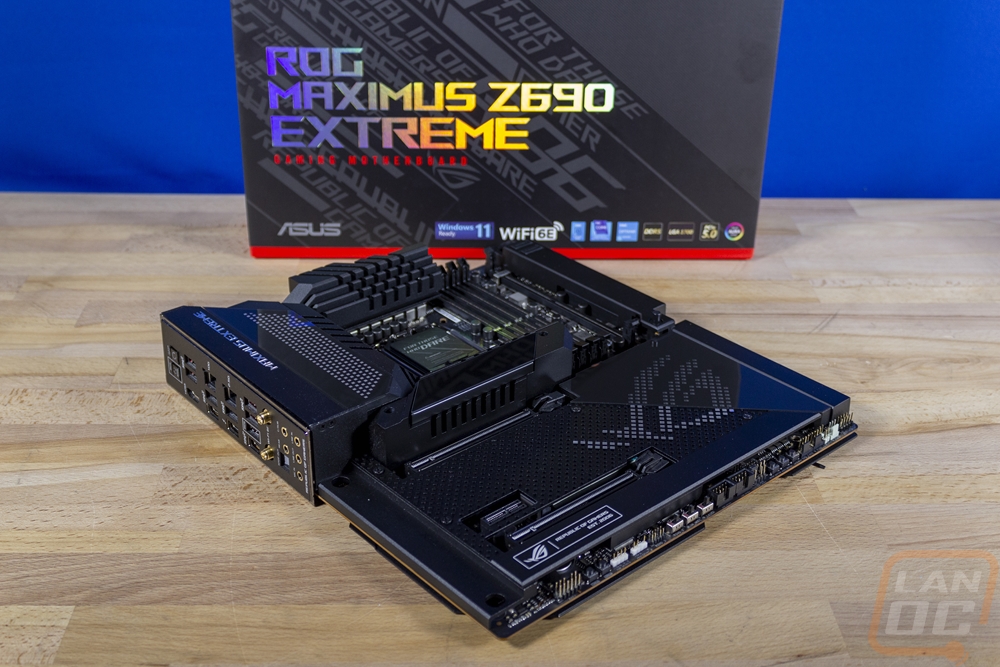
The Maximus Z690 Extreme comes in a big and heavy box and being an ROG product it does, of course, have their black and red theme with a flat black background and the red trim at the bottom as well as on the ROG logo in the top left corner. Asus has used glossy black and some dark grey on top of the flat black finish to put multiple ROG logos and sayings in the background as well as a large logo up in the top right area. But the model name itself has a holographic reflective finish on it for it to stand out. Then down along the bottom, they have the Asus logo and a few badges to give hints at some of the features like the WiFi 6E logo and the required stuff from Intel to show which CPUs it supports. Then around on the back, they have the black background again with red as accents around multiple pictures. They have a photo of the entire Maximus Z690 Extreme as well as closer zoomed-in pictures of different features. There is also a partial specification listing here as well to give you a hint as to what the board has to offer.

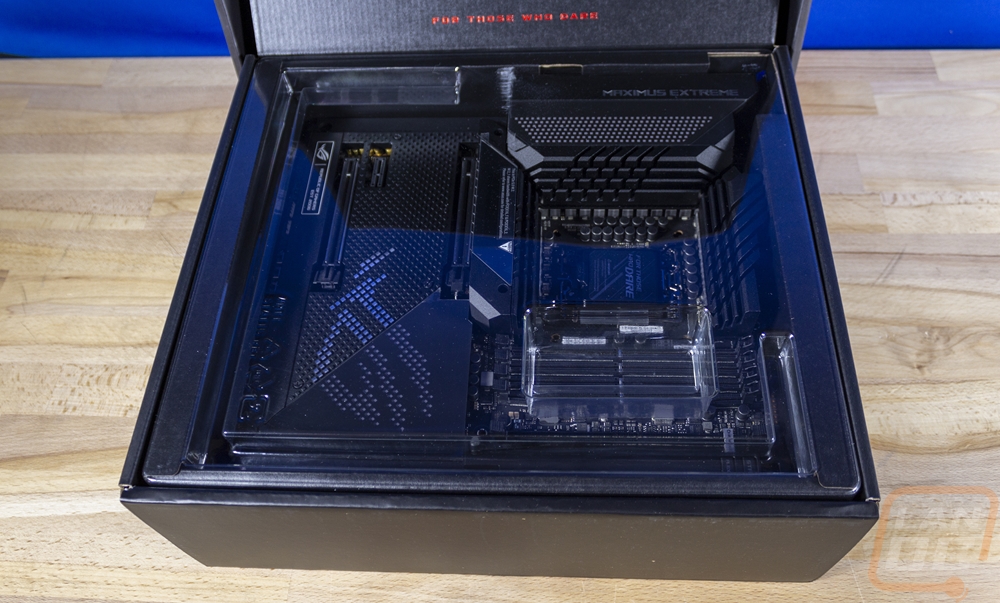
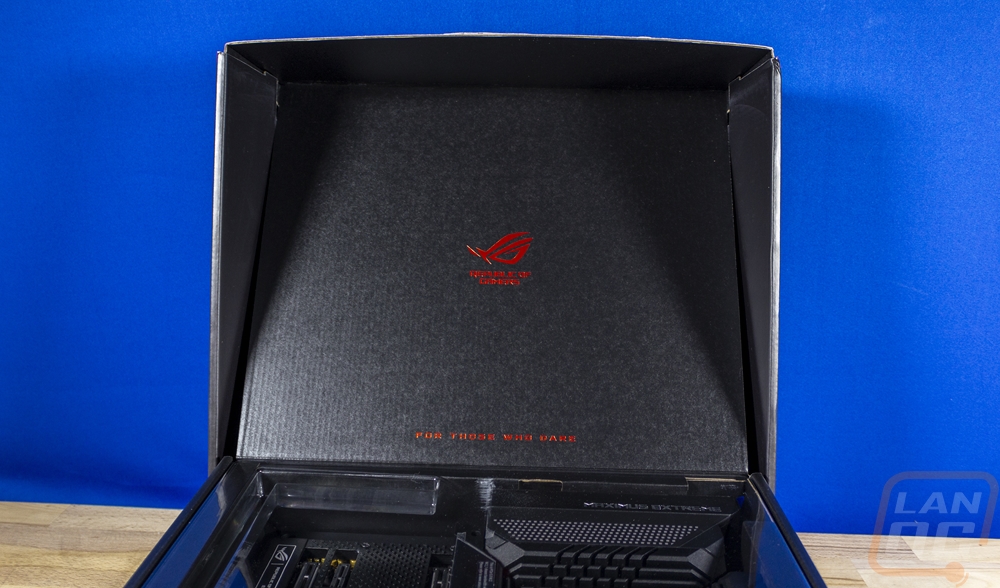
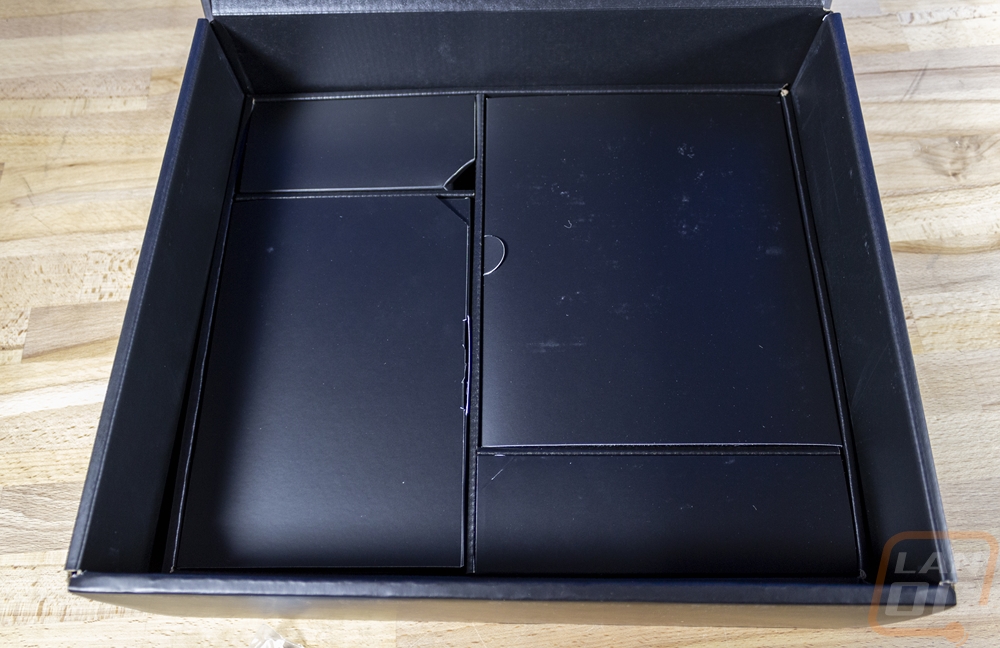
The box opens up and has the ROG logo featured with “for those who dare” under it. Then right on top, you can see the Maximus Z690 Extreme sitting under a clear plastic cover. I dig how they showcase the board and you get a proper unboxing experience by being able to see it right away rather than having it in a static bag. The board sits in its cardboard tray which you can pull out and under that, there are multiple compartments where Asus has tucked away all of the accessories and documentation that come with the Maximus Z690 Extreme, and trust me there is a LOT of stuff here.
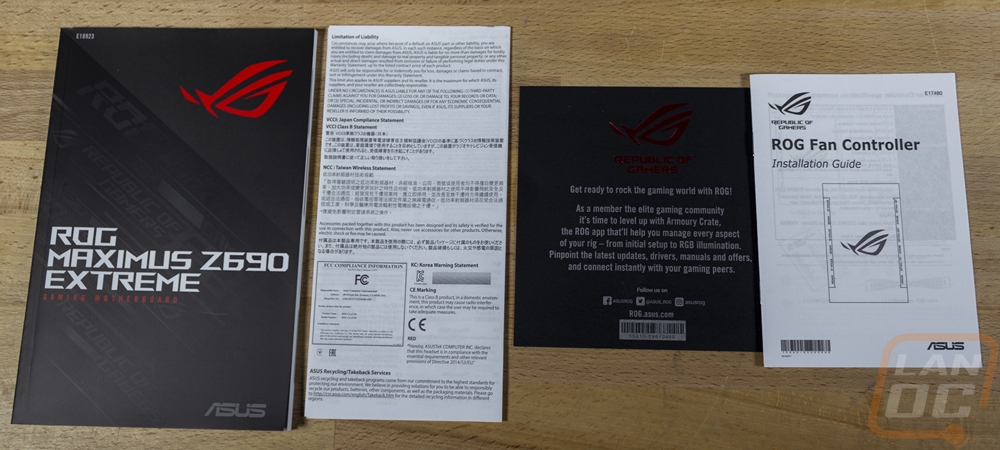
For documentation, there is a whole stack of papers. You get a thick user's manual of course. Along with it, there is an installation guide for the included ROG fan controller. You have a legal information page with the legal details and then a card welcoming you to the world of ROG. The user manual also has a full sheet of stickers tucked away inside as well. These have a reflective like finish and there is a whole variety of variations on the logo.

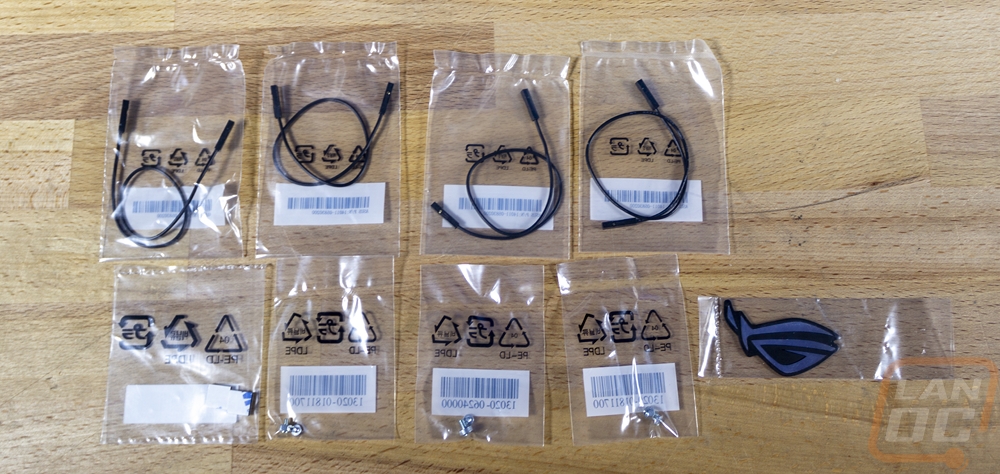
There is a whole stack of small baggies. Four of them have small one-pin wires for the ROG True Voltician. There are a few with standoffs and screws for the M.2 slots and you even get an ROG logo-shaped case badge.
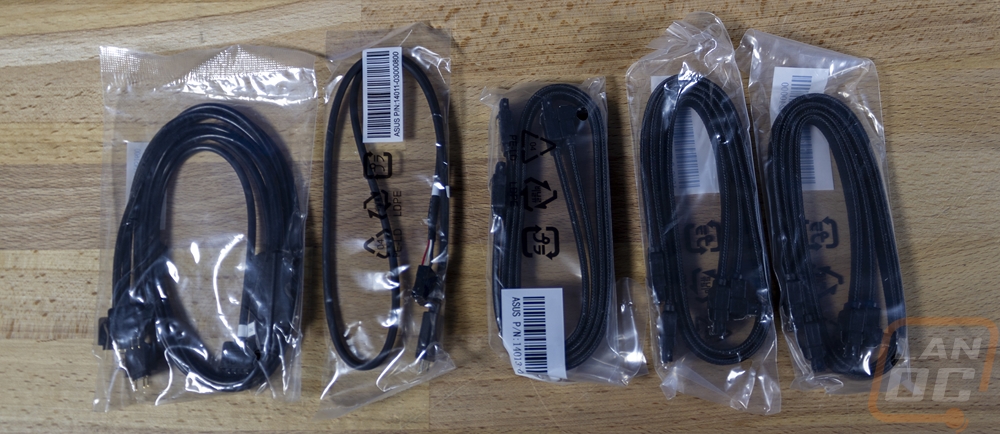
The next big bundle of cables which was in its own section gets you the SATA cables of course which are all blacked out and have a weave sleeving over them. The sleeving is a big upgrade over the standard cheap SATA cables you get with most boards. The bag on the left has a few different addressable RGB cables. The Maximus Z690 Extreme comes with a few aRGB splitter cables as well as an extension cable as well.
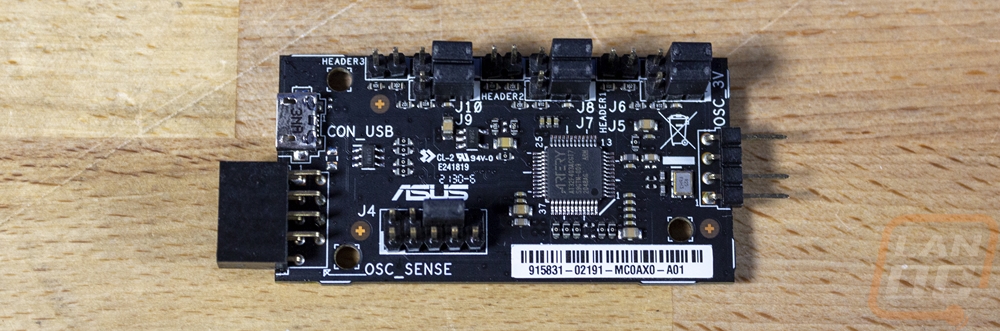
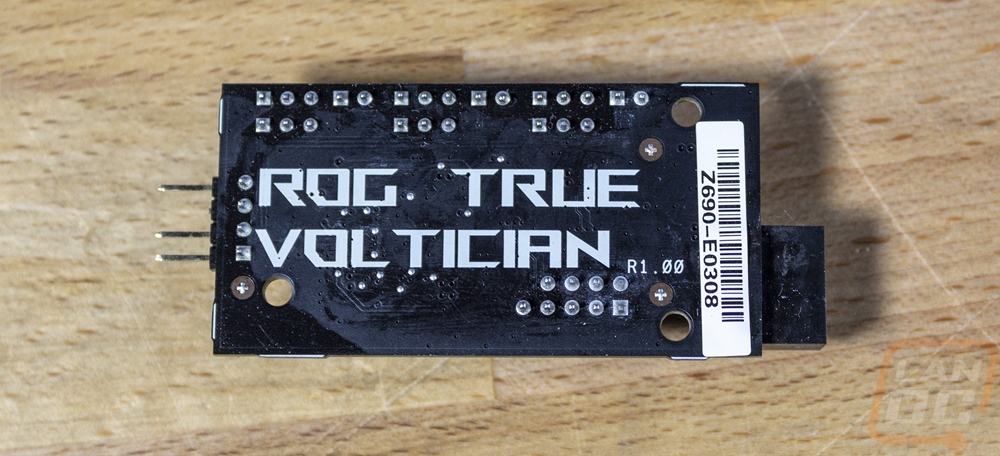
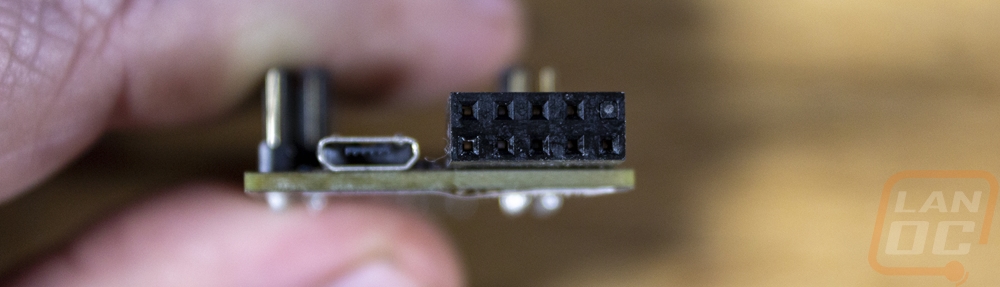
This is the ROG True Voltician that I mentioned before and this is an oscilloscope which can check and through the software display real-time voltage waveform curves. You can use the USB header on the side to plug it right into a header or the micro-USB plug to use a cable to put it to use.
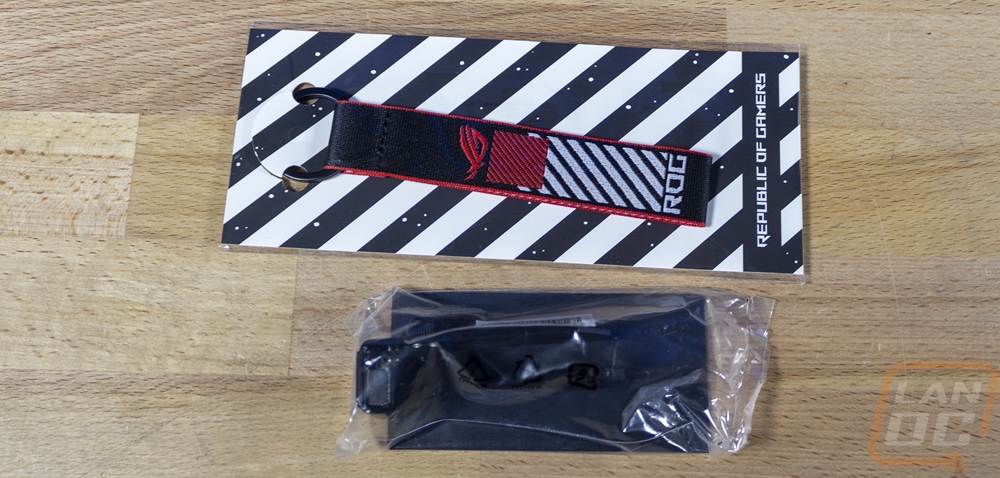
They have included some ROG swag for Maximus Z690 Extreme owners. You get a high-quality ROG keychain and a metal ROG branded GPU stand which is adjustable and has a padded tip on it.
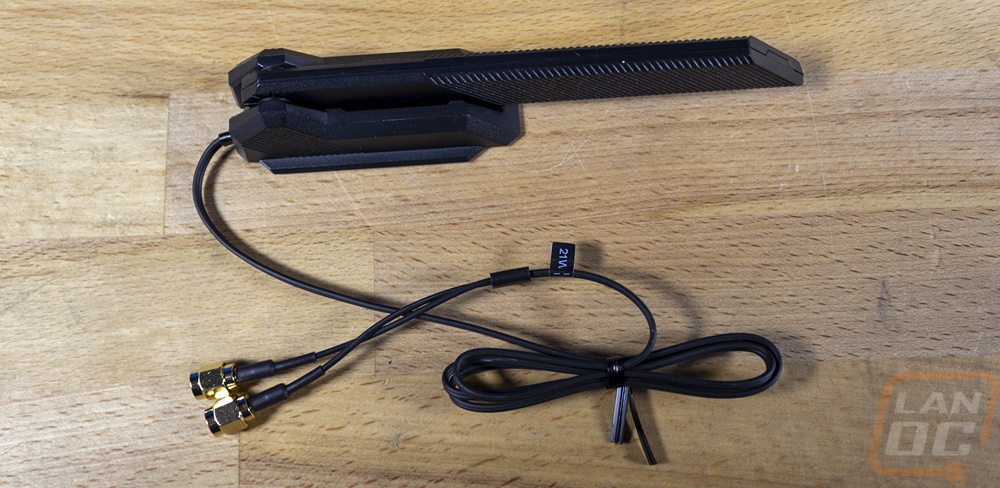
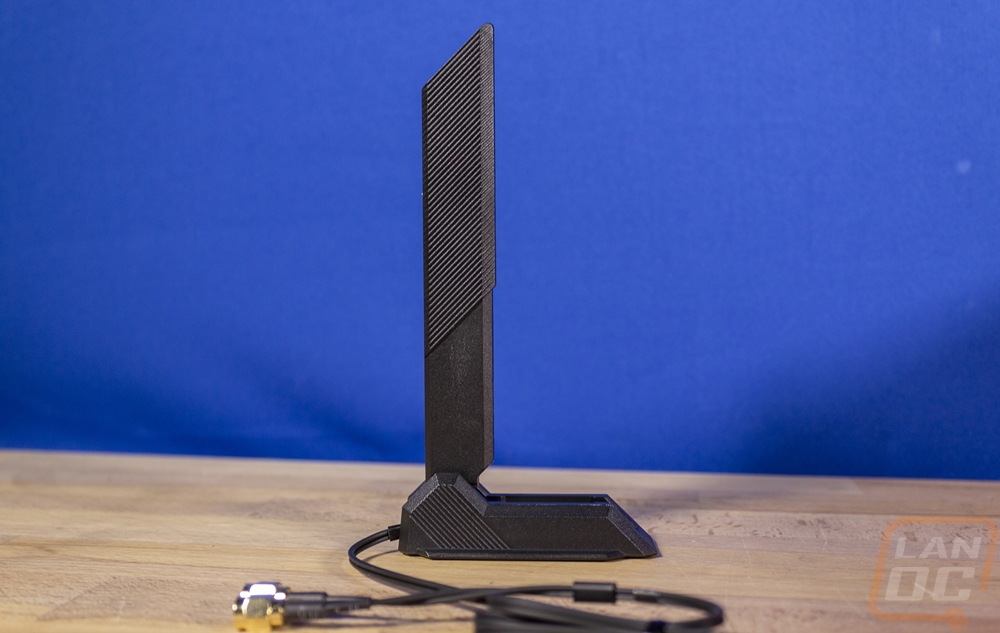
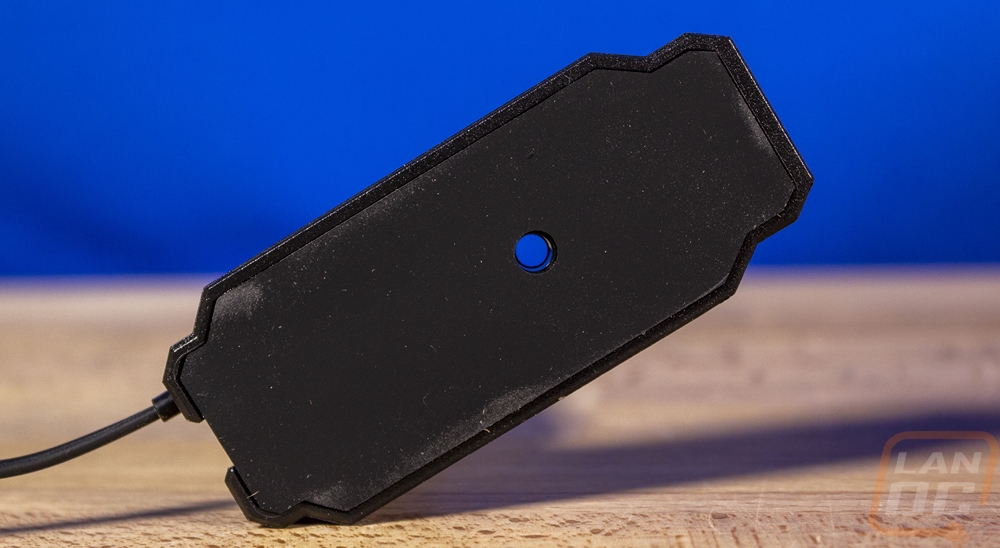
There is one section in the bottom half of the Maximus Z690 Extreme box that had foam with cutouts to hold the most delicate accessories. One of those is the wireless antenna which is the TUF style that I’ve seen with the last few generations of Asus motherboards that have onboard wireless. The antenna flips up and the base has rubber across the entire bottom to keep it from moving around too much. It also has a magnet built-in as well to stick it to your case if it is steel.
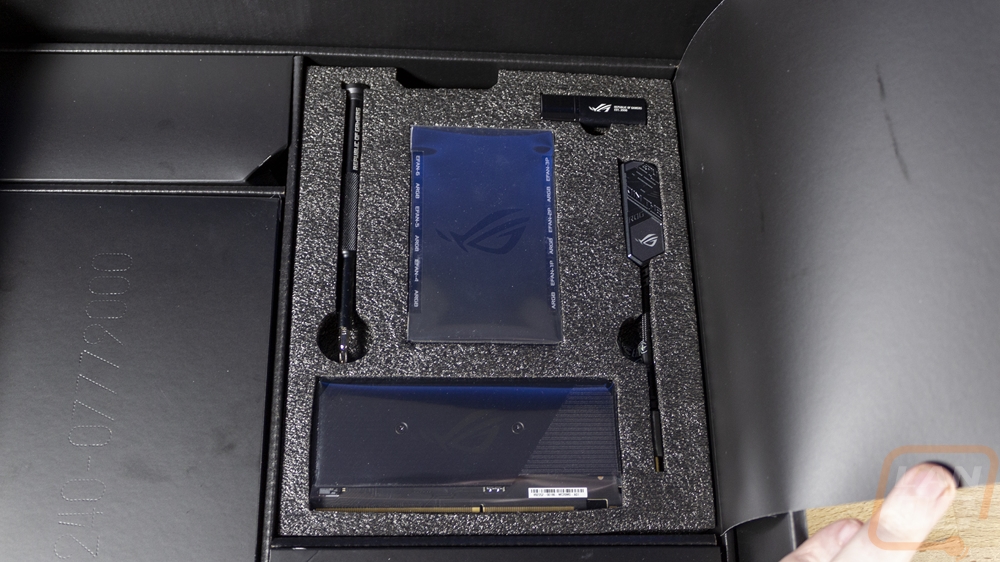
Here is a look at the rest that was in the foam compartment. This section has an ROG screwdriver as well as the ROG branded USB drive which comes with the software and drivers installed.
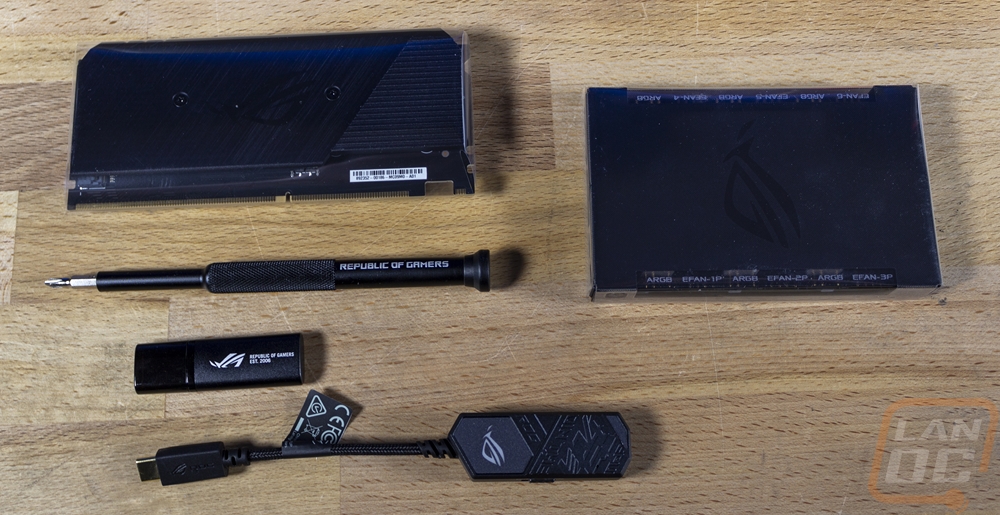
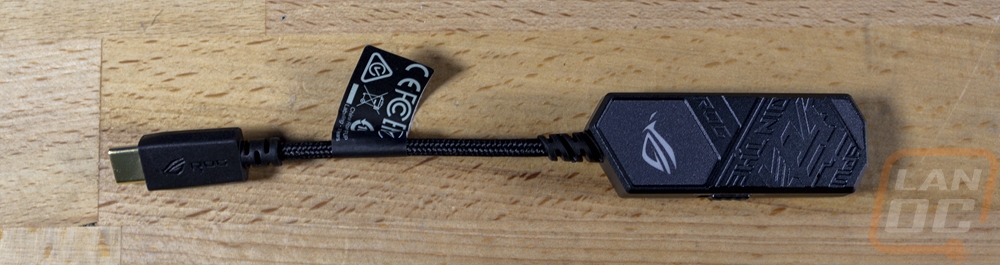
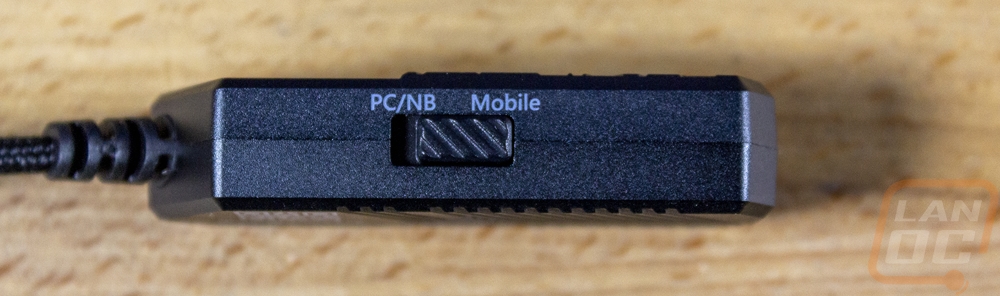
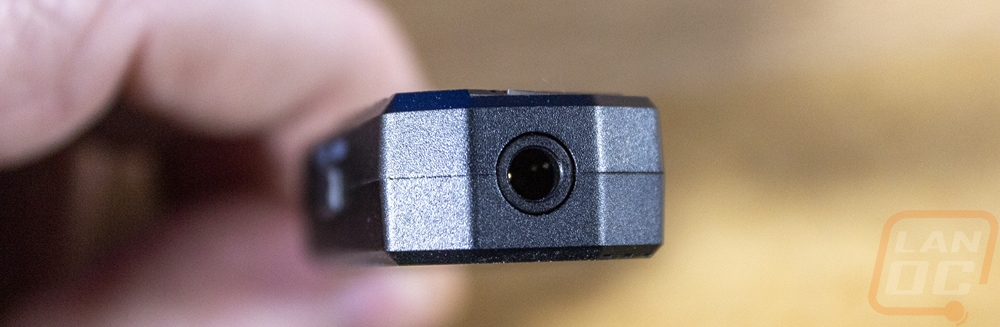
The device with a short cord is a DAC which is an interesting addition on top of having great onboard on the Maximus Z690 Extreme. The DAC has a Type-C connection and the sleeved cable. Then the plastic housing has ROG branding embossed all over it and a light-up RGB logo as well. It can work with your PC or with a mobile phone which is what the switch on the side is for. Then on the end is the standard 2.5mm headphone jack for headphone and microphone hookup.
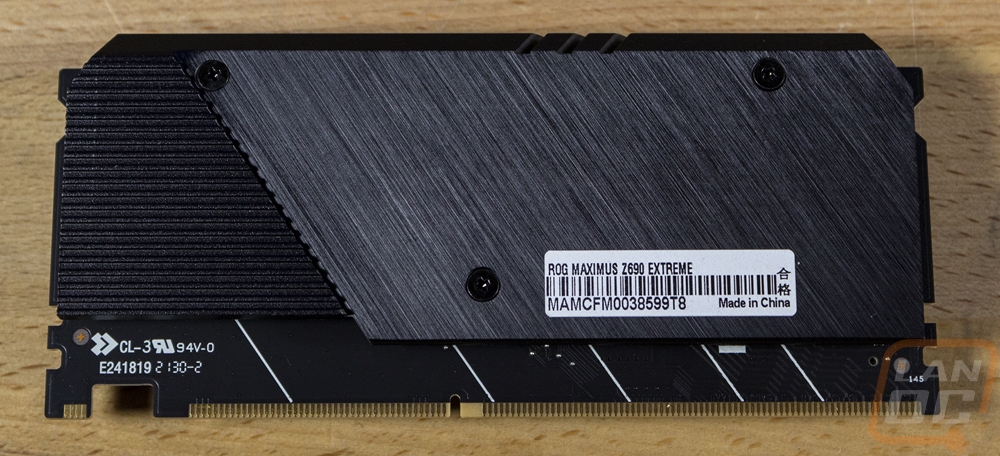
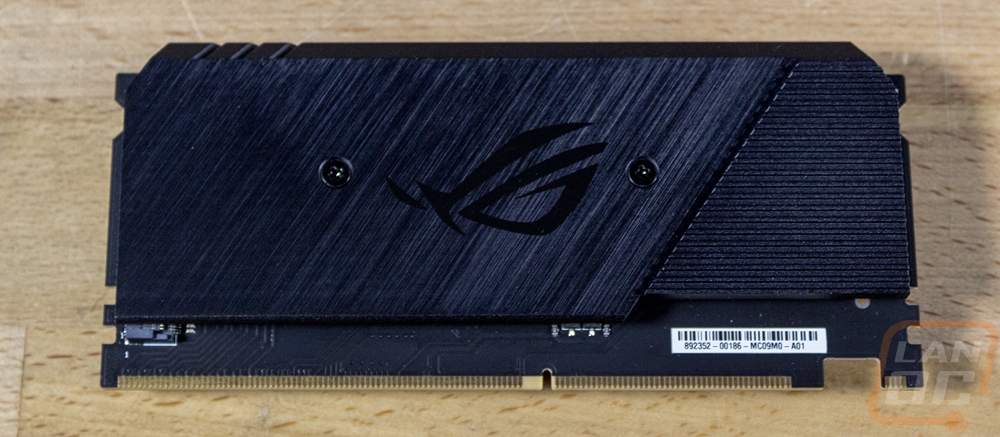
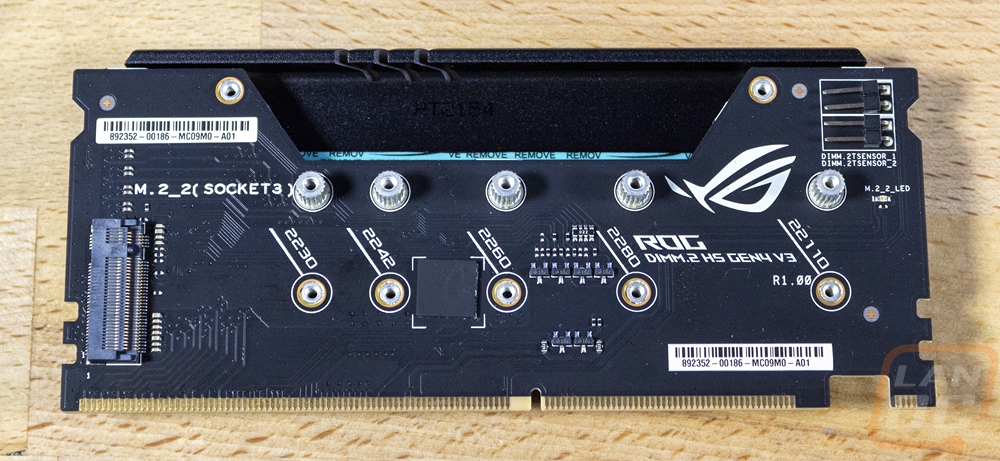
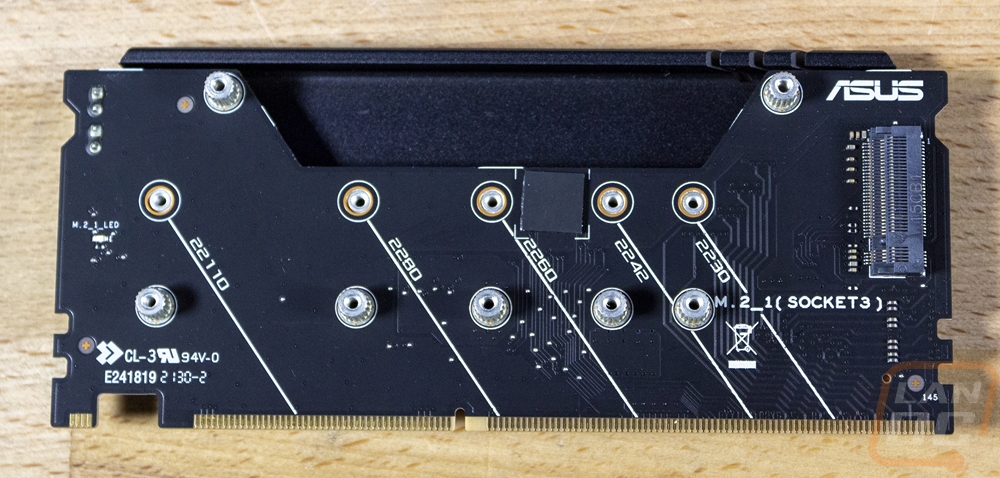
The Maximus Z690 Extreme of course comes with a DIMM.2 riser card and this is a newer version that supports PCIe 4.0 on both of its M.2 sockets. This version also comes with a thick blacked-out aluminum heatsink as well to keep everything matching once you install your M.2 drives. This installs in a slot on the Maximus Z690 Extreme that is similar to a RAM DIMM but is designed for the Dimm.2 and the riser card gives the Maximus Z690 Extreme two more M.2 slots on top of the three other M.2 slots on the board.
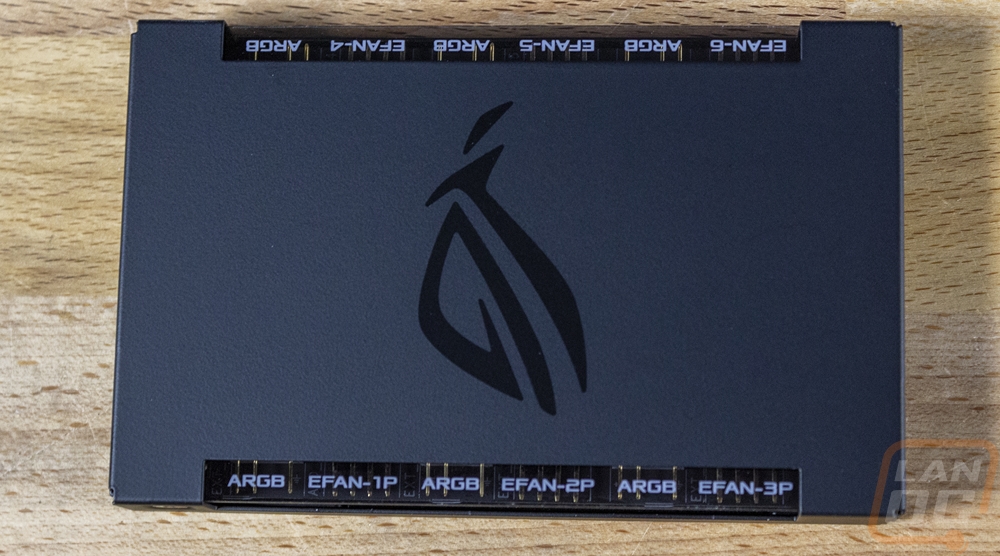
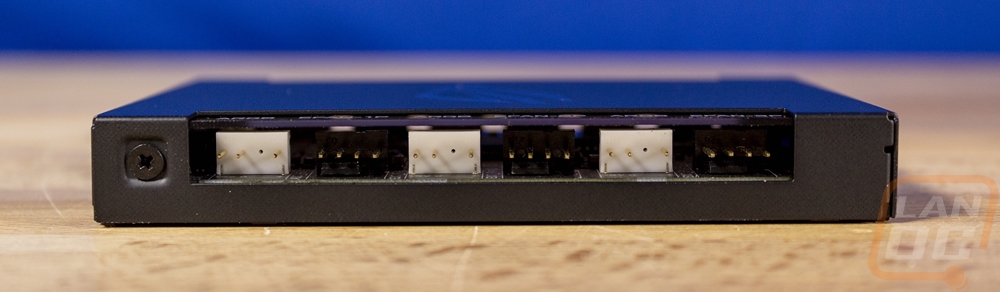
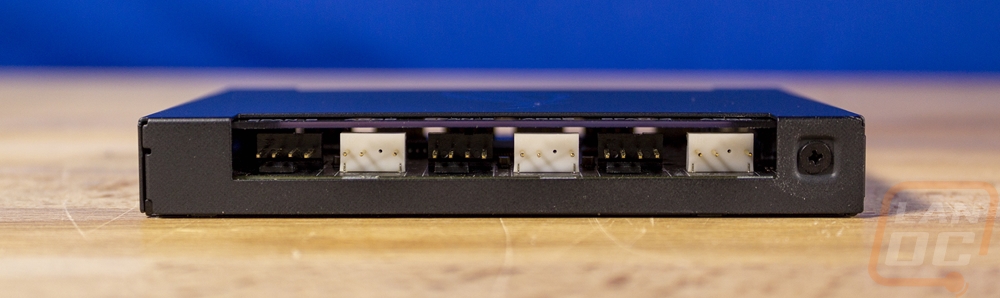
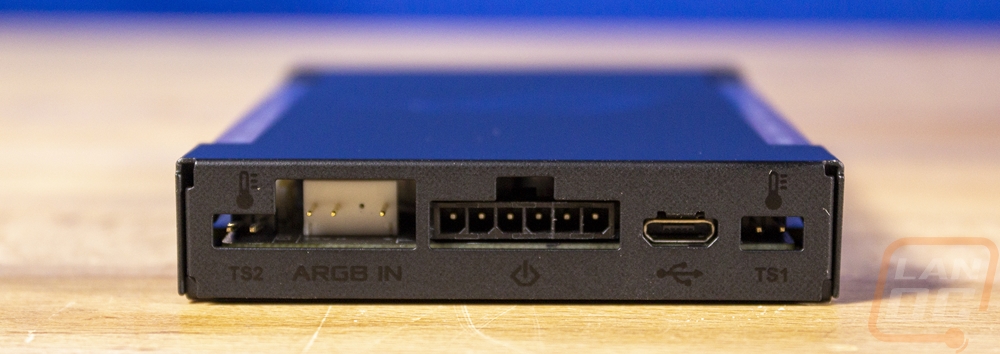
Last up is the ROG fan controller but it does more than add additional FAN headers. It has a black metal housing with the ROG logo on top and has connections running up both sides. Every other plug is a PWM fan header and the connections between those are all addressable RGB headers which adds an impressive amount of lighting if you should need it. On the end, there is a USB plug and the power connection as well as one ARGB-in header. Then the two small two-pin connections are both for thermistors. For those really crazy builds this is a cool addition, the Maximus Z690 Extreme itself already comes with 8 fan headers on the board, three addressable RGB, and three thermistor headers so it’s going to take some crazy builds for this to come into play at all.
Board Layout and Pictures
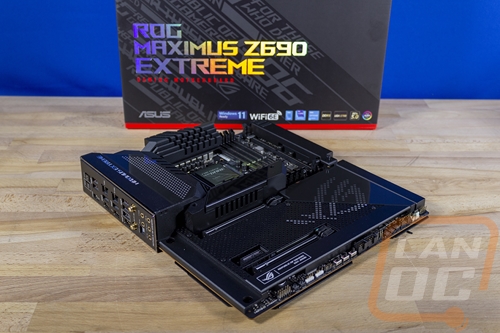
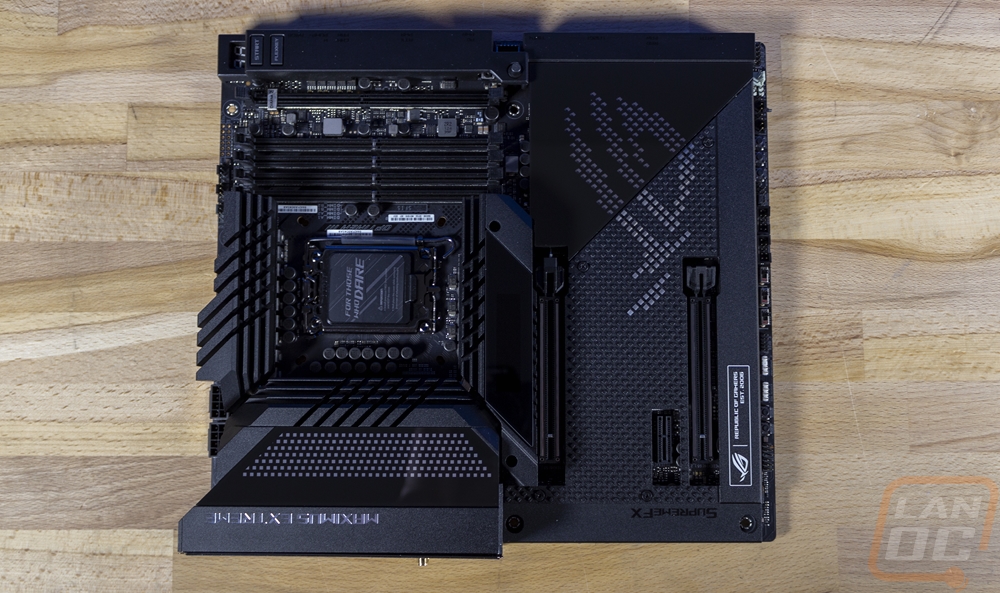
So the Maximus Z690 Extreme along with the watercooled Maximus Z690 Extreme Glacial are Asus’s highest-end Z690 motherboards so it isn’t a surprise that the Maximus Z690 Extreme is pushing the limits of the EATX form factor at 305 mm tall and 277 mm wide. The Maximus Z690 Extreme stands out when compared to their other motherboards because a majority of the board is covered with heatsinks and displays with only small bits of the PCB being visible around the CPU socket and the ram DIMMS.
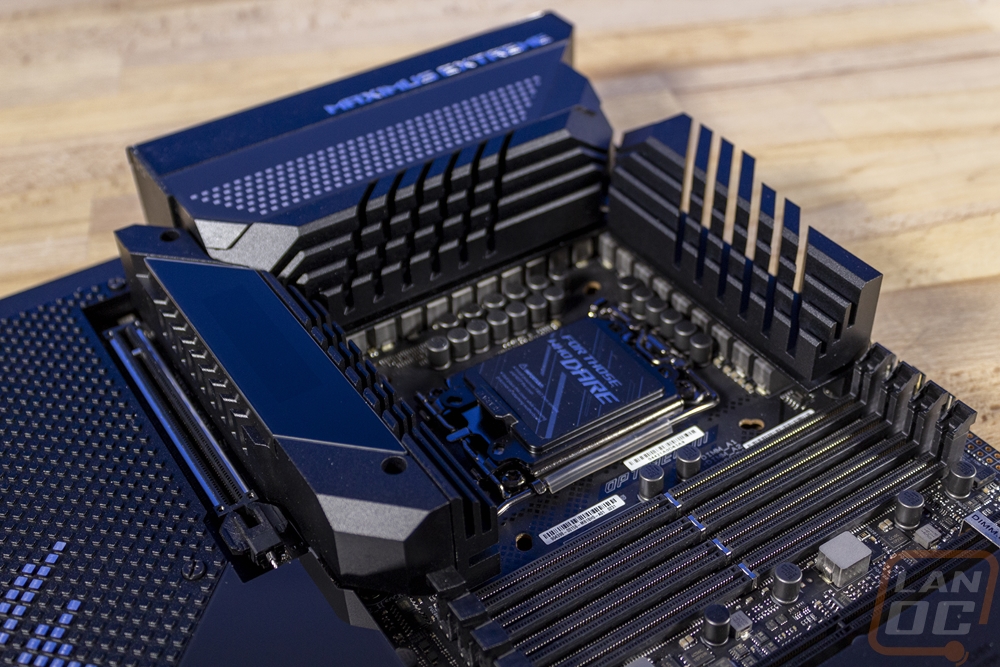
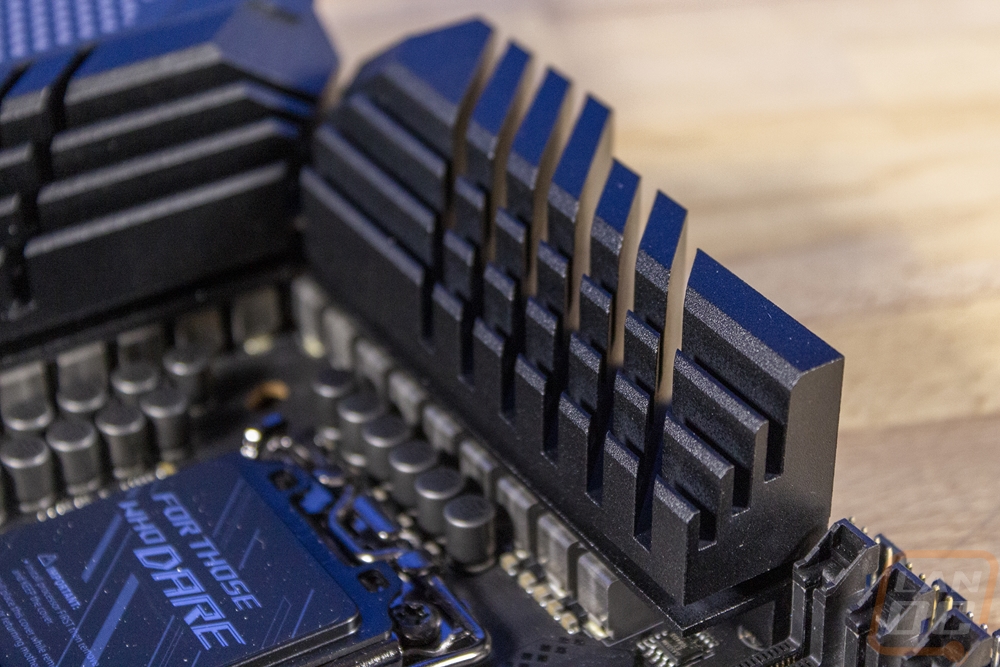
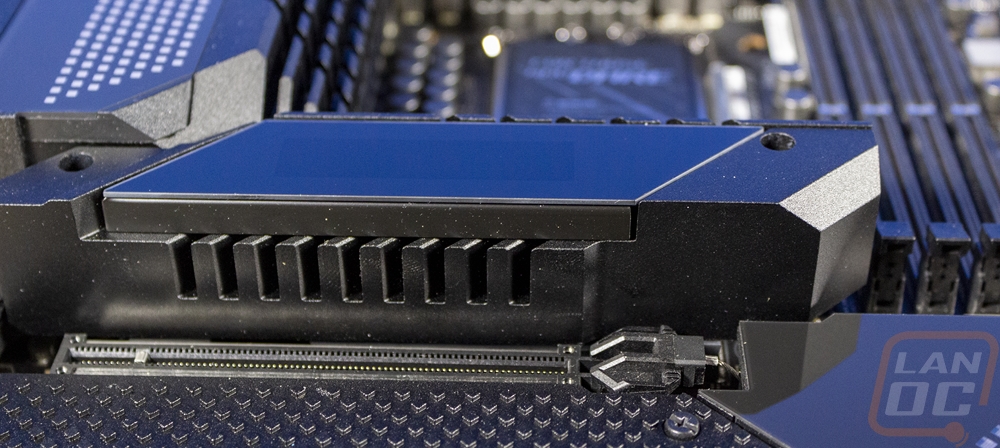
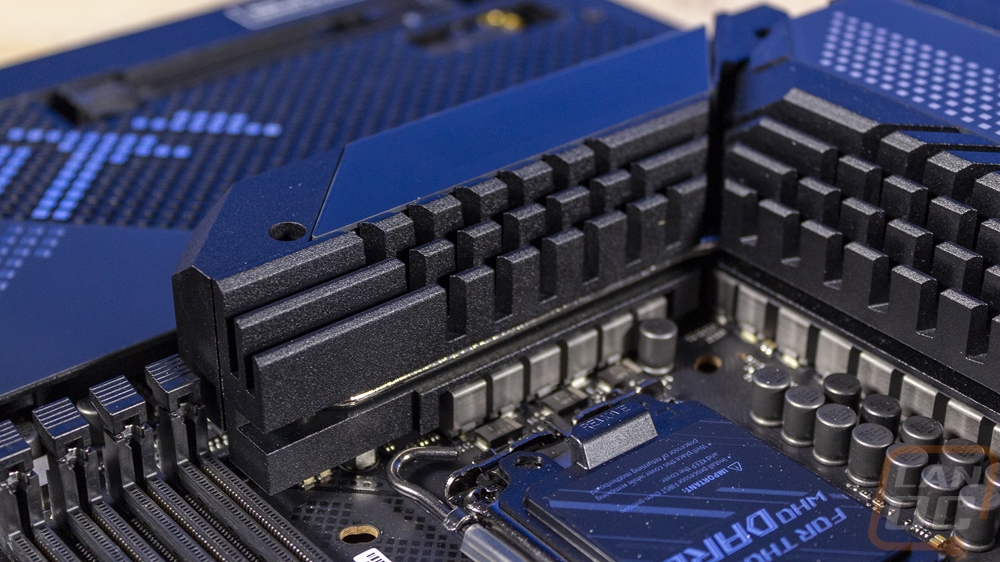
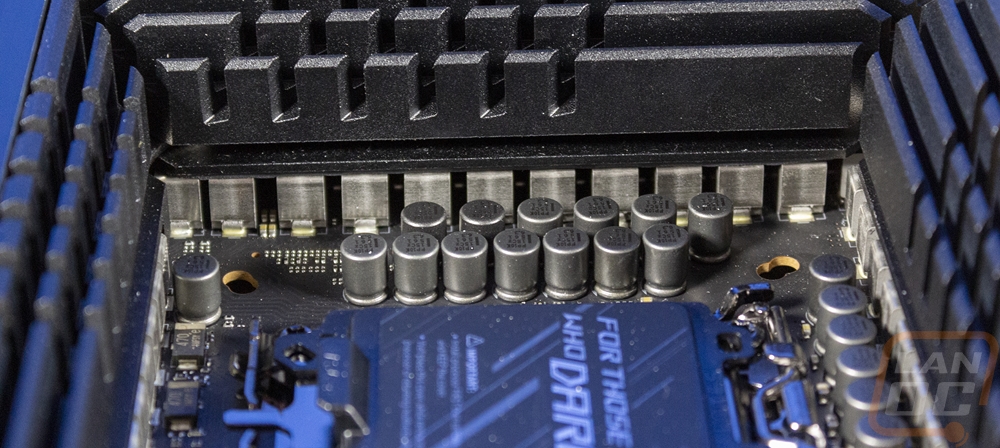
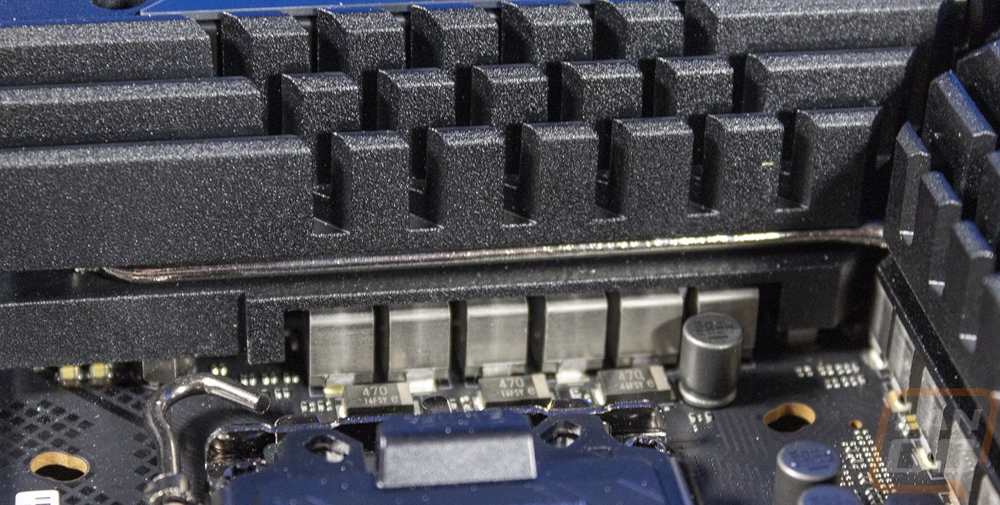
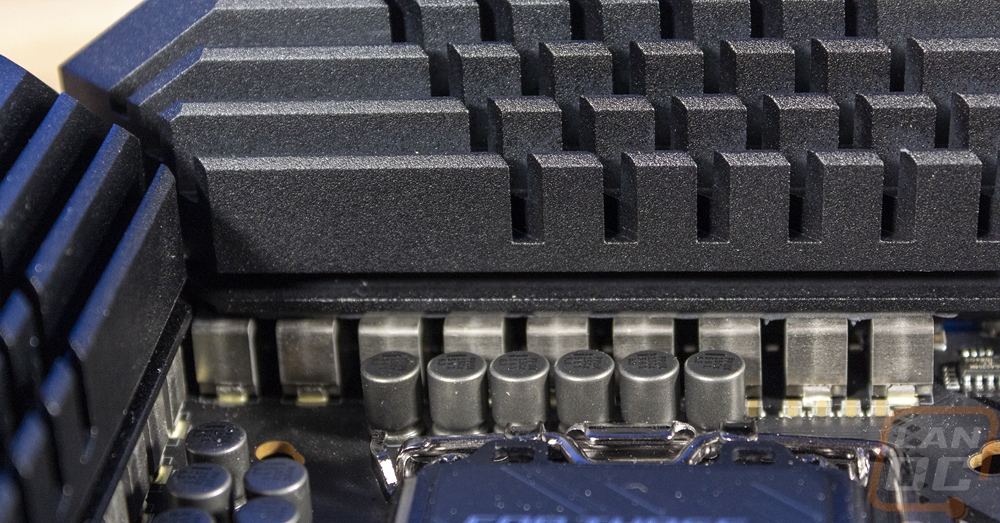
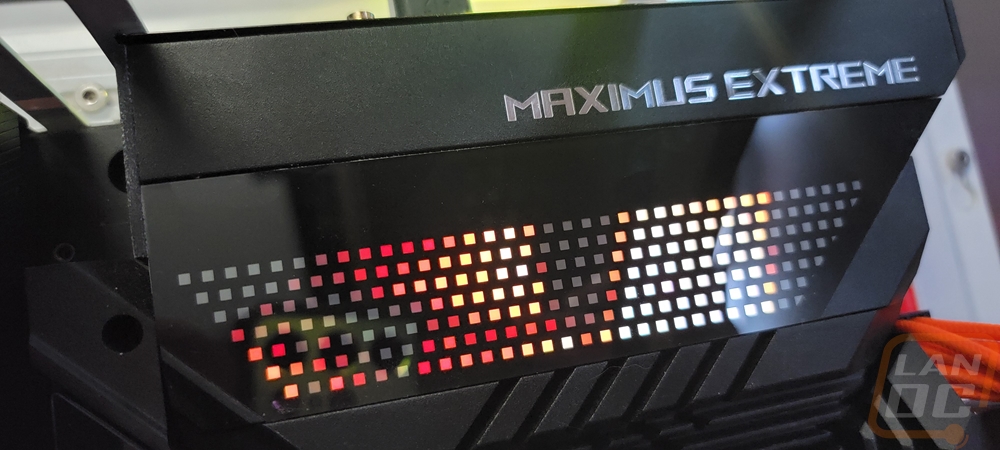
Just around the CPU socket along the Maximus Z690 Extreme has three large heatsinks in place to handle keeping the VRMs cool. Each has its own unique design and Asus has a heatpipe connecting all three. The top has grooves cut into it from the side and at a 45-degree angle. The left side heatsink is similar but it integrates in with the rear I/O cover which has a unique matrix LED set up across the top. Then the bottom heatsink only has fins on the top half because the bottom half also houses the OLED livedash display on top. All of this sits on top of the 24+1 phase VRM setup which can provide 105 amps.
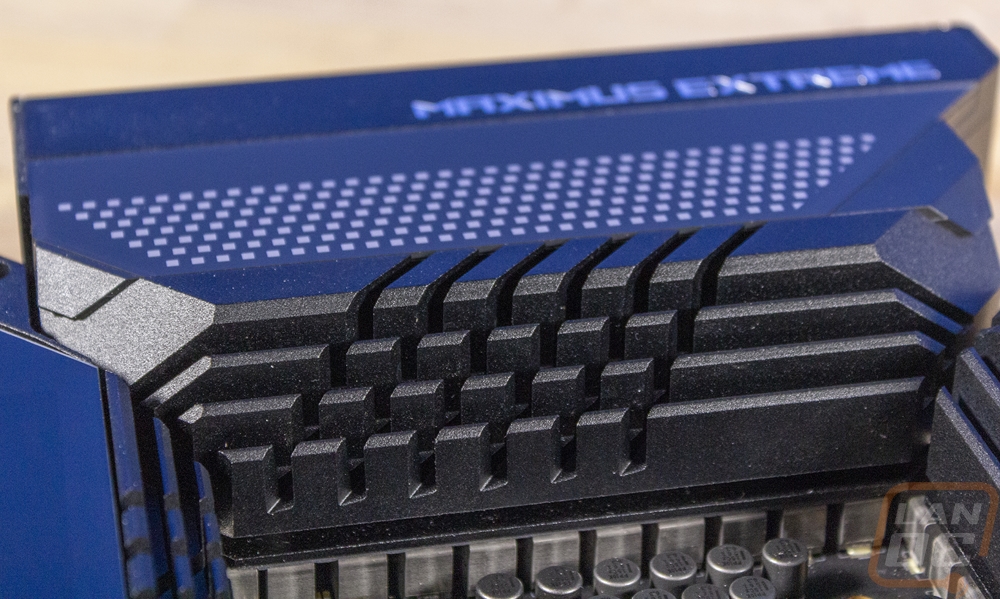
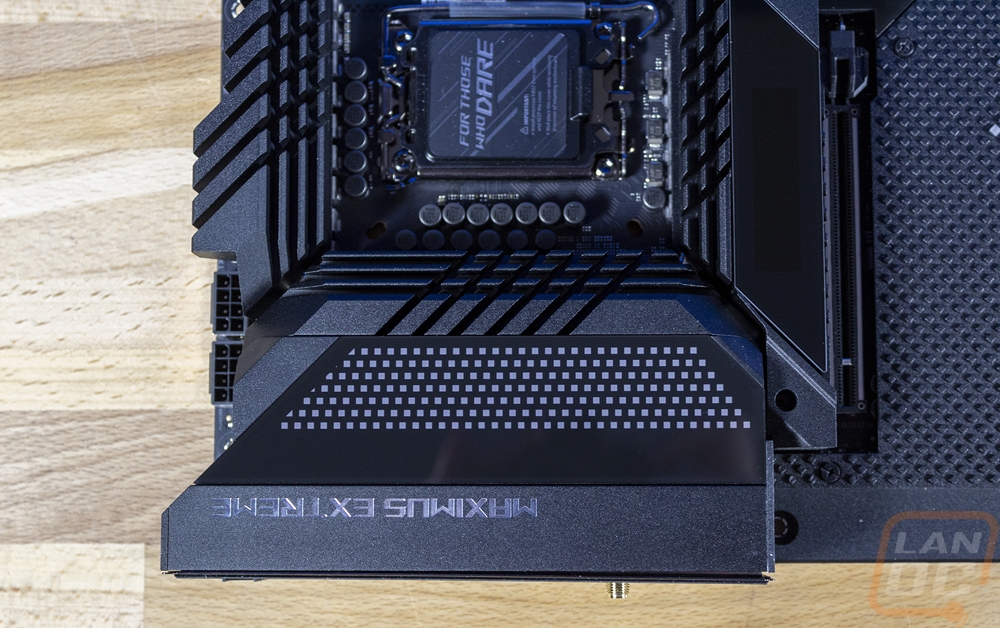
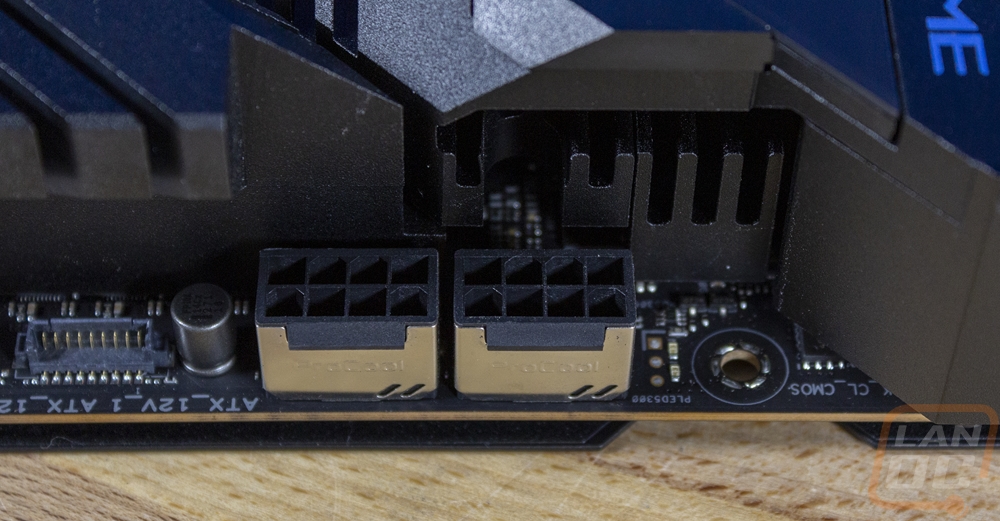
Starting in the top left corner we have the VRM heatsinks and the OLED and LED Matrix displays taking up a majority of the space but there are a few other things going on in this area. The top of the rear I/O had the Maximus Extreme branding on the top edge with a chrome finish before you get into the glossy plastic which covers the LED matrix display. Normally there would be a fan header or two tucked up under all of this but the bottom heatsink/cover runs up to the bottom of the rear I/O. Up on the top edge, there are a few things going on though starting with the two 8-pin CPU power plugs which have metal housings to help dissipate heat. I’ve had these connections melt before so the ProCool shielding does help in some situations. Next to those is the WB_Sensor plug which is designed for the Glacier model’s waterblock to plug into. The connection passes temperature probe headers, water flow, and leakage detection to the motherboard but being a proprietary plug I don’t see any waterblocks that support it (other than the glacier board of course). There is a small detail in the CPU socket area that some people will be happy to see. Like in the past when Intel changed socket sizes, Asus has doubled up on their mounting holes so you can install LGA1700 coolers or if needed older Intel socket coolers if your cooler doesn’t have an updated bracket.


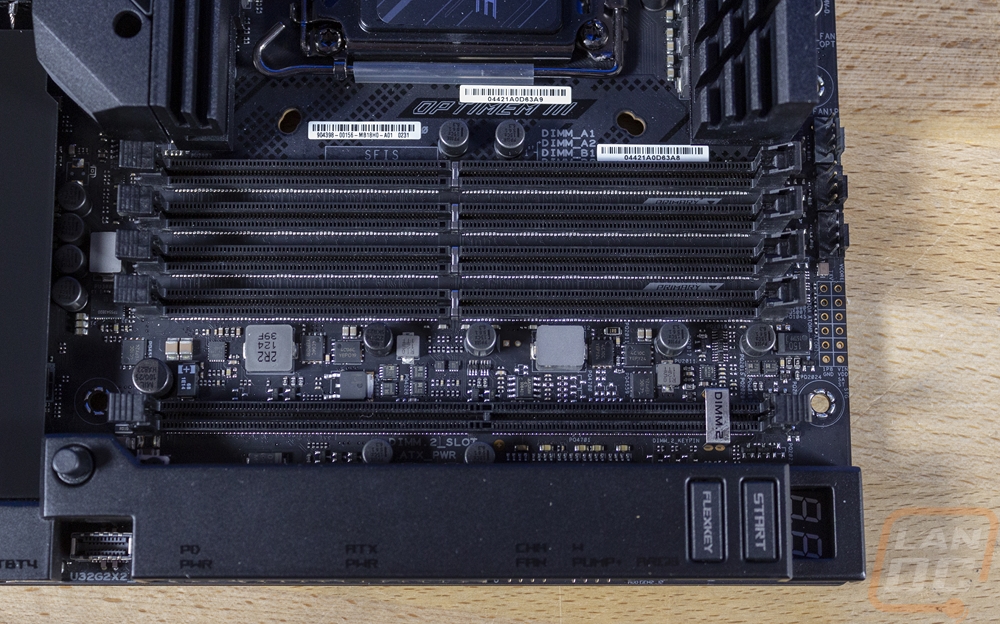
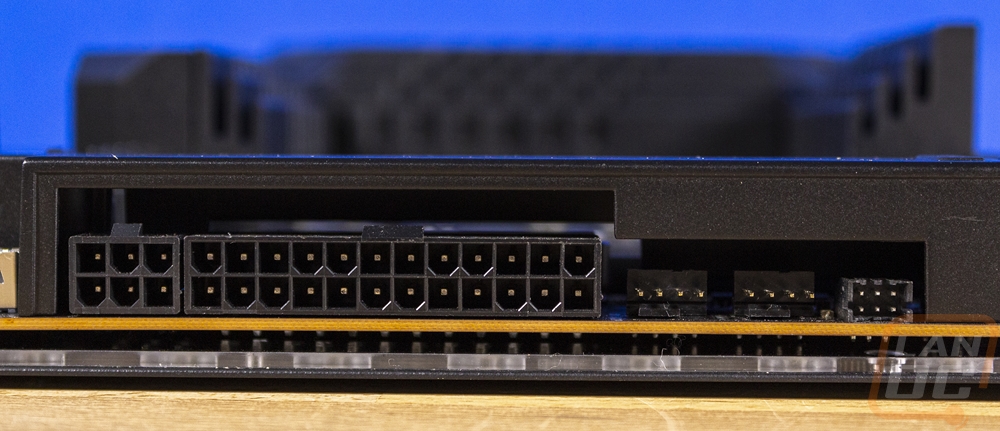
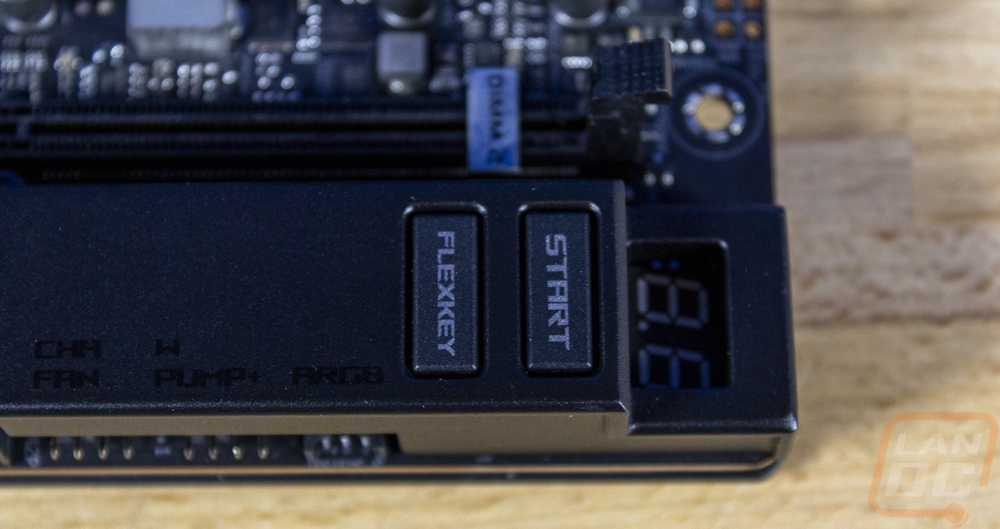
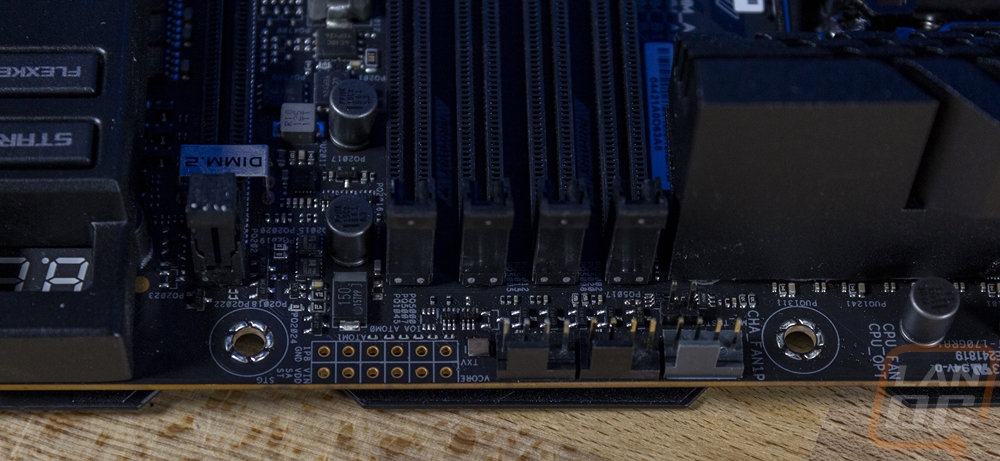
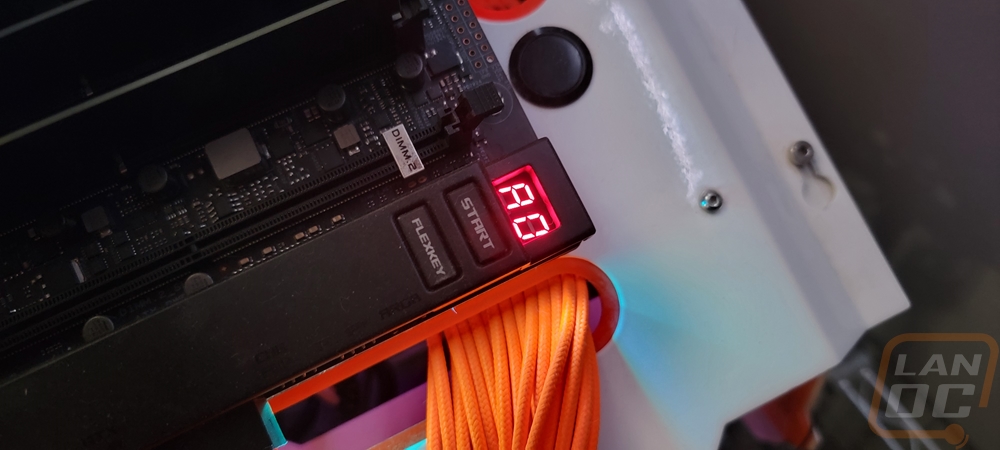
The top right corner of the Maximus Z690 Extreme is where things start to happen. To the right of the CPU socket, you have four black DDR5 ram DIMMs. Next to that Asus has also included a DIMM.2 slot which pairs up with the included DIMM.2 riser card and allows you to install two PCIe 4.0 M.2 devices. Up on the top edge above the memory, there are three PWM fan headers, one is grey to let you know this is the CPU fan header and then you have CPU fan optional and a chassis fan. Next to that, there are small pinholes in the PCB with gold contacts. These are there for overclocking so that you can use your multi-meter to pick up and check any of the voltages on the board. In the top right corner, they have a cover that runs down this side of the board. At the top, there is an opening so you can see the two-digit LED readout that shows the boot codes when booting up. Below that the Maximus Z690 Extreme has two buttons, one is the start button that you can use to power up your PC which is easy to get to and useful for testing and overclocking. The second button is the Flexkey button which can be programmed to do a variety of things but by default, I believe it is set to reset for the Maximus Z690 Extreme but sometimes I’ve seen it come set to turn the RGB lighting off. The cover down the right side of the Maximus Z690 Extreme hides the right-angled connections running up the side. In the top corner, you have the 24-pin motherboard power and a 6-pin additional power, and two more PWM fan headers. There is also a tiny 6-pin plug for addressable RGB lighting using the Y cable that comes with the board. All of these plugs have legends printed on top as well. This side view also gives us a great look at the light diffuser that runs under the PCB on top of the backplate as well. There is one upward-facing plug which is a new style USB 3.2 Gen 2 header.
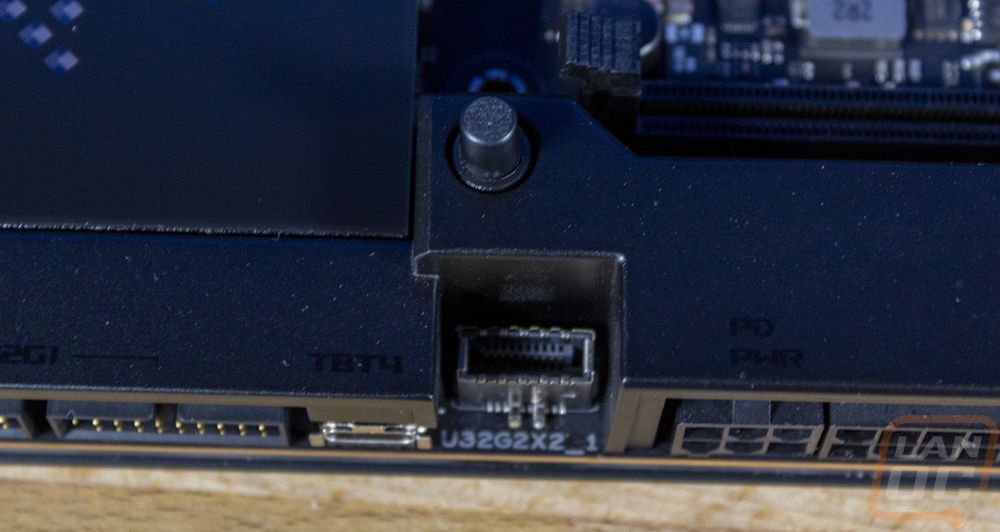
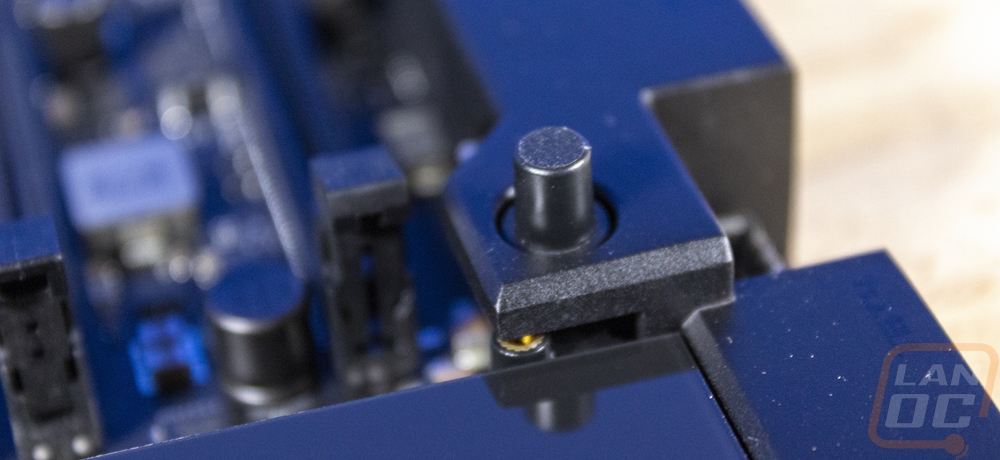
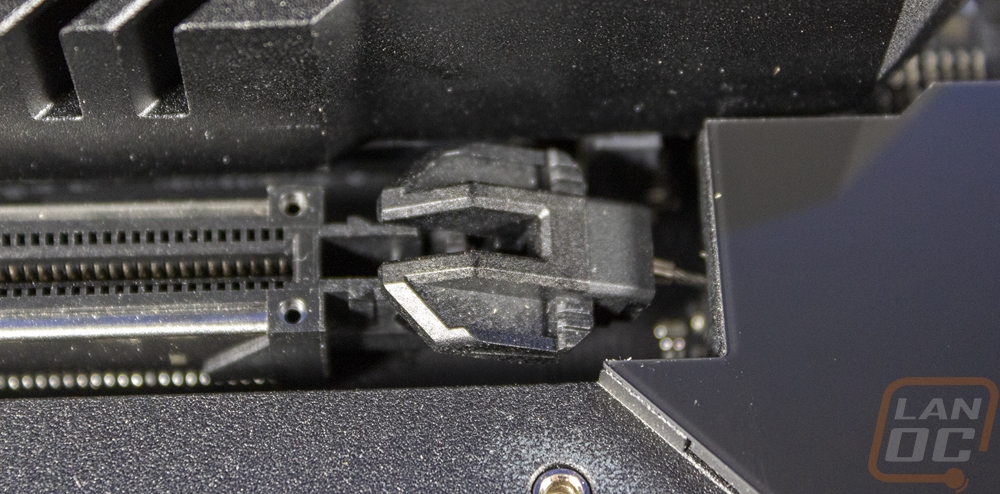
Right next to the USB header Asus has a button sticking up and this has to be one of the best additions they have added to some of their Z690 boards. This is a PCIe release button and it hooks to the top PCIe slot with a tiny cable, which you can see in the picture below. When you push the button it pulls on the cable and unlocks your GPU to make pulling it out easier. If you haven’t had to fight with reaching the PCIe lock when your video card covers it up and you have a big heatsink right on top you are lucky. This helps avoid that completely.
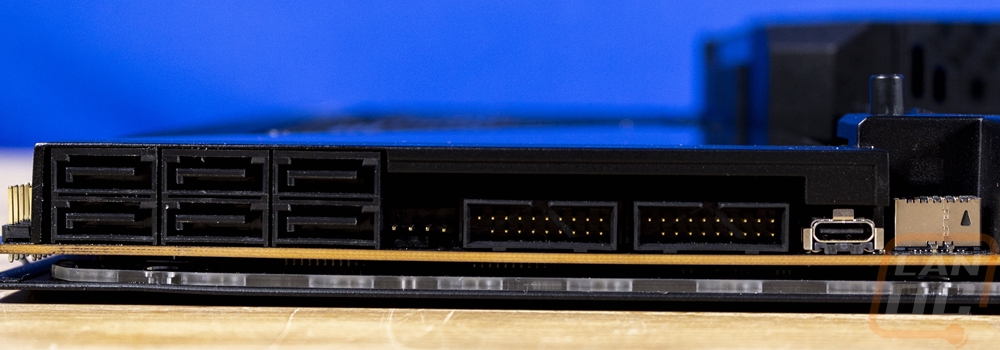
The bottom right corner has more of the LED Matrix but this one is shaped like half of the ROG logo and ties in with the logo on the main cover for the bottom half. The cover along the right edge of the Maximus Z690 Extreme continues down to the bottom and has an internal Type-C Thunderbolt 4 connection alongside two standard USB 3.2 headers. There is another four-pin fan header which is labeled for the radiator fan and then you have six SATA 6 plugs all right-angled and facing out the side. The bottom row on the Maximus Z690 Extreme has the front panel connection in the bottom right corner. The white plug is a water flow sensor header and there are two 2-pin headers right next to that for water temperature in and water temperature out. Next to that, there are two more 4-pin fan headers but the left one is for another radiator fan and the right is a water pump header that supports extra amperage. There are three small buttons, one is the retry button for overclocking that reboots with the same settings, the middle button switches between the two BIOS, and the right button is for safe booting when overclocking. Next to those, there is another temperature probe hookup and an LN2 jumper. There are also two USB 2.0 headers here for cases that still need that and for devices like lighting controllers.

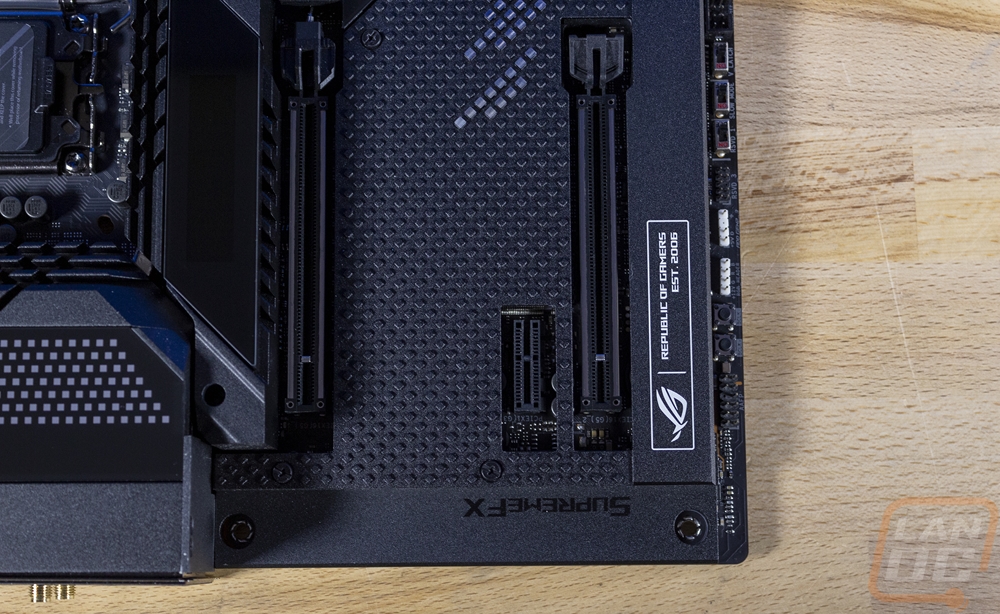
The bottom row of headers continues to the bottom left corner of the Maximus Z690 Extreme. There are three switches, one is slow mode for a slowed boot process when overclocking. One switch is for V Latch which is another overclocking feature used to help identify load line settings and then the RSVD switch is for Asus’s techs the RSVD plug is for them as well. To the left of that there is an addressable RGB header and a standard RGB header and then two small buttons for quickly bumping the BClock up and down. The last header on the left is the front panel audio header which ties in with the onboard audio. You can hardly see it because of the heatsink but the PCB is split to keep the onboard isolated. Then from there, we have the PCIe section. The Maximus Z690 Extreme doesn’t have a crazy amount of PCIe slots. You get three, two are X16 length and there is one x1 slot. The two x16 slots can run at full X16 if running on their own or when running together they drop down to x8 PCIe 5.0 speeds. The bottom slot is also tied in with the M.2_1 slot so when that is in use the bottom x16 slot doesn’t function as well. With the cover off you can see the three M.2 slots with one up top above the top PCIe slot and then two sitting between the two X16 slots. All three support 2280 M.2 drives and the top slot has support for shorter drives as well. The top two M.2 slots run off of the CPU and can run PCIe 5.0 and the bottom slot runs off of the chipset and supports PCIe 4.0 with all three supporting x4 lanes.
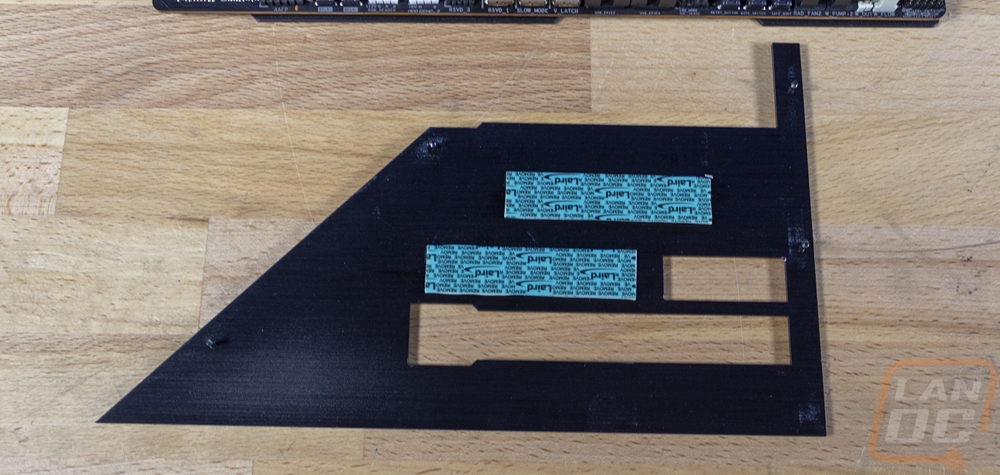
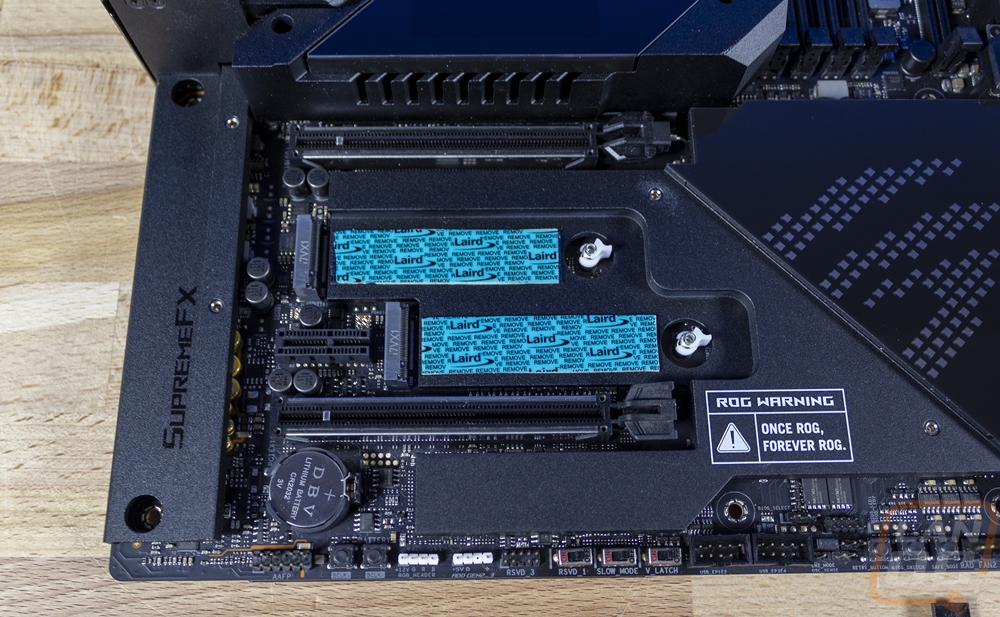
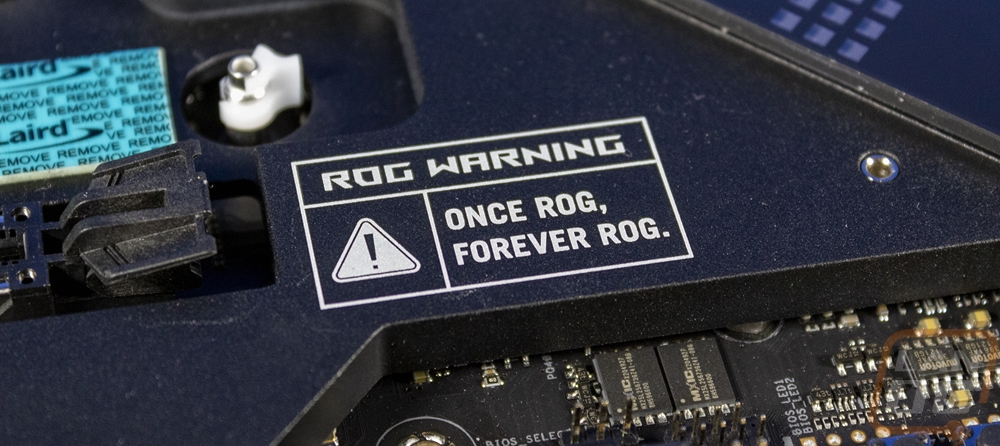
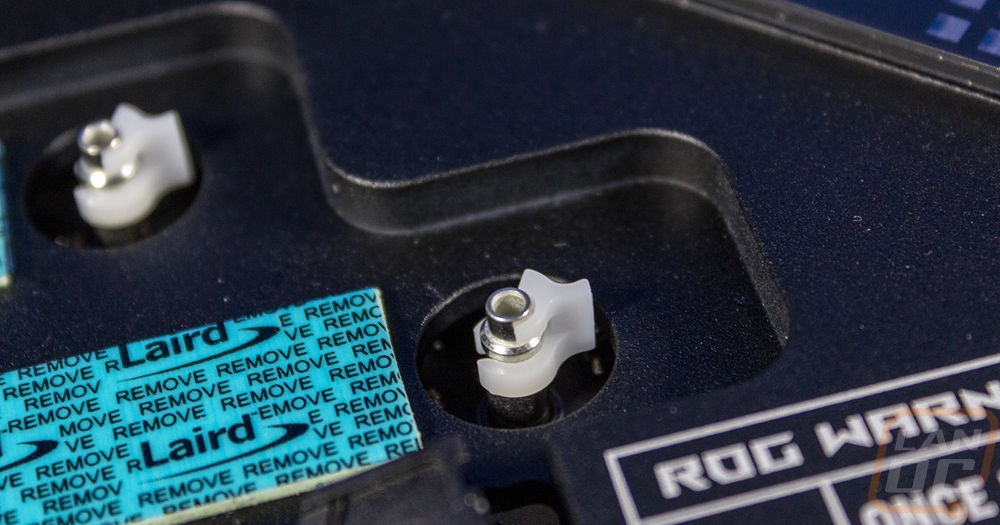
While the Maximus Z690 Extreme is packed with features, what I love the most are the smaller details like the PCIe release button. When you have the PCIe area heatsink removed Asus has printed on the bottom half of that heatsink a warning that once you ROG you will forever be ROG. They have also improved the M.2 mounting up under this heatsink with simple little twist clips that hold your M.2 drive down without using any tools. This might seem like a small touch, but it’s really easy to drop the tiny M.2 screws and if you dropped it down between the PCB and this heatsink it would be a nightmare and would easily short things out if you didn’t get it.
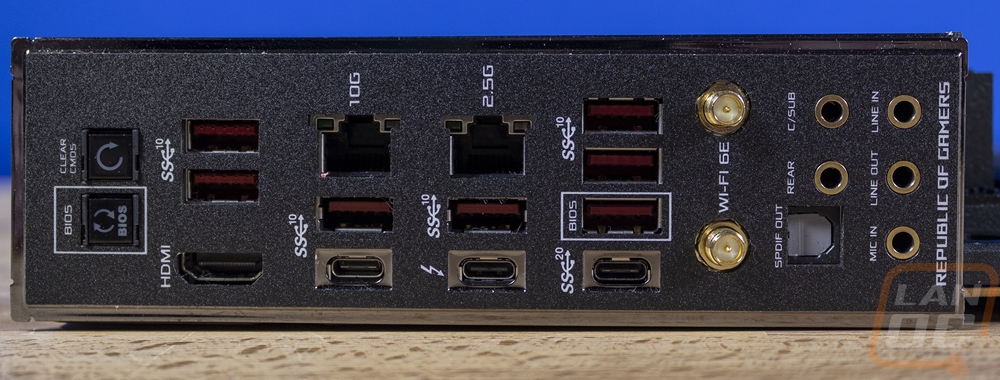
The rear I/O on the Maximus Z690 Extreme is completely packed full which is what I always love to see. So many high-end boards don’t take advantage of the limited amount of space you get on the rear I/O. The rear I/O also comes with its cover plate preinstalled so you don’t need to worry about fighting with that when installing the board and it has a textured black finish that should match up nicely with most cases and white legends for all of the plugs. On the far left you get a clear CMOS button for quickly resetting the BIOS without having to get inside of your PC and below that the bios swap button to switch between the two BIOS. That button also lets you update the BIOS without ram or CPU installed using the USB plug that also says BIOS on it. This is great for updating when your CPU isn’t supported, you don’t need to borrow another CPU to get it done. On the far right, you have the onboard audio connections which all have gold contacts and LED lights inside as well that make figuring out the correct plug in the dark so easy. Next to that are the two WiFi antenna plugs for the included antenna, these work with the Intel 6E wireless NIC. In the middle you have two ethernet connections, one is the 2.5G port that works with the Intel I225V NIC built into the chipset, and then next to that is the Marvell FastLinQ Edge 10G NIC. There are seven USB Type-A connections which are all res and support SuperSpeed 10 or USB 3.2 Gen 2 and then on the bottom row, there are three Type-C connections with the port on the left being the one USB 3.2 Gen 2 Type-C connection. Then the middle port is Thunderbolt 4 and on the far right is USB 3.2 Gen 2x2 which has double the speed so they have all of the connection possibilities covered. There is also an HDMI port on the left should you need to use the built-in GPU in your CPU if it supports it.
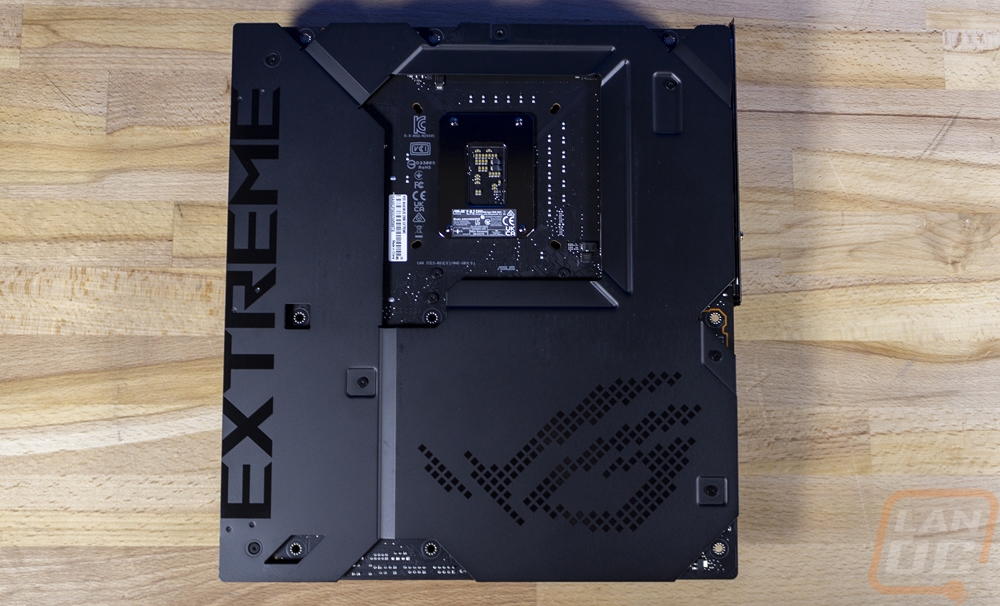
Even the back of the Maximus Z690 Extreme has a few things going on. We can see the black PCB around the CPU socket but the rest of the back of the board is completely covered by a metal backplate. The backplate has EXTREME printed on it in a huge font and then a pixelated version of the ROG logo as well, both with a gloss black so that they blend in and stand out at the same time on the flat black backplate. Your serial number is tucked in the CPU socket area on a small sticker and then all of the required logos are all printed there as well. The nice thing about the serial number location is you will most likely be able to see this through the CPU install hole in the motherboard tray in most cases. The backplate also hides addressable RGB lighting that Asus has placed around the outside edges to give a little underglow look between the PCB and the backplate.
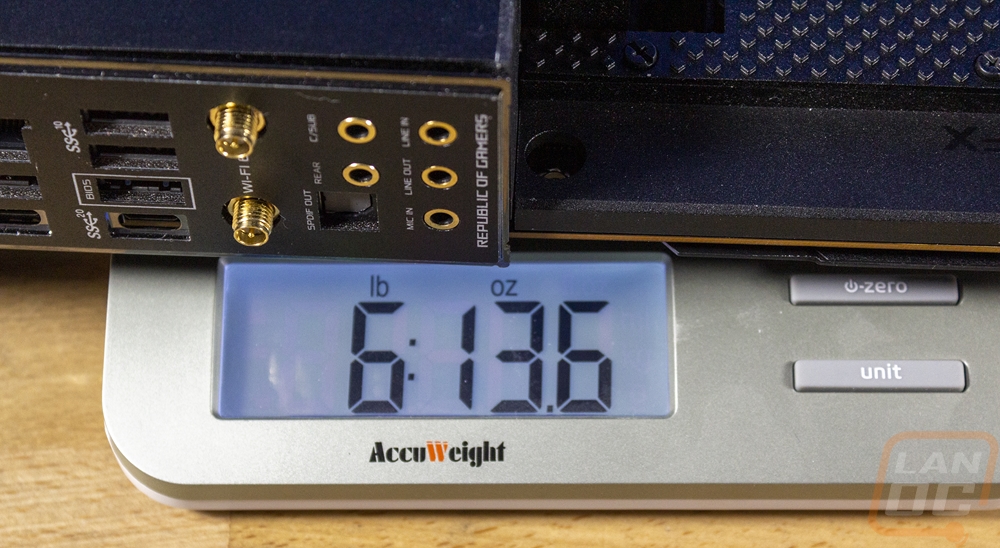
I don’t normally put motherboards on the scale but the Maximus Z690 Extreme is the heaviest motherboard that I have ever seen short of a few that have full-cover water cooling preinstalled. But the weight here comes from a few areas. The backplate that helps protect the back of the PCB adds to it but so does the overall thickness of the PCB, and the large heatsinks up top as well. Higher-end boards also use more copper in their PCBs which helps with heat dissipation
BIOS
Rather than overwhelm everyone with BIOS pictures trying to show every feature I have put together a simple video of me just clicking through the options in the BIOS. If you want to check out any specific areas you can flip through it and pause where needed. The Maximus Z690 Extreme loads up into its BIOS right into the advanced mode which for a lot of boards I would complain about but given the overclocking focus and how high-end this board is I think it's fair to expect anyone messing around in here to know what they are doing. But if not the EzMode button is down at the bottom and that will get you a single page where you can see your components listed out, check if fans are hooked up, and set XMP profiles as well as fan profiles. Drag and drop boot order and use AI overclocking for basic overclocking.
Back in the advanced BIOS, you start with the main page but this is just where you set your language and time and you can see basic things like the CPU model and clock speed. But the Maximus Z690 Extreme also shows you that information over on the right side as well. There is also a favorites tab and you can select any BIOS option and add it to your favorites if you want to curate your own main page with settings that you might change often.
Being an overclocking board it’s the Extreme Tweaker tab that is going to have a lot of the goodies going on. You have all of the clock speeds up top for your P and E CPU cores, cache, and DRAM. Then you dive into basic settings like the AI overclocker and Asus’s Multicore enhancement. Then from there, you can set clock speeds for everything. The specific performance core page lets you set things by the core as well. From there you get into details like AVX settings and specific timing controls for the memory which is a huge page in itself. There just aren’t many boards that offer the level of tweaking that Asus does on their high-end overclocking boards.
The advanced tab then gets into the more standard details with pages for the platform, CPU, and things like your PCH. This is also where you make changes to subsystems like your USB, NIC, NVMe, and PCI settings. Then for Windows 11, the trusted computing settings are here as well.
The monitor page is where you can see all of the sensor readouts for the entire board to check voltages, fan speeds, and whatnot. You can also get into your Q-Fan settings here, not creating fan profiles but other details like how fans should ramp up, ignoring some fans, and aspects like that. The boot tab has all of the boot settings and is also where you can change your boot order. Then the tool tab is where Asus has tucked away the rest of their tools. This is where you can reflash the BIOS, secure erase hard drives, do MemTest, and set up your BIOS profiles. You can also change the flexkey button here to do whatever you would prefer it do.
Test Rig and Procedures
Test System
CPU: Intel Core-i9 12900K – Live Pricing
Cooling: MSI MAG CoreLiquid C280 - Live Pricing
Noctua NT-H1 Thermal Paste - Live Pricing
Memory: Micron Pre Launch DDR5 2x32GB – Live Pricing
Storage: Sabrent Rocket Q4 2TB – Live Pricing
Video Card: Nvidia RTX 3080 FE - Live Pricing
Power Supply: Corsair AX1200 - Live Pricing
Case: Dimastech Test Bench - Live Pricing
OS: Windows 11 Pro 64-bit - Live Pricing
|
Motherboard Testing |
|
|
Passmark Performance Test 10 |
Overall PCMark score |
|
PCMark 10 |
PCMark 10 standard test, not the quick or extended versions |
|
3DMark |
We run the 2013 Fire Strike test on the performance setting and Time Spy on its regular setting |
|
In Game Tests |
|
|
World War Z: Aftermath |
1080p, In-Game Benchmark, Ultra detail |
|
Tom Clancy’s Ghost Recon: Wildlands |
1080p, built-in benchmark run at the high setting |
|
Shadow of the Tomb Raider |
1080p, In-Game benchmark, High detail setting |
|
Far Cry 6 |
1080p, In-Game benchmark, Ultra detail setting |
|
Subsystem Testing |
|
|
Passmark |
Passmark Advanced network test |
Performance
When it comes to performance testing, typically motherboard to motherboard we aren’t going to see any big performance difference when running the same components and clock speeds. The exception to that is when boards are auto overclocking of course and there are a few areas where components can make a difference like with ethernet and USB controllers. For our Z690 testing I previously had tested the MSI MPG Z690 Carbon WiFi and I did the same tests with the Maximus Z690 Extreme of course. Both boards were in line with each other in most of my tests. The Maximus Z690 Extreme was a little higher in PCMark but there was a gap between the tests. I was most curious how the Maximus Z690 Extreme did on the network tests which like I said can sometimes be different. The Maximus Z690 Extreme does have WiFi 6E but our office only has WiFi 6 so we weren’t able to see any of the benefits of the 6Ghz range here but the Maximus Z690 Extreme came in a little lower than the MSI on that test. That has been my experience with all of the Asus’s with this current antenna design. It works well enough, but it tests a little slower than the competition even when they both have the same wireless NIC. Then for wired the Maximus Z690 Extreme has both 2.5Gbps and 10Gbps NICs. Testing on the 1Gbps network didn’t show any difference but when we moved to the 10G network both performed well.
|
3DMark – Fire Strike |
|||||
|
Motherboard |
Overall Score |
Graphics Score |
Physics Score |
||
|
MSI MPG Z690 Carbon WiFi |
36688 |
42430 |
38900 |
||
|
Asus ROG Maximus Z690 Extreme |
36062 |
42774 |
38703 |
||
|
3DMark – Time Spy |
|||||
|
Motherboard |
Overall Score |
Graphics Score |
CPU Score |
||
|
MSI MPG Z690 Carbon WiFi |
17887 |
17715 |
18932 |
||
|
Asus ROG Maximus Z690 Extreme |
17732 |
17577 |
18666 |
||
|
PCMark 10 Score |
|||||
|
Motherboard |
Overall Score |
Essentials |
Productivity |
Content Creation |
|
|
MSI MPG Z690 Carbon WiFi |
8783 |
11240 |
10725 |
15251 |
|
|
Asus ROG Maximus Z690 Extreme |
9066 |
11462 |
11399 |
15476 |
|
|
Passmark PerformanceTest 10.0 - Overall Score |
|||||
|
MSI MPG Z690 Carbon WiFi |
8254.4 |
||||
|
Asus ROG Maximus Z690 Extreme |
8242.8 |
||||
|
World War Z: Aftermath – Ultra Detail – Average FPS |
|||||
|
MSI MPG Z690 Carbon WiFi |
279 FPS |
||||
|
Asus ROG Maximus Z690 Extreme |
279 FPS |
||||
|
Tom Clancy’s Ghost Recon: Wildlands – High Detail - Average FPS |
|||||
|
MSI MPG Z690 Carbon WiFi |
156.5 FPS |
||||
|
Asus ROG Maximus Z690 Extreme |
158.8 FPS |
||||
|
Shadow of the Tomb Raider – High Detail - Average FPS |
|||||
|
MSI MPG Z690 Carbon WiFi |
209 FPS |
||||
|
Asus ROG Maximus Z690 Extreme |
208 FPS |
||||
|
Far Cry 6 – Ultra Detail - Average FPS |
|||||
|
MSI MPG Z690 Carbon WiFi |
141 FPS |
||||
|
Asus ROG Maximus Z690 Extreme |
143 FPS |
||||
|
Average Network Speed- Wired on a 1G Network - Mbits/Sec |
|||||
|
MSI MPG Z690 Carbon WiFi - Intel I225V 2.5G NIC |
942.5 Mbits/sec |
||||
|
Asus ROG Maximus Z690 Extreme - Intel I225V 2.5G NIC |
927.1 Mbits/sec |
||||
|
Asus ROG Maximus Z690 Extreme – Marvell FastLinQ Edge 10Gb |
934.7 Mbits/sec |
||||
|
Average Network Speed – WiFi 6 - Mbits/Sec |
|||||
|
MSI MPG Z690 Carbon WiFi – Intel WiFi 6E Module |
448.8 Mbits/sec |
||||
|
Asus ROG Maximus Z690 Extreme - Intel WiFi 6E Module |
340.6 Mbits/sec |
||||
|
Average Network Speed – wired on 10G Network - Mbits/Sec |
|||||
|
MSI MPG Z690 Carbon WiFi – Intel I225V 2.5G NIC |
2356 |
||||
|
Asus ROG Maximus Z690 Extreme - Intel I225V 2.5G NIC |
2321 |
||||
|
Asus ROG Maximus Z690 Extreme – Marvell FastLinQ Edge 10Gb |
9542 |
||||
I hate to consider RGB lighting part of the performance, but it is a component of the Maximus Z690 Extreme so I did take a look at it. The Maximus Z690 Extreme has lighting built into multiple areas starting up over top of the rear I/O with the LED Pixel Matrix. I originally didn’t think much of this design but once I saw it in action I dig the look that the matrix gives you. You can program this to scroll low pixel images or animations or program things down to the individual pixel to match your build. By default, it scrolls this ROG logo which almost looks like flames.

The ROG lighting over top of the chipset doesn’t have the same control but does still look sharp when lit up.
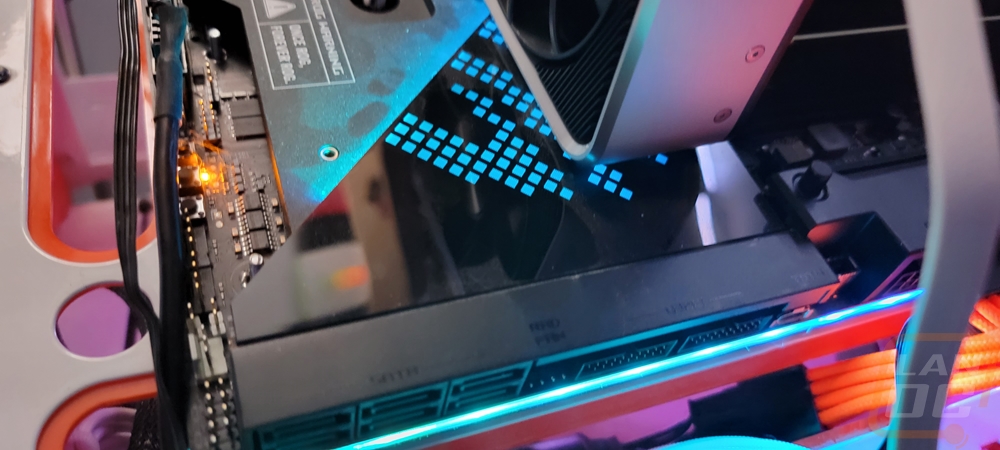
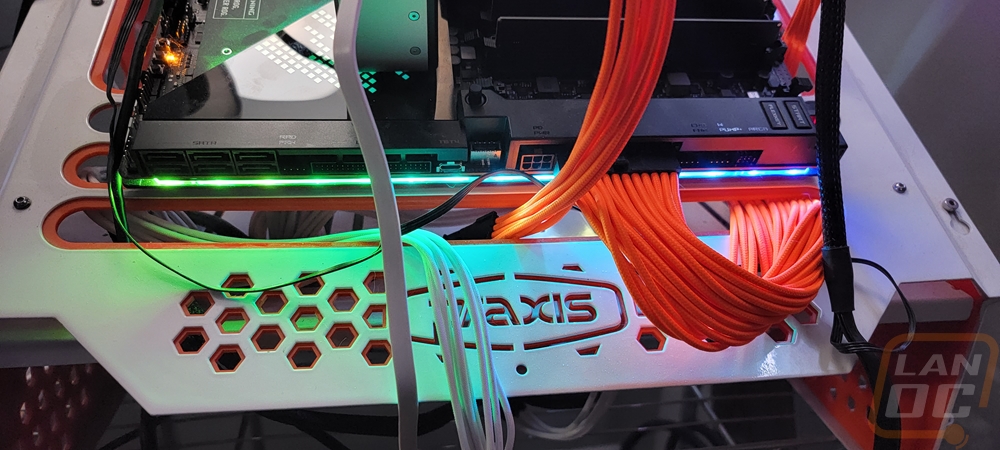
The full right side of the Maximus Z690 Extreme has addressable RGB lighting running under the PCB with the diffuser sitting between the PCB and the backplate and this gives the board a cool underglow look.
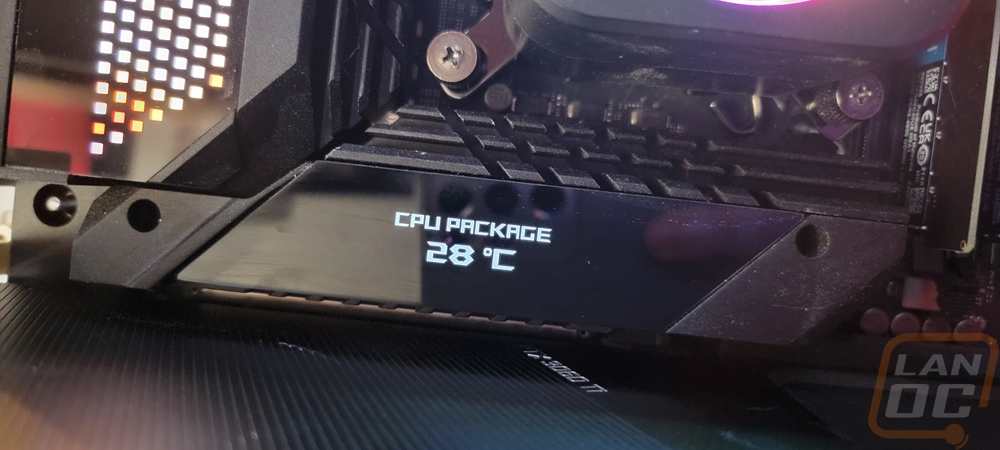
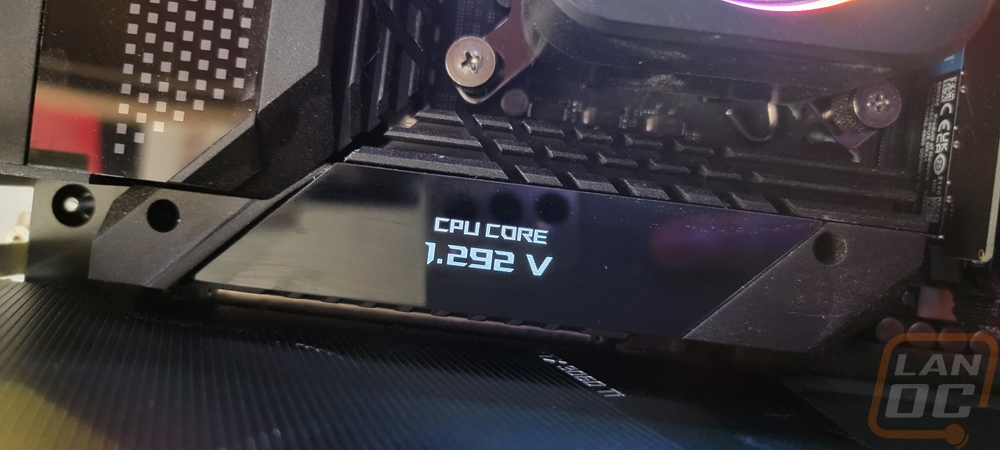
The Maximus Z690 Extreme does have a standard LED display in the top right corner for diagnostics, but it also has a livedash screen up under the CPU socket which shows more detailed information when booting and then once booted flips through information like CPU temperature and voltages.
Overall and Final Verdict
There aren’t many motherboards that you take a look at and just don’t know where they could go next but the Maximus Z690 Extreme is one of those boards. Most motherboards come with some documentation and if you are lucky a few stickers. The Maximus Z690 Extreme on the other hand comes with a pile of swag with things like keychains, USB drives, ROG branded screwdrivers, but that is just the tip of the iceberg of what the board comes with. Asus includes their DIMM.2 M.2 riser card that adds 2 M.2 slots to the 3 that the Maximus Z690 Extreme already has. You get a USB DAC to go with the high-end onboard audio setup the board has. It comes with what they call the ROG True Voltician which sounds like a transformer but is a USB oscilloscope. Then you have the fan controller that gives you six more PWM fan headers on top of the 7 fan and pump headers on the Maximus Z690 Extreme and the fan controller also gives you six more addressable RGB headers on top of the three aRGB and one RGB headers on the board. Just unboxing the Maximus Z690 Extreme is overwhelming but so are the connection options you have available.
All of that is on top of the base features of the Maximus Z690 Extreme like its 24+1 VRM phases and the crazy cooling built around that. Or the heatsink that covers the entire top of the motherboard and the backplate that does the same for the bottom. You also have a variety of RGB lighting setups even before plugging any other lighting in like the underglows, heatsink lighting, and the LED Matrix on top of the rear I/O. I could go on for days with the overall feature list. But for me, it’s the small details that I was happiest with like the one push button that unlocks the PCIe slot and the tool-less M.2 slots which make working with the Maximus Z690 Extreme easier especially if it is a test bench or you are changing things up often with overclocking.
I only ran into one issue with the overall setup and that was an issue that I have had with all Asus boards recently. While they have a great Intel wireless NIC the performance is always a touch slower than the competition for me which I have to assume is related to the antenna design they have been using for the last few generations. Beyond that my only other issue would be with the price which is a given considering the Maximus Z690 Extreme will run you $1099.99 which is more than most of my PCs have cost. But we can’t say that Asus isn’t giving the Maximus Z690 Extreme the features needed to justify a high price because the board is loaded to the gills and some of the accessories that come with the board alone would be expensive if you were buying them separate like the Voltician aka the oscilloscope. Overall this is clearly only a board for the craziest highest-end builds and typically for those builds pricing doesn’t even matter anymore. So I doubt anyone buying the Maximus Z690 Extreme is going to be complaining too much about the price, but they will be enjoying all of its features. For the rest of us Plebs, Asus has a long list of other Z690 boards that might be better for us.

Live Pricing: HERE


