Software
For me there are two aspects to a good access point, performance is obviously a big one. But software is also important, at least if you are the one who is maintaining the network and setting things up. Software is something you take for granted, but my experience with our Unifi AP showed that it was important. With Ubiquiti, you have to run a server on your network to set things up or to make changes. If you are like me and lost your server install when switching PCs or with a hardware failure you don’t have any way to check in on things or make any changes without going through steps to completely start over. So when I started reading on how you setup the EnGenius ECW230 AP or even the ECS1008P switch, I was happy that you don’t have to go through that same trouble. They use a cloud based system, which to be honest anything cloud or reach out of my network I’m always a little skeptical on. But I did like the simplicity of setting things up.
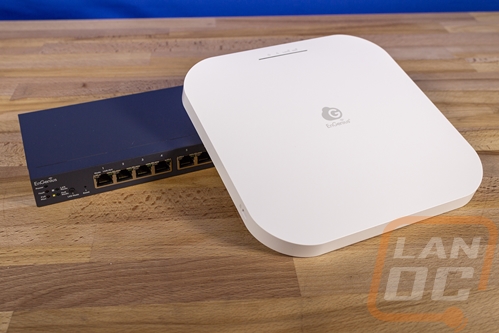
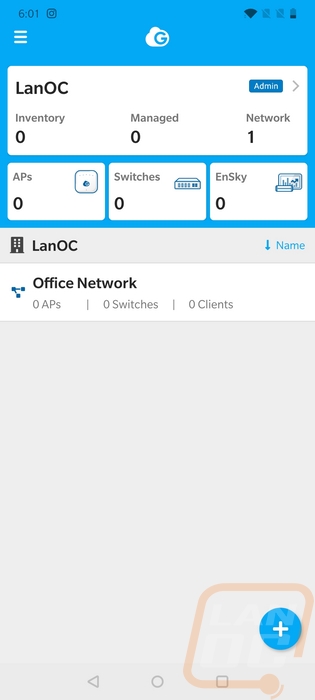
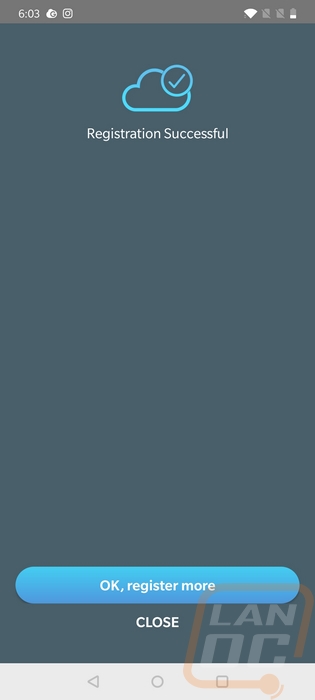
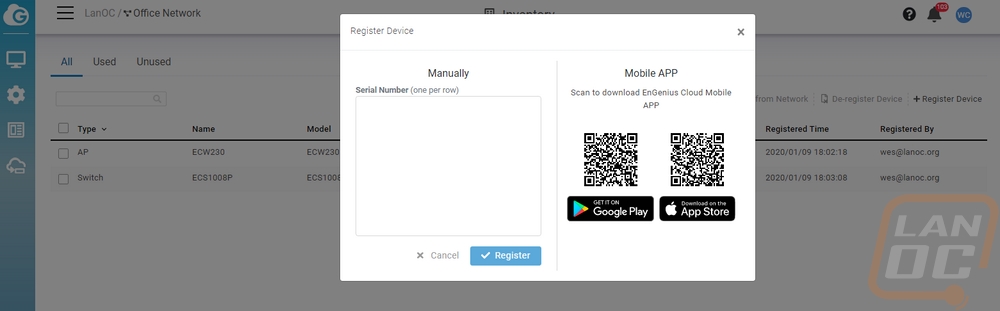
Once you have your devices installed, in our case the ECS1008P plugged into our network and the ECW230 AP plugged into the ECS1008P. You install the EnGenius Cloud app on your phone, which is available on both IOS and Android. You sign up for your account and from there you can configure your network. You need to name the network location and the network as well. Then down in the bottom corner, you can click the plus sign and add a device. This is where those QR codes on the back of both the switch and AP come into play. You can use your phone camera and it scans the code and automatically adds it to your network.
You can also sign in to the EnGenius Cloud on your PC and that is where I did a lot of my configuration. But all of the same settings are available on the app or on the website. You can also add devices as well but you have to use the serial number.
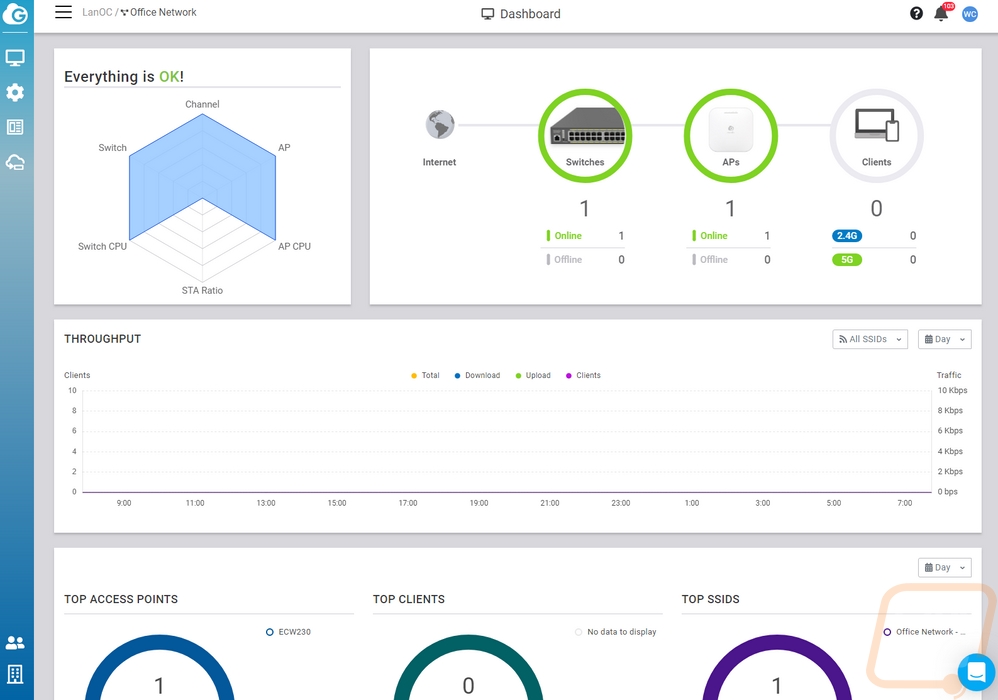
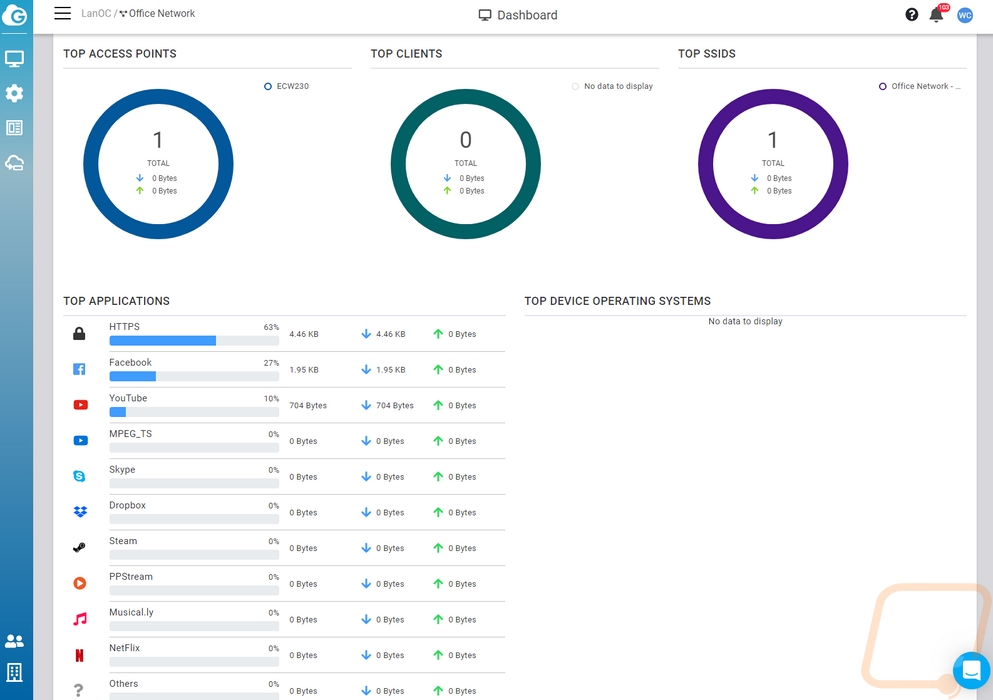
Adding both devices was quick, then for my testing, I set up a test network. For long term use multiple SSIDs to help keep things sorted. But once set up this is what your dashboard looks like when you first open it up. You can see right away that everything is okay on the left and from there they show your switches that are online and access points that are online and the number of clients that were connected. For the clients, it also breaks that down between 2.4GHz and 5GHz frequencies as well. Under that it graphs out your traffic usage, you can set how far back you want it to show. Ours doesn’t have anything because when I took these I had just moved the AP but the graph will show you the number of clients connected as well as the amount of traffic being used. Upload and download are shown on their own as well as a traffic number with them together. Under that, you will see your top clients, top access points, top SSIDs, and a breakdown of the type of traffic as well.
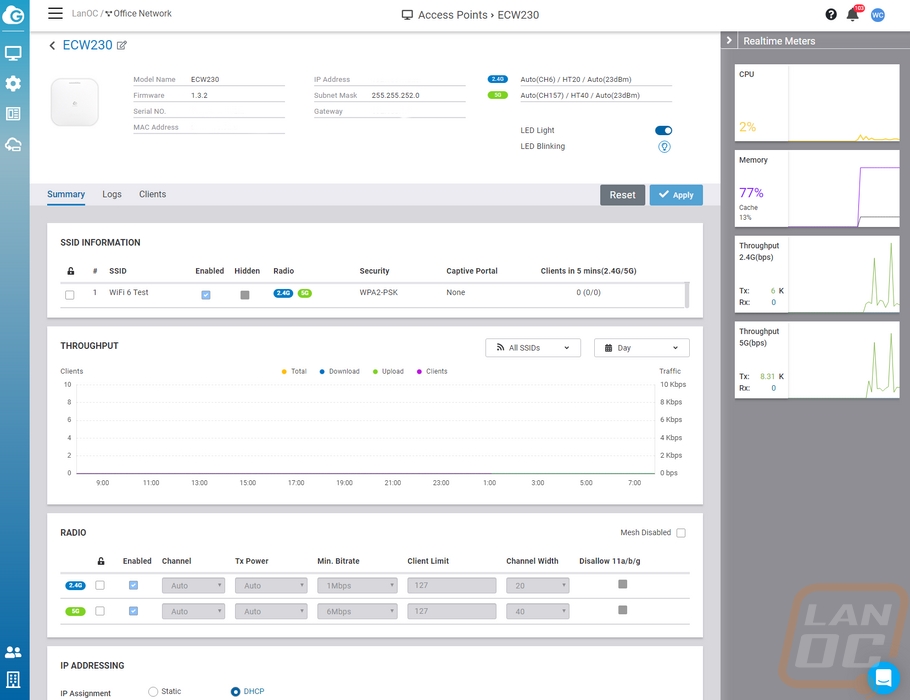
From the dashboard, you can click on the access point picture or the switches and it will get you on to their dedicated page. You can also reach them through the menu on the left as well. Below is the page for the ECW230, though I have removed a few details like serial number and mac addresses for privacy. Right up top, they break down all of the device information including what the 2.4 and 5 GHz channel settings are. I love that to the right you have real-time monitors that show CPU and memory usage as well as traffic on both frequencies as well. Then the main portion of the page shows your SSID as well as that throughput graph again. You can set the access points IP or let it run through DHCP here and down at the bottom, not in the picture is an option to include a photo. You can upload a picture showing where the AP is on a map if you have a big location, a picture pointing to it or anything else you want to help know where this AP is. There are other tabs that show all of the AP logs, this includes showing what devices connect and what SSID they connect too as well as things like device updates and power up and down or offline. The client tab then shows each client you have connected with information like their IP, connection rate, what frequency they are on, OS, SSID, and mac address. You can look back to past clients as well or break it down by OS, IP, and SSID.
The ECS1008P switch has a similar detail page but it does have a few more settings. Up top again you have all of the details as well as a list of important settings. On the right you have CPU and memory graphs again but no traffic this time. The summary page shows a drawing of the 8 ports and lets you see which are connected as well as what rate they are connected with markers that also show which ports are using PoE and which is the upload to your network. Below that they graph out your total PoE usage of the 55-watt budget. This also allows us to see how much power the ECW230 access point is pulling because it is the only device hooked up. 9.4 watts isn’t too bad and it means you could have 5 hooked up to this switch and still be under the power limit, but I’m not sure if they pull any more power when you have more clients connected or anything. They also graph out the utilization by the port, but with just one AP hooked up it just shows the same information as the other graph. Like with the access point at the bottom you can set up the DHCP or static IP of the switch and add photos as well.
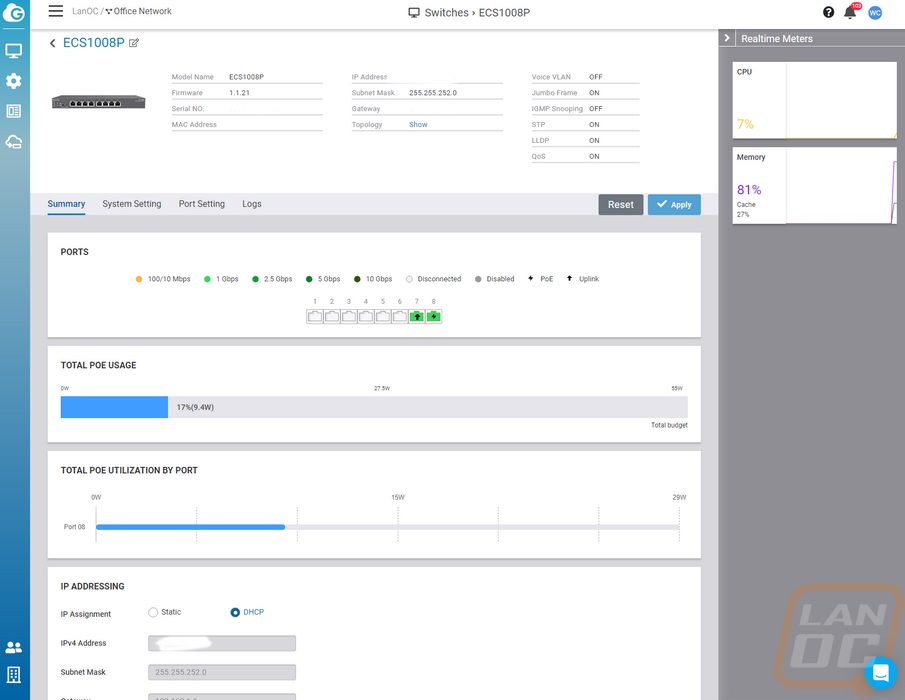
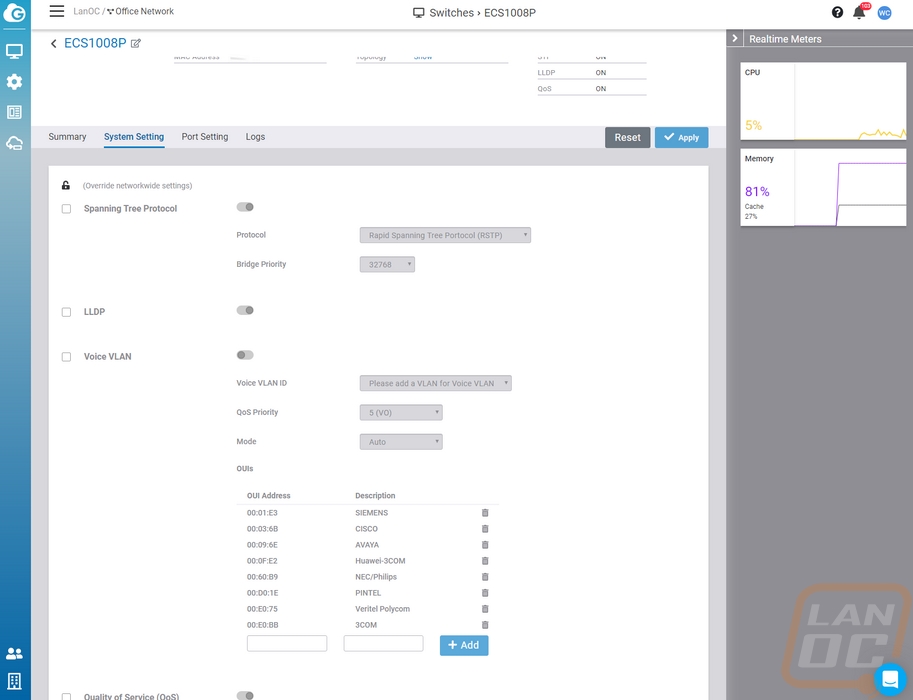
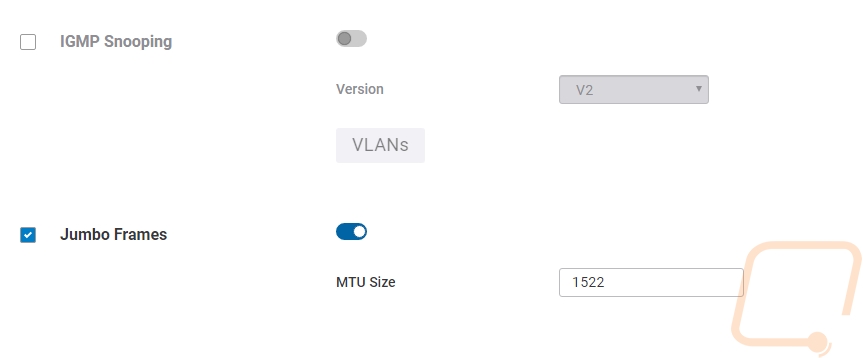
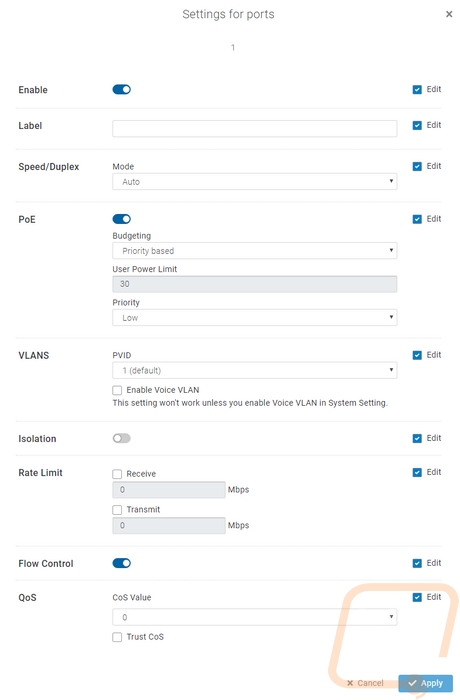
The ECS1008P does have more system settings which include being able to turn on spanning tree protocols, LLDP, voice VLAN, QoS, UGMP Snooping, and Jumbo Frames as well. Each has a few more specific options that turn on when you turn that option on like on Jumbo Frames you can set the MTU Size. The ECS1008P also has a tab up top dedicated to port settings. You click select one or more ports and then click configure and there is a whole list of settings. You can label ports which is really helpful, I have this done on our main switches for easier remote management. You can even turn PoE on or off and set the priority and power limits. Set bandwidth limits on ports, VLANs, and isolate a port completely. There is also another logs tab, which like the access point lets you see all activity including port status changes.

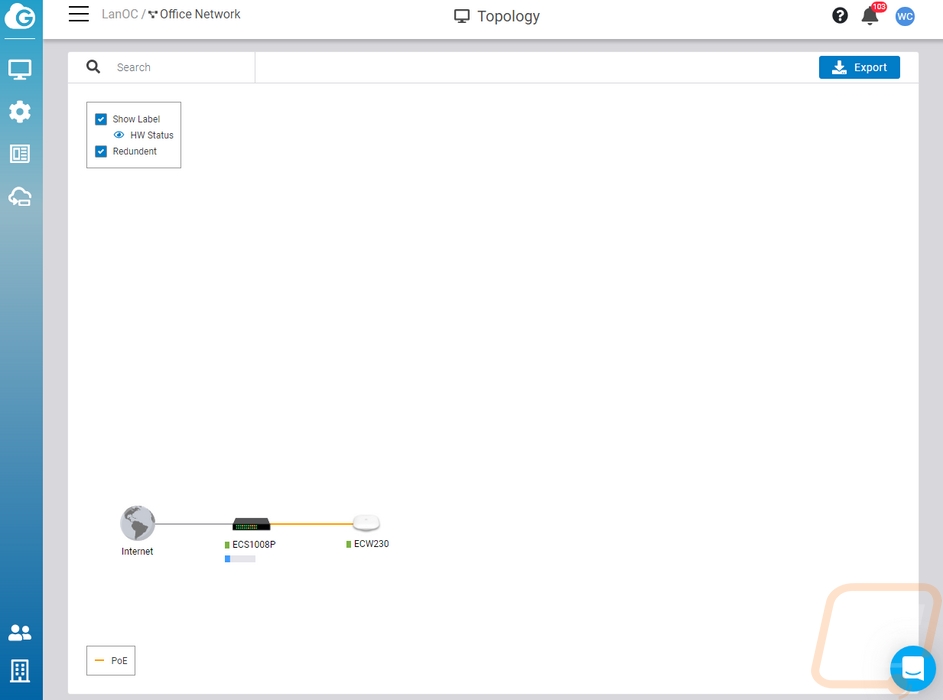
Digging through the menus on the left, in the same section, you will find the access points and switches you can see a total network topology. At least anything plugged into this switch. This, of course, won’t include anything prior to the uplink on the switch. But it is a cool little feature. Mousing over the devices show IP information as well as PoE usage on the switch with that small graph.
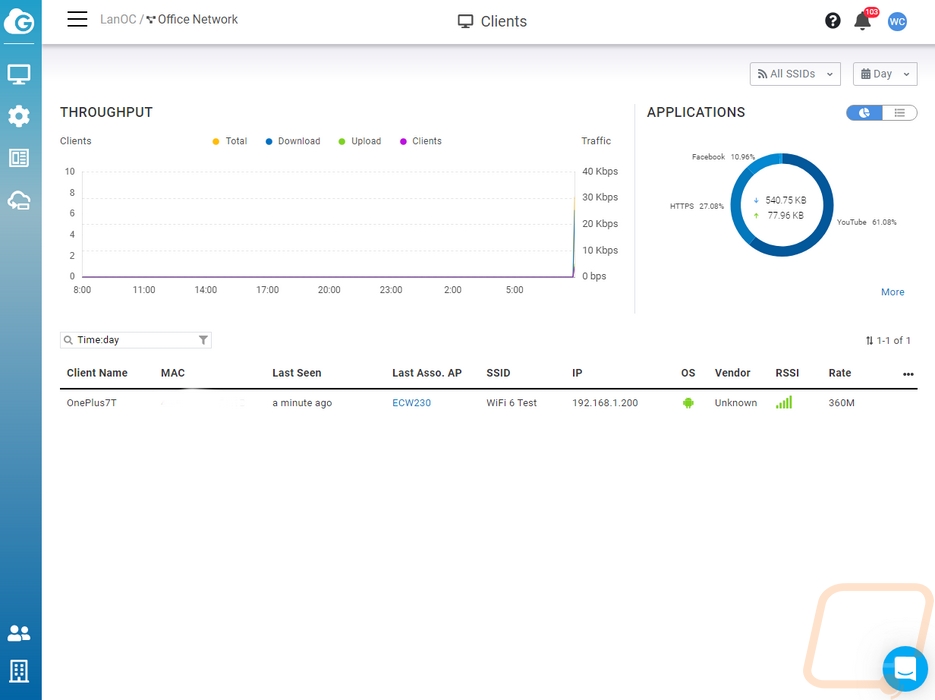
There is also an overall clients page. This doesn’t show anything that hasn’t been shown on other pages. It will list all of the clients who have accessed the network on either of the EnGenius products. Up at the top, you can see graphs of traffic which you can change how far back those show. The one on the left shows throughput and on the right shows where all of the web traffic went. Then down at the bottom, they list all of the clients who have been on the network as well as their OS, data rate, mac address, name, SSID and so on.
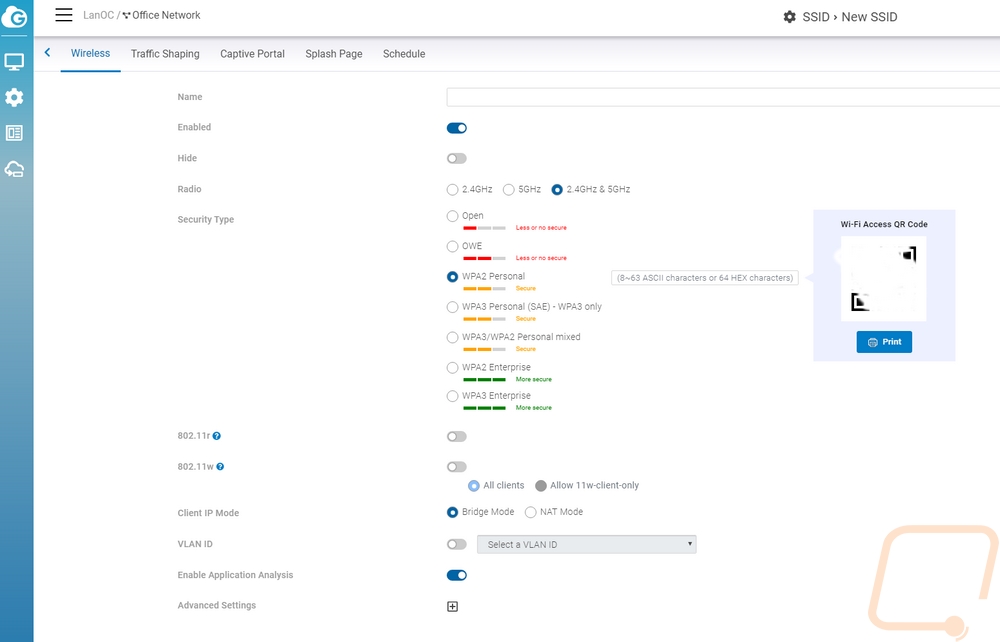
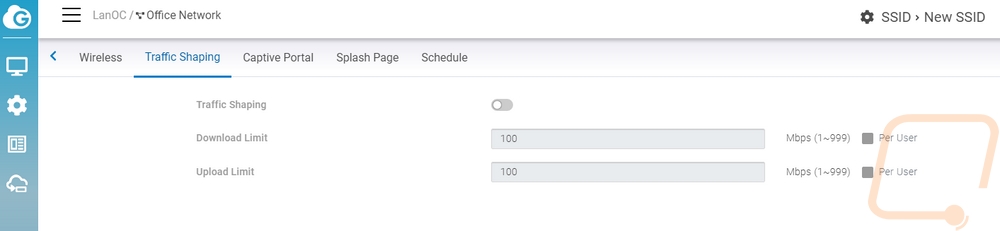
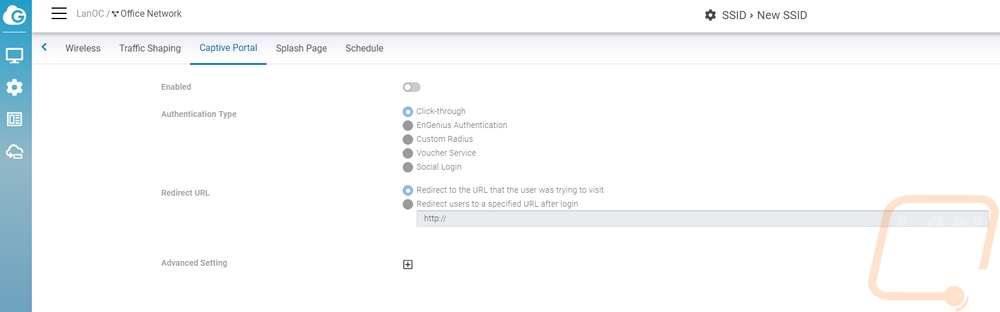
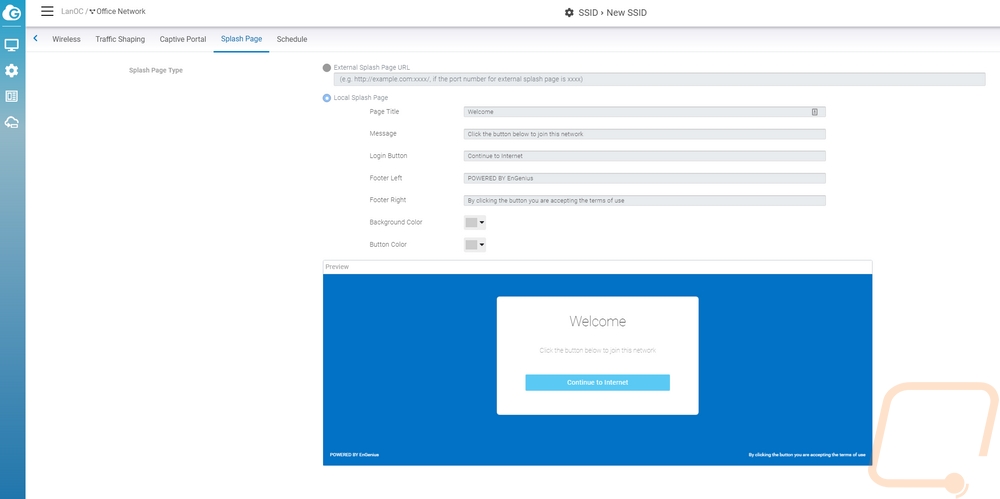
So I did set up a basic test network before diving into the software but I did want to show everything that you can configure with the ECW230. The main page lets you name the SSID, turn it on and off, hide it like any router or access point would. You can force it to specific frequencies which is nice and there is a list of different security settings. With each of those, the security is shown with colors and bars. I love that on the right once you set everything up you can open up and print a QR code that will quickly get phones attached to the network. I have one of these at our house as well, it is easier than telling someone a long and complicated password and both Android and IOS support it. You also have VLAN options as well as advanced options like band steering and isolation. There are additional tabs up top for more options as well like traffic shaping which lets you turn that on per SSID and set the limits on a per user basis. There is also a schedule which is perfect for a business, you can set the wireless to only be on when you are open. There are even quick templets for the normal 8-5 weekdays. This is business-focused, a home user could use this to keep things secure and only have the SSID up for specific times for your kids or even only when you are off work. As a security feature, this can prevent someone from being able to camp near your location and brute force the security or even a rouge employee getting on the network after hours to access sensitive information. There is also a captive portal option where if you have a retail shop you can allow people access to the network temporarily. You can even configure a basic splash page as well.

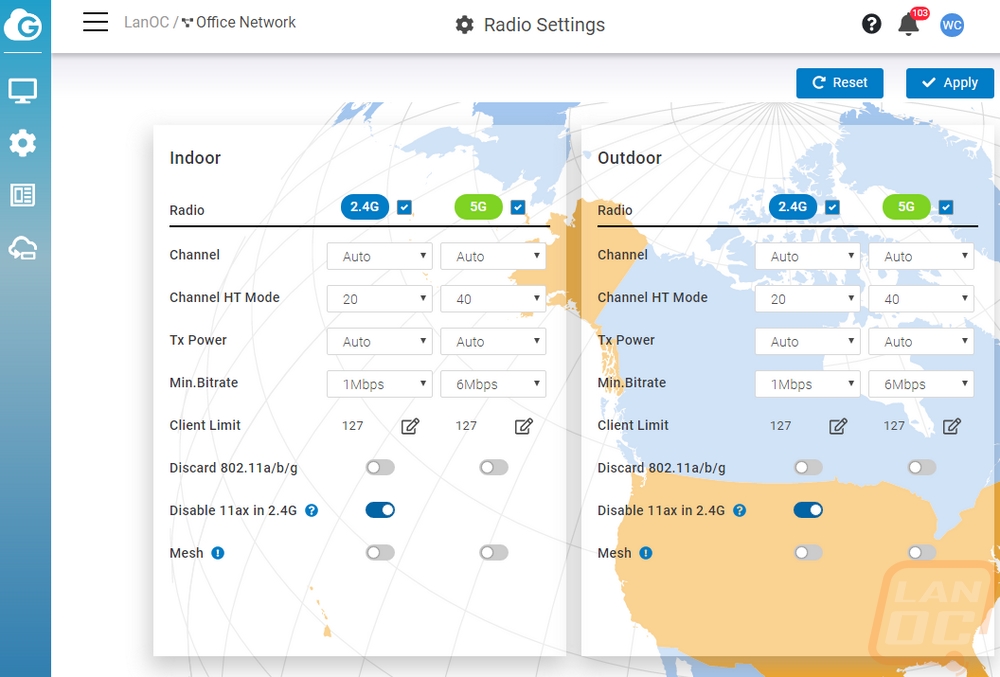
The radio settings page lets you dive more into your overall radio settings and to force a specific channel if needed and set up things like client limits. You can also turn on mesh functionality as well.
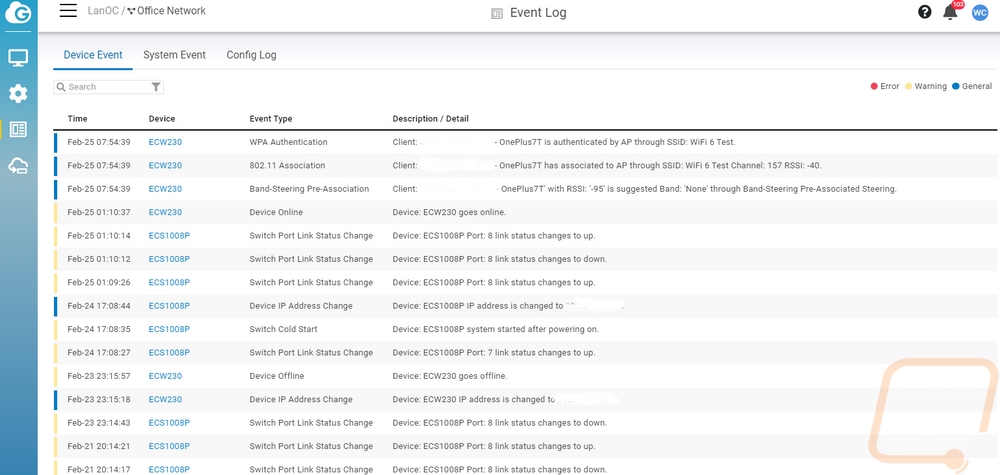
Like with each individual device you also do have a logs page where everything is aggregated. You can see device-specific events, system events, and a log of configuration changes as well. If you are using the EnGenius Cloud app you can also have the app notify you of different events. In fact, it will do this by default. It is nice, but I don’t know about the level of notifications being on by default. I was getting spammed with link status updates. But that did help point out that I had a cord that didn’t work well with the PoE for the ECW230.