Well, I’ve been busy and because of that projects like our TrueNAS Core build quickly get put aside for other things. But it is still important. The last time we took a look at it I went over the storage options that we went with. Well in order for everything to work, I need processing power. So today I’m going to go over what I’m planning on using for the motherboard, CPU, RAM, and for some of our cooling. The original goal for the build was to put to use some older hardware combined with new components on wear items like the storage into a new rack-mounted case. So some of this hardware isn’t going to be cutting edge, but that’s the point of a NAS build like this right? Putting your old PC hardware to use to get more life out of it.
Title: Project Data Hoarder – TrueNAS CORE Build Part 3
Written by: Wes Compton
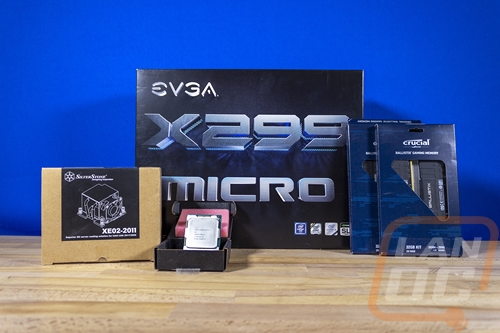
Build Sponsors/Supporters: Silverstone - Western Digital - Crucial
Amazon Affiliate link: Storage Drives – OS Drive
Links to the rest of the project: Part 1 – Part 2 – Part 3 - Part 4

Motherboard
Even before picking out a CPU, once the Silverstone RM21-308 rack mounted case was picked out. It cemented a few of the key features our motherboard would need to have. The biggest of those was the cases support for ITX or mATX. I could have gone with a larger case, Silverstone does have them. But I wanted something somewhat compact. That decision limited my options significantly. Frankly, we don’t get a lot of mATX motherboards in, and a lot of the ITX options which I have a few of would struggle to cover the other three areas that were important to me. So in addition to being mATX or ITX, our motherboard would have to have a way to handle the eight SATA hard drives. This right here eliminated all of the ITX boards I had around. I also wanted to run an M.2 NVMe SSD for the OS drive so I would need one M.2 slot. Then the last important thing was having 4 RAM DIMMS so I could have a good amount of memory. That one also took ITX boards off the table, but I was a little more flexible on that option because 32GB modules are a thing.
So the 8 SATA drives were needed so I could avoid having to add a RAID controller and like I mentioned that took all of the ITX boards off the table. But even with mATX having 8 or more SATA ports is rare, right now on Newegg even you won’t find even one Intel option with 8 or more SATA ports with an mATX form factor and I mean ALL of Intel's chipsets. There are two ASRock options on the AMD side and one would be my first choice but I don’t have it around. So before going to adding to the cost of the build, I found a creative solution using a board I do have around. I could use a board with a U.2 port with an SFF-8643 to SATA cable to expand the SATA capabilities. Let me just also point out that as I am writing this, it is all still untested so this could still all blow up in my face and I would need to go a different route. But As it sits, I just happened to have an mATX board that we previously reviewed on hand that had a U.2 port and at least 4 more SATA ports that fit the bill.
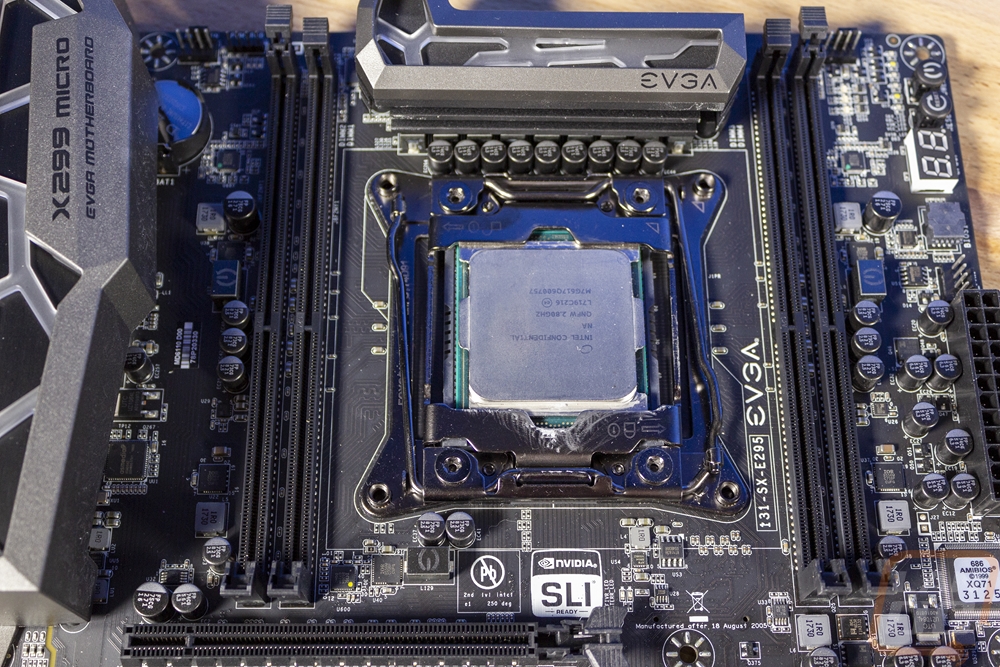
The board I came up with was the EVGA X299 Micro that I reviewed back in 2017, wow time flies… This wasn’t as cutting edge as I would have liked, but it perfectly fits the scraping together old components to build a NAS that perfectly fits this build.
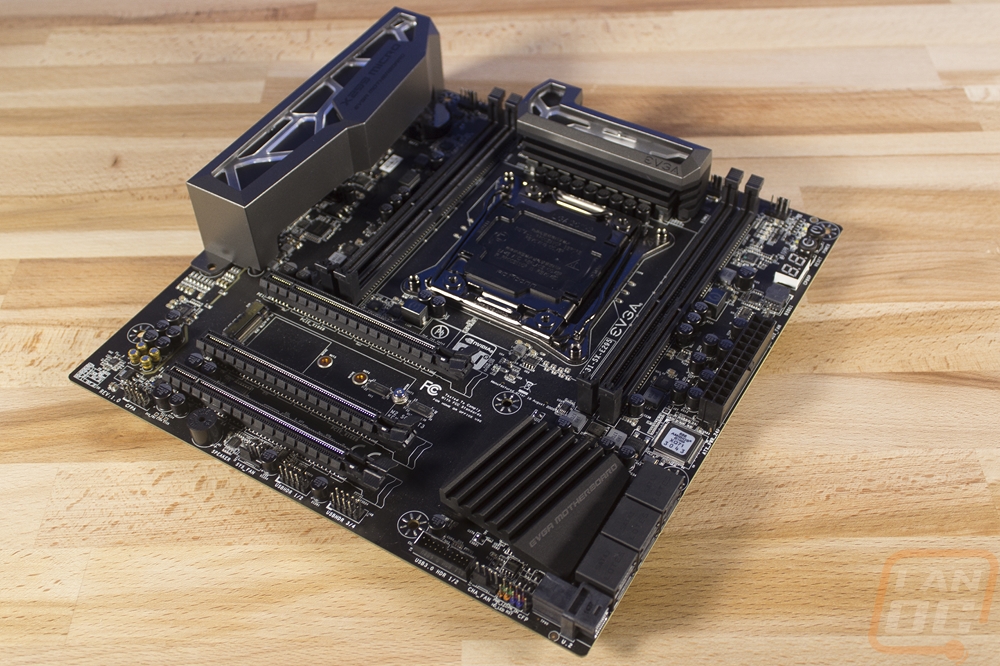
The EVGA X299 Micro was the right form factor and has four memory DIMMs which is good.
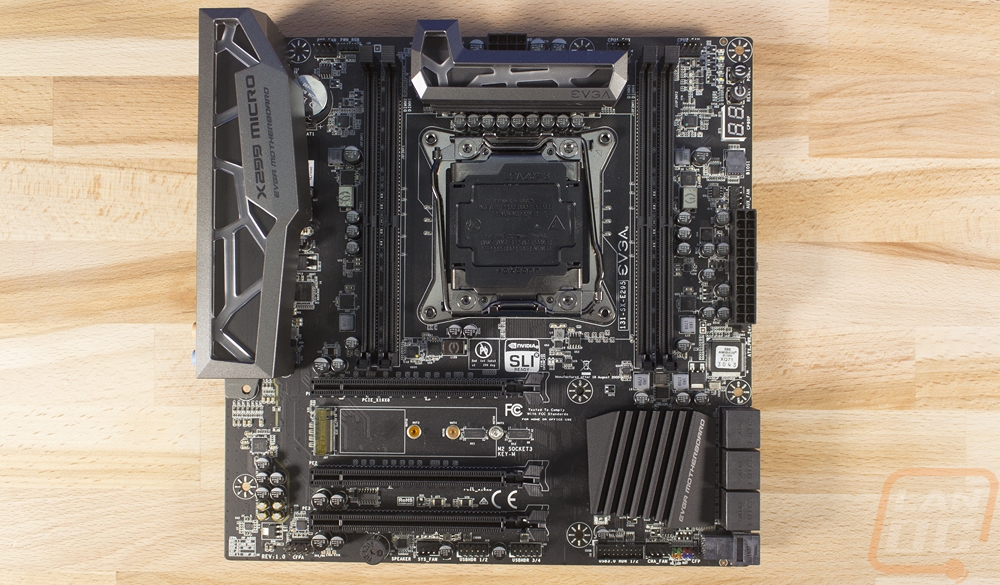
The U.2 plug is easy to get at and is right next to the six in total SATA ports giving me 10 SATA ports in total if needed. The Silverstone RM21-308 has the eight hot-swap bays. But there are also two internal 2.5-inch bays as well that I could use for a little emergency expansion if needed.
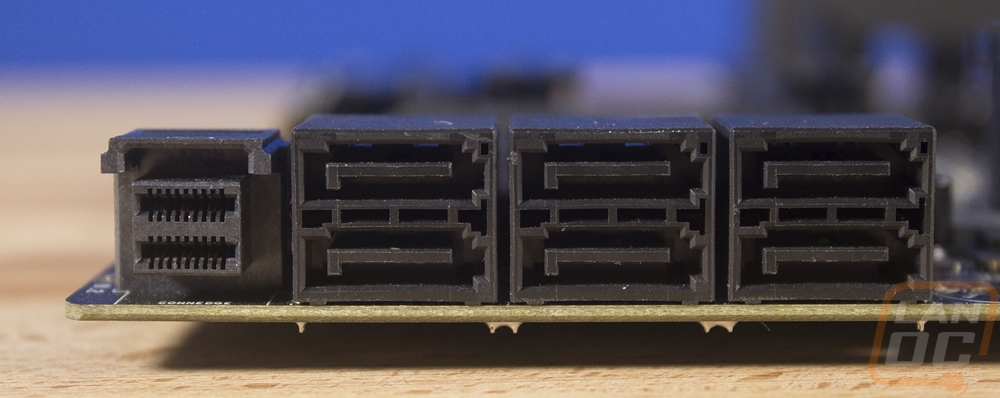
It also has one M.2 slot and the documentation at least doesn’t have it sharing bandwidth with the U.2 port which was initially a concern of mine. X299 offering a good amount of PCI lanes is a nice bonus giving us three x16 length PCIe slots with two being 16x if only one is used and both runnings at x8 if both are in use and the bottom slot is x4 full time. This means I have a few slots to add on a well. With a 10G or 2.5G network card, for example, a RAID controller if my convoluted solution doesn’t work, or a low profile video card if needed.

CPU
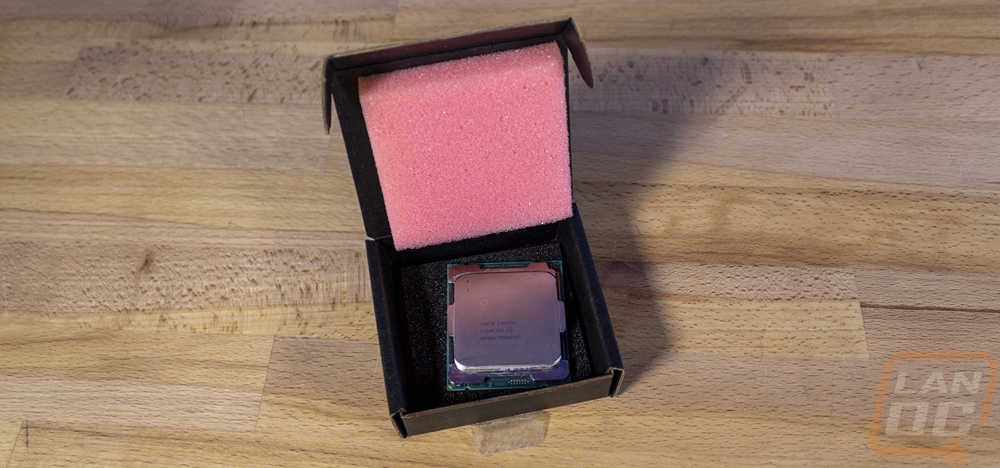
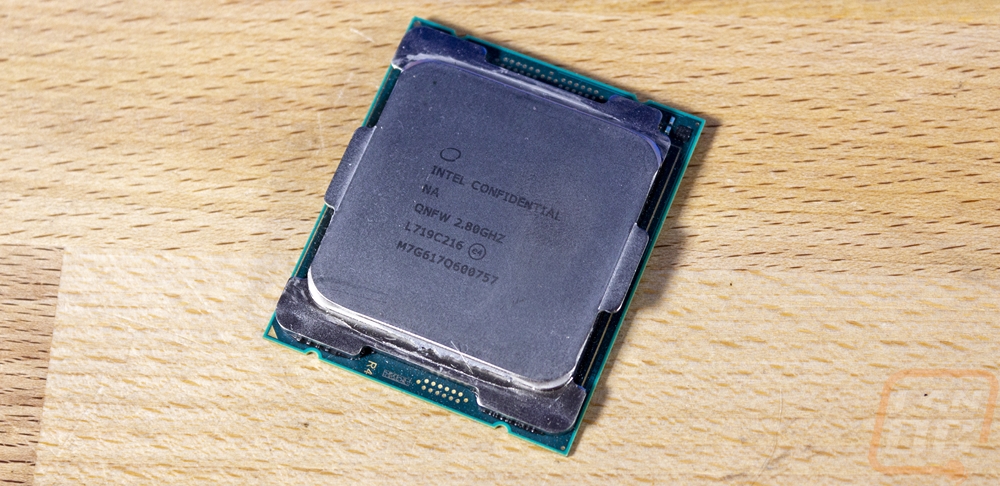
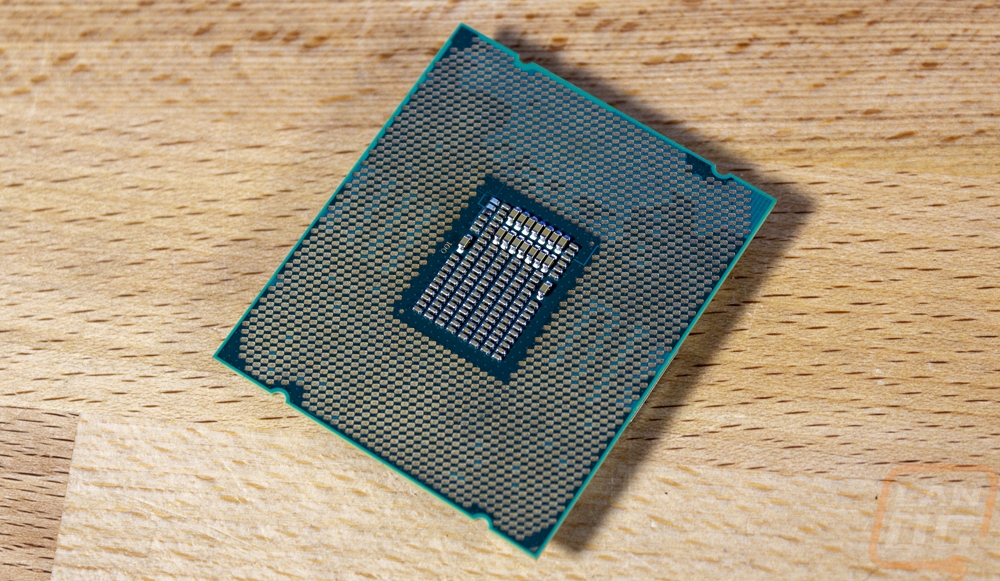
Well, the motherboard decision locked me into just a few generations of CPUs from Intel’s Core-X lineup. If I had my choice I think I would have preferred going with something with lower TDP and wattage options like the AM4 board that I found but didn’t have or if I could have found any mainstream Intel option. X299 isn’t all bad though, it has a lot of PCIe lanes with most of the options and I had a few different options on hand. I have the i7-7740 on hand which was a Core-X version of the i7-7700K, but as it turns out it isn’t listed as supported on the EVGA X299 Micro.
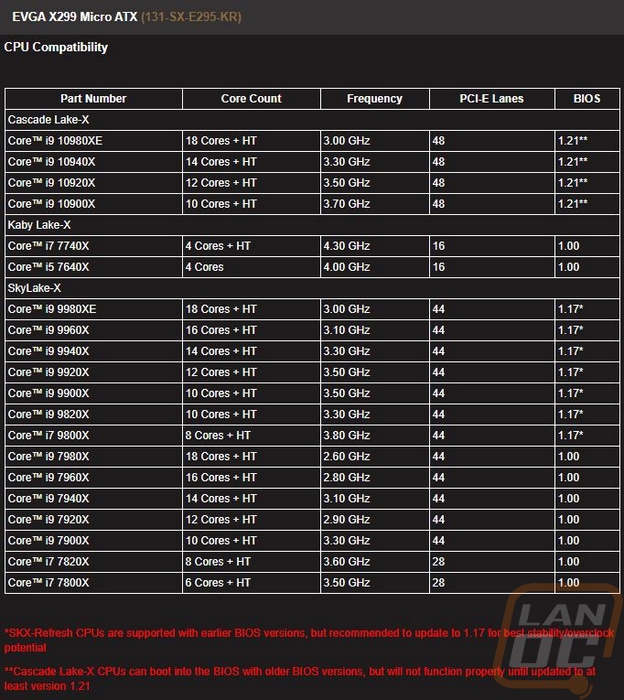
From there the options I had on hand were the higher end i9-7980XE, the i9-7960X, and the i9-7900X. I could just go with the big 7980XE with its 18 cores, but I am a little concerned that it will cause heat issues in the build. I will talk about cooling here shortly but taking to cool anything in the limited height that a 2U case offers can get complicated. Servers designed for it integrate cooling solutions that use the full case airflow for cooling and the RM21-308 does have three 80mm fans. But my experience with SFF builds is to never trust any cooling. So I was looking at the i9-7960X and the i9-7900X. The 7960X has the same TDP officially as the 7980XE but with 16 cores I have decided to give it a try. If it doesn’t work out, the 7900X will be my backup plan because it has a “lower” 140-watt TDP. But getting the extra 6 cores was worth a try.
RAM
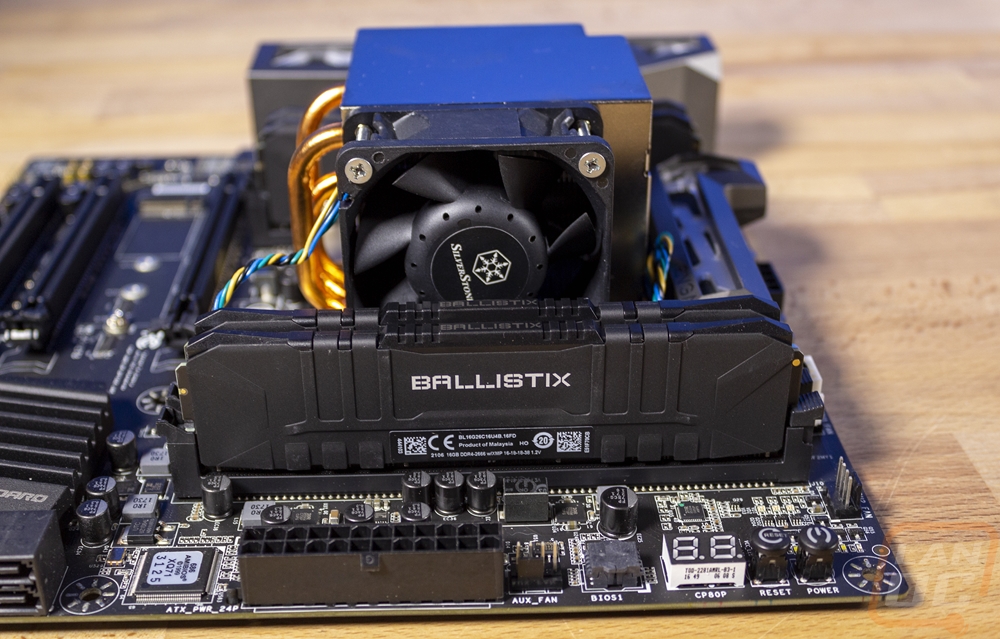
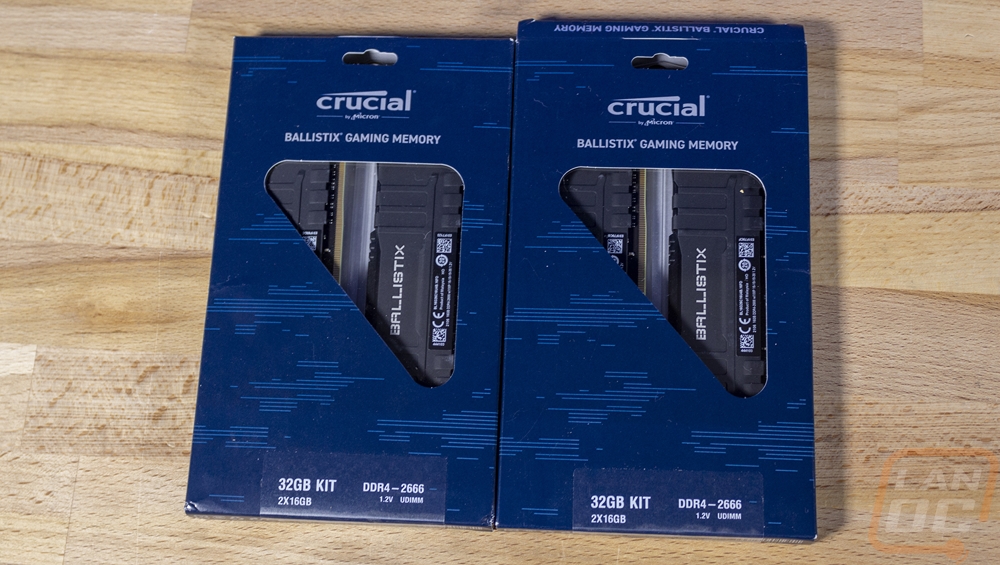
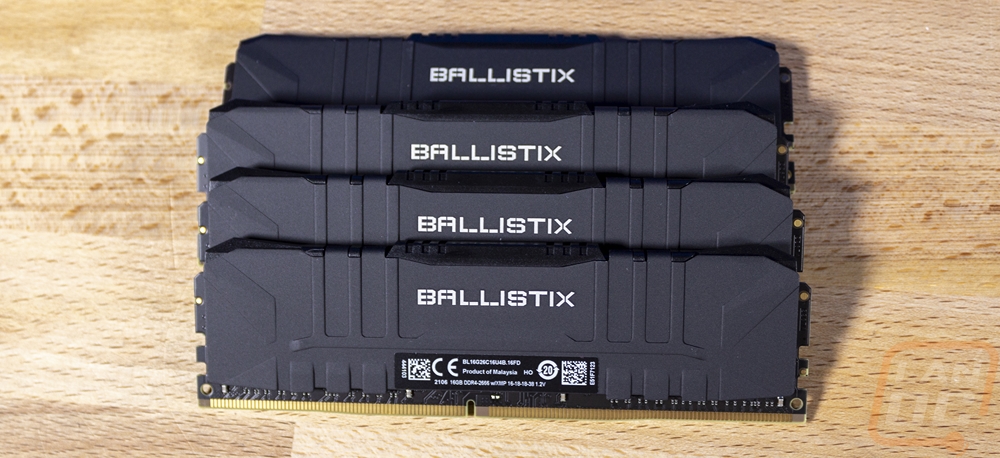
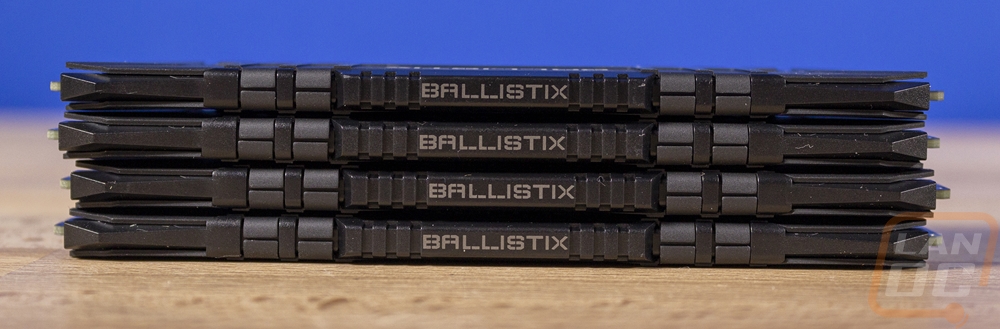
With the motherboard and CPU worked out I reached out to Crucial to look at memory options. I didn’t have any kits in the office that fit what we would need with the TrueNAS CORE build. With the goal being to run ZFS. ZFS has its Adaptive Replacement Cache which likes to snatch up as much memory as possible. So with our four memory slots, I was aiming to get the highest density ram possible. Sadly there are some compatibility issues with 32GB ram density so I decided to stick with four 16GB sticks to get us a total of 64GB of memory. From there it was mostly just a matter of what might be in stock, with the shortages in PC hardware.
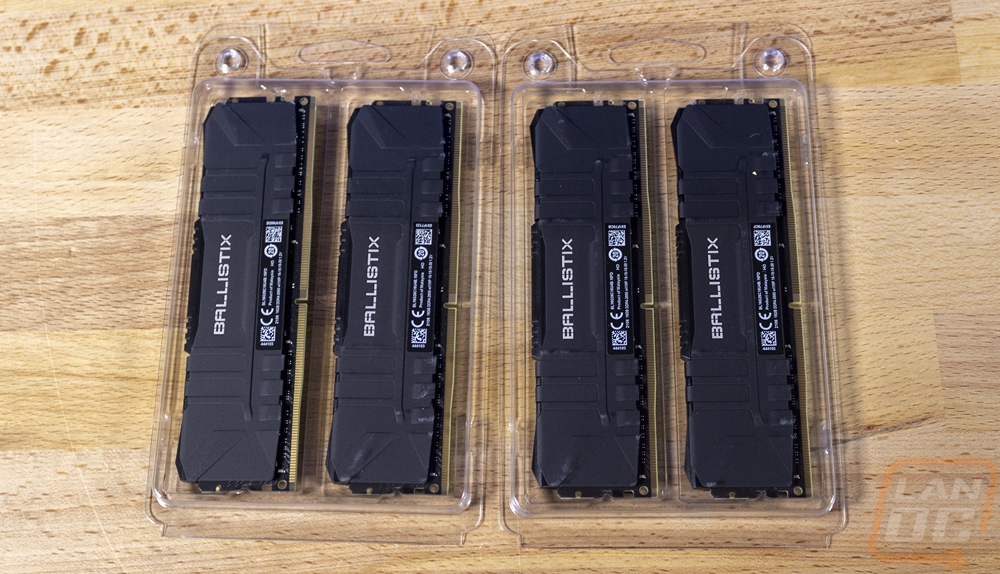
I originally just wanted a basic old-school green kit without a heatspreader. But they weren’t in stock. The kit that they did have on the other hand was much better. We ended up getting two BL2K16G26C16U4B kits. They are both dual-channel 2x16GB kits running at 2666MHz which is perfect. Even cooler though, these have the new Ballistix heatspreaders on them in black and they are sharp! This build is a patched together build, but I have to admit that the memory goes perfectly with the EVGA X299 Micro with its all-black setup.

Cooling
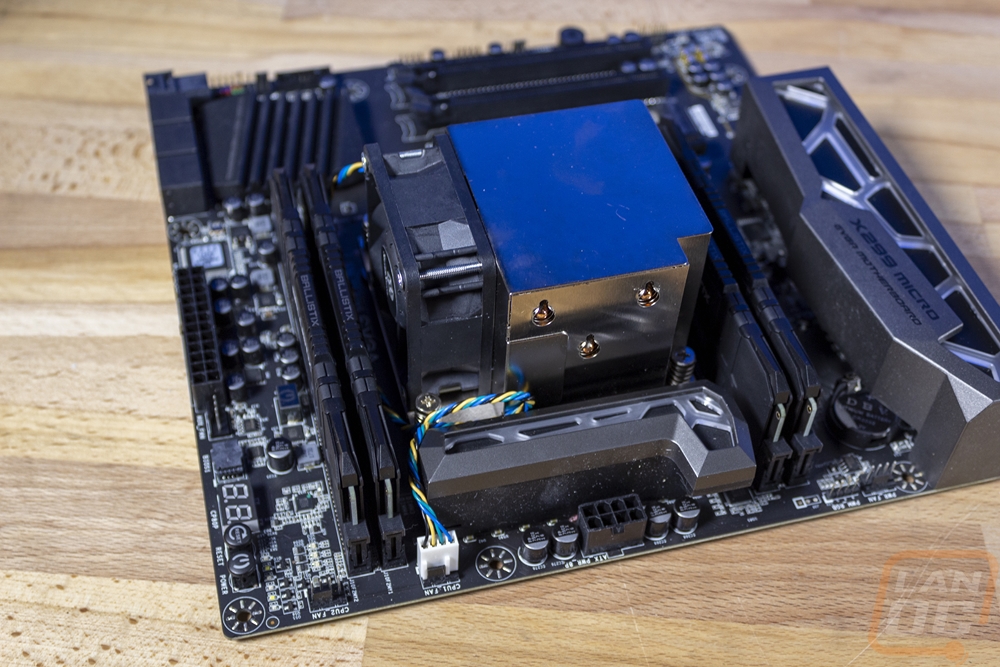
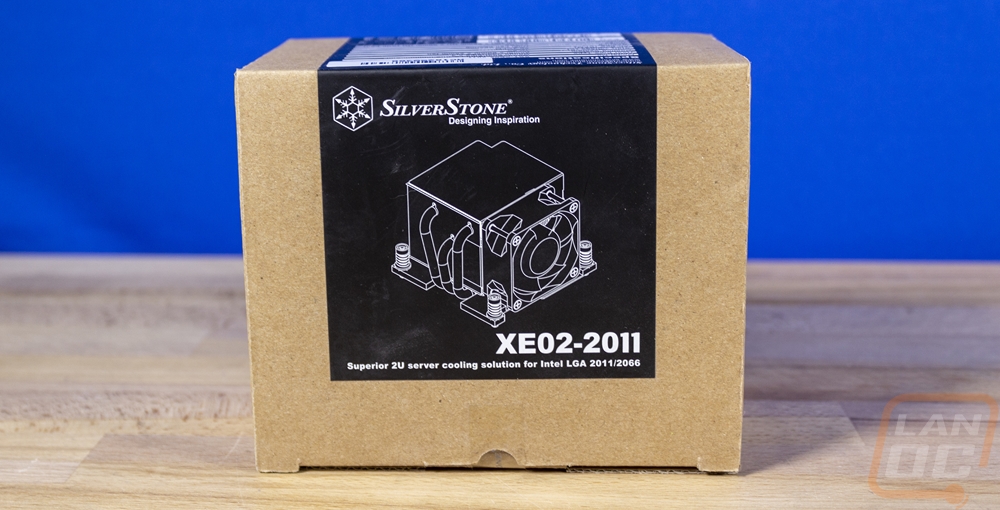
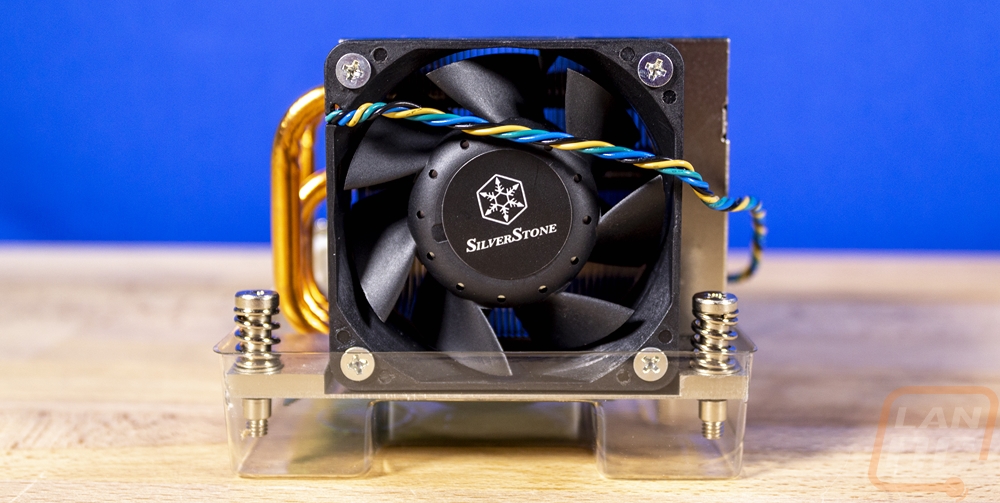
Now keeping that i9-7960X cool in the 2U rack-mounted case does bring up concerns. The 165-watt TDP is a lot of heat to deal with and the case doesn’t have a lot of height for a large cooler like a normal PC might have. Silverstone did have a 2U cooler available with support for a traditional LGA2011 CPU socket so they sent over the XE02-2011 when they sent over the RM21-308.
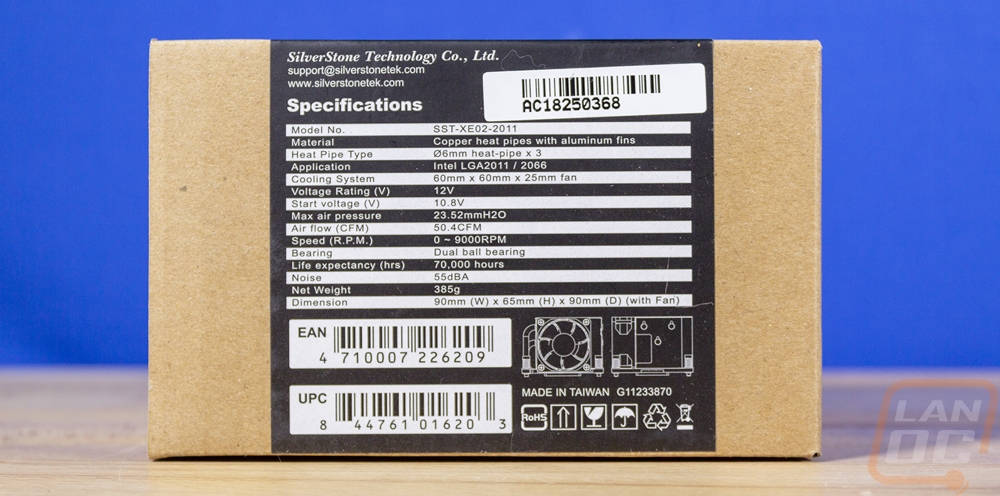
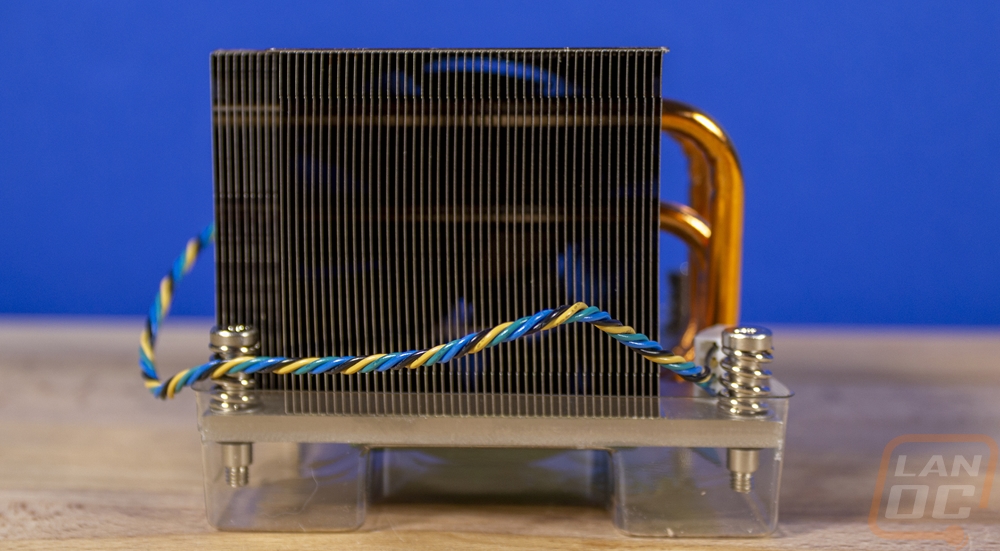
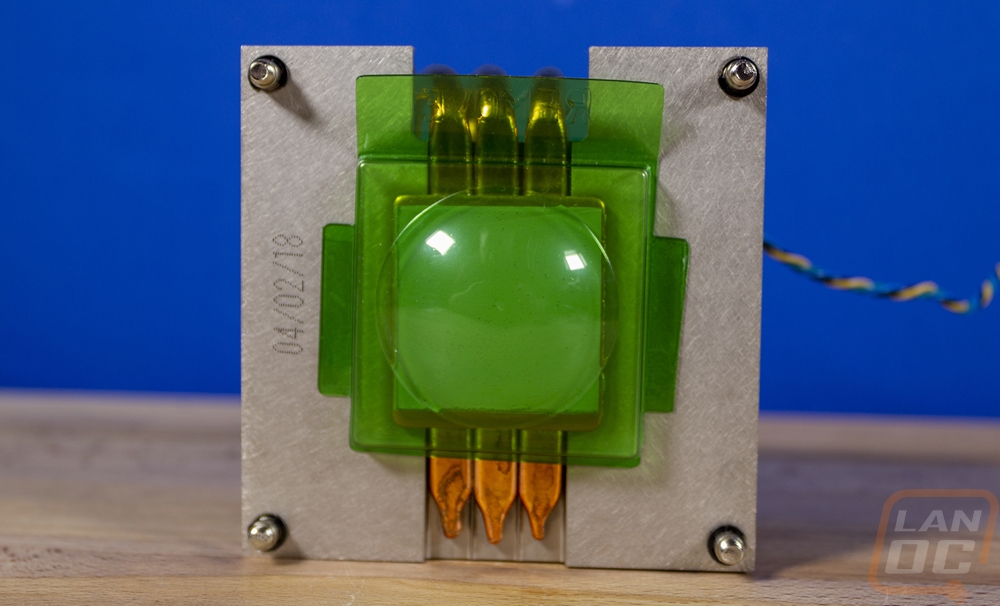
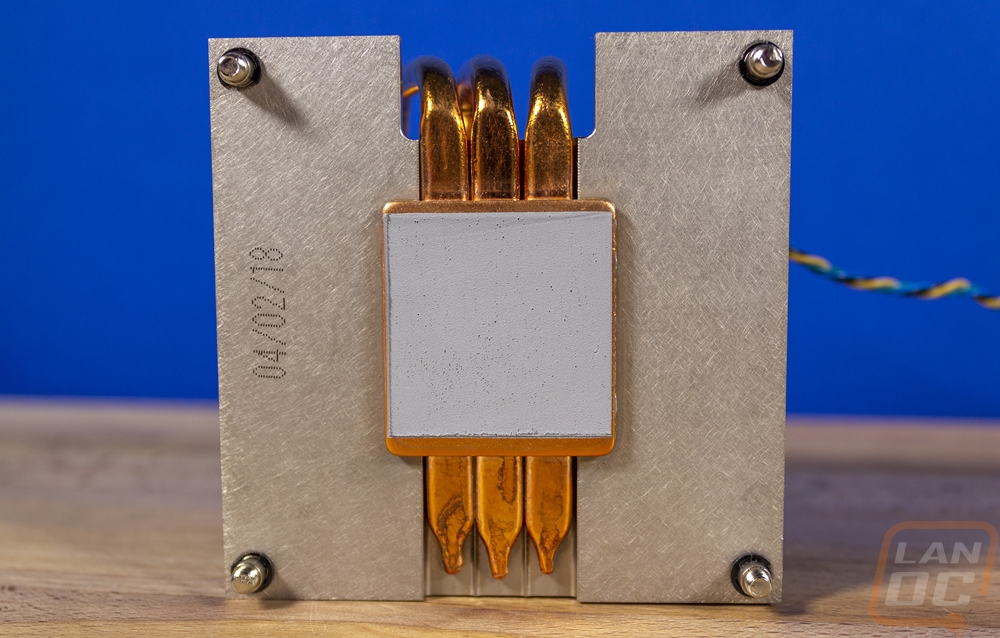
The XE02-2011 is 90mm wide and 90mm deep to fit the square LGA2011 mounting and then to fit inside of the 2U case it is a total of 65mm tall. Silverstone went with a 60mm fan which is about as big as you can fit once you add the mounting plate on the bottom of the cooler. The XE02-2011 has three copper heatpipes that run right on top of the copper contact surface to help pull the heat up into the heatsink. Then the fan runs up to 9000 RPM which is crazy fast and I imagine very loud as well but we will see. They do have the noise level listed at 55dBA in the specification. They have the airflow at 50.4 CFM and with dual ball bearings on the fan, it has an expected life of 70,000 hours which is just under 8 years. Sadly the XE02-2011 doesn’t have a TDP listed, so I can’t be completely sure if it will handle our 165 watt i9-7960X, but we will find out.
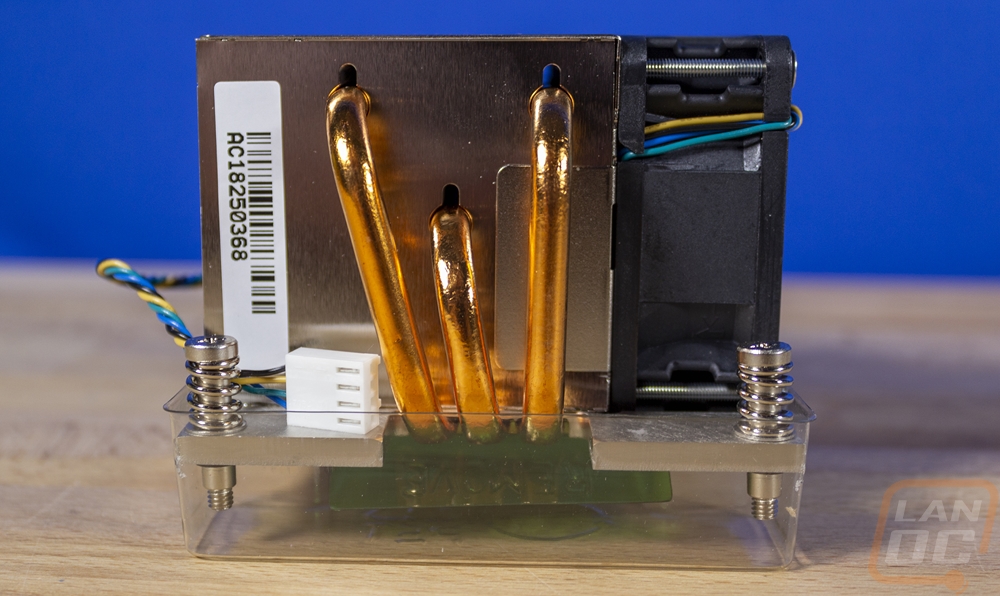
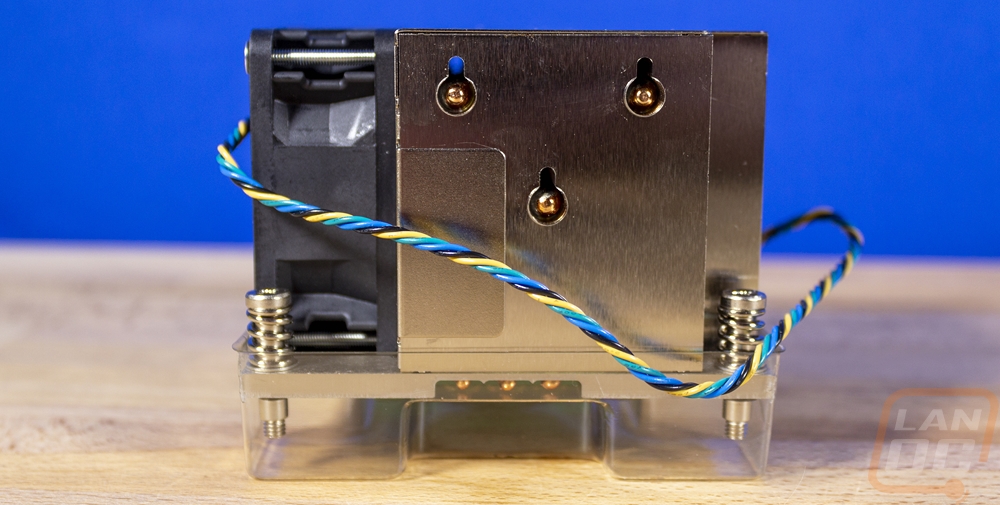
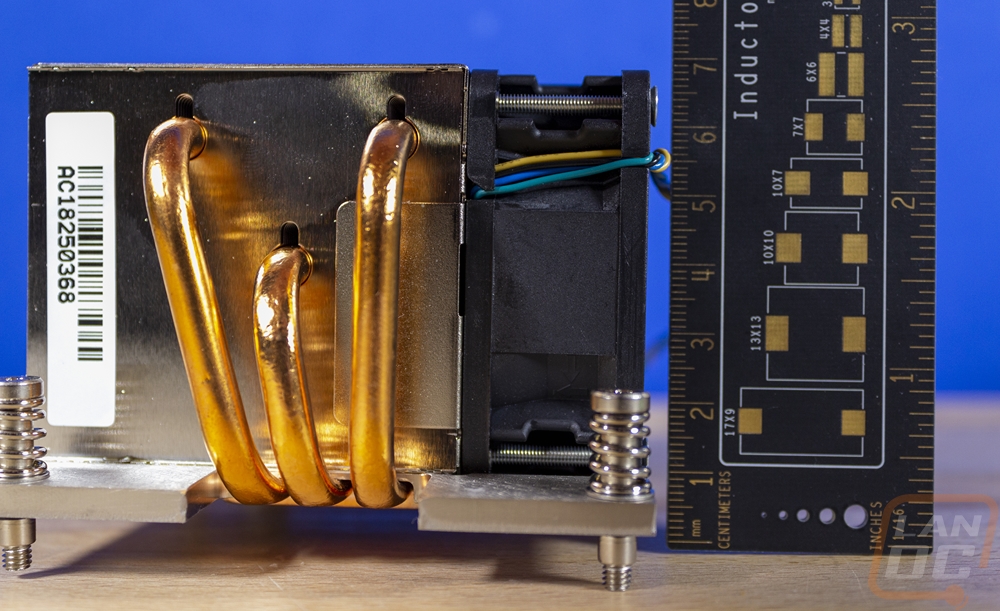
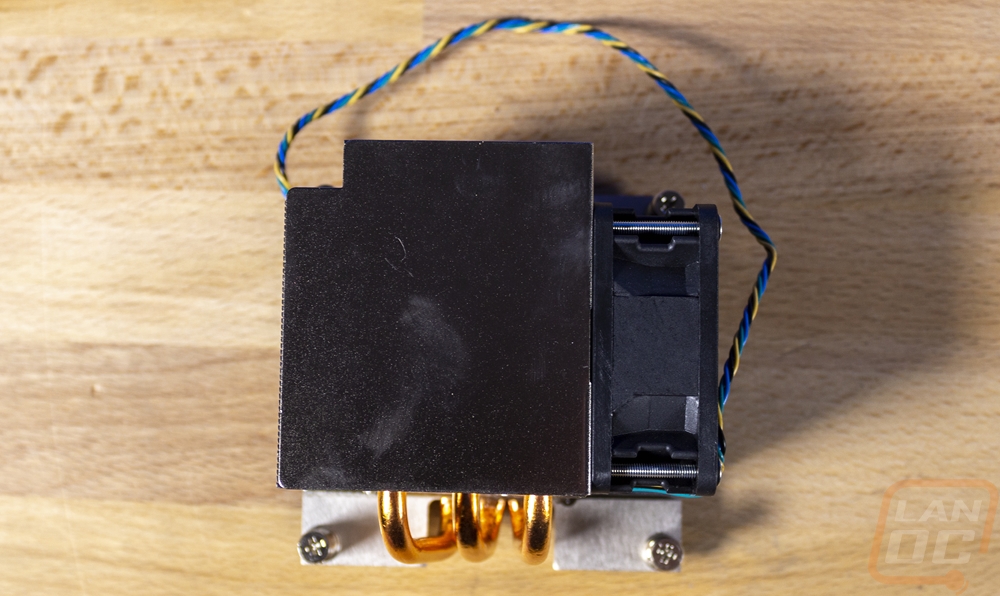
The XE02-2011 comes with thermal paste preinstalled and because it is designed specifically for 2011 and 2066 socket CPUs you don’t have any mounting bracket to change out as well.
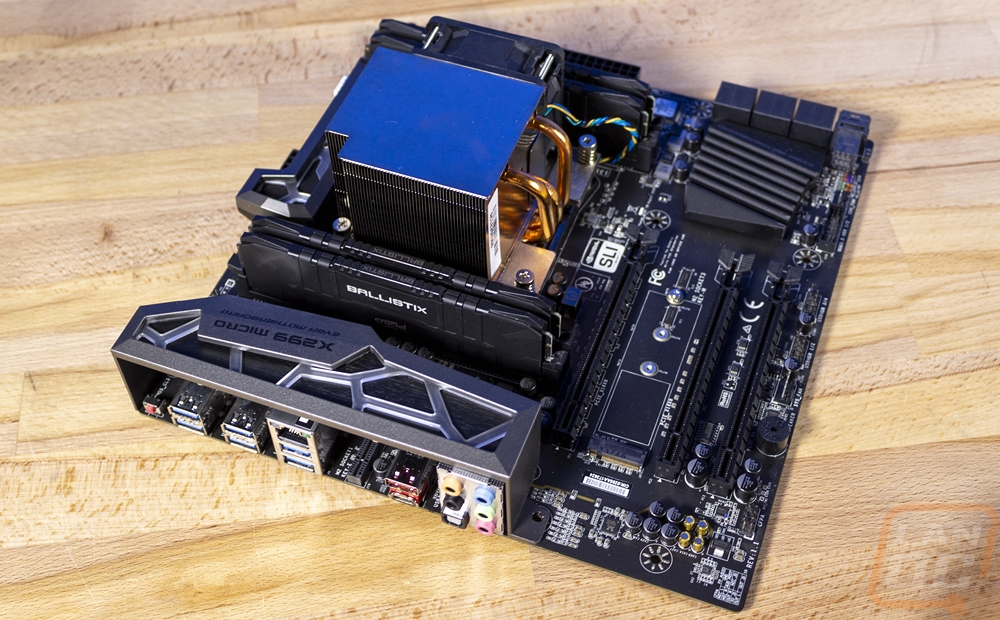
Just to get ready for building in the system soon I did go ahead and put together all of the components I went over today. I was able to drop the i9-7960X into the X299 Micro. Then installing the XE02-2011 was as simple as screwing down the four spring loaded mounting screws. Then getting the Ballistix memory installed in the four slots. All it is missing is the Crucial P5 that I previously took a look at and I could boot everything up!