While I am a keyboard and mouse guy to the core, there are plenty of games that play better when using a controller. So even the most hardcore keyboard and mouse PC gamers should keep a good controller around as well. I’ve been using a PS4 controller for a while but have issues with it from time to time and with that, I have been checking out a few different options from the Cooler Master Storm Controller as a budget option up to the Scuf Reflex controller and with the ROG Ally launch Asus also launched a new controller, the ROG Raikiri Pro and today I’m going to check it out as well to see what it is all about.
Product Name: ROG Raikiri Pro
Review Sample Provided by: Asus/ROG
Written by: Wes Compton
Amazon Affiliate Links: Here
|
Specifications |
|
|
Compatibility |
Windows 10 Windows 11 Xbox Series X|S Xbox One |
|
Connectivity |
Wired RF2.4Ghz Bluetooth (Download driver required) *Xbox console only supports wired connection |
|
Weight |
330g (including cable) |
|
Dimensions |
103(W) x 64(H) x 155(L) mm |
|
Color |
Black |
|
Button Mapping |
Yes |
|
Analog Thumbsticks |
Yes |
|
Lighting |
RGB |
|
Rumble |
Yes |
|
I/O port |
USB-C 3.5 mm jack |
|
OLED |
1.3” with 128 x 40 resolution, 2 grey level |
|
Audio output |
3.5 mm analog audio port compatible for Xbox and PC (Windows) * Headset connection is only available in wired connection |
|
Microphone input |
3.5 mm analog audio port compatible for Xbox and PC (Windows) * Headset connection is only available in wired connection |
|
Battery life |
Last for up to 48 hours of use (w/o lighting, vibration OFF). |
|
Cable |
3m USB-C to A detachable cable |
|
Contents |
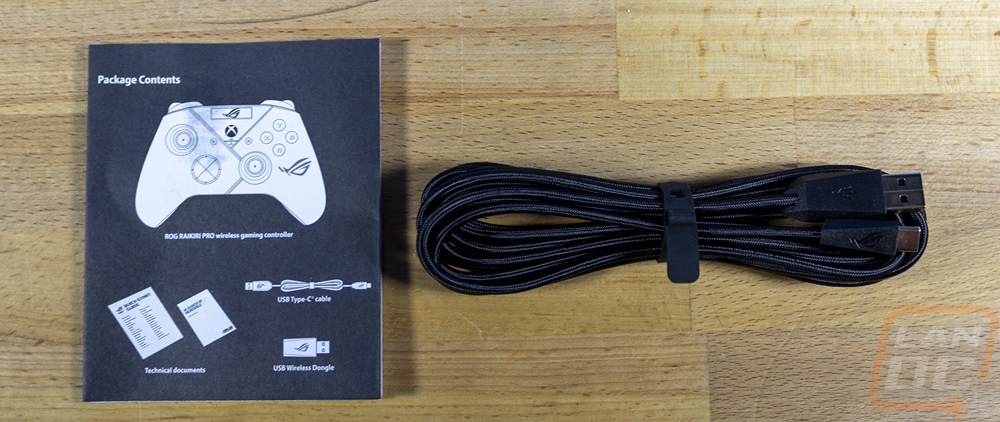
1 x ROG Raikiri Pro gamepad 1 x USB Type-C to Type-A cable 1 x USB wireless dongle 1 x Warranty book 1 x Quick start guide |
|
Warranty |
1 year |
Packaging
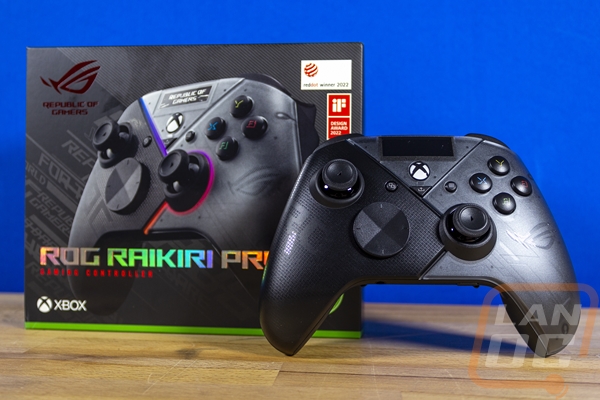
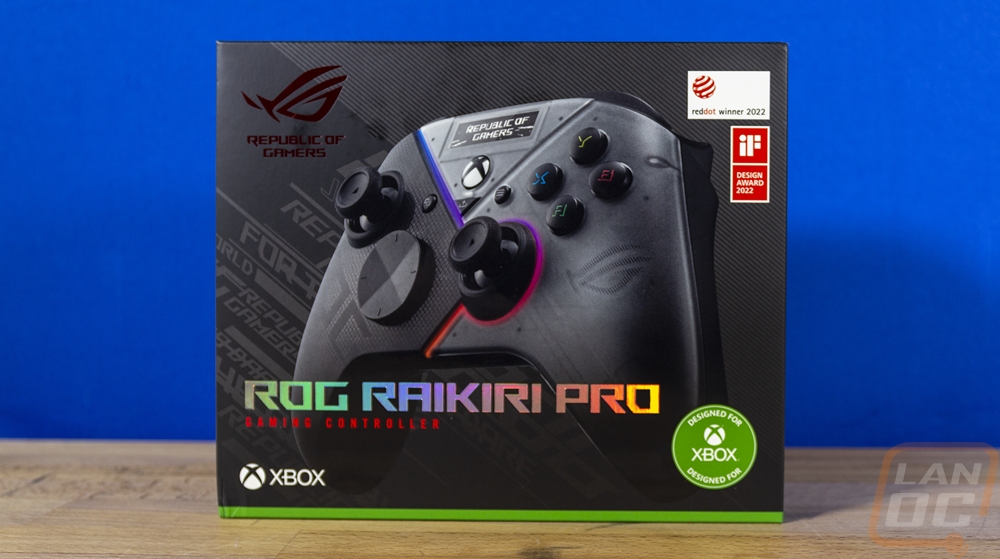
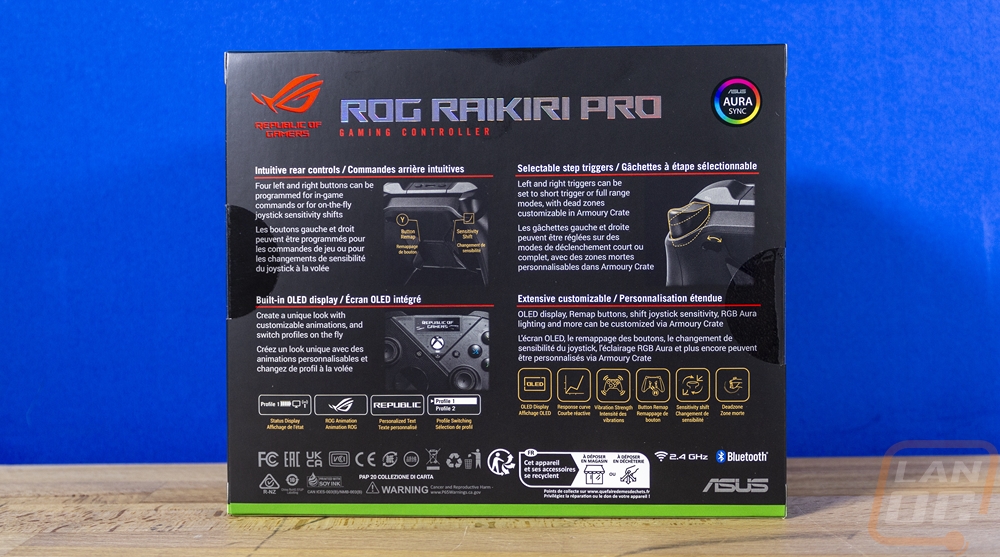
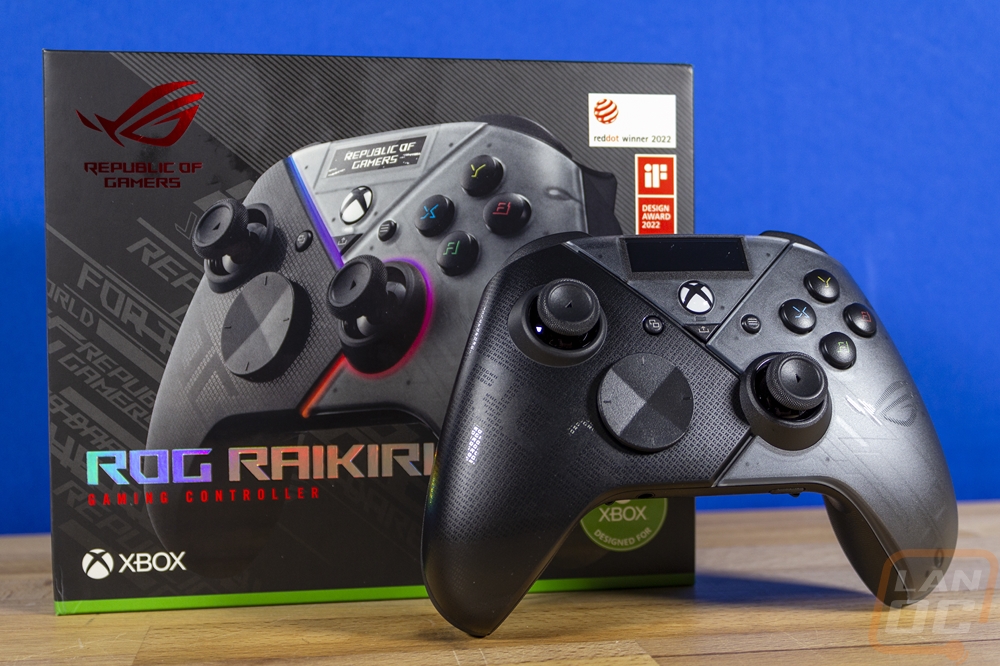
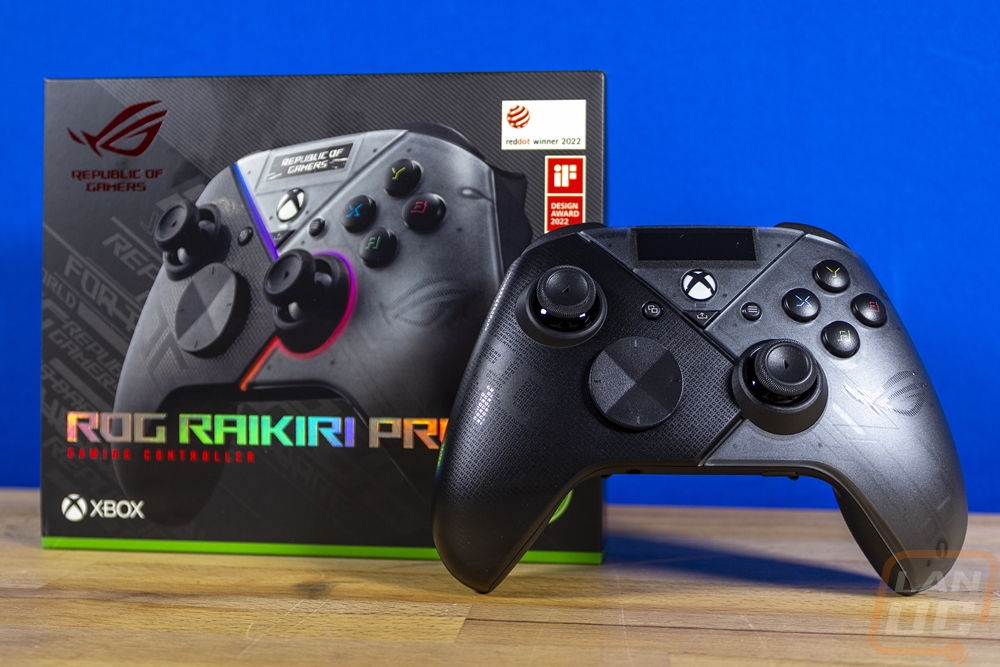
The box for the ROG Raikiri Pro has a black background with various ROG branding in the background as well as lines across half. They have a huge picture of the controller that takes up most of the front of the box, this has the RGB lighting lit up and shows off the display in action as well. Across the picture is the ROG Raikiri Pro model name which is in a reflective holo finish. The ROG logo is in the top left corner and is reflective as well but with a red tint. Along the bottom, there is a green stripe and the Xbox logo as well as a designed for Xbox badge that lets you know that this is an Xbox-based controller. The back of the box has the ROG branding and the ROG Raikiri Pro model name repeated along with the Asus Auro Sync badge. Then they have four sections that highlight different features. They all have longer descriptions and most have zoomed in detail pictures as well. The green line from the front wraps around here as well and they do show that this support 2.4 GHz and Bluetooth as well down along the bottom.
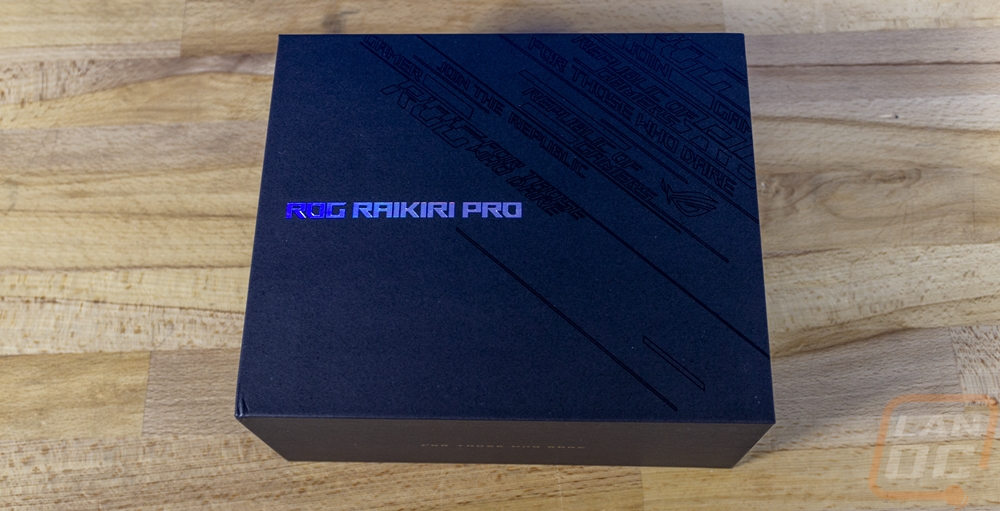
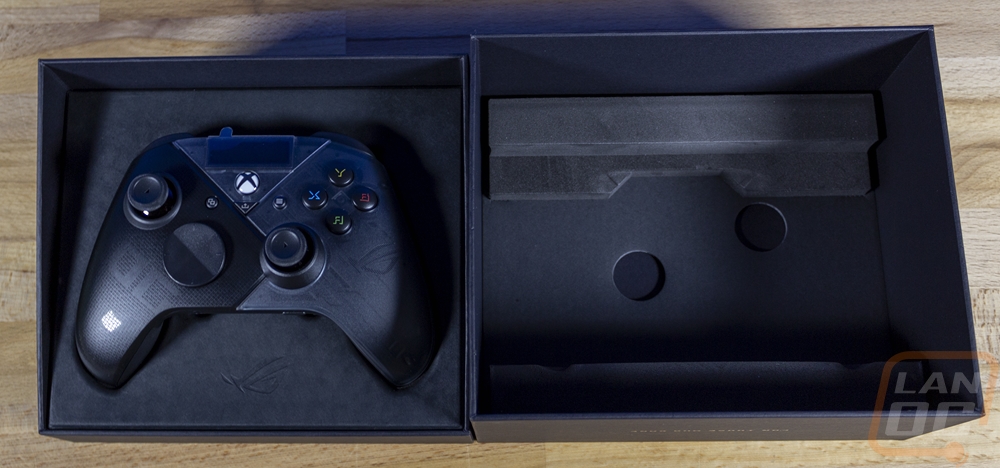
The outer box has a second box inside. This one is all black with gloss black ROG branding printed across it and the ROG Raikiri Pro model name in the holographic finish again. The lid on this box lifts up and inside you have dense foam glued to the top to keep the controller from moving around and then the controller in the bottom half sitting in a tray formed to fit it to keep it from moving as well. Under the controller tray, you have the documentation and the accessories.
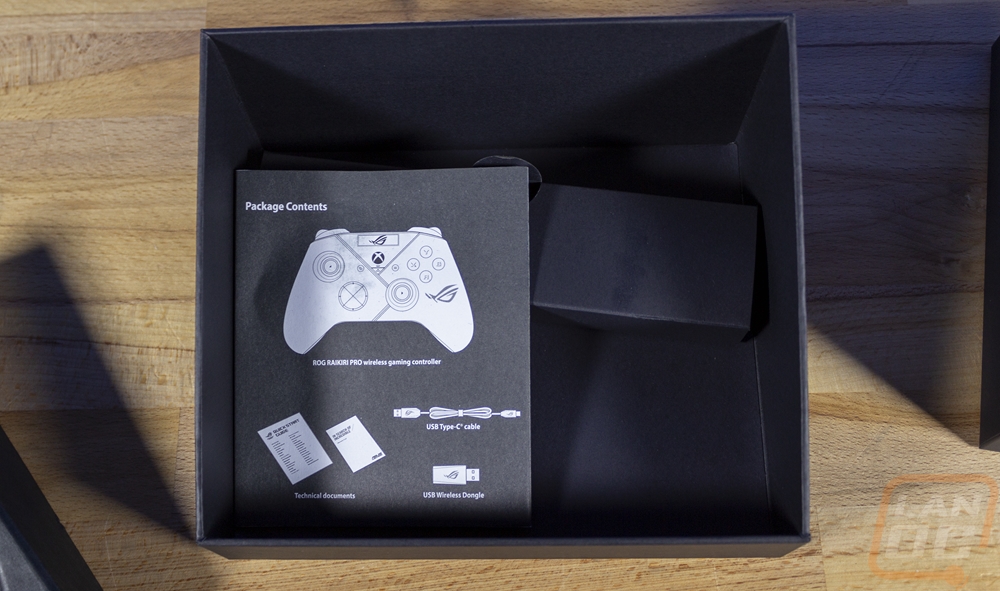
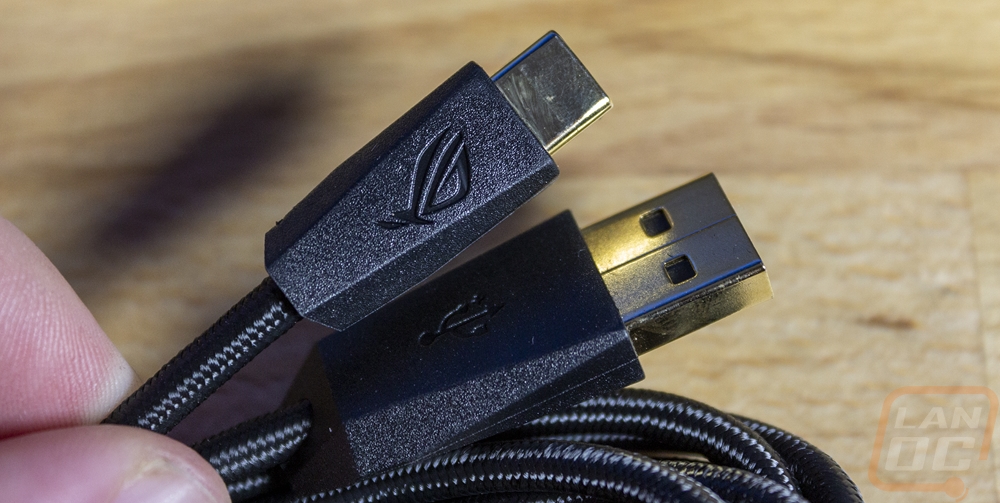
For documentation, you get a user guide that has the package contents right on top which is nice. Then for accessories, you get a USB cable. The cable has a black sleeving and a rubber reusable tie to wrap the cord up. The cord has unique-shaped plugs on both edges with ROG branding. One end has a Type-C connection and the other is a standard USB Type-A connection. The contents also list a wireless dongle but you won’t find that here, it comes hidden away inside of the ROG Raikiri Pro itself.
Photos and Features
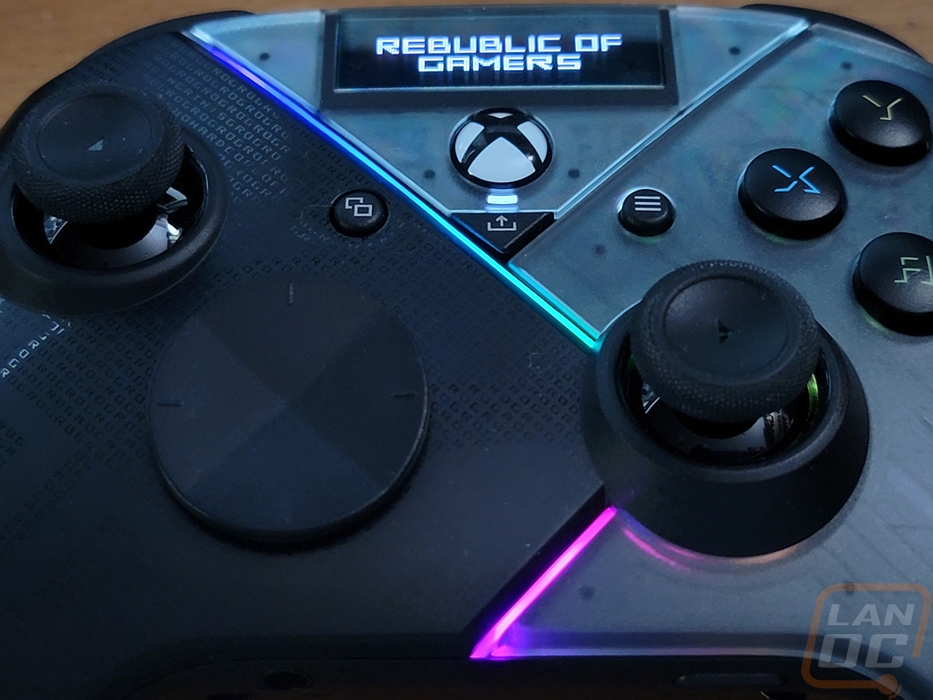
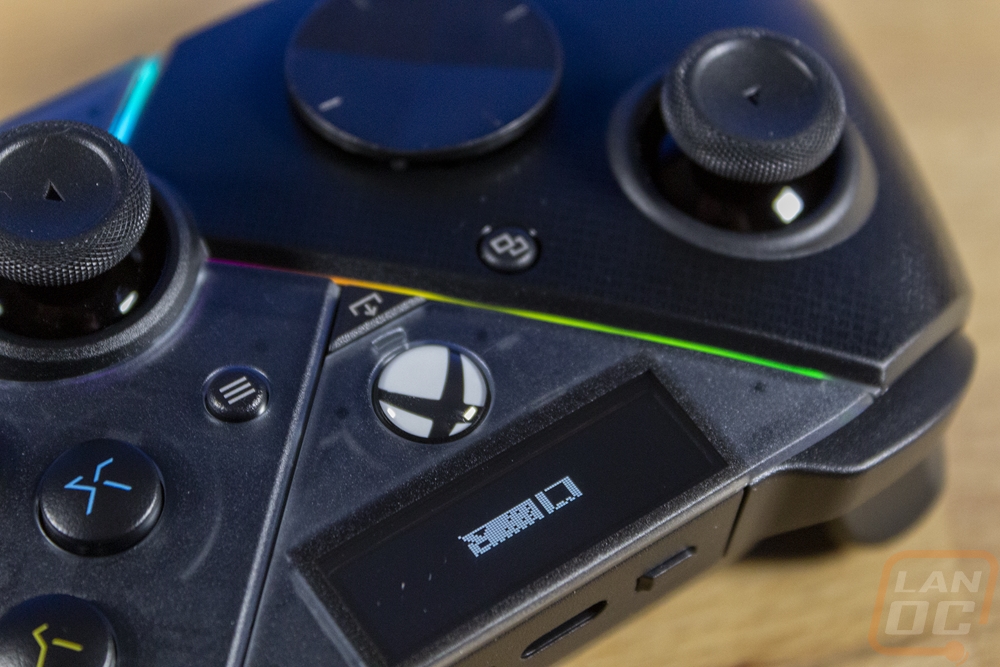
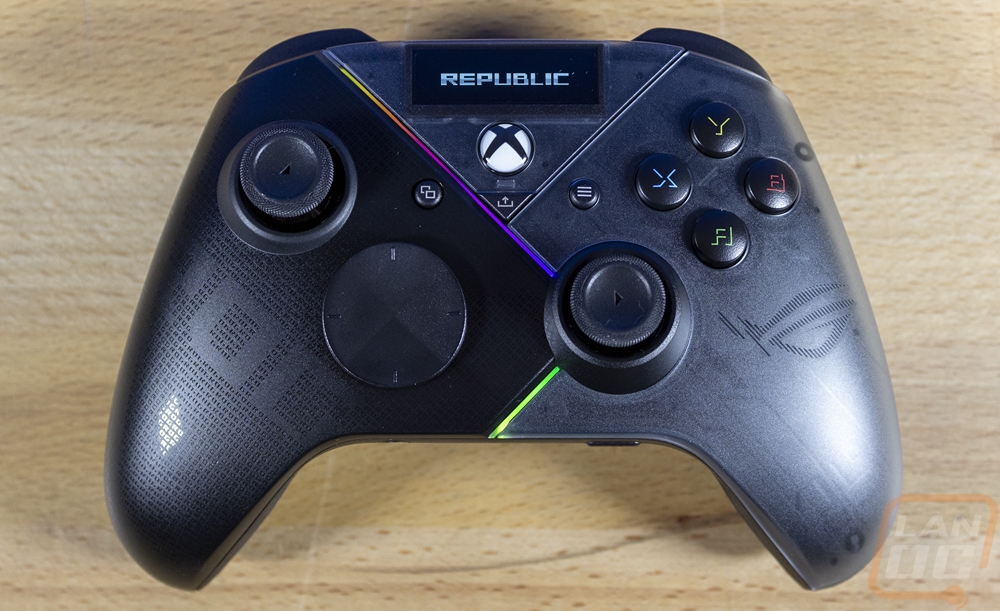
The ROG Raikiri Pro, like the packaging, implies, is an Xbox controller at its core and Asus hasn’t changed the shape of the controller too much. The overall shape is still very Xbox and it does have the offset analog sticks that the Xbox controller style is known for with the left analog stick up higher and the direction pad on the left down at the bottom like the right analog thumbstick. The Raikiri Pro does have a unique split design where the left side of the controller is black and then on the right it has a translucent cover over top of a black base which they use to integrate ROG logos into the styling all over. The black side has ROG logos as well with extremely tiny ROG slayed out and gaps in the small logos that make MORE ROG logos. The layout is moved around slightly in the top middle to accommodate the OLED screen at the top which is one of the big features of the Raikiri Pro.
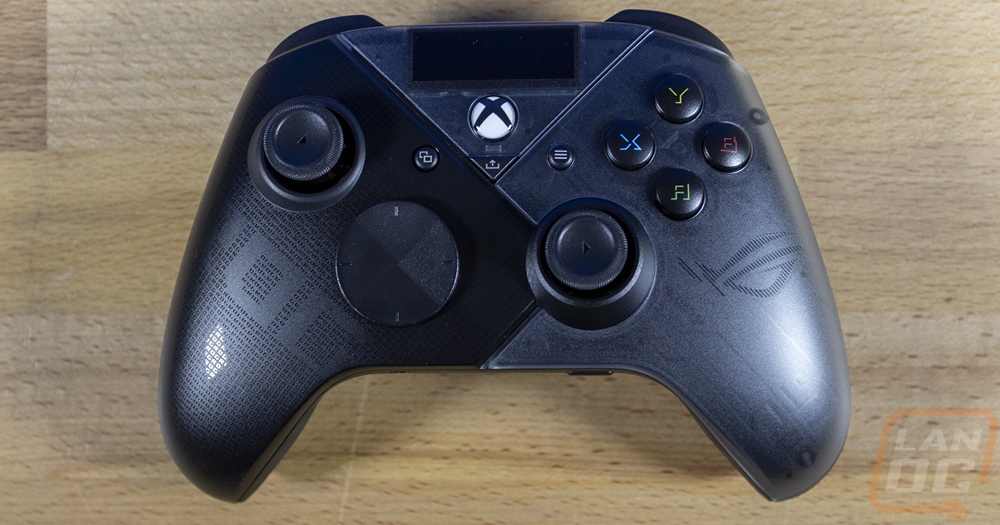
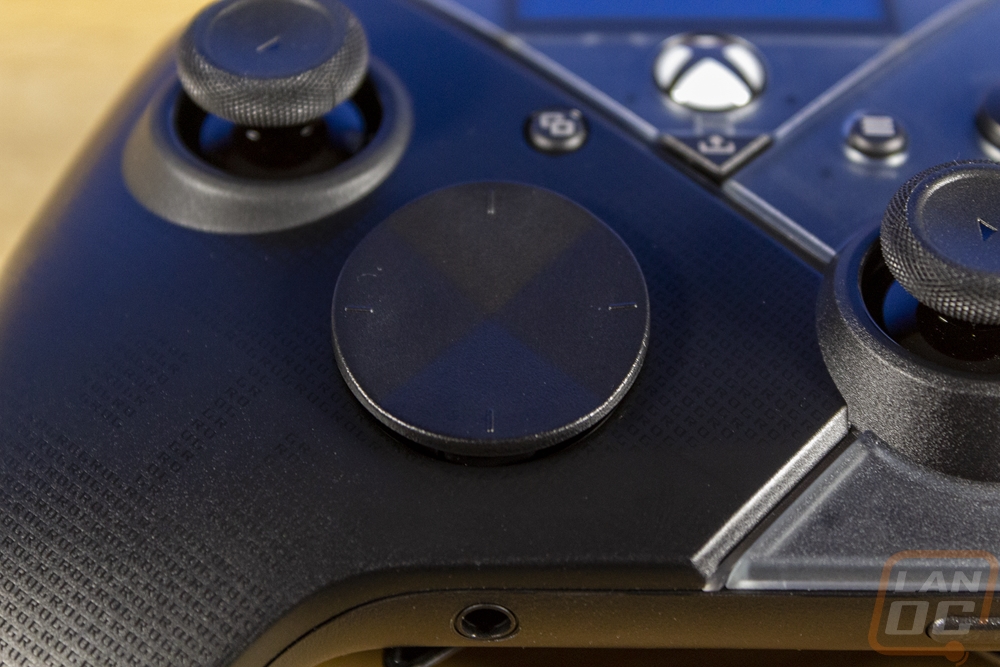
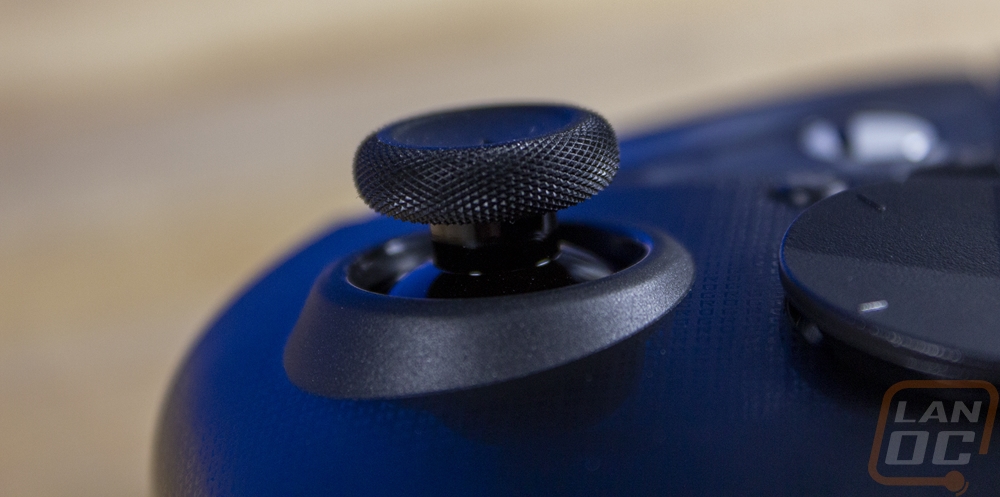
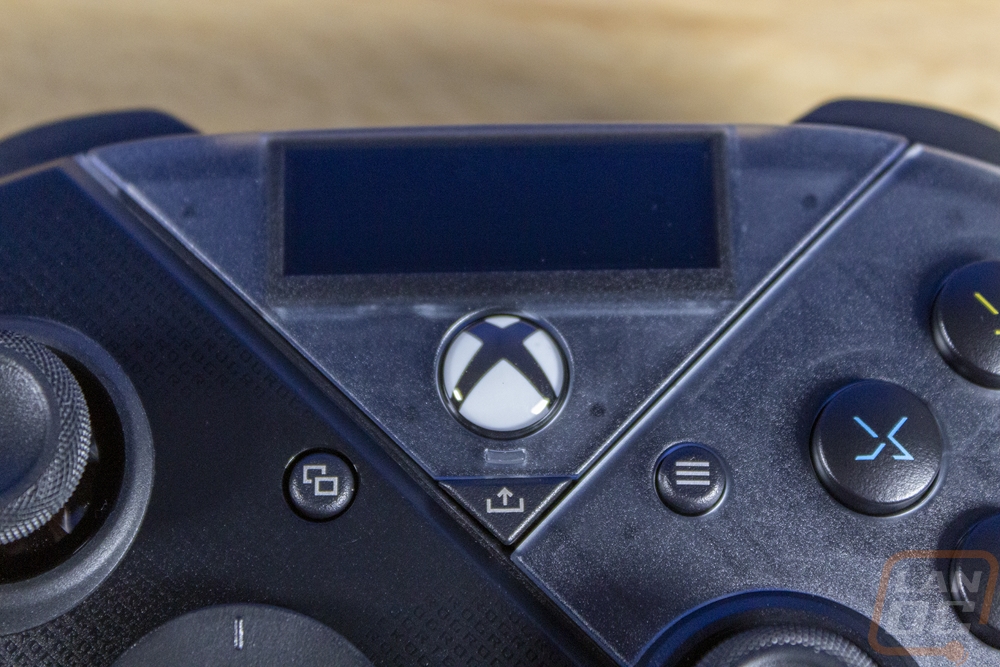
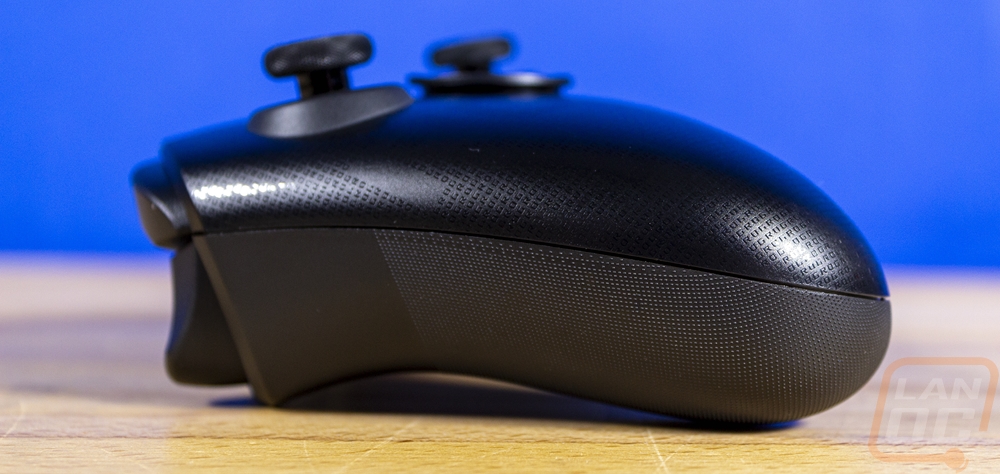
The left side of the Raikiri Pro has the top thumbstick which has a concave top and around the outer edge, it has a heavy knurled texture all on the rubber cap on top. The direction pad below that is round similar to the Xbox Elite design only it has a surprisingly flat shape to it with a slight X shape in it where each of the raised up, down, left, and right areas meet together in a valley. It is flat enough that I initially thought the colors you can see in the picture below were just painted on until I felt it. Next to these, the Raikiri Pro does have a View button which has the two boxes on it. Then over on the right side mirroring the view button it has a menu button with the three lines on it. You have the X, Y, A, and B buttons on the right and they have the same colors as on a standard Xbox controller but the font here is a lot harder to read than is needed. You can see the translucent cover on the right side of the Raikiri Pro that lets you look down through and of course like the other side has ROG logos in it. The right thumbstick or thumbstick has the same concave top and knurled grip on the rubber cap so no difference there compared to the left side. It all leads to the center where the Xbox logo is down lower and a little smaller. There is a status LED just under the Xbox button and below that the triangle-shaped button is the share button that you can find in the same location on the Xbox S and X controllers. Above that is a small OLED display which is 1.3 inches in and has a resolution of 128 x 40 and supports two grey levels for a little more than black and white pixels.
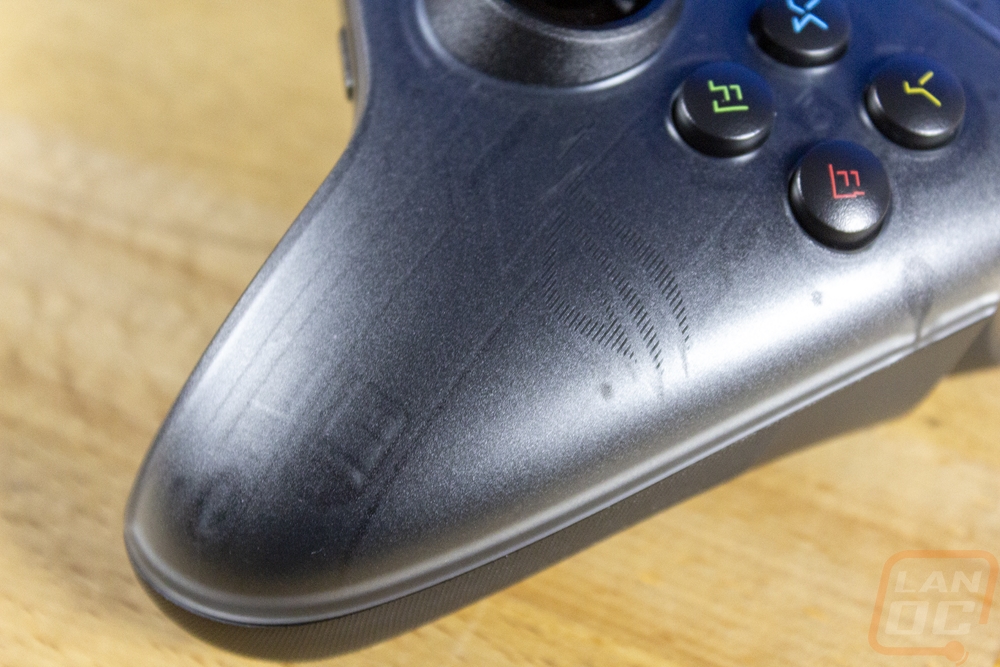
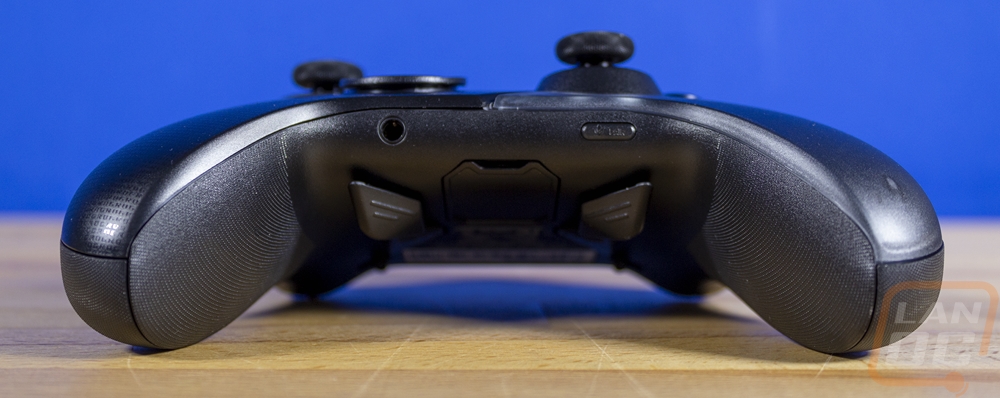
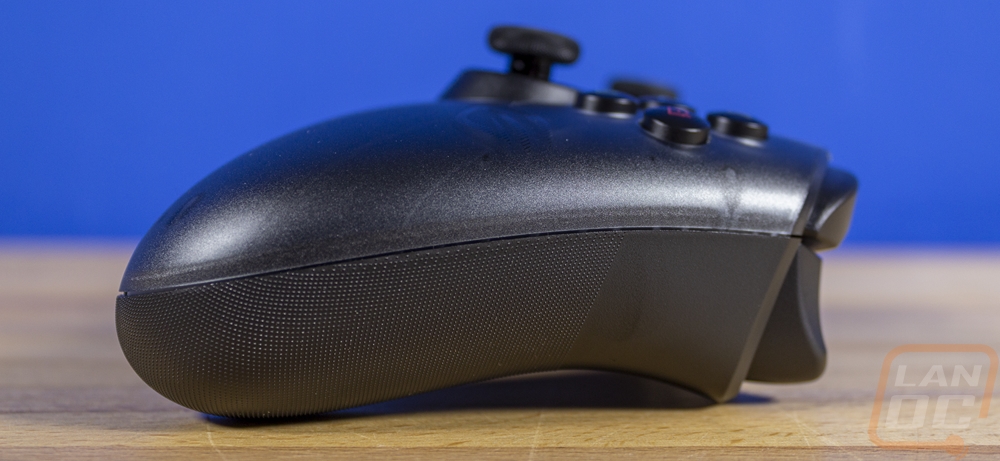
The bottom of the Raikiri Pro does have a headphone jack just like the Xbox controllers but it doesn’t have the wider bottom plug that Xbox controllers have in the center. Over on the right, there is a button hidden away, this is the pair button for pairing Bluetooth devices to the Raikiri Pro. The bottom view as well as both side views of the Raikiri Pro show the knurled grip that wraps around from the back up onto the sides of the controller and on the inside of the grips at the bottom as well. This is the same grip that the Raikiri Pro has on the thumbsticks and calling it knurled isn’t completely accurate. While that is what it feels like it is actually tiny raised dots.
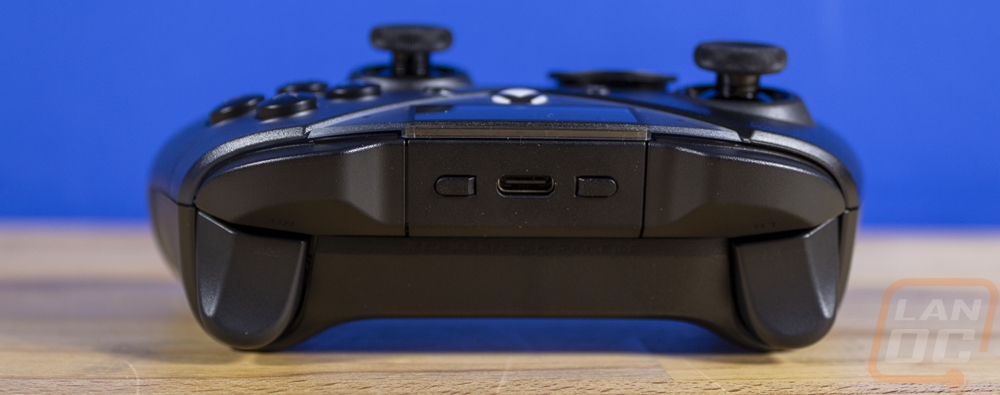
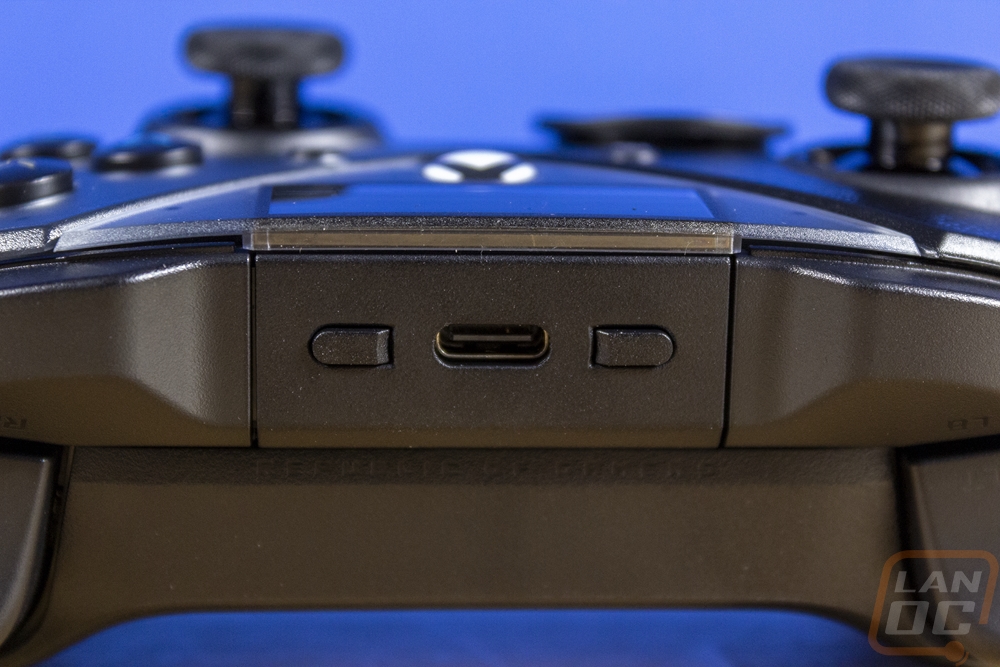
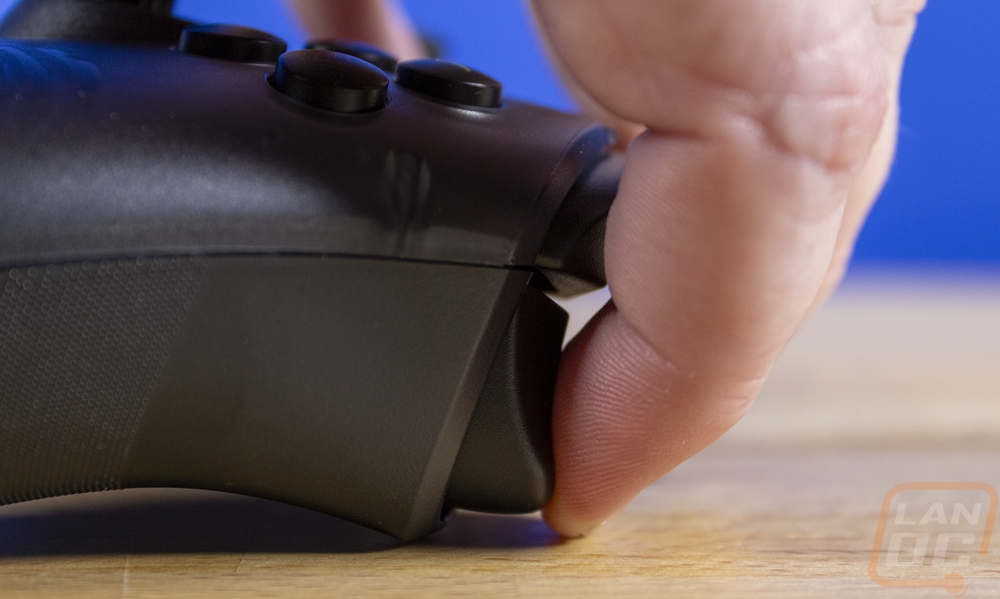
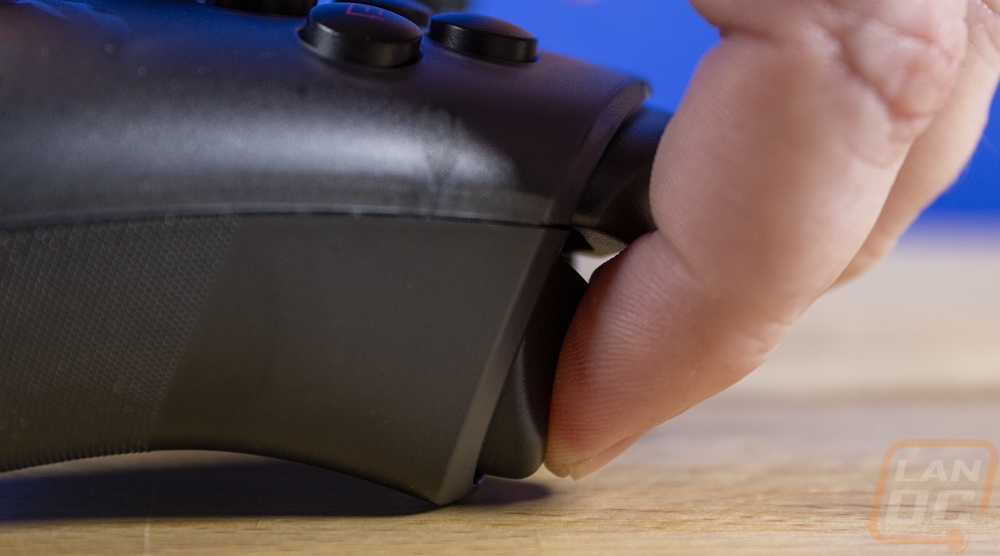
The top edge has a few things going on. As you would expect both sides have top bumpers and analog triggers down below just like on any modern controller including all of the Xbox controllers. The analog triggers do have a short throw mode that shortens their throw but they aren’t instant like with the instant triggers on the Scuf Reflex, but being able to swap between them is worth the tradeoff. Then in the center, there are two buttons on either side of a USB Type-C connection. This is the charging port for the Raikiri Pro which also doubles as a wired controller when you have it plugged in. The two buttons on either side of the plug however are unique and these are the navigation buttons for the OLED screen on the front of the Raikiri Pro.
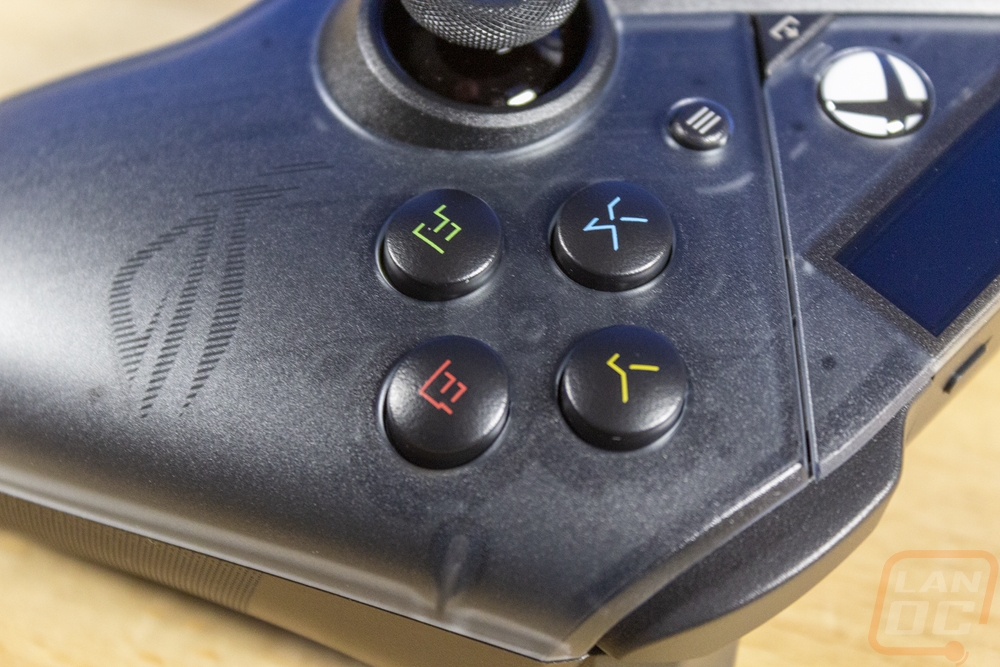
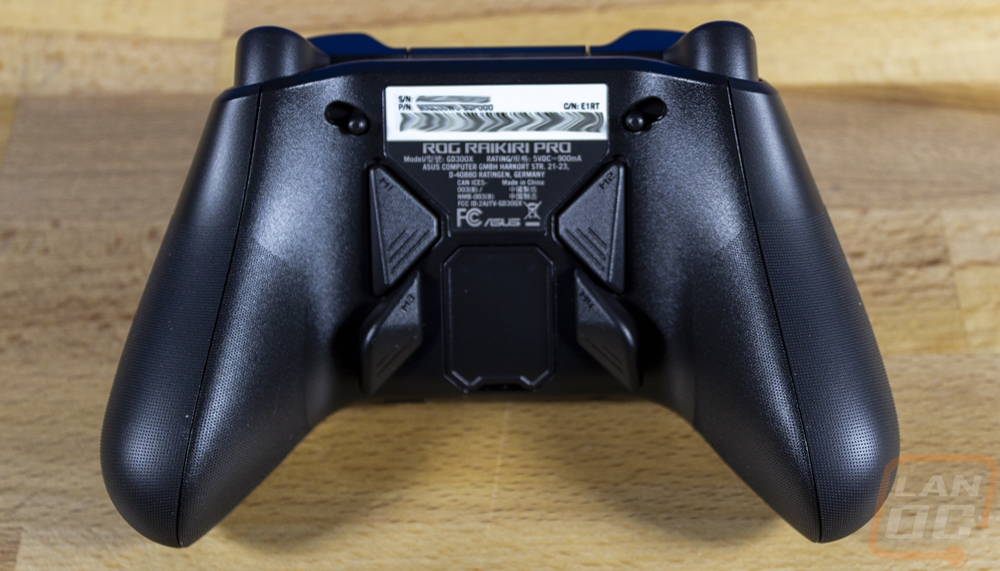
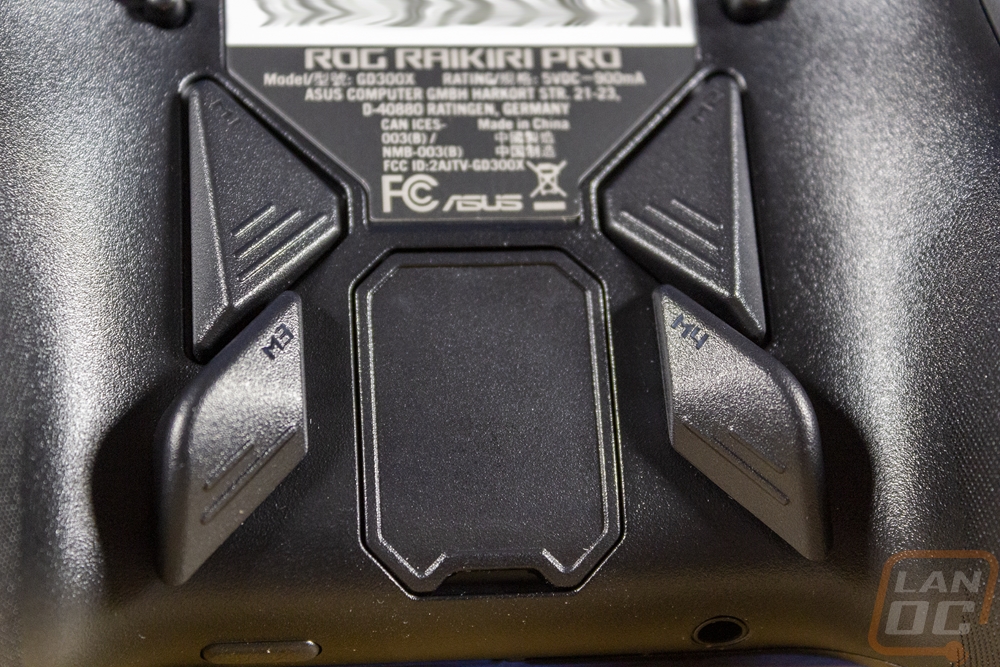
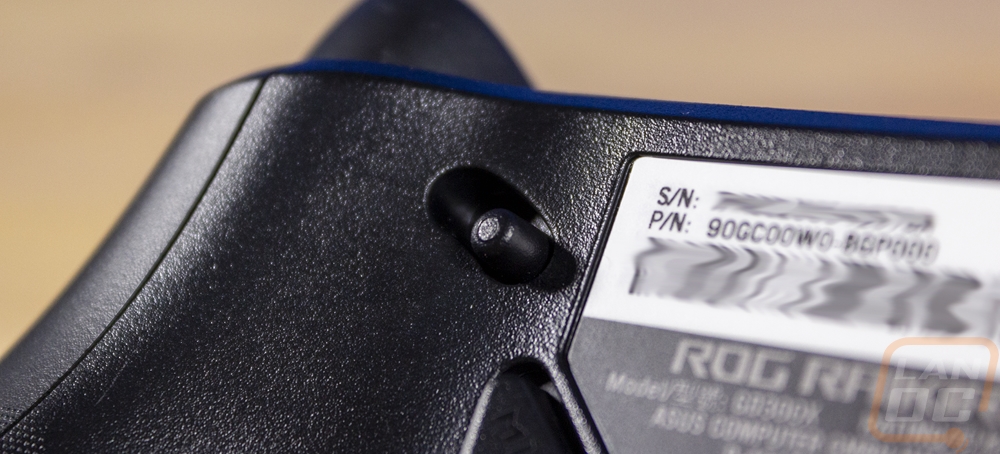
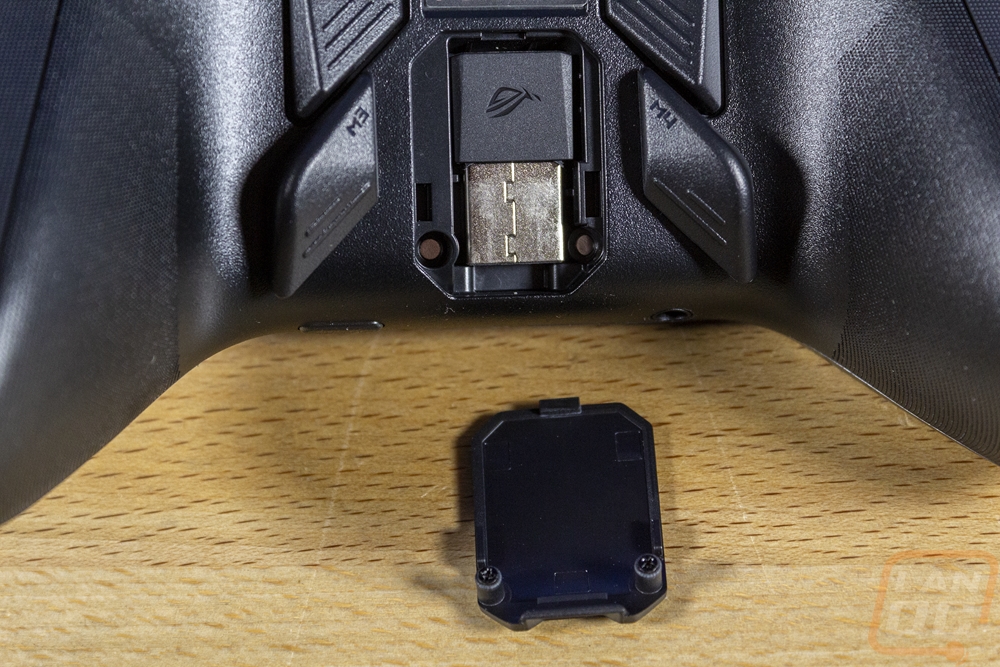
The back of the Raikiri Pro has the same textured grip wrapping around the bottom half of the grips on both sides. Then like with the Scuf Reflex, the Raikiri Pro has four programable back buttons. Unlike the Reflex or the Xbox Elite designs, however, these aren’t removable or swapable. In between all of those, there is a sticker with the model information, required certification logos, and of course the serial number and a barcode for the serial number. Then below that in between the bottom back buttons, there is a small removable cover held in place magnetically. On either side of the serial number sticker, there are small sliders that switch each of the analog triggers between the full-length and short trigger modes.
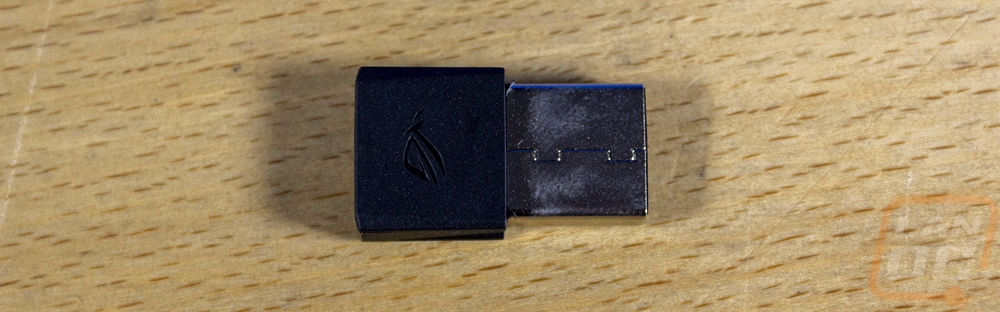
The removable cover on the back hides the 2.4 GHz wireless dongle for PC use. The dongle is a little longer than most that you will find these days which hardly stick out past the USB plug at all. It has a black plastic end on it with the ROG logo on it.
I did also get the Raikiri Pro onto the scale when checking it out. Asus has it listed at 330 grams but that includes the cable which is a weird way to list the weight on a wireless controller. On our scale, it came in at 258 grams while having the wireless dongle inside. If you are using that it will take a little off of that as well. That puts it right in between the Cooler Master Storm Controller which was 220 grams and the Scuf Reflex which was 288 grams. The Xbox Elite controller is 275 grams (with no accessories on it), the Xbox One is 279 grams, and the Xbox Series X controller is 287, all with two AA batteries. The Raikiri Pro comes in lighter than all of those. Personally, I feel a lighter weight controller is going to be more comfortable over longer periods of time but the tradeoff is that they will also feel like they are lower quality. Asus did manage to get rechargeable batteries and the screen in the Raikiri Pro and come in lower weight than the other Xbox controllers though.

Performance
Before getting into testing I did want to check out the software for the Raikiri Pro and see what all you can change. If you have Asus components in your build there is a good chance that you will already have their Armoury Crate software installed which is what the Raikiri Pro uses. You just want to make sure things are up to date. The Asus website for the Raikiri Pro has a link as well as a driver for using the Raikiri Pro with Bluetooth and a firmware update download for the Raikiri Pro as well. The firmware update updates both the included dongle and the controller, you get both files but you will have to follow the instructions and run both.
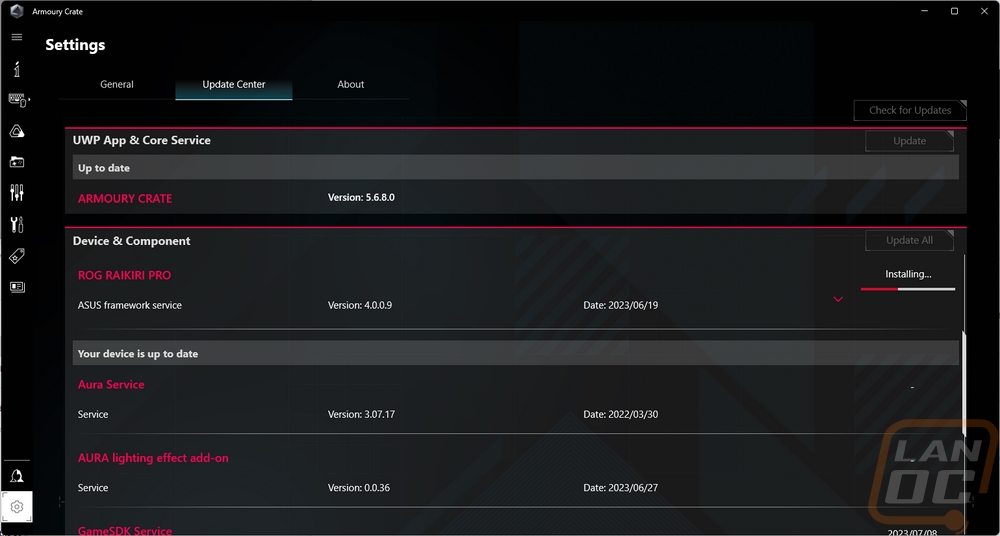
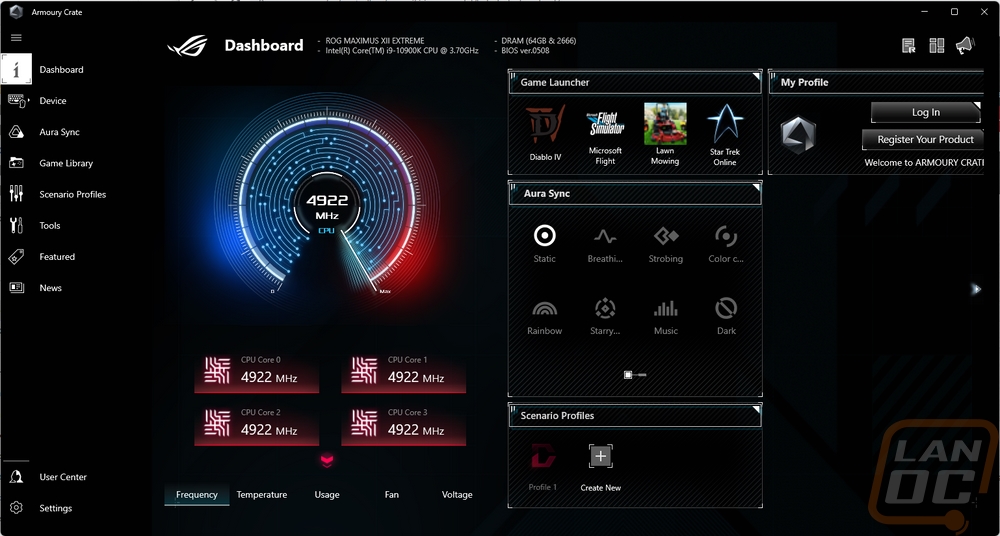
The Asus Armoury Crate starts off on the dashboard and this software is designed to handle any of your Asus hardware so it isn’t specific to their peripherals at all but it is what you would use with them. The dashboard has a quick launcher for a few games, quick changing for Aura Sync lighting on your PC, and profiles. You can also see things like clock frequencies, temperatures, fan speeds, voltages, and CPU, GPU, and memory usage. Everything related to the Raikiri Pro however is going to be on the left under device and when you mouse over it will show the Raikiri Pro. A big note here though is this ONLY works when you have the Raikiri Pro connected through the wired connection. I don’t understand at all why using the included wireless dongle doesn’t also work and that seems like a big omission. In fact, I spent more time than I would like to admit trying to get the software working before figuring that out.
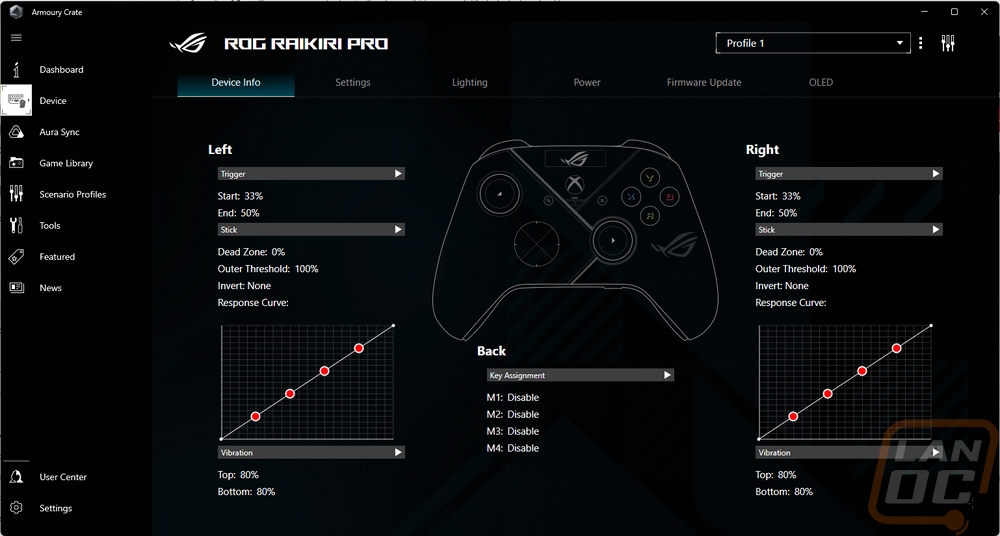
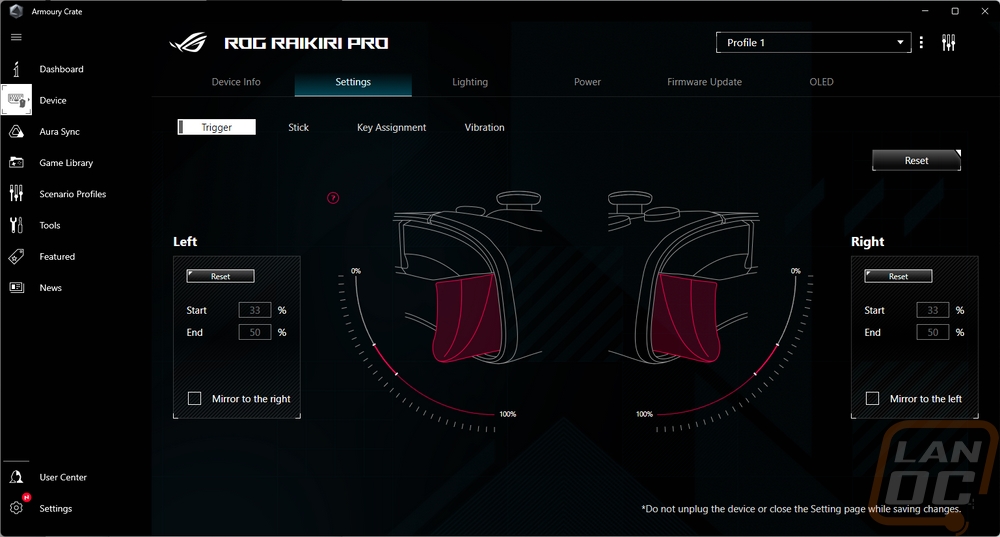
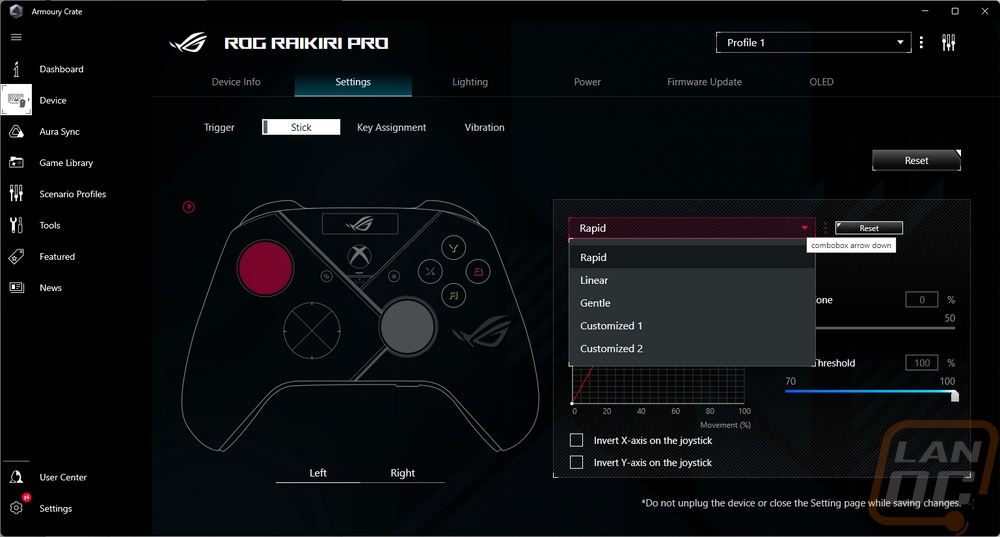
The landing page for the Raikiri Pro has a line drawing of the controller in the center and readouts for all of the triggers and thumbsticks and it shows the response curves for the sticks as well. Moving over to the settings tab then has four of its own pages for each of the areas of the Raikiri Pro. The trigger page has line drawings of both triggers and here you can set the start and end points for the triggers. The Stick page handles the left and right thumbsticks, for this they have that same response curve shown again. You have a few drop-down options like rapid, linear, gentle, or two customizable profiles that you can make yourself. You can also set the dead zone and thresholds and invert the X and Y axis independently to get things set up how you like it.

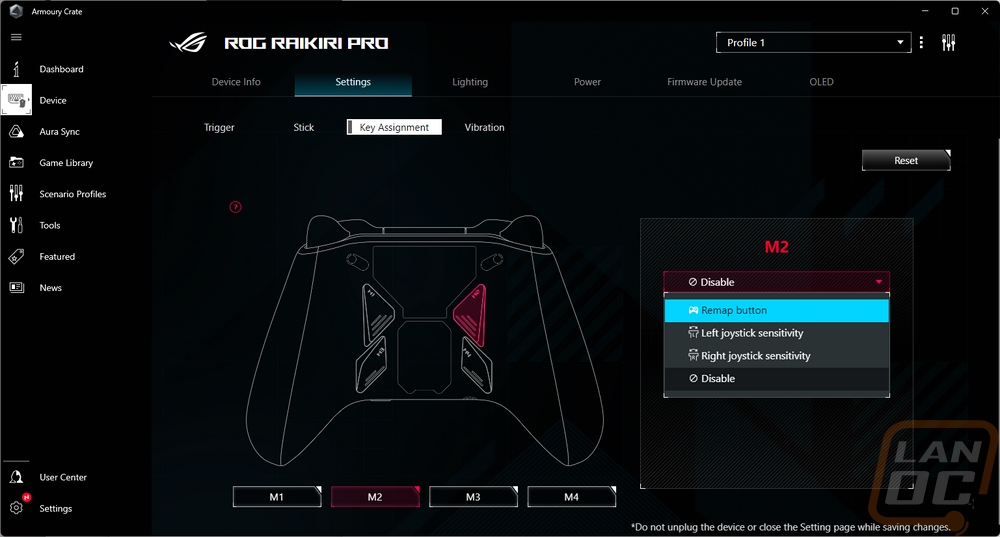
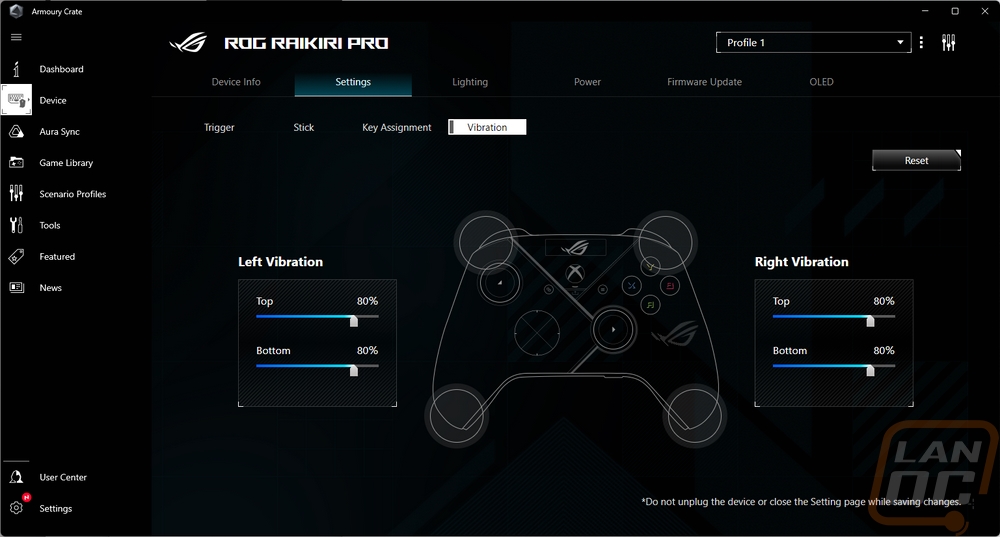
The key assignment page has a line drawing of the back of the Raikiri Pro with each of the four back buttons being clickable. Once selected you have a drop-down menu of what you can do with each button including being able to change thumbstick sensitivity on the fly which is a cool one that snipers will really like. You can also remap them to any other button. The last page under settings is where you can change the vibration settings. The line drawing shows that the Raikiri Pro has vibration motors in the four corners and you can adjust how strong they are independently. By default, they were set to 80%.
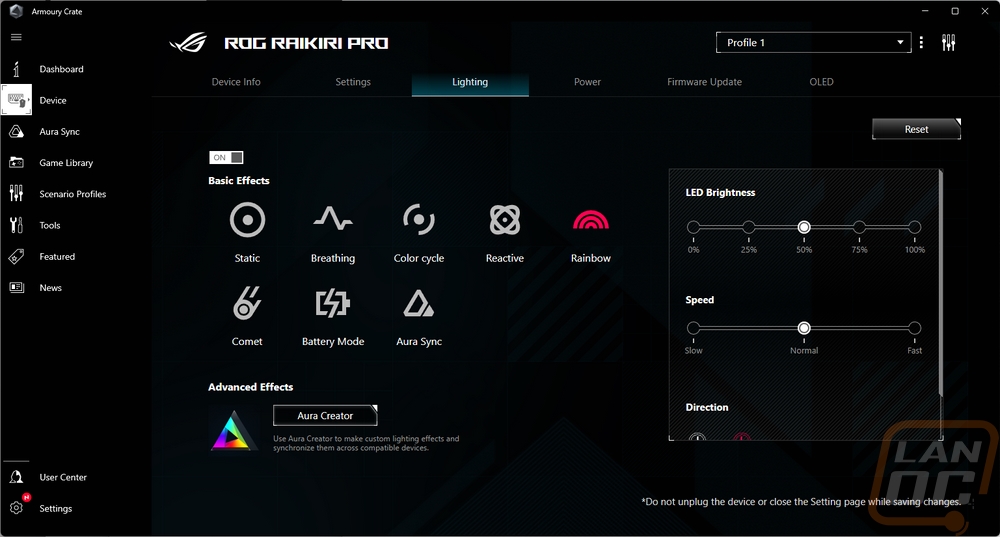
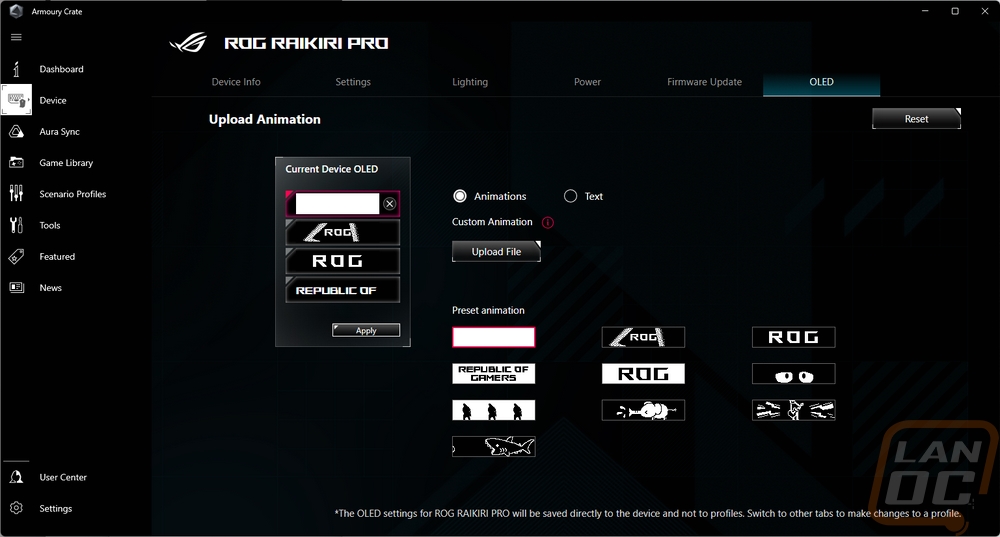
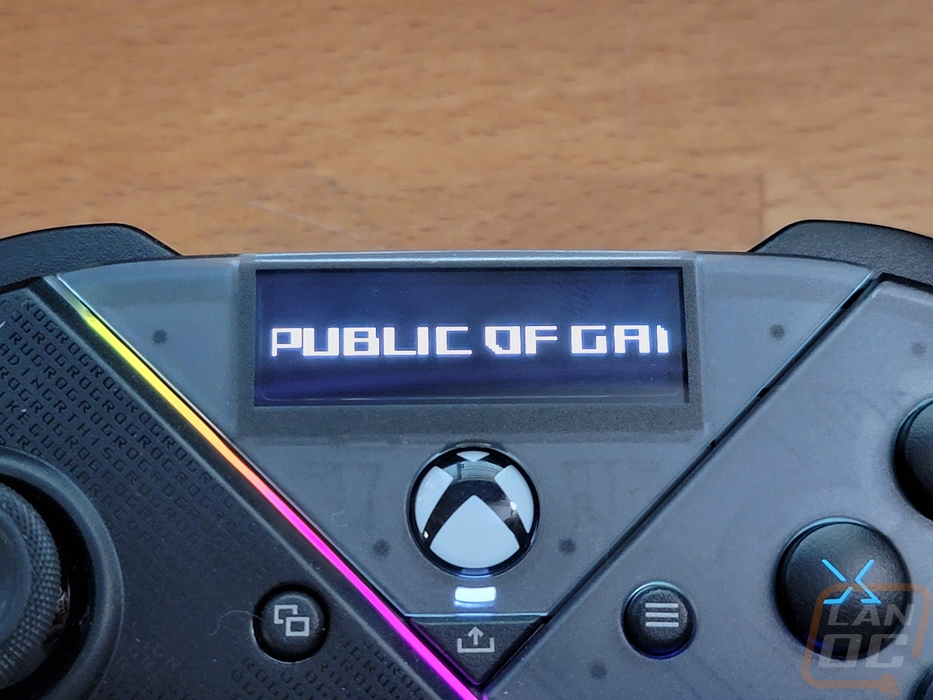
The lighting controls have a few effect options and each has direction, speed, and brightness settings over to the right. Effects that have different color options can also have those changed as well. You can also use Aura Creator to make your own effects. They then have a page for power settings which shows the battery status and is where you can set the battery low alert percentage and set how long the Raikiri Pro sits idle before it will go into sleep mode. Then the OLED tab is exactly what you would think it is. There are four default preset animations on the controller that you can pick from through the OLED screen. Here you can change them out, they have 10 there with half of those being different ROG effects but there are a few cool options like the eyes. You can make and upload your own and you can just have it show text as well which could be a nice way to label the Raikiri Pro if you have more than one or to just have your username on there if you don’t know how to make your own animation. I’m surprised they didn’t have a few images that aren’t animations as options as well.
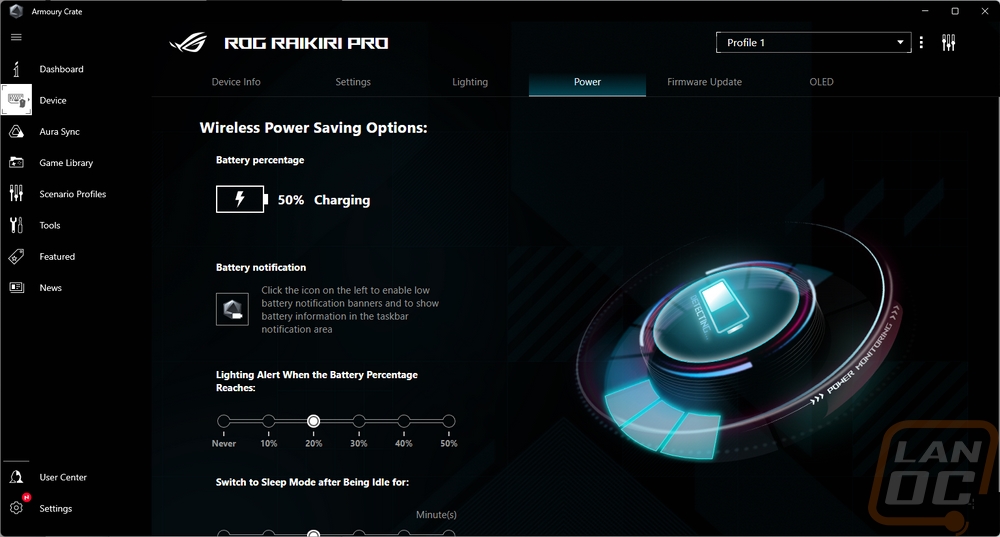
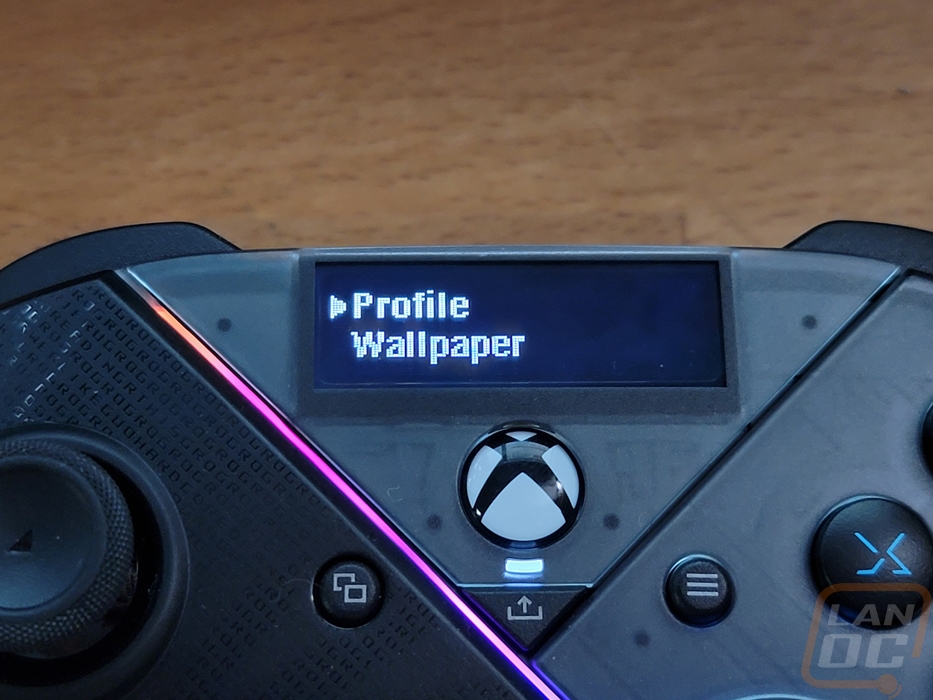
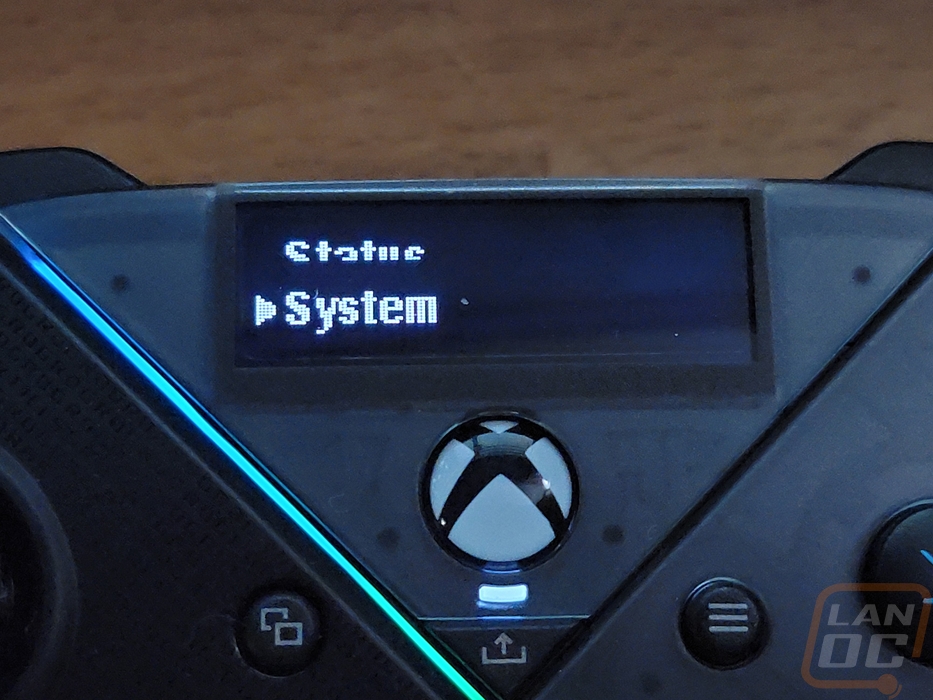
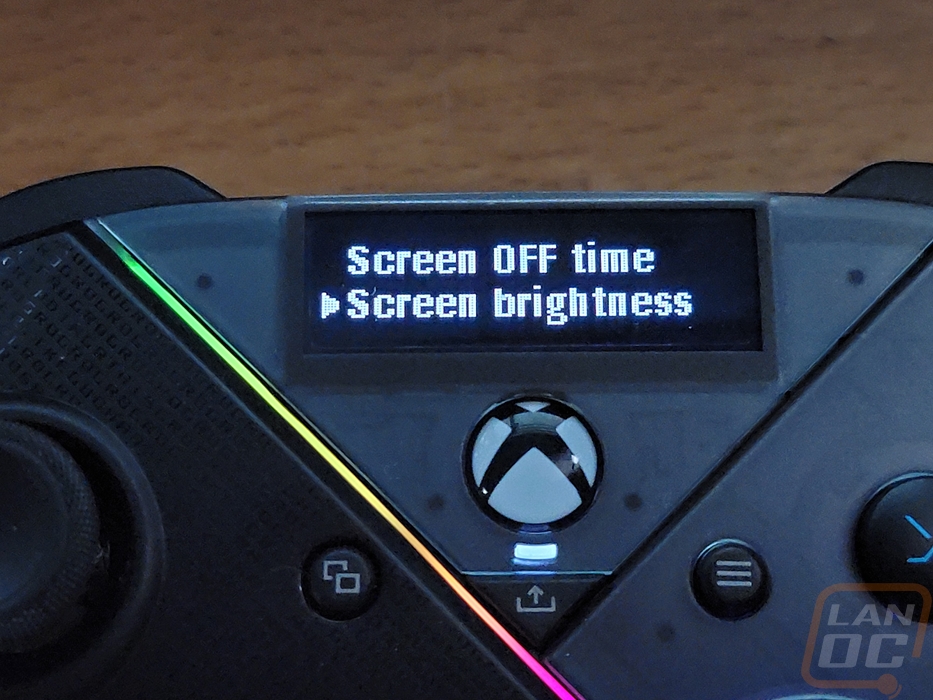
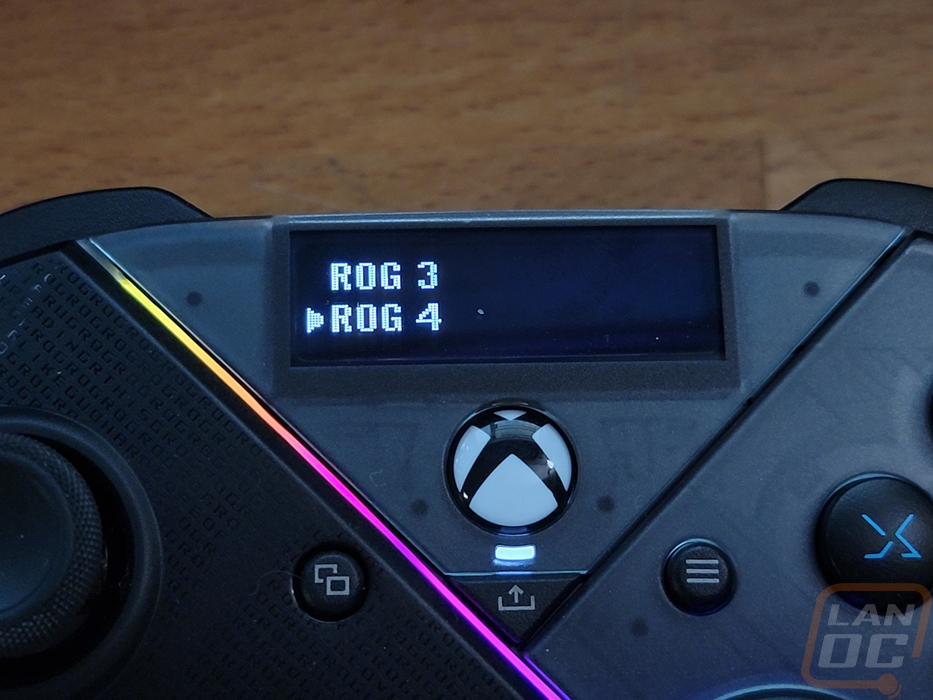
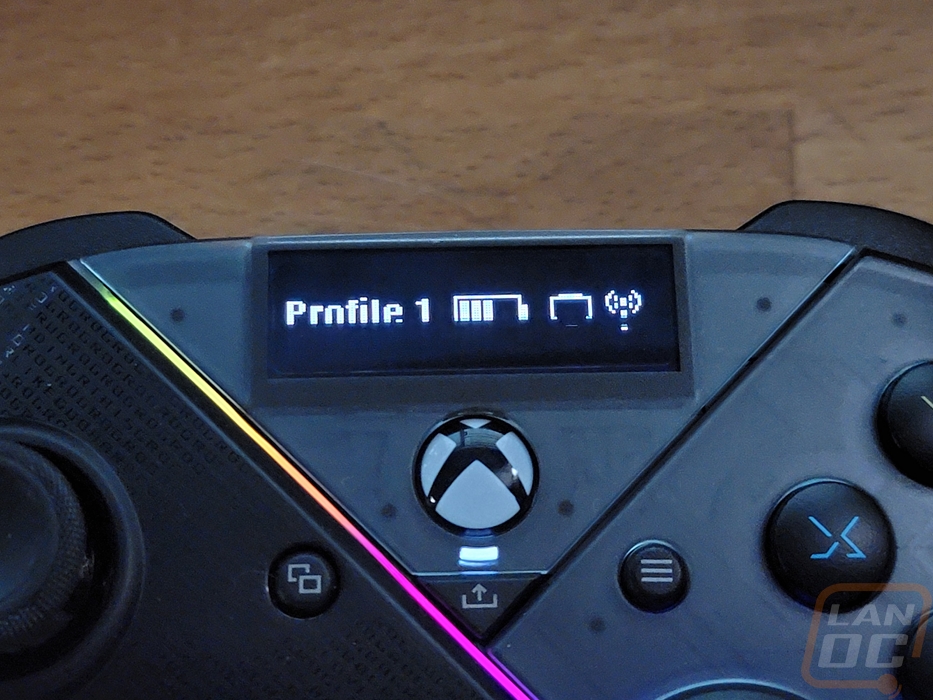
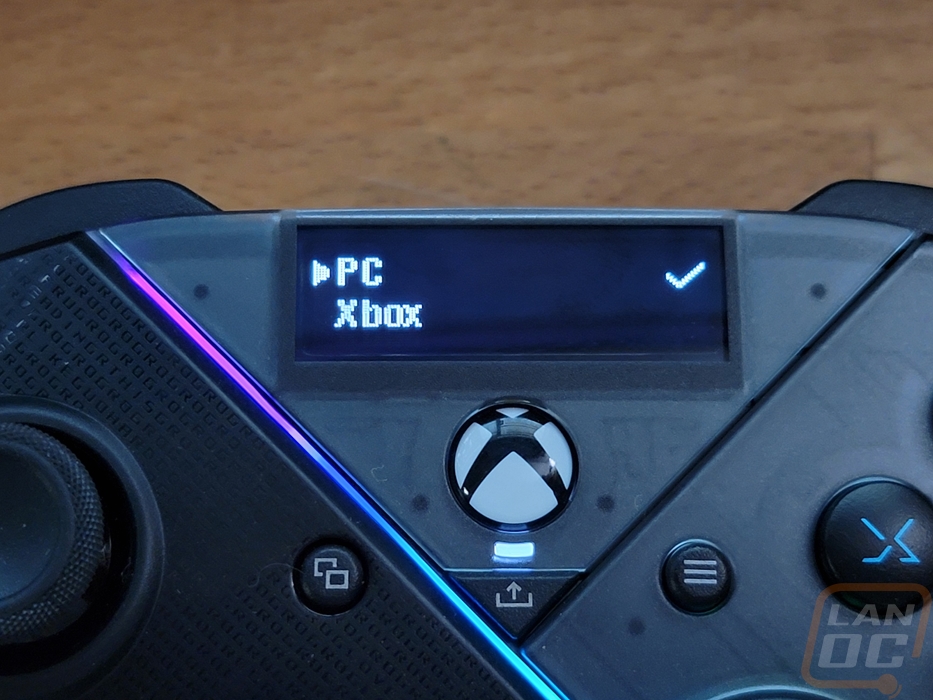
The OLED is one of the Raikiri Pro’s biggest features so of course I was curious what it had to offer other than a few animated effects which is what it shows by default. The refresh rate for the OLED display did lead to a few weird pictures where the picture happened to catch the refresh halfway through, it wasn’t noticeable in person, but it isn’t a high refresh display either. Using the two buttons on the top edge next to the Type-C connection you can open up the menu and navigate it. The left button when you hold it turns the display off, otherwise, it is the back button. The right button when you hold it for 2 seconds opens up the menu, single presses flip through the menu, and then holding it for 2 seconds while in the menu open or select things. With that, it is slow to flip through things. You can switch between the four profiles, change screen brightness and the screen off time, you can also flip between PC and Xbox use and under that option, you can switch between wired, 2.4 Ghz, and Bluetooth to switch between multiple devices. You can also pick from the effects that you have uploaded to the controller. One thing I did notice though is that profile names that you set on the software don’t show up here and I was surprised there weren’t any options for the built-in lighting other than changing profiles. I am surprised that you can’t set the screen up to show any current PC information even when hooked up as a wired controller. The one useful page is hidden away in the menu as the status page which shows what profile you are on, battery level, PC or Xbox, and how you are connected. This should be an option you can set on by default not hidden away in the menu.
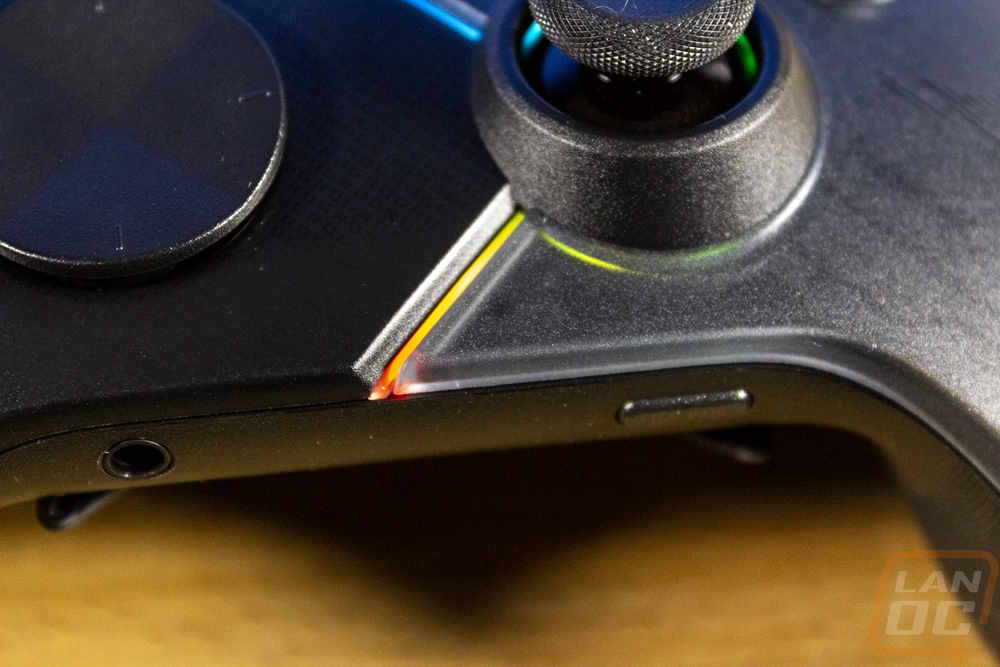
As for the lighting, the area where the black and translucent sides join together is all lit up with addressable RGBs. It is hardly visible but some of the translucent plastic around the right thumbstick also glows as well as the inside of the thumbstick itself.
After the issue, I had with the Scuf Reflex when I went with the instant triggers only to realize that I wouldn’t be able to use the controller on a lot of the games that I like. The Raikiri Pro has two switches on the back of the controller that lets you switch between a short throw and the normal long throw. The Reflex’s instant triggers had mouse switches behind them and had basically zero throw. The Raikiri Pro on the other hand does still have some throw as you can see in the three examples below that show the full throw, short throw, and its resting location. But being able to switch between them is worth the tradeoff, you can use the short throw with fighting and shooting games but still have analog triggers for other games.

As far as comfort goes, the Xbox design is always extremely comfortable and Asus didn’t depart from that shape at all so there were no issues there. What was an improvement however was the overall grip. The texture on the grips makes a big difference in how well you grip the Raikiri Pro even if your hands are a little sweaty. They were able to do that without adding any rubber which should help the controller hold up long term as well, rubber or soft coatings almost always eventually turn into a sticky mess when they break down from oils from your hands but we see a lot of controllers still use those. I will always be a bigger fan of the old-school Nintendo plus sign for the direction pad but with that not being an option the round direction pad worked fine but it isn’t my favorite. The thumbsticks on the other hand work great with the knurled texture around the edges giving even more grip. For the other buttons, I thought we might see Asus use mouse-style switches which have a shorter throw and a satisfying click but the Raikiri Pro has standard membrane contact switches which have a much longer throw and feel about like most controllers. The rear buttons on the other hand do use the mouse switches and while extra buttons haven’t been my thing they were easy to reach, so much so that I accidently pushed them multiple times. Having them as an option is great, but sadly for PC use because this is an Xbox controller they are still tied to the Xbox controls so you can’t rebind them to other PC uses which could be great for use with games like Microsoft Flight Sim or even just binding your push to talk to one of them.
The Raikiri Pro does have built-in batteries and a USB Type-C connection for charging which is an improvement over having to get AA batteries. As far as battery life goes, with the lighting and display off you can expect up to 48 hours of use but most aren’t going to turn those off. In my testing, I didn’t have any issues with the battery life and with that much life, you at least don’t have to worry about charging it up every day. I think the best feature is the flexibility. This is still an Xbox-compatible controller so there is support for that, but for PC use which is where I expect to see most people looking at you can connect it as a wired controller with the included cable, use the included wireless 2.4 GHz dongle, or use Bluetooth 5.0 and even swap between devices using the screen. Speaking of the screen, I really wanted to like it. I love the idea of showing your controller status, the time, or even something as simple as your username. But most of the options that are on the Raikiri Pro by default are just ways to animate the ROG logos. You can add your own animations through the software which for some reason only works when you have it wired to your PC. But it feels like the display is being underutilized and with it being one of the main selling points that is a bummer. It doesn’t get mentioned much but the headphone output is also an upgraded DAC. The audio quality when I tested it out was solid, when at my PC I am still going to use my normal DAC but it is a good option when that isn’t possible.
Overall and Final Verdict
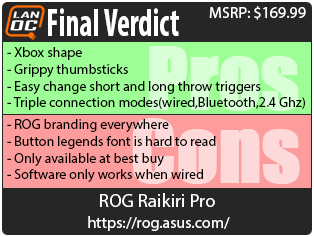
It’s interesting how of the three different controllers that I have taken a look at recently all three have gone completely different directions. Cooler Masters Storm Controller just set out to offer a reasonably priced option that didn’t do anything too crazy for styling or features other than the purple trim on the buttons and being able to connect to multiple devices. Scuf on the other hand has their signature back button configuration which is integrated into the PS5 controller design with the Reflex. They offer insane amounts of customization and a great grip design. Then for the Raikiri Pro Asus went with the Xbox controller as a base and integrated an OLED display into it. The Raikiri Pro fixes issues I had with the Reflex like having the option to be able to switch between short throw and normal long throw triggers which you can do on the fly. The Raikiri Pro also has extremely gripper thumbsticks and uses that same grip design on half of the back of the controller as well and it works really well. Speaking of the back, like with the Reflex the Raikiri Pro does have four programable buttons on the back. You are limited to binding them to the Xbox controller options but it should help you be able to have quicker access to more buttons without having to adjust your hands.
You can’t go wrong with the Xbox shape and combining that with the improved grip this is my favorite of the three controllers to hold. I do however wish that the ABXY buttons had more premium mouse-like switches behind them like the back buttons have. I’m also not a big fan of the font that they used on those, I know you shouldn’t need to look at them often but if you need to look it is hard to read. You don’t have to buy AA batteries because there are batteries built in and the Raikiri Pro can connect as a wired controller, wireless with the included dongle, and with Bluetooth in addition to being able to work with any of the modern Xbox. The PC software was a mixed bag. I was really impressed with the customization you can do when it comes to the triggers and thumbsticks which you can pick from premade profiles or make your own. You also can adjust all of the vibration motors to tune that as well. But I was surprised and disappointed that the software only works when you have the Raikiri Pro hard-wired, I don’t know why it wouldn’t work with the included dongle. I also would have liked to see stuff like profile names transfer over to the controller and some non-animated screen options on there by default. As a whole Asus goes way overboard with the branding. All of the styling of the controller is based around having countless versions of the ROG logo across the top and that is mainly what they use the display for as well. You can upload your own animations but I would love to see the display by default be able to show its status without having to go through the menu to find it each time for example.
As far as pricing the Raikiri Pro has an MSRP of $169.99 which when we compare that with the standard Xbox controller which when a rechargeable battery and cable are included to make them comparable is $84.98. The Raikiri Pro does have a few things to offer beyond having a rechargeable battery of course. It has Bluetooth and a wireless dongle for PC use, an upgraded DAC, a built-in OLED display, improved grips on the thumbsticks and controller, programable back buttons, programable triggers and thumbsticks, and short or long throw triggers. But a lot of those options do compare with the Xbox Elite controllers which are similarly priced as well as Scuf’s Instinct Pro controller as well which is $199. Personally, I think all of them are a little crazy in pricing, but Asus at least isn’t far from the competition. The Raikiri Pro also is only available for sale at Best Buy right now just like the Asus ROG Ally which if you are like me and don’t have a Best Buy nearby is a bit of a bummer, but I’m sure we will see that open up eventually.
Live Pricing: HERE


