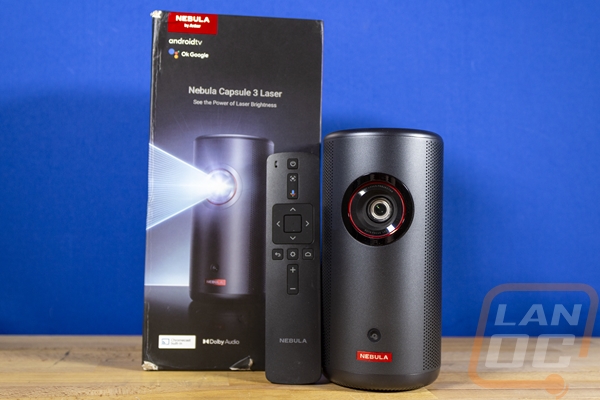
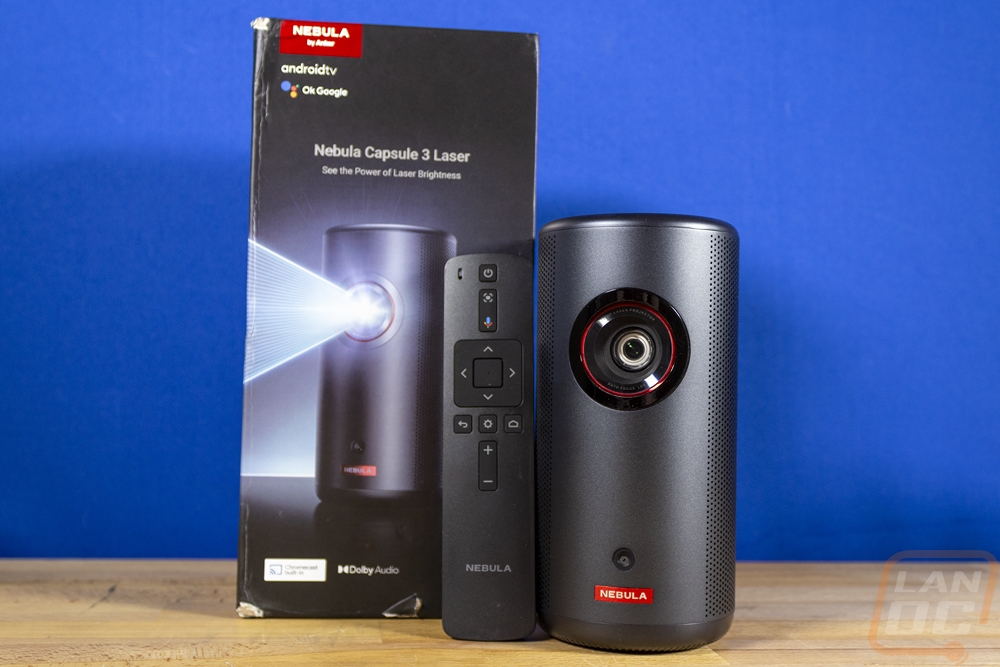
Photos and Features
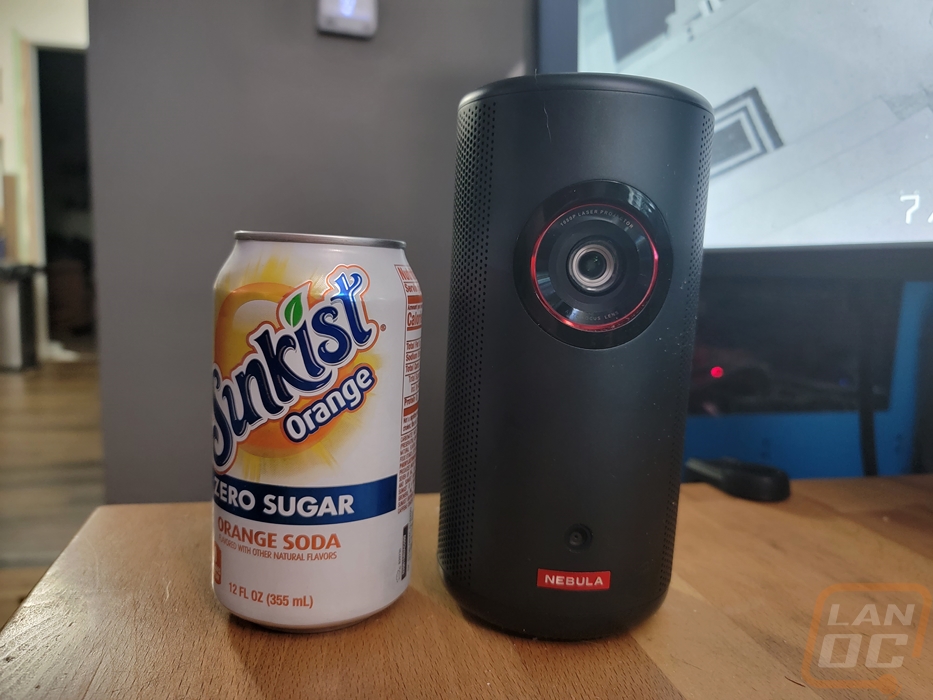
The Nebula Capsule 3 Laser looks very similar to the original Nebula Capsule that I took a look at last year. The overall shape being a “can” sized tube is the same and it does have an aluminum shell at least on the sides/front/back which wraps completely around it. This shape is compact enough to be easy to pack and bring with you or to tuck away on a shelf if you want to use it in your house. Nebular targets this at outside or camping use just like the original but it isn’t dust or water rated at all so you do have to work around that and I’m surprised that it doesn’t come with a carrying case to help it during that. Like the original it does have a computer inside running Android, this time with Android 11 so you don’t have to bring anything but the projector with you to get use out of it. This includes built-in Chromecast and access to the play store which has almost endless apps available especially when it comes to music, TV, and movies as well as games which if you pair it up with a Bluetooth controller could make for a cool portable game setup for your kids. With a 52 Watt Hour battery inside you can run it away from the plug with a 2.5-hour long movie playtime or 10 hours if you run in Bluetooth speaker mode which turns off the projector and functions as a normal Bluetooth speaker. The Capsule 3 however isn’t as compact as the original which did match the size of a traditional soda can. The Capsule 3 is 6.7 inches tall and 3.3 inches wide and 2.1 pounds. The original was 4.72 inches tall and 2.67 inches wide, so the same shape is there but it is larger in every aspect.
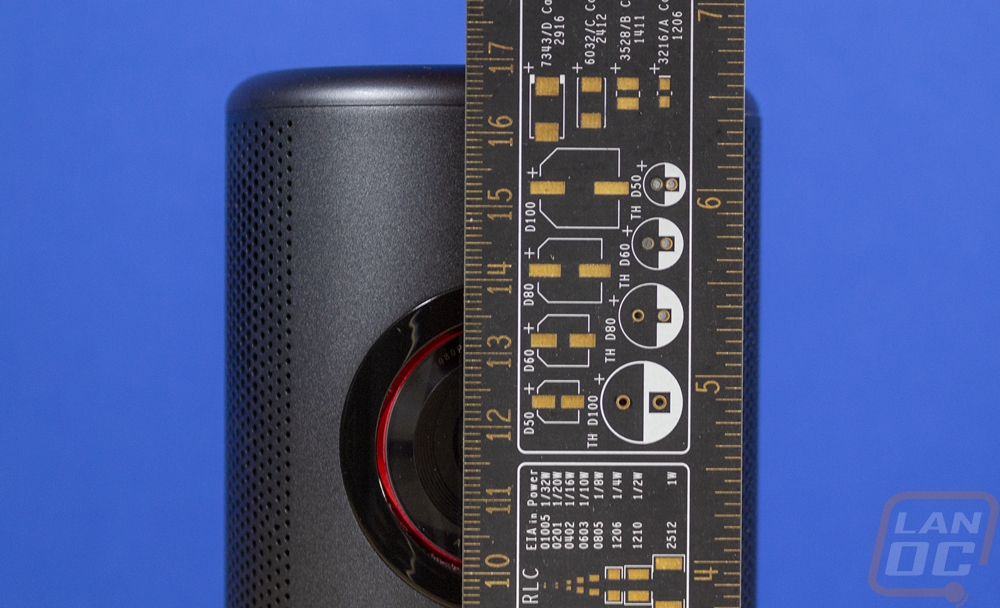
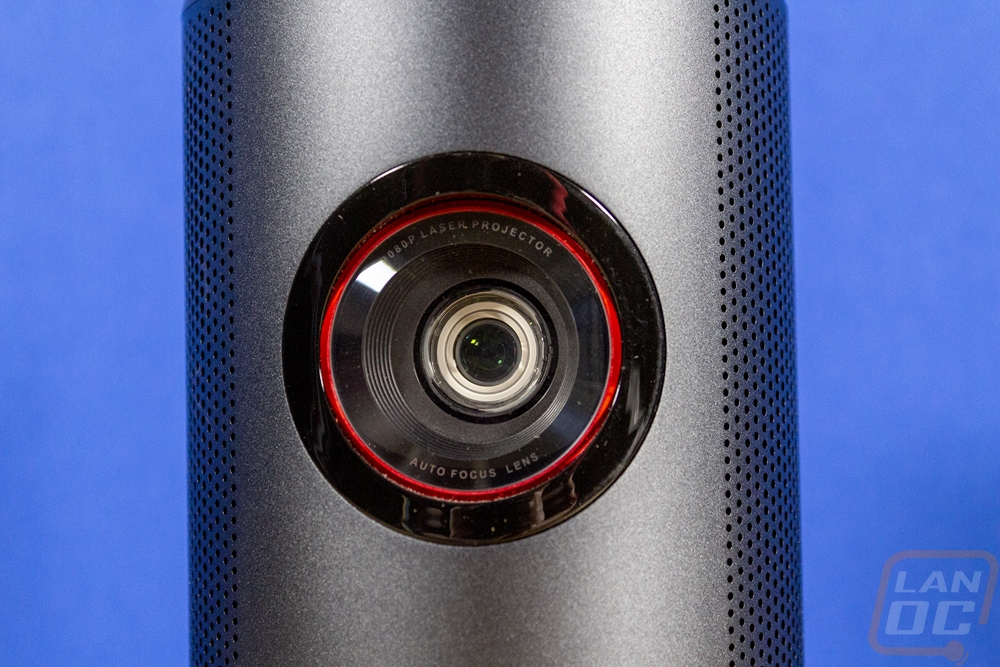
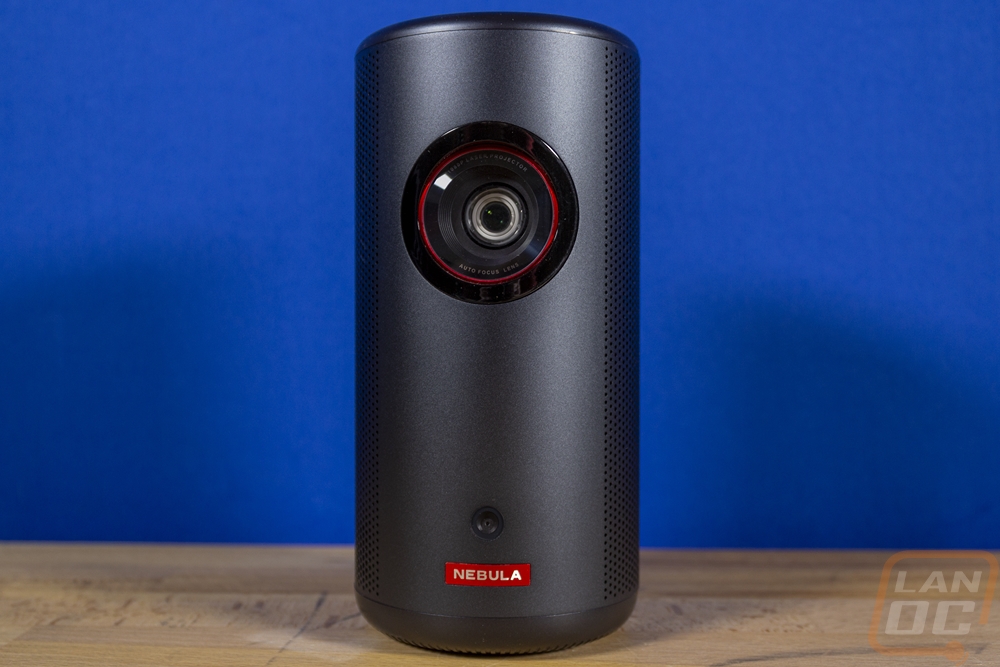
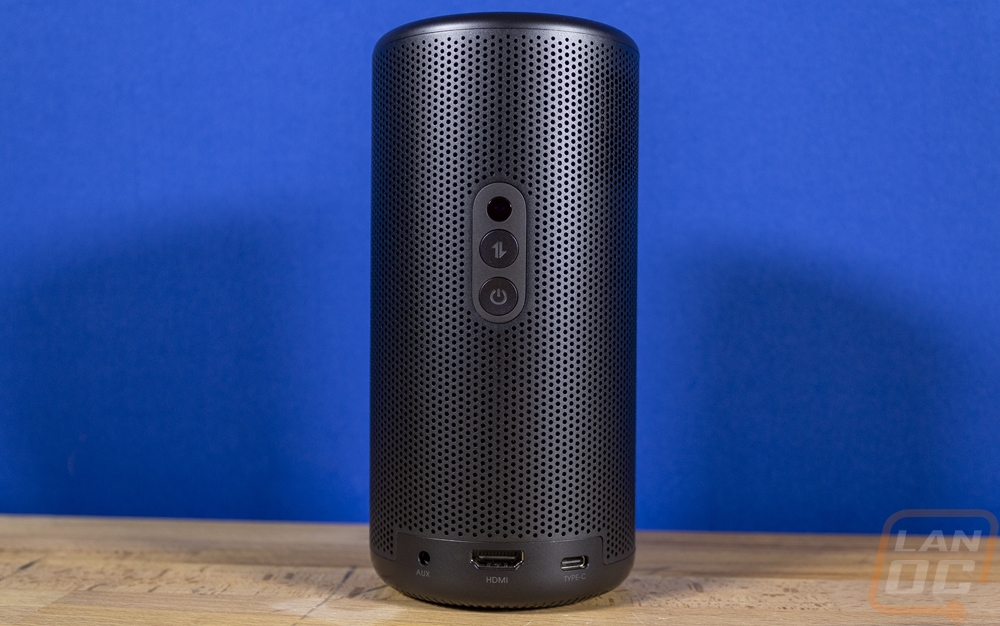
The front of the Capsule 3 Laser has the Nebula branding with a red background down at the bottom and a small camera sensor just above that. This is one of the big changes from the original Capsule to the Capsule 3. This adds autofocus and also a gridless keystone correction that takes three seconds to run. The original just had a manual slider for the focus and its auto keystone replied just on tilt sensors which worked well sometimes but would have issues when projecting onto the ceiling for example. Then up towards the top is of course the projector output. The Capsule 3 Laser is of course as the name implies a DLP laser projector. The resolution runs at 1920 x 1080 or 1080p which is a huge jump up from the original Capsule that ran at 480p and also from the Capsule 2 which was 720p. That is a 16:9 aspect ratio and it has a 1.2 throw ratio which means for every foot of image width it needs to be 1.2 feet away. For brightness it is rated at 300 ANSI Lumens which compared to the original Capsule is an upgrade but is still extremely low when you try to compare that to any traditional projector. For comparison though the Samsung Freestyle which is in my opinion the most direct competition to the Capsule 3 has been tested to be 240 ANSI Lumens.
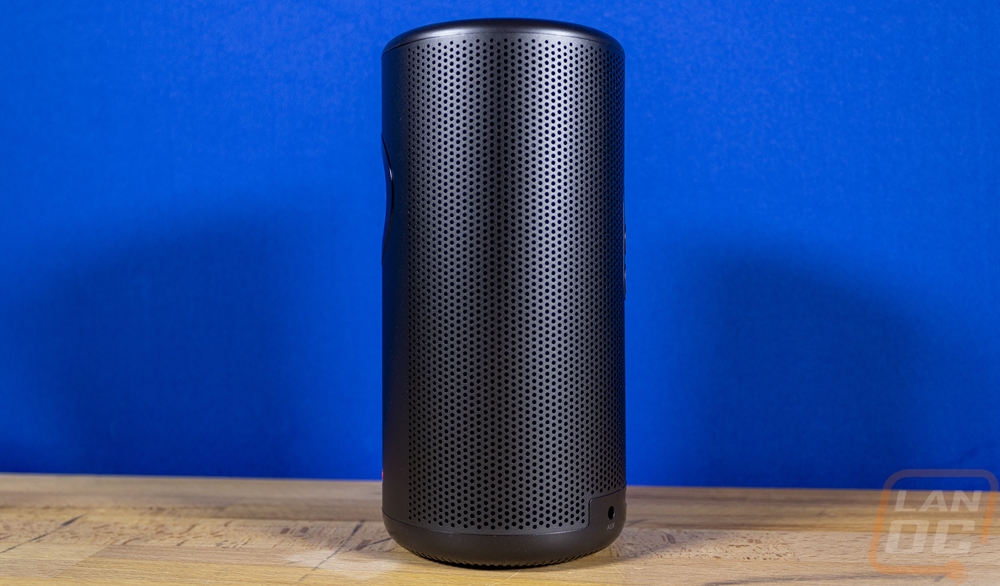
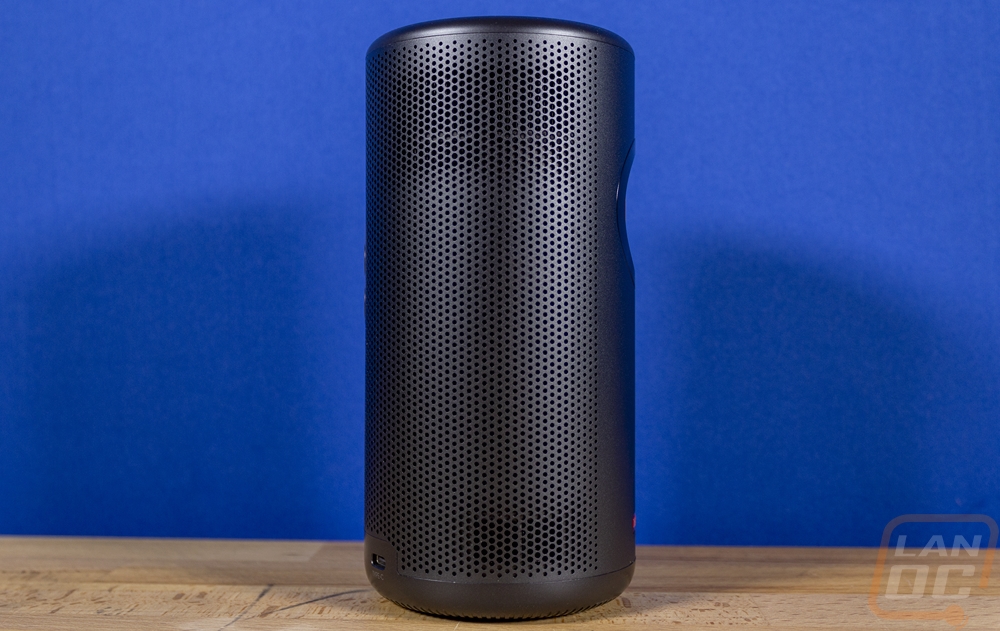
The aluminum housing for the Capsule 3 wraps completely around with no visible seams. Starting on both sides they have machined small ventilation holes. They start small towards the front then get larger and are consistent from one side, across the back, to the other side. The left side of the Capsule 3 doesn’t have anything visible but once you get a flashlight out on this side you can see two large openings and one smaller one behind the aluminum housing. The right side has the same design but the holes behind it are a lot more visible. Without having the Capsule 3 apart it is hard to say what each does but we do know that one is for the 8-watt speaker which doubles as the Bluetooth mode speaker and the speaker for the projector. The rest are most likely for ventilation, projectors create a lot of heat and that is without figuring in that there is also an Android-based computer inside as well.
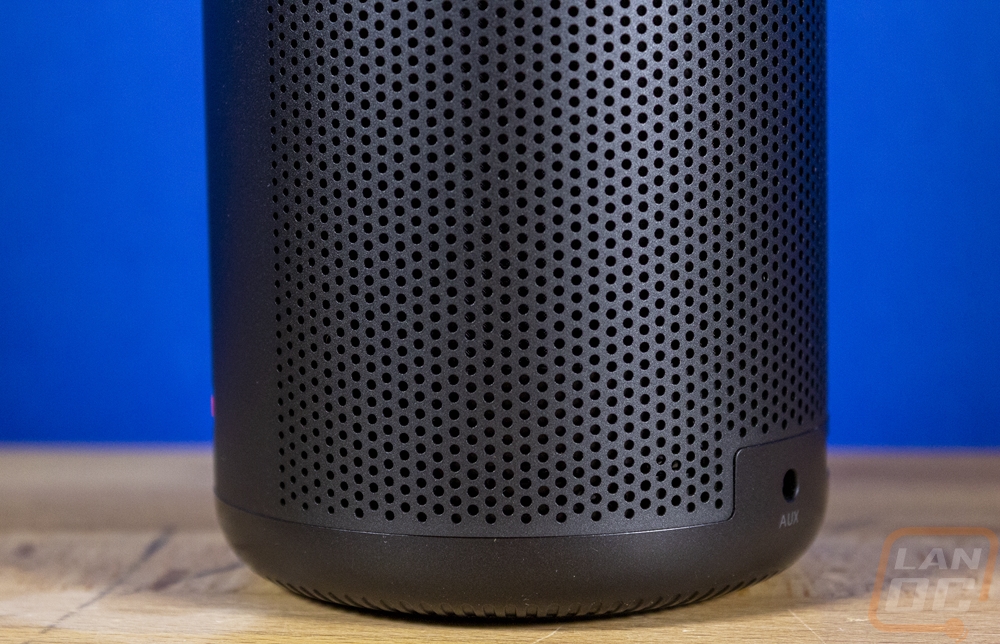
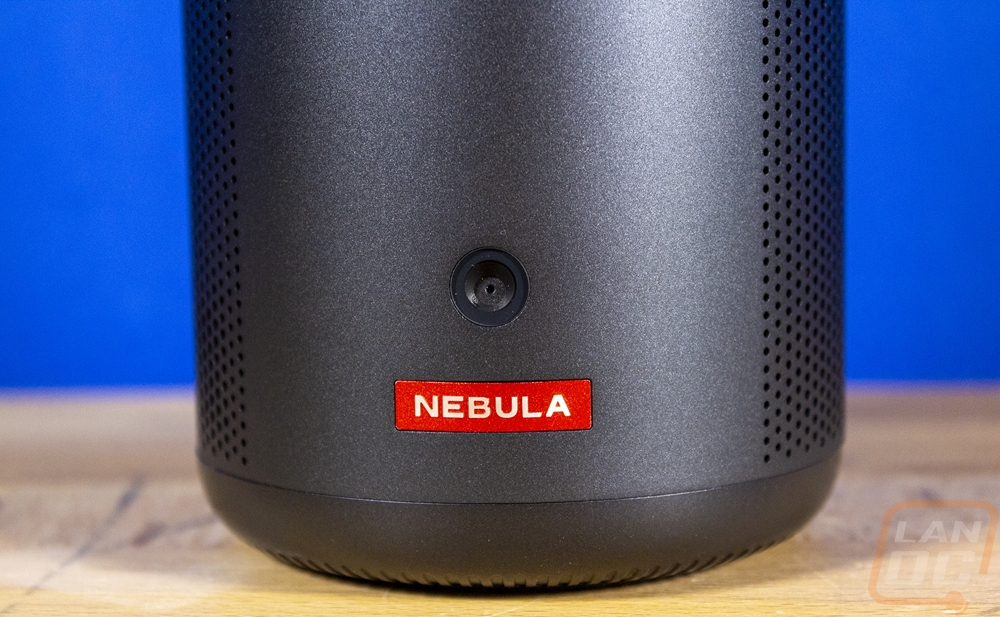
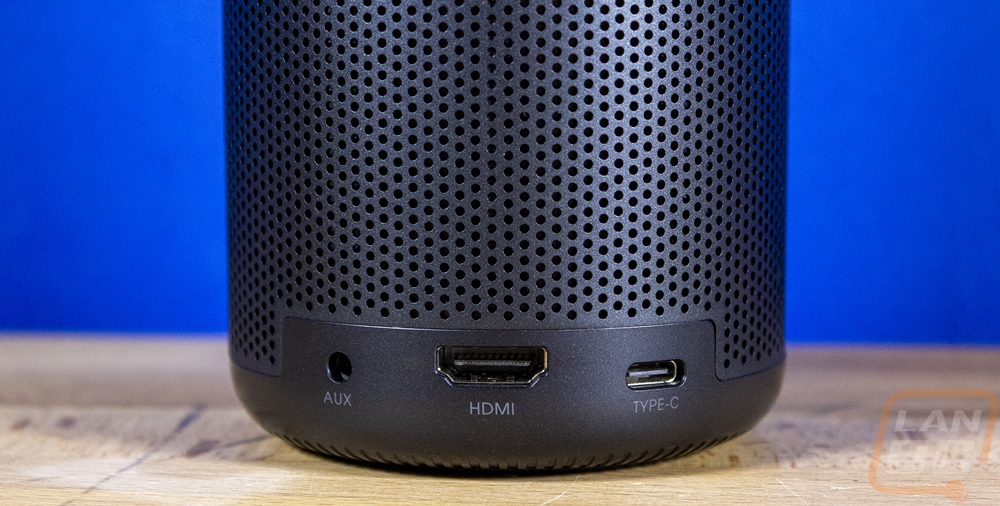
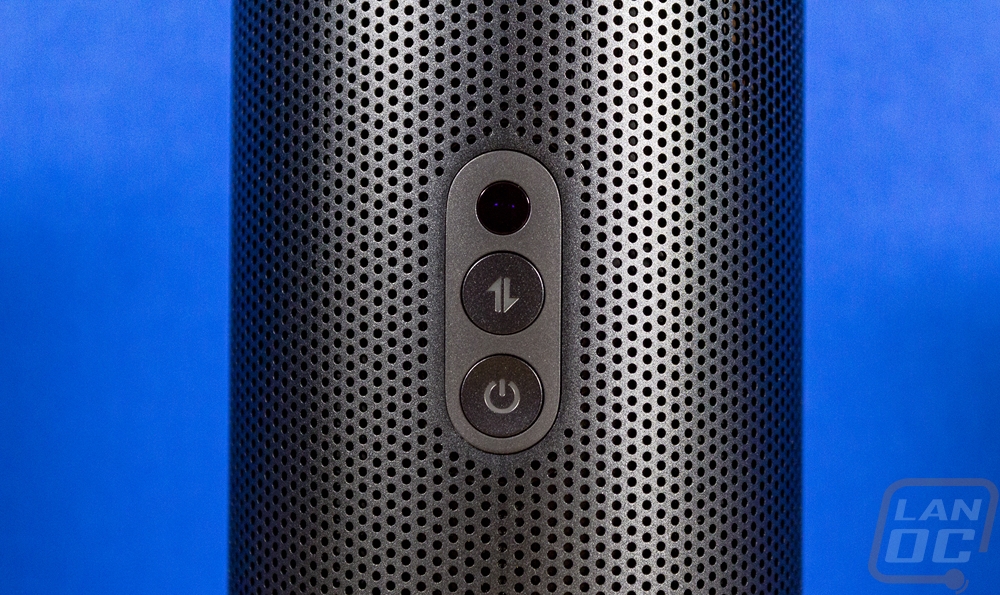
The back of the Capsule 3 Laser continues the perforated holes that were on the sides as well. The back has two main things going on. In the middle, there is an oval section that has two physical buttons and also the IR input for the camera. The top button switches the Capsule back and forth between projector mode and Bluetooth speaker mode and the button below that is the power button. Both are backlit and in the case of the power button it has different colors to also show when the Capsule 3 is charging. Down at the bottom is then the I/O which has three ports. In the center and the largest of the ports is an HDMI input, you can use this to hook up other devices to the projector. On the left is an auxiliary output which is a 3.5mm headphone jack to output audio into another device. Then on the right is a USB Type-C connection which is where you charge the Capsule 3.
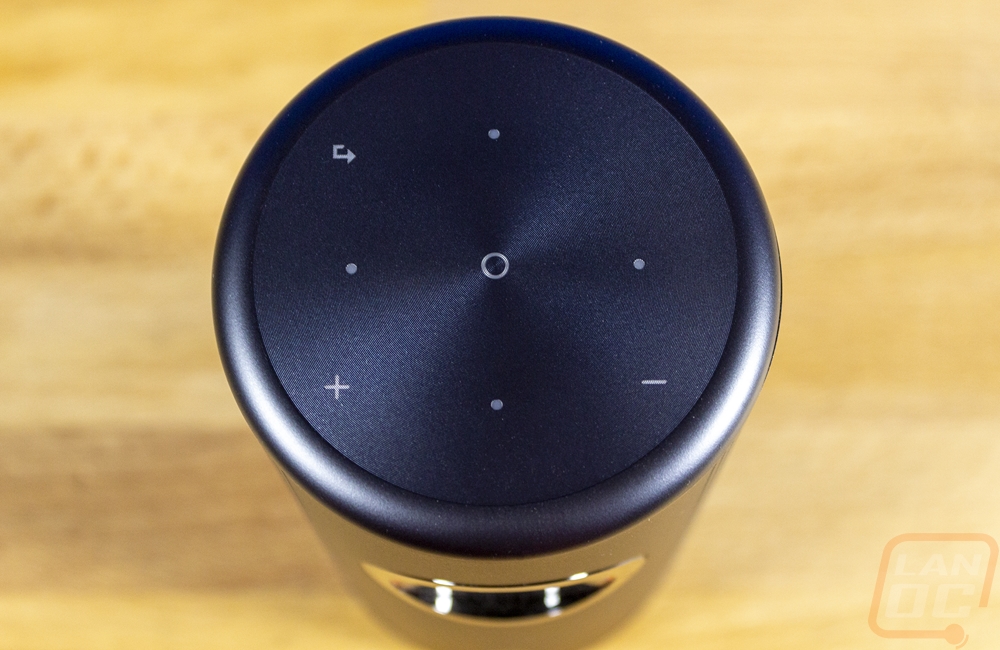
Where the sides of the Capsule 3 are aluminum at the top and bottom edges to navigate the transition between the sides to the top is a plastic cap over the top. It has a nearly black but dark grey finish which has a hint of blue in it and the top has been machined with a circular finish. The top also has built-in capacitive controls which are all labeled with the legends machined out of the top to expose a translucent finish that is backlit white when powered up. You have four dots for the direction pad and in the center a select button. Then volume up and down buttons and one back button. The only thing missing are the menu and home buttons that the controller has and the autofocus button as well.
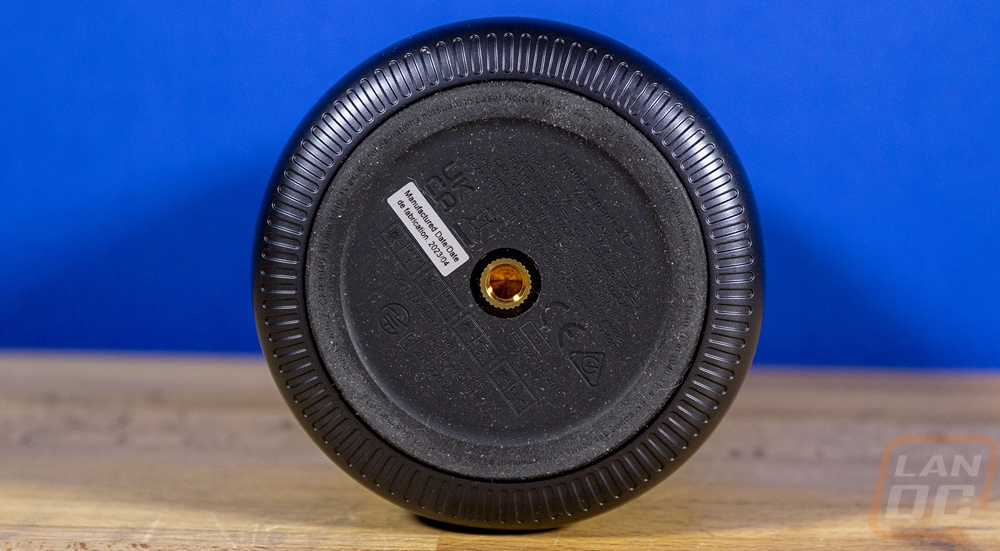
The base of the Capsule 3 has a ribbed effect around the outside edge of the plastic housing. Then the entire bottom is covered in rubber with a lip around the outside edge that functions as its foot to keep it from moving around. This has all of the model information and certification logos molded into it as well. Then in the center, it has a threaded mount just like a camera where you can attach the Capsule 3 to a tripod or various stands.